Project details
Skill
Cost
Estimated Time
Whether you’re restoring an old house or building a new one, properly installed window trim can add an upscale look to any room. This finishing project requires a moderate amount of carpentry skill but is achievable for do-it-yourselfers (DIYers) comfortable using a hammer and saw.
This guide will walk you through how to trim out a window, from understanding the different types of window trims and components to tips for achieving a professional finish.
Window Trim Components
Before diving into the installation process, familiarize yourself with the main components of window trim: the casing, stool, apron, and corner blocks.
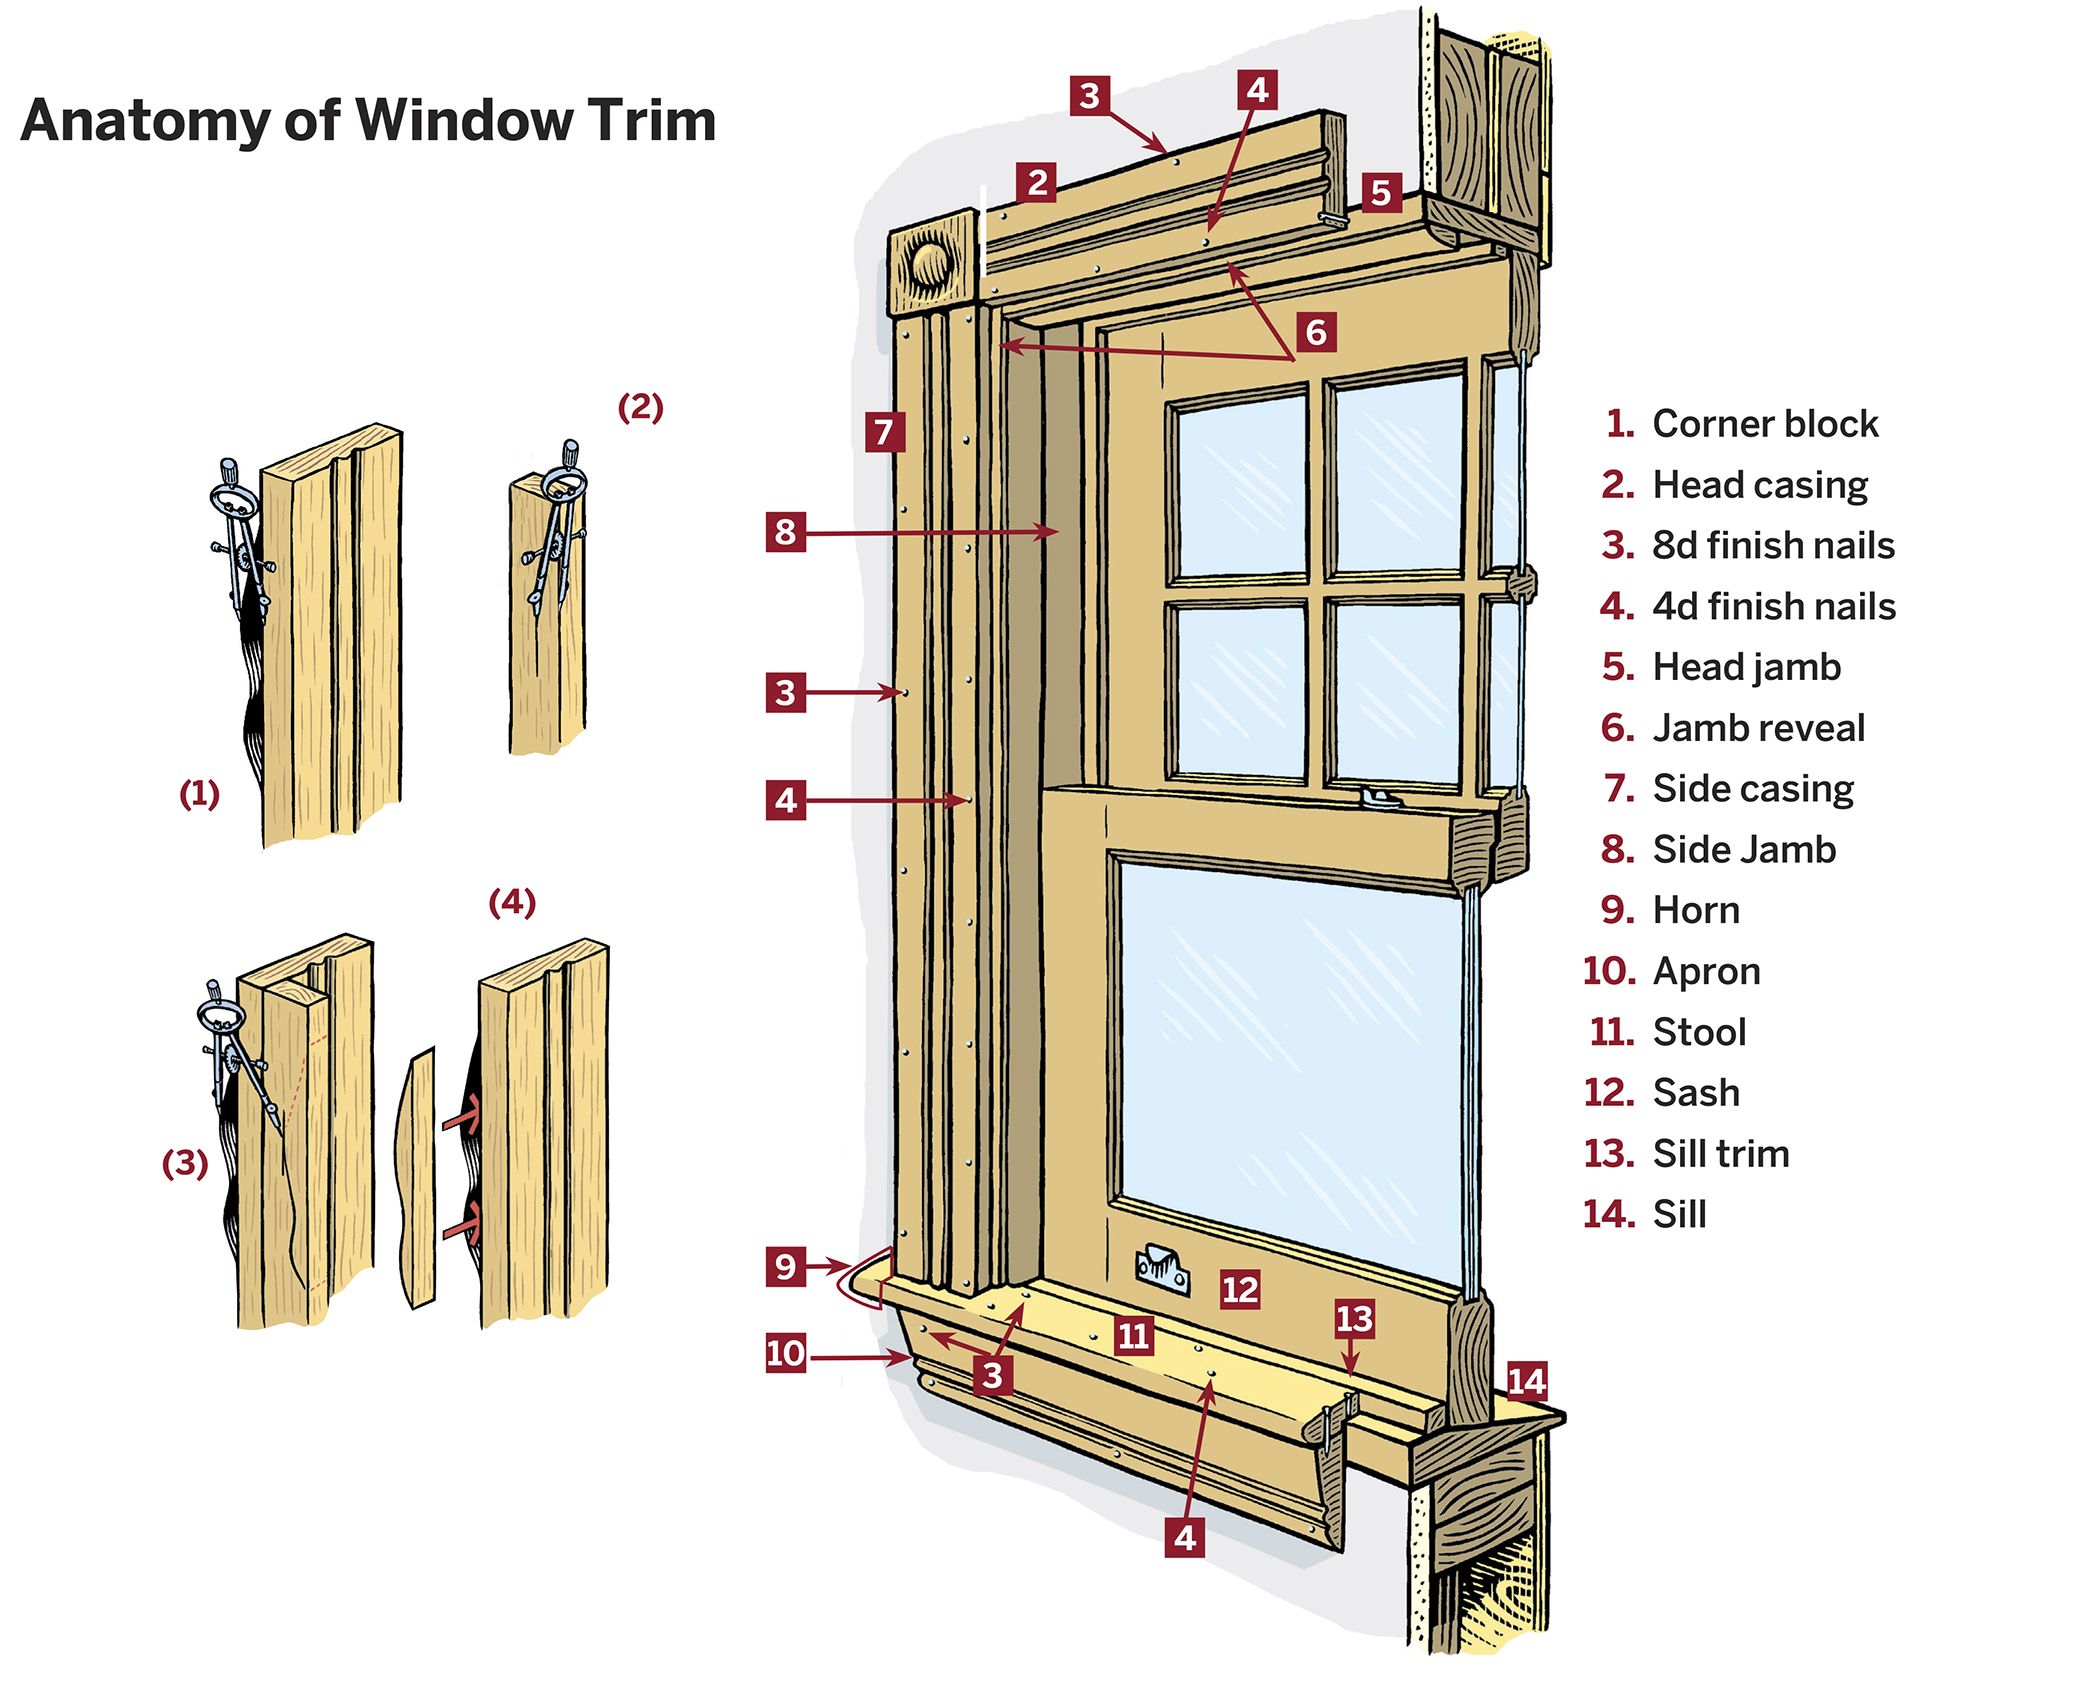
Window Casing
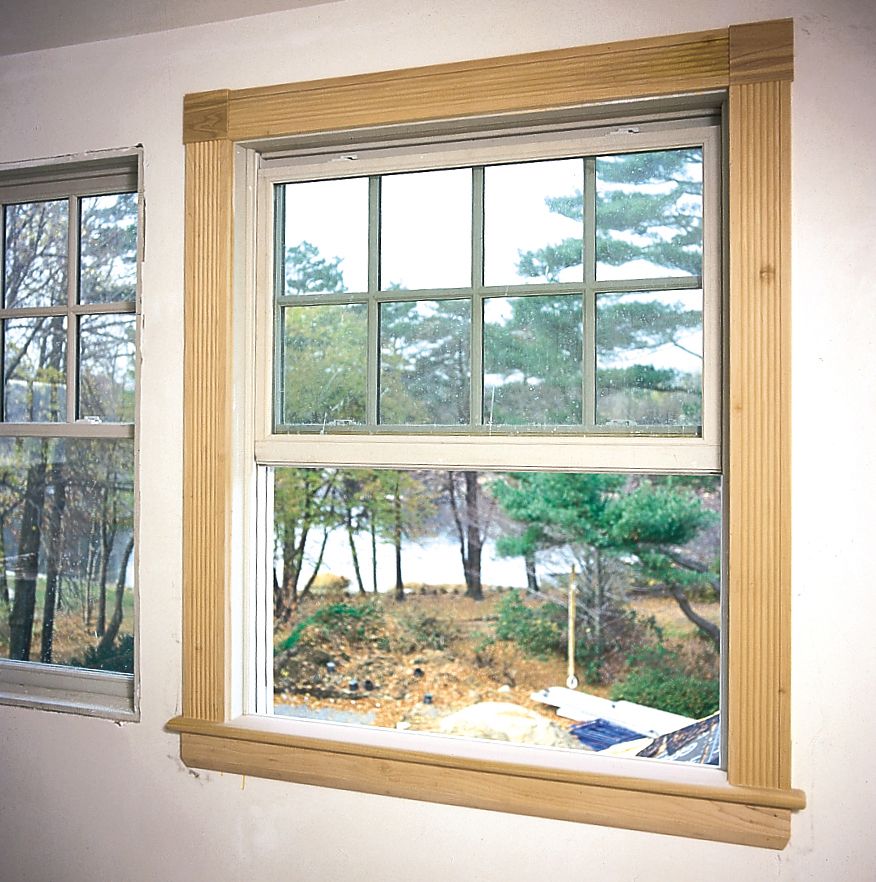
Window casing is the frame that surrounds the window opening. It serves both decorative and functional purposes, covering the gap between the window frame and the surrounding wall. Casings come in various styles, from simple flat boards to more ornate profiles. For a cohesive look, it’s best to match the casing style to the existing trim in your home.
Stool and Apron
The stool, often mistakenly called the sill, is the horizontal piece at the bottom of the window that extends past the casing on either side. The apron is the trim piece installed directly below the stool, which gives the window a finished look. Together, these elements create a stable base for the window trim.
Corner Blocks
Corner blocks are decorative elements placed at the upper corners where the side casings meet the head casing. They can add visual interest and help to conceal any imperfections in mitered joints. While not always necessary, corner blocks can elevate the overall appearance of the window trim.
Trimming Out a Window: Step-by-Step Guide
In the section below, Tom Silva shows you how to install window trim that has reeded side and head casings, plain corner blocks, a thick stool, and a dainty apron, all of which he copied from the original trim. “People often put in a casing that’s too small or a different style,” Silva says, “but I think it adds to the feel and the value of a home to keep to its original character.”
As with all finish carpentry, Silva says successful installation begins with stable material—clear, kiln-dried wood or precast foam—and ends with precise measurements and cuts. The result is a seamless assembly with tight joints and no gaps between wall and casing. “Take your time, and always measure twice before you cut,” he advises.
Step 1. Prep the Jambs
Hold a straightedge across the window; check that each jamb is flush with the wall. If they protrude, plane them down to the wall. If the jambs fall short of the wall, measure the largest gap between the straightedge and each jamb. Then, from 1x stock, rip jamb extensions as wide as necessary and ¼inch thinner than the jamb thickness. Holding the strip against the jamb, drive 1 1/2 inch 18-gauge pneumatic nails (or 4d finish —10 inches. Plane off any excess.
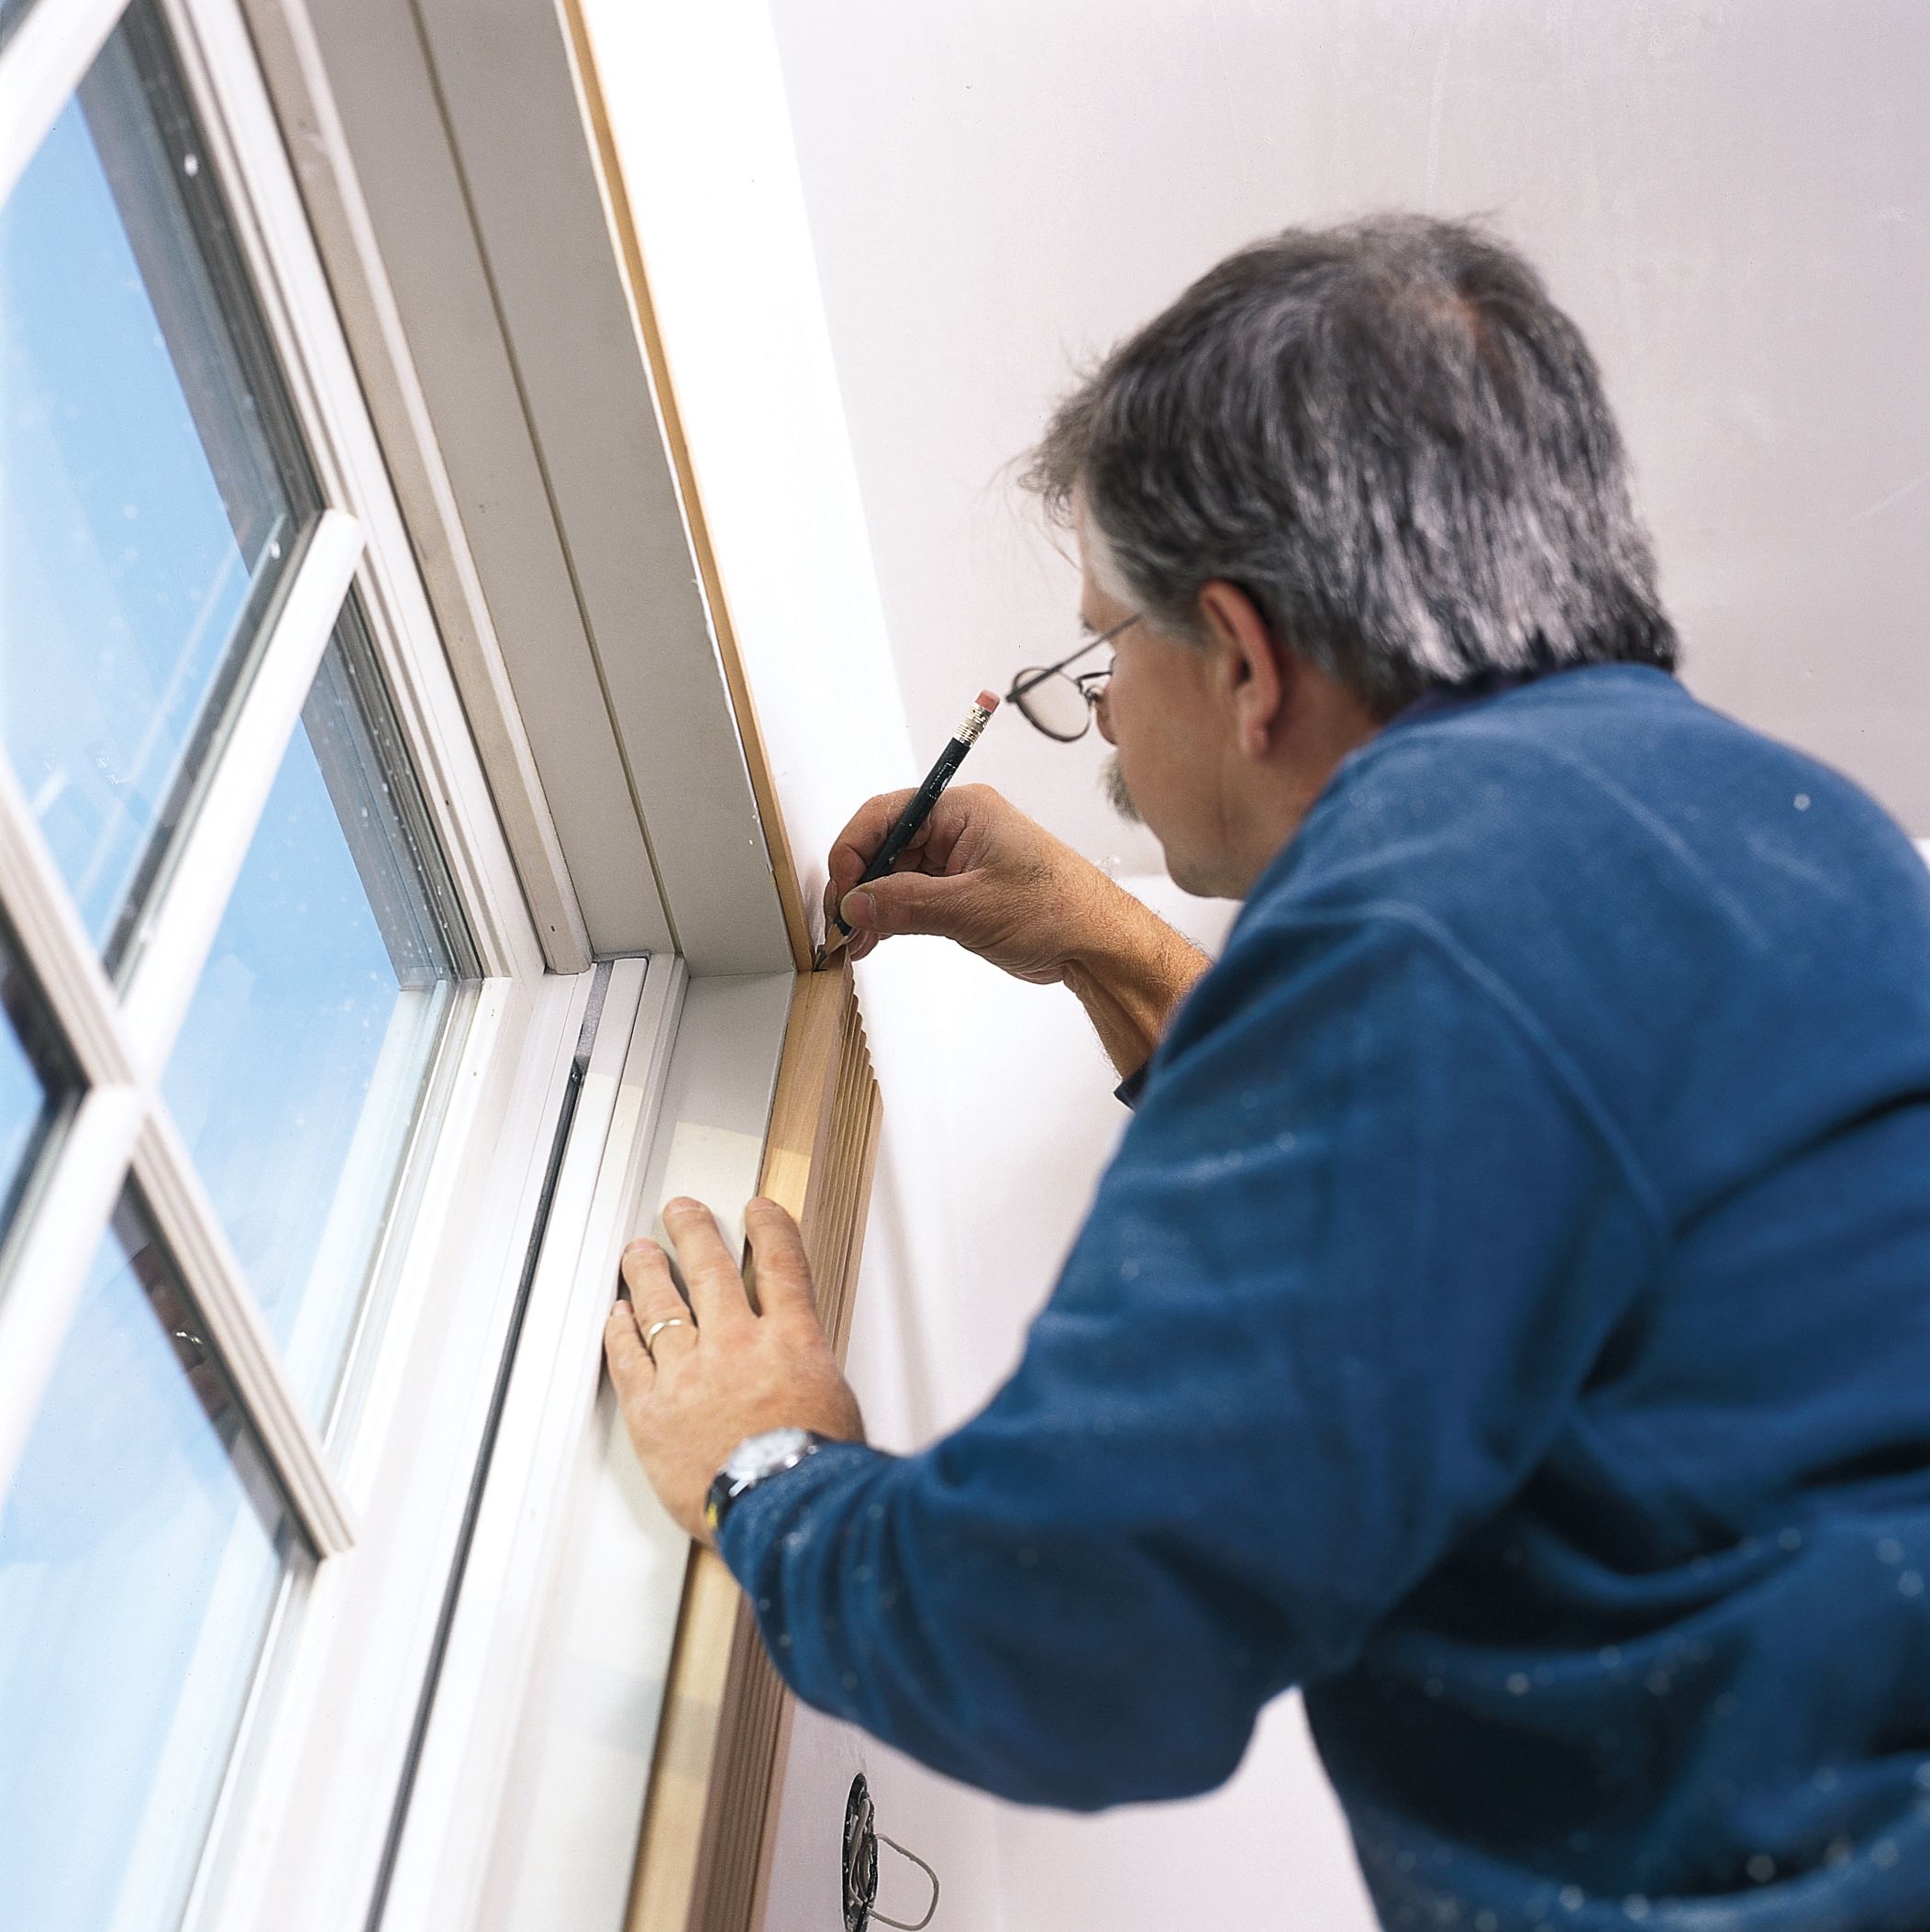
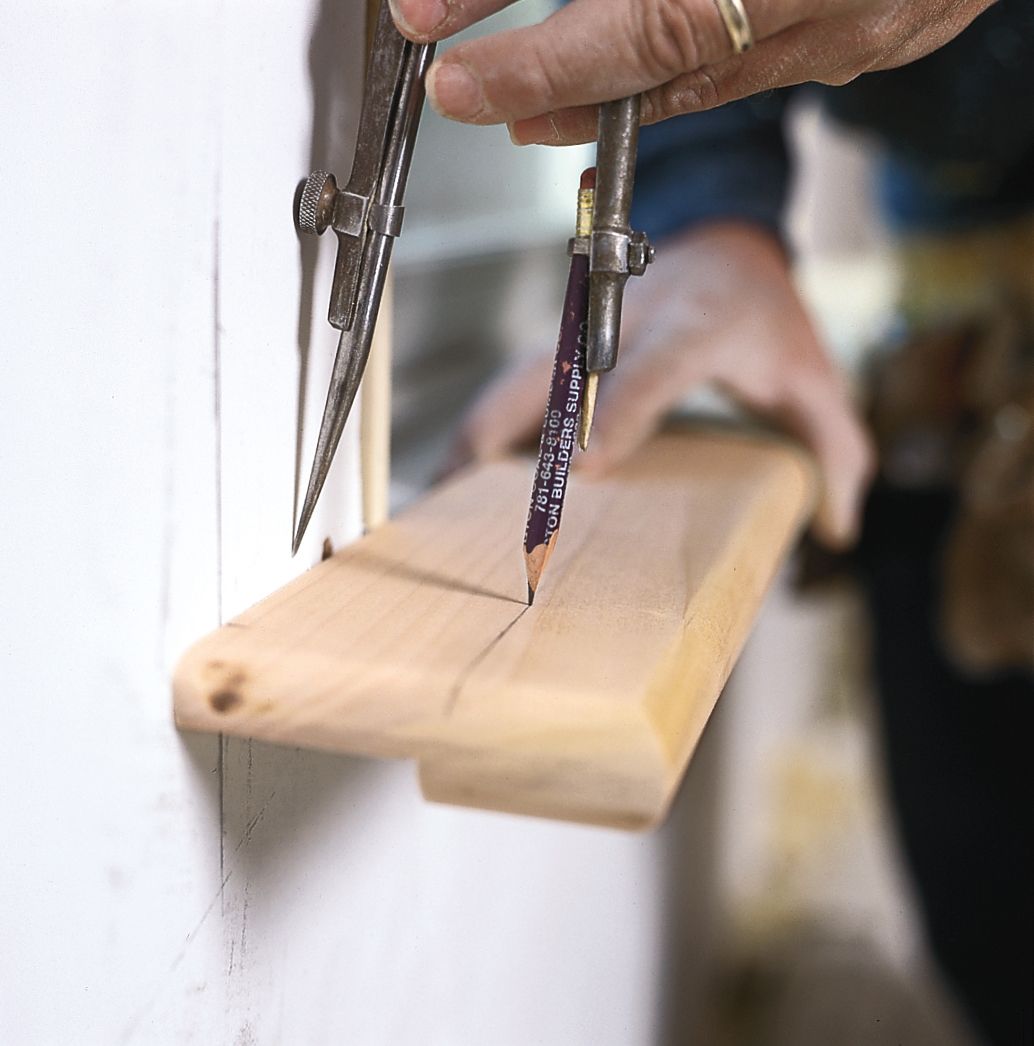
Spread the legs of a compass 1/4 inch and rest the point on one of the jamb’s lower inside corners. Using the inside face of the jamb as a guide, draw a reveal line along the edges of all three jambs.
Tip: For a tight fit between the casing and jamb, plane a slight bevel into the wall-side edge of the jamb.
Step 2. Cut and Rabbet the Stool
Place a side casing against the wall, aligned with the reveal line on a side jamb. Mark the wall at the casing’s outside edge. Repeat for the opposite jamb. Measure between the marks, add 2 inches, and cut the stool to this length.
Place the stool face down on the sill with its back edge against the sill trim. Mark where the top of the trim meets the stool’s end.
Keeping the back corner against the sill trim, slide the end of the upside-down stool against the jamb. Make a vertical mark where the end of the stool touches the jamb.
Connect the two marks with a square and make an X in the area defined by the lines; this is the waste that will be cut out to make the rabbet.
Remove the waste in two separate rip cuts on a table saw.
Step 3. Notch and Install the Stool
Mark the stool’s inside edge 1 inch from each end and place it across the opening. Mark where the stool’s edge meets the inside edge of the jambs. Set a square at those marks and draw “jamb lines” across the top of the stool. Rout the desired profile into the stool’s edge and ends.
Align the jamb lines with the jambs’ inside edges. Set the compass to the distance from the stool’s back edge to the sill trim. Hold the compass point against the wall and scribe lines from each end of the stool to the jamb line.
Following the scribe lines, cut a notch into each end of the stool with a jigsaw. Test fit the stool; fine-tune it with a jigsaw, chisel, or sandpaper. Apply a bead of glue to the sill.
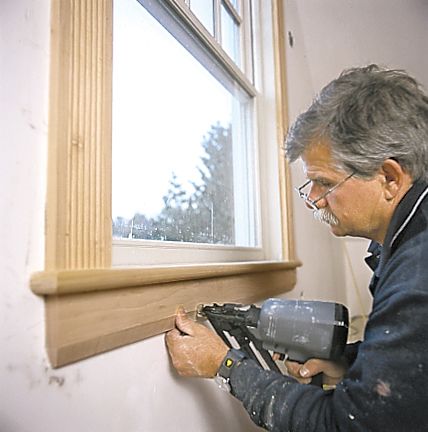
Facenail the stool to the sill with four 18-gauge nails (or 4d finish nails).
Step 4. Install Side Casing
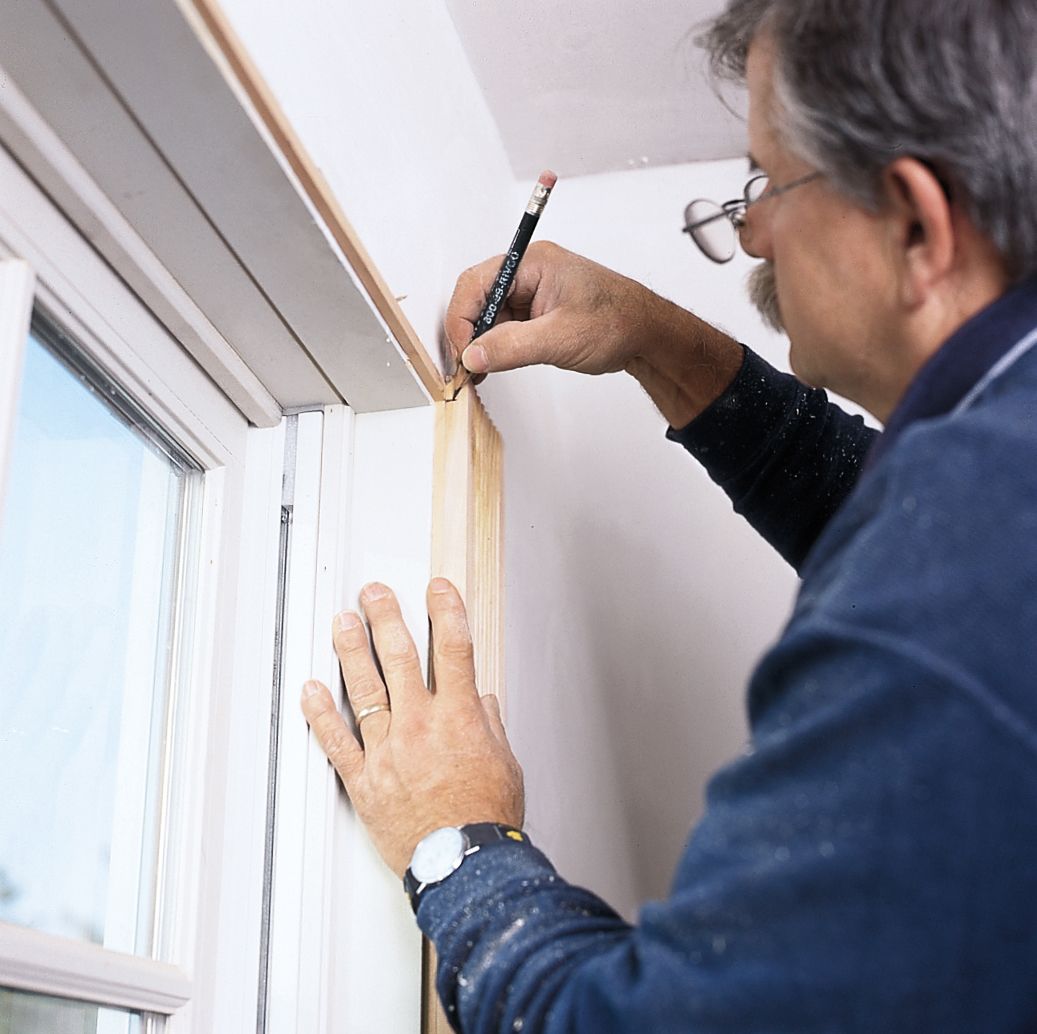
Cut a square end on a piece of casing and stand that end on the stool. Mark where its inside edge meets the head jamb’s reveal line. Make a square cut at that mark. Repeat on the opposite side.
Apply a bead of glue to the casing where it overlaps the side jamb and on the end that sits on the stool; line up its edge with the reveal line. Facenail the casing into the jamb with 4d finish nails, and to the wall with 8d finish nails. Wipe up squeezed-out glue. Repeat the process on the other side.
Nail up through the bottom of each horn into the ends of the casing with two 18-gauge or 6d nails. If hand nailing, drill pilot holes.
Tip: To cut snug-fitting beveled ends, put casing face up on 1/8-inch-thick scrap 3 inches from the miter-saw blade.
Step 5. Add Head Casing
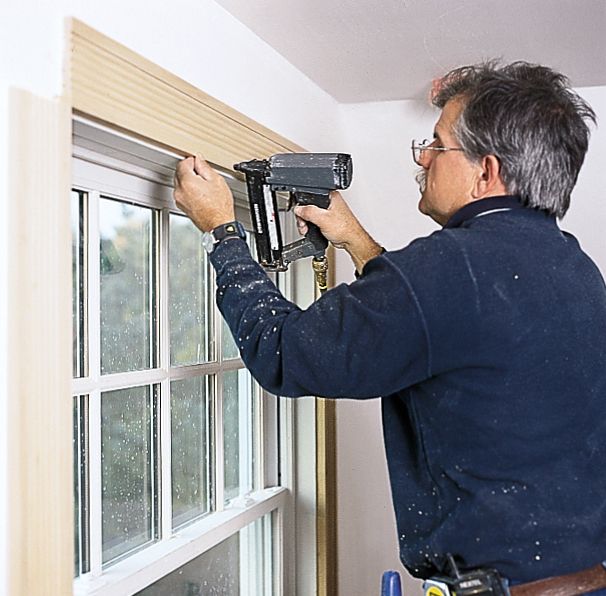
Hold a length of casing across the top of the window and mark where it meets the inside edge of each side casing. With a miter saw, make square crosscuts at those marks.
Glue the head casing to the head jamb, making sure its bottom edge lines up with the reveal line.
Step 6. Add Corner Blocks
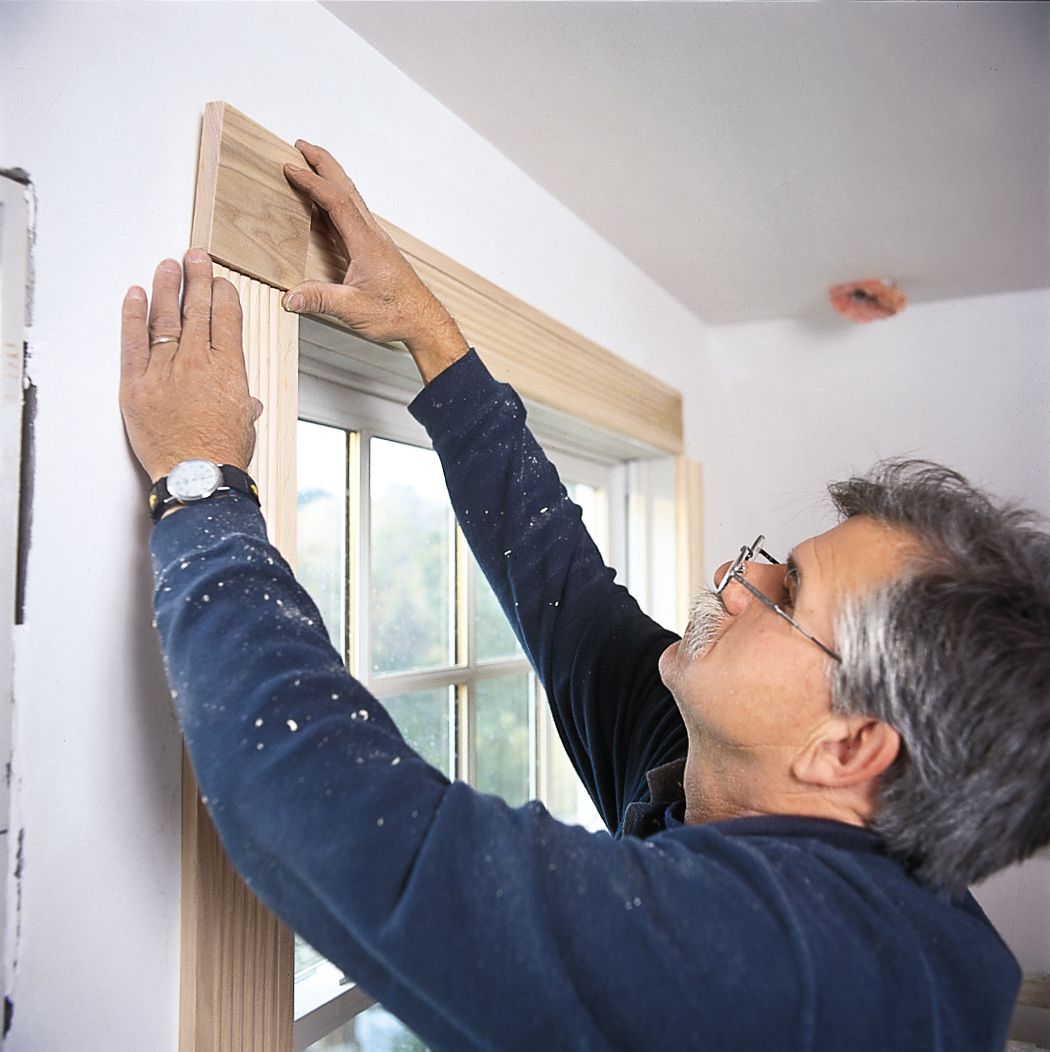
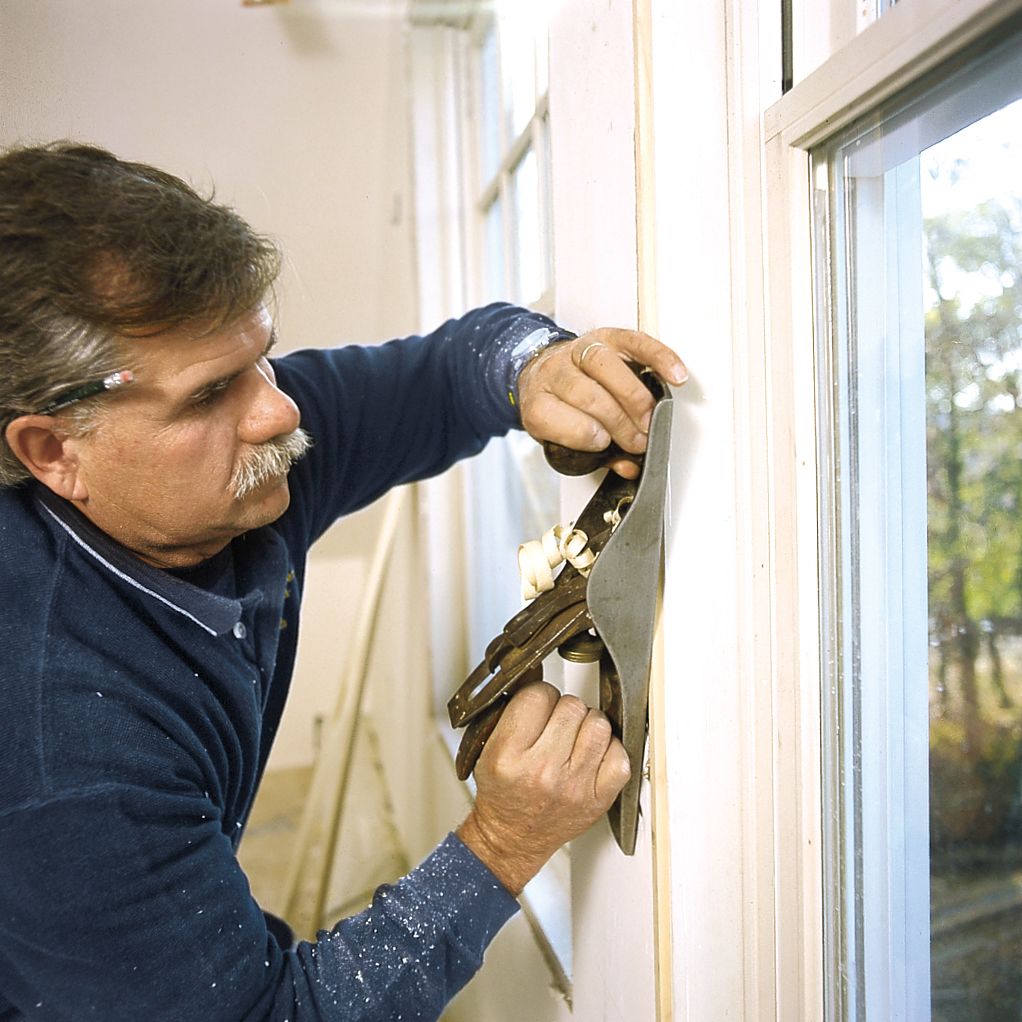
Test fit the corner blocks at both corners to check for gaps. Trim the edges of the block with a plane as needed to get a tight fit.
Apply a thin bead of glue to those edges of the block that will join the side and head casing. Then dab glue on the back of the block; put it in place.
If using a pneumatic nailer, drive 18-gauge nails into each corner. If hand nailing, drill pilot holes, then drive in 8d finish nails.
Step 7. Cut and Install the Apron
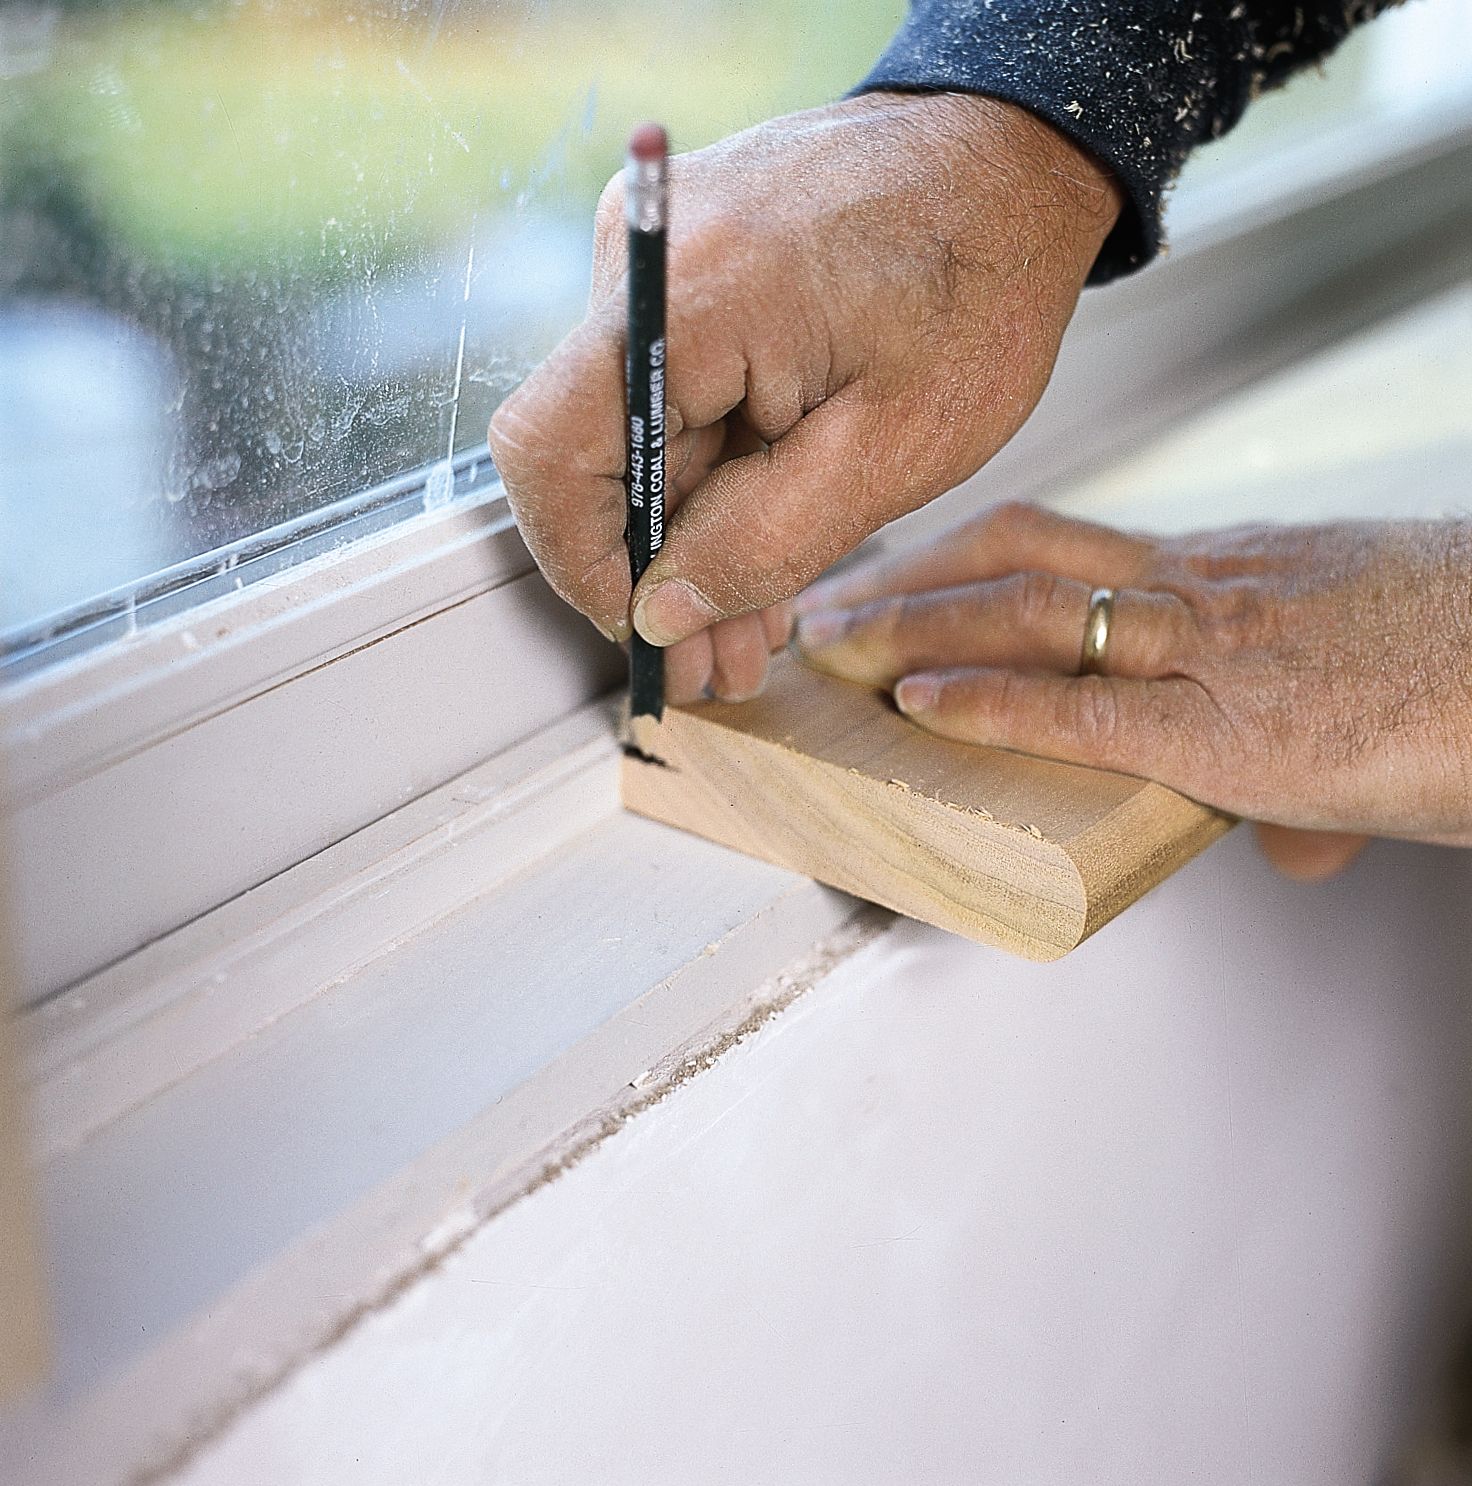
Hold a length of apron stock face down on the stool. Mark the stock where it meets each side casing’s outside edge. At the marks, make square cuts with a miter saw.
To dress up the ends of an apron, hold the end of a scrap apron piece perpendicular to the face of the piece just cut. Face the scrap’s profile toward the end of the apron and make the edges flush. Trace the scrap’s profile onto the face of the apron. Repeat on the other end. Cut along the pencil lines with a jigsaw or coping saw, and sand smooth.
Apply glue along the top edge of the apron, align its ends with the outside edges of the side casing, and press the top edge against the bottom of the stool.
Step 8. Finishing Touches
Recess all nail heads with a nail set and hammer, then fill the holes with wood putty. Allow the putty to dry overnight.
Using 120-grit sandpaper, lightly hand-sand the putty flush with the surrounding wood. Then lightly sand the casings, corner blocks, stool and apron.
Wipe away all sanding dust with a tack rag, then apply a coat of stain and varnish, or primer and paint.
Tips for Achieving Professional-Looking Window Trim Results
Takes these steps to make your window trim look as good as a professional job:
- Always measure twice and cut once to avoid wasting material.
- Use a sharp pencil for accurate marking.
- Keep your tools clean and sharp for precise cuts.
- Work slowly and methodically, checking your work as you go.
- Use a level frequently to ensure everything is straight and plumb.
Common Mistakes To Avoid When Trimming Windows
Be aware of these common pitfalls:
- Rushing the job and making careless measurements or cuts.
- Failing to account for uneven walls or out-of-square openings.
- Using low-quality materials that may warp or shrink over time.
- Neglecting to check for and repair rotted windowsills before installing new trim.
- Over-relying on caulk to fill gaps instead of using proper fitting techniques.
Our Conclusion
Trimming out a window is a rewarding project that can enhance your home’s look. While it requires patience and attention to detail, you can achieve professional-looking results by following these steps and tips. Remember that practice makes perfect. If you’re new to carpentry, consider starting with a less visible window to hone your skills. With each window you trim, you’ll become more proficient and confident in your abilities.