From the Imaginations of the Pros
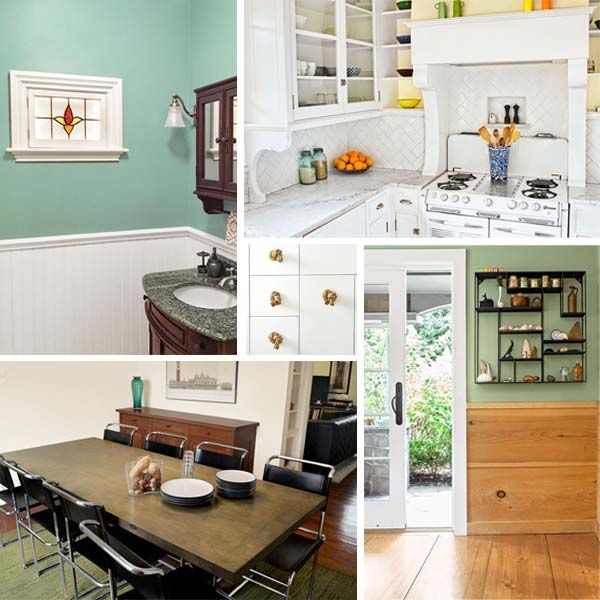
They may point their deep-pocketed clients toward high-end fixtures and finishes, but most architects and designers face the same real-world budget constraints as the rest of us. How do they handle it? By putting their creativity to work with everyday, low-cost materials. These special touches may inspire some clever ideas for your own interior
Manila Rope = Drawer Knobs
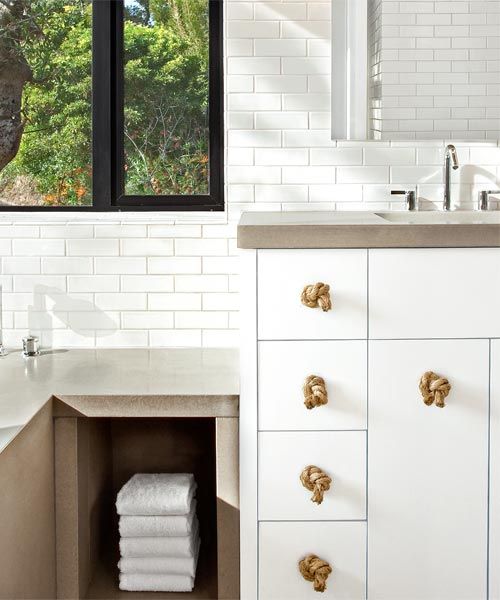
Scott Lee and Erin Martin, San Francisco
Cost: $25
How They Did It: For his energy-efficient house, architect Scott Lee turned to long-time collaborator Erin Martin to design the interiors. As part of her economical and green mandate, and to add a hint of texture to this sleek, neutral bath, she ditched the expected metal vanity pulls in favor of knotted lengths of ¾-inch manila rope, made from durable natural fibers, that she bought from a local marine-supply store. Each pull is threaded through a hole in the cabinet door or drawer and held in place by overhand knots on the front and back. “If the knots loosen, I use a bit of epoxy to hold them together,” Martin says. “And the rope stands up well to bathroom humidity, since it’s tough enough to be used in ocean water.”
Wood Brackets = Cabinet and Hood Supports
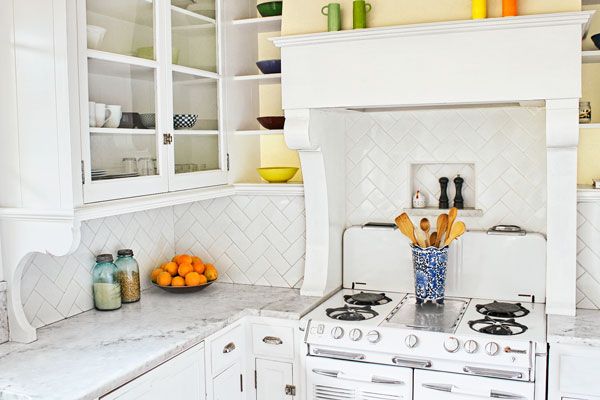
Robert Kelly, Piedmont, California
Cost: $60
How He Did It: Call us flattered: Architect Robert Kelly saw a photo of a bracket-supported range hood in a This Old House book on kitchens and decided to make something similar. To find the perfect profile, he sketched designs at full size on cardboard and taped them in place. The short brackets supporting the upper cabinets are 2 inches thick; to improve the proportions of the long ones flanking the range, he beefed them up to 6 inches thick. Then he used a jigsaw to cut them out of plywood and Douglas fir, again using cardboard templates. “These brackets take away the ‘factory-built’ look of upper cabinets that float on the wall,” he says. White paint for the brackets and cabinets ties all the pieces together.
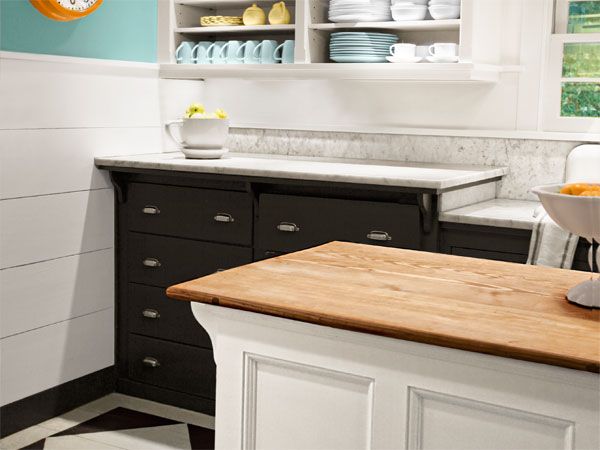
Flooring = Wainscoting
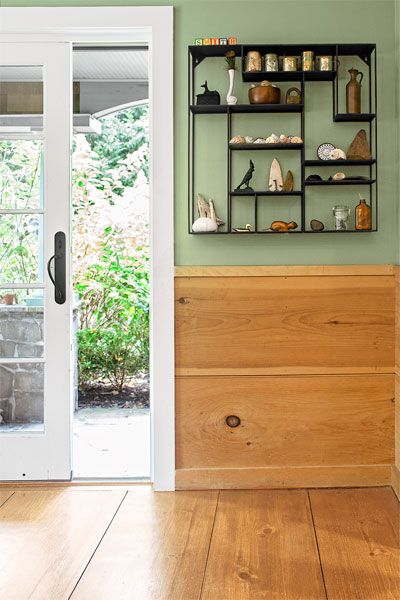
Erica Bröberg Smith, East Hampton, N.Y.
Cost: $0 in materials; $120 for labor
How She Did It: As she was renovating her home’s first floor, architect Erica Bröberg Smith couldn’t bear to part with the leftover wide-plank pine flooring she still had on hand. So she turned it into wainscoting on her eat-in kitchen’s walls. For a more finished look, her contractor routed a bead to fit between the two horizontal boards and added a simple baseboard and cap. Bröberg Smith still hasn’t decided whether to paint or pickle the wood, so in the meantime its natural look goes with just about any decorative scheme she dreams up for this space.
Sheathing = Wall Covering
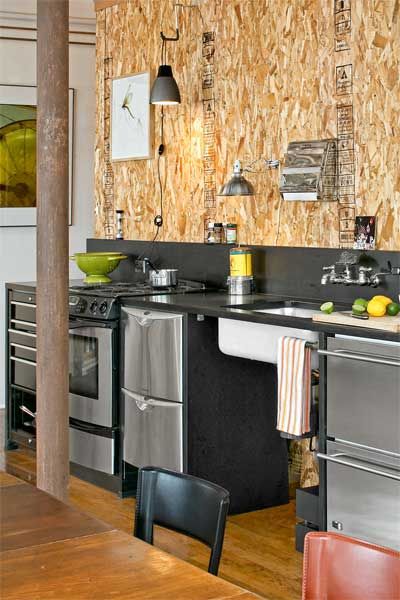
Joseph Kennard, Boston
Cost: $50
How He Did It: Architect Joseph Kennard wasn’t yet sure where he wanted to mount items like wire shelving or a light over the sink when he was renovating his kitchen, so he needed a wall covering that was sturdy and inexpensive and would allow him to experiment. He opted for oriented strand board, a sheathing product with a textured-looking surface that’s made from wood chips bound by adhesives. It’s typically used beneath finished walls or floors, like plywood is. Using drywall screws, he mounted ½-inch-thick 4-by-8-foot sheets to the walls behind his sink and cooktop. “The material camouflages nail and screw holes, so I can relocate things without having to patch it up,” he says.
Stair Treads = Island Top
Rick and liz O’Leary, Croton Falls, N.Y.
Cost: $75
How They Did It: When building an island for their farmhouse-style kitchen, designers Rick and Liz O’Leary chose a countertop made of stock southern-yellow-pine stair treads for several reasons: They were wallet-friendly, available at the local lumberyard, and ideal for the room’s aesthetic. Plus, the prefab boards already had bullnose edges like many countertops do. Rick ripped three 1×12 boards to size, and a neighbor who’s a retired master carpenter cut grooves in the long sides, inserted splines to hold the pieces together, and edge-glued them. Rick then bolted the boards across the grain, using threaded rods to keep them secured. After plugging the bolt holes with dowels and smoothing the surface with an orbital sander, Liz sealed the wood with food-grade mineral oil. “We expect the wood to move a bit naturally and to show wear and tear,” Rick says, “but we’re going for an aged look here, not something sleek and new.”
Plywood Subfloor = Custom-Painted Floor
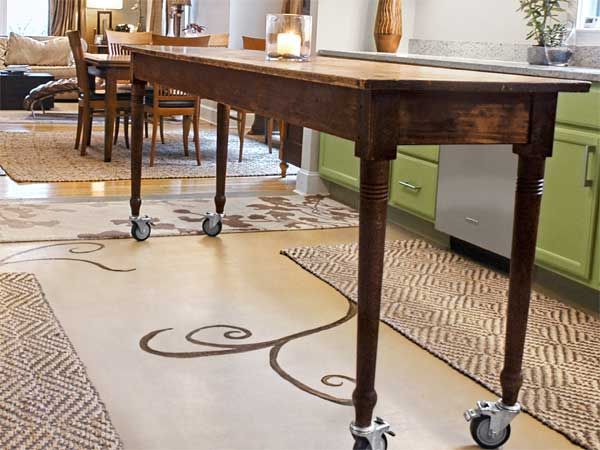
Amy Dutton, Portsmouth, N.H.
Cost: $400
How She Did It: Designer Amy Dutton admits that she wasn’t ready to “spend money on the kitchen floor of my dreams” as she was reworking her 1910 bungalow. So she painted one instead, right onto the plywood subfloor. After caulking the seams between the sheets, she put down two coats of floor paint, then painted freehand tendrils and swirls that play off the colors of the area rugs and the vintage-table-turned-island. “Because the floor has such a large surface area, I came up with a pattern that suited the scale and filled up the space, pulling together elements from the room,” she says. “The organic forms add interest and movement, and distract the eye from the plywood’s seams.” Even better, she can repaint when she gets tired of the look.
Steel Tubing = Sink Support
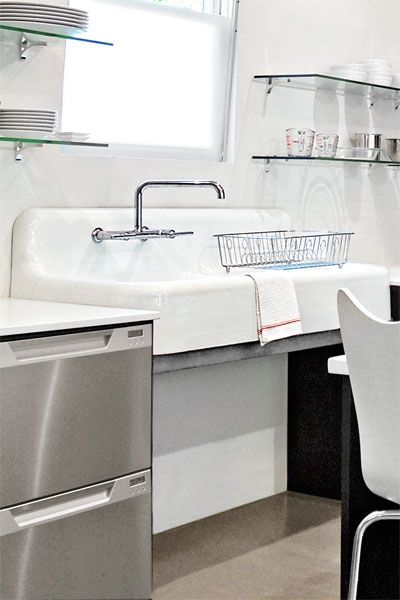
Thaddeus Siemasko, Beverly, Mass.
Cost: $200
How He Did It: For his ongoing kitchen renovation, architect Thaddeus Siemasko bartered with a client for a cast-iron vintage sink from his house in exchange for a donation to the client’s favorite charity. He loved the sink’s deep bowl and washboard top, if not the lead-paint-covered cabinet that came with it. Instead of refinishing the cabinet, he ditched it entirely and bolted together a support frame of stainless-steel angles and rectangular steel tubing from an industrial catalog. “The open area gives me an easy-access spot for storing baskets of kitchen towels and other necessities,” he says. The sink is anchored to the wall for stability.
Stained Glass and Rope Lighting = Faux Window
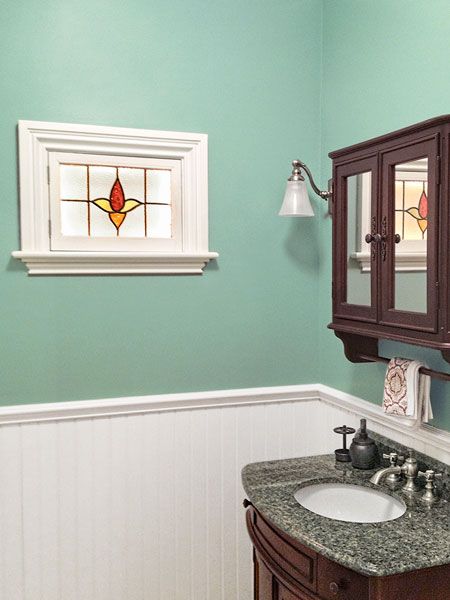
Michael Gray, Essex, Mass.
Cost: $400
How He Did It: Though architect Michael Gray wanted natural light in his master bathroom, he couldn’t cut a window opening in the facade of his historic Second Empire home. So he built a recess between the wall studs, lined the perimeter with low-voltage rope lighting, and fronted it with a stained-glass window he’d bought years earlier and casing he’d salvaged from elsewhere in his house. “The soft glow from the ‘window’ makes a great night-light,” he says.
Interior Door = Dining Table

Rod Garrett, Washington, D.C.
Cost: $200 for the base
How He Did It: When architect Rod Garrett’s firm remodeled its offices, all the old furniture was sent to the scrap heap. But he fished out one freebie for himself, a solid-core maple-veneered door that had been used as a temporary drafting table during construction, and turned trash into treasure. Once he had lugged the 200-pound piece home, he applied green stain and a polyurethane finish and added metal trestle legs from a tool catalog for a DIY dining table that stands up to the wear and tear from his family of four. “With two boys, we needed a piece that was indestructible,” he says. “But I also wanted it to look cool, and this fit the bill.”