We may be compensated if you purchase through links on our website. Our Reviews Team is committed to delivering honest, objective, and independent reviews on home products and services.
Project details
Skill
Cost
Estimated Time
Installing interior window trim requires only hand tools, basic carpentry skills, and an hour’s worth of time—making it an excellent DIY project. In this video guide, This Old House general contractor Tom Silva walks you through the process step by step.
Interior Window Trim Parts
Before beginning any window trim project, it’s essential to understand the different components that make up the trim. Familiarizing yourself with these parts will not only help you follow our guide, but also ensure that each piece is installed correctly for a polished, professional look. Below are the key parts of window trim and their roles.
Window Stool
The window stool is the horizontal piece of trim located at the bottom of the window’s interior. It is often referred to as the “sill” and serves both functional and decorative purposes.
While the primary function of the stool is to provide a flat surface for the bottom of the window frame, it also acts as a small shelf where homeowners often place small decorative items like plants, picture frames, or candles. When installing a window stool, ensure that it extends slightly beyond the side casings to create a more finished look.
Side Casings
The side casings are the vertical trim pieces that run along either side of the window. These casings frame the window and serve to cover the gaps between the window frame and the wall, giving the installation a clean, finished appearance. They also help to insulate the window and prevent drafts by sealing the gap between the wall and the window unit.
Side casings can be simple and flat for a minimalist look or more detailed and ornate, depending on the style of the home. When installing side casings, pay careful attention to measurements and ensure that both sides are level and even for a symmetrical finish.
Header
The header is the horizontal piece of trim located above the window. It serves as the crowning feature of the window trim and is often more decorative than other parts of the trim. The header can be a simple piece of flat trim or an elaborate design that incorporates crown molding or layered trim pieces for a more ornate appearance.
The header helps to conceal the gap between the top of the window frame and the wall. When installing it make sure that it is level and aligns perfectly with the side casings to maintain a balanced appearance.
Apron
The apron is a piece of horizontal trim located directly beneath the window stool. Its primary function is to provide a visual finish to the bottom of the window trim and cover the gap between the wall and the bottom of the stool. The apron also helps to tie the design together, creating a cohesive look by mirroring the width and style of the window header and side casings.
Depending on the style of your home, the apron can be a simple, flat board or a more decorative molding that adds depth and character to the window trim. When installing the apron, ensure it is cut to match the exact width of the window stool for a seamless fit.
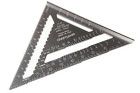
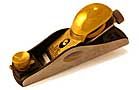
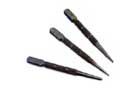
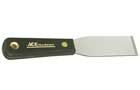
Tools You’ll Need to Install Interior Window Trim
While a miter saw and table saw would make things go a lot quicker, you can effectively install window trim with hand tools alone. Here’s what you’ll need.

Step-By-Step Guide To Installing Interior Window Trim
Once you’ve gathered your tools and chosen the trim style you’d like, you’re ready to begin. Most big-box hardware stores have sections dedicated to window trim, making it easy to shop around and choose the style you like best.
Step 1. Prepare the Window Stool
The window stool is the foundation of your trim installation and is best installed first.
- Measure and mark: Measure and mark the intended location of the side casings on the wall.
- Cut to length: Cut the window stool to the required length from 1×4 primed pine. The stool should project ⅜ inch on either side, so add ¾ inch to the total measurement.
- Rip to width: Use a handsaw or table saw to rip the stool to the appropriate width.
- Mark notches: Mark notches on each end of the stool to fit around the window stops.
- Cut notches: Use the handsaw to cut these notches carefully.
- Smooth it out: Smooth the edges and ends of the stool using a block plane and sandpaper.
Step 2. Install the Window Stool
Once the window stool is properly prepared, installing it is straightforward. Follow these steps:
- Apply wood glue: Spread wood glue on the bottom of the stool.
- Position the stool: Ensure the stool is level and in the correct position against the window.
- Secure with finishing nails: Use 2½-inch finishing nails, driving them through the center of the nosing into the window frame.
- Countersink nailheads: Use a nailset to countersink the nailheads below the surface of the wood.
Remember to wipe away any excess glue immediately. Glue that dries on the surface can be difficult to remove and can interfere with finishing processes like painting or staining.
Step 3. Cut and Install Side Casings
With the base in place, you can move to the side trim.
- Measure and cut: Measure and cut the side casings to the correct length, ensuring they fit snugly between the window stool and the top of the window frame.
- Apply wood glue: Apply wood glue to the back edge of each casing.
- Position and nail: Position the casings flush against the window stop and secure them using 2-inch finishing nails along the inside edge and 2½-inch nails along the outside edge.
- Additional nail for stability: Drive a nail up through the underside of the window stool into the bottom of each casing.
Step 4. Add the Header and Apron
The header and apron go on in a similar manner:
- Measure and cut the header: Measure and cut the header to length, ensuring it extends slightly beyond the side casings.
- Apply glue: Spread glue on the top edges of the side casings and the area where the header will contact the wall.
- Install the header: Secure the header with 2½-inch finishing nails, ensuring it is level.
- Cut the apron: Measure and cut the apron to be slightly wider than the window stool.
- Apply glue to the apron: Apply glue to the top edge of the apron.
- Install the apron: Position the apron directly below the window stool and secure it with 2-inch finishing nails.
Step 5. Finishing Touches
These punch-list items will give the new window trim a polished look.
- Fill nail holes: Use wood putty to fill all nail holes. Smooth out the putty with a putty knife.
- Sand the surface: Once the putty is dry, sand the entire trim surface smooth using 120-grit sandpaper.
- Wipe away dust: Use a damp cloth to remove any sanding dust, preparing the surface for final finishing.
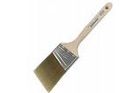
- Apply paint or stain: Apply paint or stain as per your desired finish. Use a sash paintbrush for corners and edges to achieve a clean look.
Properly finishing your window trim enhances its appearance and protects the wood from moisture and wear.
Tips for a Smooth Window Trim Installation
Installing interior window trim is a manageable DIY project that can significantly improve the look of your home. With the right tools, materials, and techniques, you can achieve professional-looking results. To further ensure a successful project, consider these tips:
- Pre-drill nail holes: If working with particularly hard wood, pre-drill your nail holes to avoid splitting.
- Test the fit: Always dry-fit each piece of trim before gluing. This allows for any last-minute adjustments.
- Maintain clean tools: Keep your tools clean and sharp. A sharp handsaw and well-tuned block plane can make all the difference in achieving clean cuts and smooth surfaces.
- Double-check measurements: Measure twice, cut once. Accurate measurements are fundamental to a successful trim installation.
Don’t hesitate to seek help if you encounter challenges.