Project details
Skill
Cost
Estimated Time
Windowsills are particularly vulnerable to moisture damage due to their exposure to the elements — and a rotted windowsill can lead to serious structural issues and compromise your home’s energy efficiency over time. Windowsill rot is usually caused by poor water drainage, inadequate exterior caulking, and improperly installed or damaged flashing.
Luckily, replacing a deteriorated sill is a manageable DIY project for those with moderate carpentry skills, and in this guide, we’ll walk you through the process from start to finish. You can also watch the video above to see This Old House general contractor Tom Silva complete these steps.
Understanding Windowsill Rot
Over time, water can seep into your windowsill, causing decay and creating an entry point for pests and water infiltration.
Signs of a Rotted Windowsill
Before replacing your windowsill, you should identify the extent of the damage. Look for these indicators:
- Soft or spongy wood, when pressed
- Visible cracks or splits in the sill
- Peeling paint or discoloration
- Visible mold or mildew growth
- Water stains on the interior wall below the window
Tools and Materials Needed To Replace a Rotted Windowsill
To replace a rotted windowsill, you’ll need the following:
- Circular saw
- Cold chisel (1/2-inch)
- Drill/driver
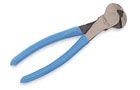
- End nippers
- Flat pry bar
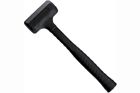
- Hammer
- Handsaw
- Hand plane
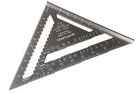
- Layout square
- Oscillating multi-tool
- Pneumatic finish nailer
- Random orbit sander
- Reciprocating saw
- Spanish cedar board (for new sill)
- Caulk gun
- Dead blow hammer
- Minimal-expansion foam
- Paint to match existing trim
- Silicone caulk
- Water-based primer
When working on any home improvement project, safety should be a top priority. Take these precautions:
- Wear safety glasses and a dust mask.
- Use work gloves to protect your hands.
- Ensure proper ventilation when using paints or solvents.
- Be cautious when handling power tools.
- Have a first aid kit nearby.
Removing the Old Windowsill
The first step in replacing a rotted windowsill is carefully removing the damaged piece. Silva demonstrates this process, highlighting key techniques for a clean removal.
Cutting the Sill Free
Follow these steps to cut the old, rotted windowsill:
- Use an oscillating multi-tool to cut through the nails holding the stool to the sill.
- Cut through the house siding directly below the sill with the multi-tool.
- Make two cuts in the sill about 2-inches from each side jamb using a reciprocating saw.
Prying Out the Old Sill
After cutting, the sill may still be firmly attached. Silva shows this clever technique to remove it:
- Drive 3-inch screws into the edge of the severed sill near the cuts, leaving about 1/2 an inch protruding.
- Use a flat pry bar to hook onto the screw heads and leverage the sill out of the frame.
- Remove any remaining sill pieces with a hammer and chisel.
Cleaning the Sill Area
Once the old sill is removed, use end nippers to remove any protruding nails from the sill space. Clean out any debris or loose material, and inspect the underlying structure for any additional rot or damage that may need addressing.
Measuring and Cutting the New Windowsill
Accurate measurements and precise cutting are important for a properly fitting replacement sill. Measure the depth of the sill space, width between the side jambs, and overall length, including the horn (the part that extends beyond the jambs).
We recommend using a Spanish cedar sill for its weather-resistant properties. Once you’ve decided on a wood species, follow these steps:
- Transfer your measurements to the new wood board.
- Cut the board to length using a circular saw.
- Use the old sill’s horn as a template to mark the angle and length on the new sill.
- Adjust the circular saw’s bevel angle to match the horn angle and make the cuts.
- Finish the horn cuts with a handsaw for precision.
To prevent water from running under the sill, cut a shallow groove along the underside of the sill, about 1/2-inch from the front edge. Use a hand plane to smooth the sill’s edges and sand the entire sill with a random-orbit sander and 120-grit sandpaper.
Installing the New Windowsill
With the new sill prepared, it’s time for installation. Coat all surfaces of the new sill with water-based primer.
Positioning and Securing the Sill
Follow these steps to install your new windowsill:
- Slide the new sill into position, but don’t push it in completely.
- Inject minimal-expansion foam under the sill for insulation and added support.
- Push the sill tightly into place, ensuring it makes contact with the wet silicone caulk.
- Use a dead-blow mallet to tap the sill fully into position.
Finishing Touches
Secure the sill to the stool using a pneumatic finishing nailer and 2-inch nails. Run a thin bead of silicone caulk along the seam between the sill and stool, around each side casing, and along the siding beneath the sill. After the sill is securely in place, check that all seams and joints are properly sealed. This step prevents water from seeping into the frame and causing future rot.
Choose a paint that matches the existing window trim and provides a protective barrier against the elements. Apply at least two coats of paint, allowing each coat to dry before applying the next.
Additional Tips for a Perfect Finish
For a professional-looking finish, consider these additional tips:
- Use painter’s tape to mask off areas where the sill meets the window frame and siding.
- Sand between coats of paint for a smooth finish.
- Inspect the sill for any imperfections and address them before the final coat of paint.
Maintaining Your New Windowsill
Perform these checks at least twice a year:
- Look for any signs of water damage or wood deterioration
- Check the caulking for cracks or gaps
- Inspect the paint for chips or peeling
- Ensure proper drainage away from the window
Repaint or reseal the sill every few years and clean the sill regularly to prevent dirt and debris buildup. Address any water drainage issues around the window promptly. Consider installing a drip cap above the window for added protection.
Our Conclusion
Replacing a rotted windowsill is a worthwhile project that can prevent further damage to your home and improve its curb appeal. As our very own Tom Silva demonstrated, with the right tools, materials, and techniques, you can successfully complete this task.
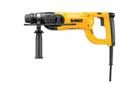
 oscillating multi-tool
- Reciprocating saw
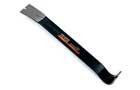
- Flat pry bar
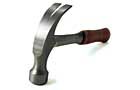
- Hammer
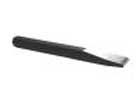
- cold chisel – 1/2-inch
- Dead blow hammer
- End nippers
- Circular saw
- Layout square
- Drill/driver
- Handsaw
- Hand plane
- Random orbit sander
- Caulk gun
- Pneumatic finish nailer