We may be compensated if you purchase through links on our website. Our team is committed to delivering honest, objective, and independent reviews on home products and services.
Project details
Skill
Cost
Estimated Time
Stuck sash windows are a common issue in older homes, often caused by layers of paint that seal the window shut. While frustrating, this problem is usually fixable with some patience and the right tools.
This guide will walk you through the process of freeing a painted-shut window and restoring its functionality. In the video, This Old House general contractor Tom Silva demonstrates how to tackle this home improvement task step-by-step.
*Cost information in this article sourced from Angi.
What Are Sash Windows?
Sash windows are a classic feature in many homes with movable panels called sashes. Contrary to common use, the term “sash window” does not refer to double-hung windows exclusively, as many older homes have single-hung windows with operable bottom-only sashes.
Types of Sash Windows
There are two main types of sash windows:
- Double-hung windows: Both the top and bottom sashes can move independently.
- Single-hung windows: Only the bottom sash moves, while the top remains fixed.
Common Causes of Stuck Windows
Several factors can contribute to a window becoming stuck, including a broken sash cord, multiple layers of paint, rusted hardware, and a warped wood frame.
Preparing for the Repair
Before starting the repair process, we recommend gathering the following items and taking proper safety precautions, especially when dealing with older homes that may contain lead paint.
Tools and Materials Needed
To free a stuck sash window, you’ll need:
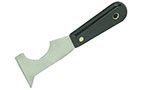
- 5-in-1 painter’s tool
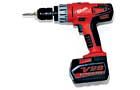
- Drill/driver
- Finishing nails
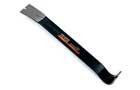
- Flat pry bar
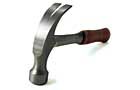
- Hammer
- New sash cord
- Plastic drop cloth
- Screws
- Utility knife
- Wet/dry vacuum with HEPA filter
Safety Precautions
When working on windows in homes built before 1978, assume you’ll encounter lead-based paint. You must take the following precautions to protect yourself from lead exposure:
- Cover the floor with plastic sheeting
- Use a vacuum with a HEPA filter to collect dust and debris
- Wear protective gear such as gloves and a dust mask
- Work slowly to minimize dust creation
Free the Stuck Window
The first step in repairing a stuck sash window is to break the paint seal holding it in place. This process requires patience and careful maneuvering to avoid damaging the window or frame.
Break the Paint Seal
To break the paint seal, take these steps:
- Unlock the sash and use a 5-in-1 painter’s tool to break the paint seal around the window.
- Gently tap the painter’s tool with a hammer to cut through the paint along both vertical sides of the sash, the bottom stool, and the meeting rail.
- Have an assistant hold a vacuum hose nearby to catch paint dust and chips as you work.
- Repeat the process on the window’s exterior, cutting the paint seal around the entire sash.
Remove the Sash
Once the paint seal is broken, you can remove the sash from the frame in the following manner:
- Position a flat pry bar under the sash’s vertical stile.
- Gently pry upward until the sash breaks free.
- Test the sash by raising and lowering it a few times to check its movement.
Replace Sash Cords
Old, worn-out sash cords can contribute to a window’s stiffness. Replacing them can significantly improve the window’s operation.
Access the Sash Weights
To replace the sash cords, you’ll need to access the hidden weights. Here’s how:
- Remove the stop beads on either side of the window frame.
- Pull the sash free from the frame and set it aside.
- Unscrew and remove the access doors on each side jamb.
- Pull out the old sash weights.
Install New Cords
With the weights exposed, you can now install new sash cords by taking these steps:
- Feed a new length of sash cord over the pulley on each side jamb and down into the wall cavity.
- Tie the sash weights onto the new cords and return them to their pockets.
- Replace the access doors to conceal the weights.
- Secure the new cords to the sides of the sash using screws.
- Trim any excess cord with a utility knife.
Reinstall the Window
After replacing the sash cords, it’s time to put everything back together and ensure smooth operation.
Weatherstripping and Lubrication
- Lubricate each piece of metal weatherstripping.
- Slip the weatherstripping between the sash and the side jambs.
- Secure the weatherstripping to the side jambs using small brad nails.
Reattaching Stop Beads
- Position the stop beads back into place.
- Secure them with 1½-inch finishing nails.
- Ensure the stop beads aren’t too tight against the window to allow for smooth sliding.
Additional Installation Details
When reinstalling your window, pay attention to specific details that can affect long-term performance.
- Aligning the sash: Proper sash alignment ensures smooth operation. Check for even spacing along the edges and, if necessary, adjust the sash before securing it back into the frame.
- Securing with nails: Use finishing nails to secure the sash. Confirm the nails are slightly countersunk, and fill the holes with wood putty for a smooth, finished look.
Maintaining Sash Windows
Regular maintenance can prevent future sticking and extend the life of your sash windows.
Cleaning and Lubrication
We recommend periodically cleaning and lubricating your sash windows. The process is simple and consists of the following:
- Clean the window tracks regularly to remove dirt and debris.
- Apply a silicone-based lubricant to the tracks and moving parts annually.
- Inspect weatherstripping and replace it as needed.
Painting Tips
When repainting sash windows, follow these tips from our experts:
- Remove hardware before painting.
- Use thin coats of paint to avoid sealing the window shut.
- Allow each coat to dry completely before closing the window.
Seasonal Checks
Inspect your windows seasonally to ensure they operate smoothly. Look for signs of wear and tear, such as frayed sash cords or deteriorating weatherstripping, and address these issues promptly.
Proper Ventilation
Ensure proper ventilation when painting or lubricating your windows. Good ventilation helps the paint or lubricant to dry evenly, preventing future sticking.
Tools
 Wet/dry vacuum with HEPA filter
- 5-In-1 Painter’s Tool
- Hammer
- Flat pry bar
- Drill/driver
- Plastic drop cloth