Inevitably, weather and wear will degrade your front porch over time. When you’re dealing with splintered boards, sagging structures, or outdated designs, a porch renovation may be in order. This comprehensive guide will help you assess your porch’s condition, select the right materials, and tackle common repair and upgrade projects.
Determining the Scope of Your Front Porch Fix-Up Project
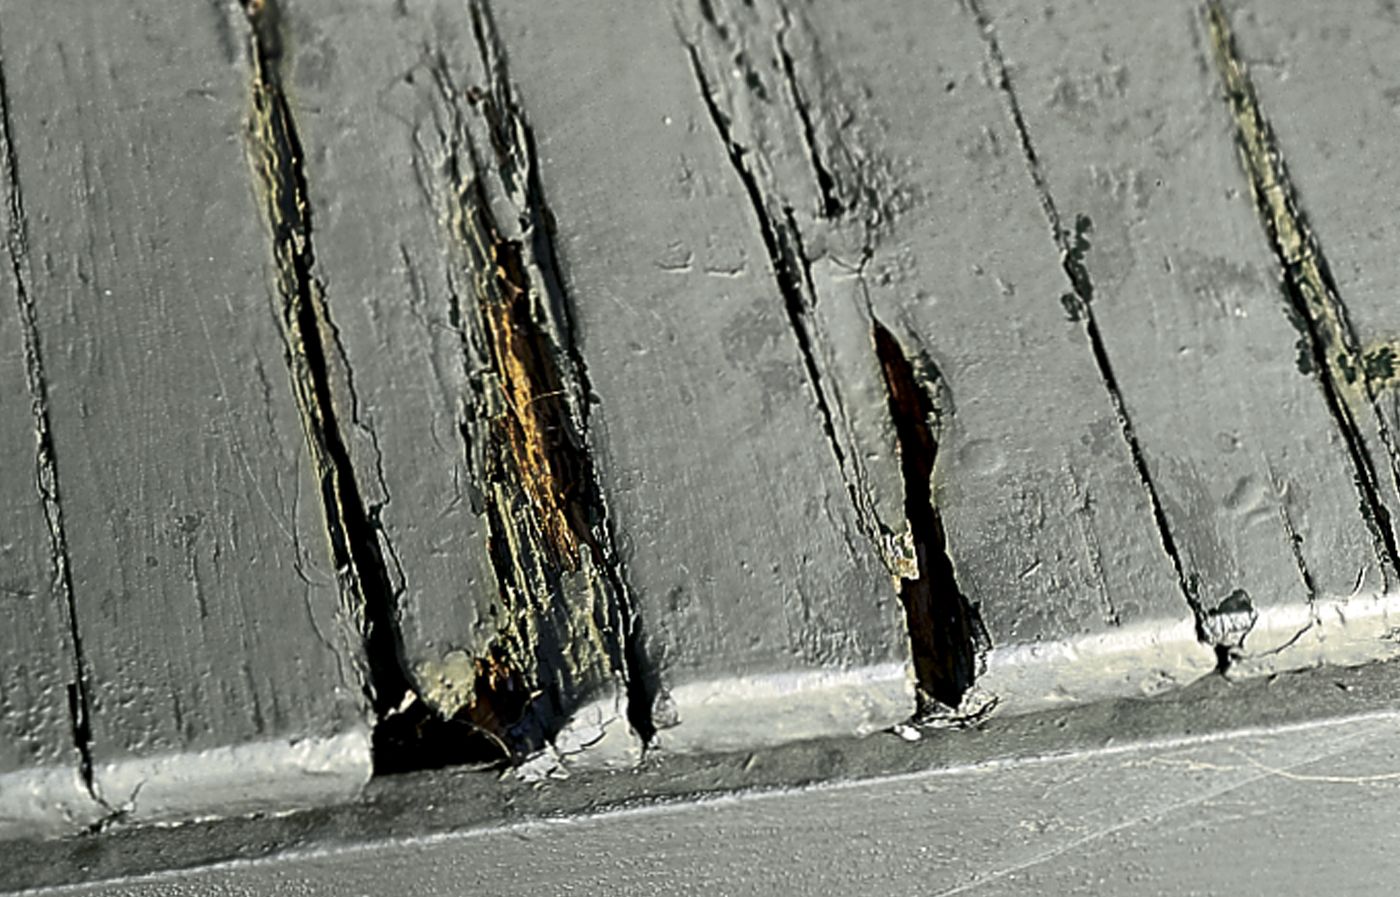
Before setting out on any renovation projects, inspect your porch for signs of wear and damage. Look for:
- Rotting or splintering wood
- Loose or missing boards
- Peeling paint or stain
- Rusted hardware or nails
- Cracks in concrete or masonry
- Sagging floors or roofs
Pay special attention to areas where moisture accumulates, such as corners and joints. These spots are particularly prone to rot and decay. Any project you undertake should address these issues.
Once you’ve identified the issues, assess whether they’re primarily cosmetic or structural. Cosmetic problems like peeling paint or minor board replacements are typically DIY-friendly. However, structural issues such as a sagging foundation or compromised support beams may require professional intervention.
Essential Tools and Materials for Porch Renovation
While the scope of your project may add more items to your list, here’s what you’ll need to get started for most porch renovations.
Tools Needed:
- Circular saw
- Pry bar
- Hammer
- Drill and drill bits
- Measuring tape
- Level
- Polyurethane construction adhesive
- Safety gear (goggles, gloves, dust mask)
- Sander (belt and orbital)
For more specialized tasks, you might also need a table saw, nail gun, or power planer.
Selecting the Right Planks
If you need to replace decking, opt for materials that can withstand the elements and heavy foot traffic. Specifically, you might consider:
- Pressure-treated lumber
- Composite decking
- Vertical-grain hardwoods
When selecting fasteners, opt for stainless steel or hot-dipped galvanized nails and screws to prevent rust and staining.
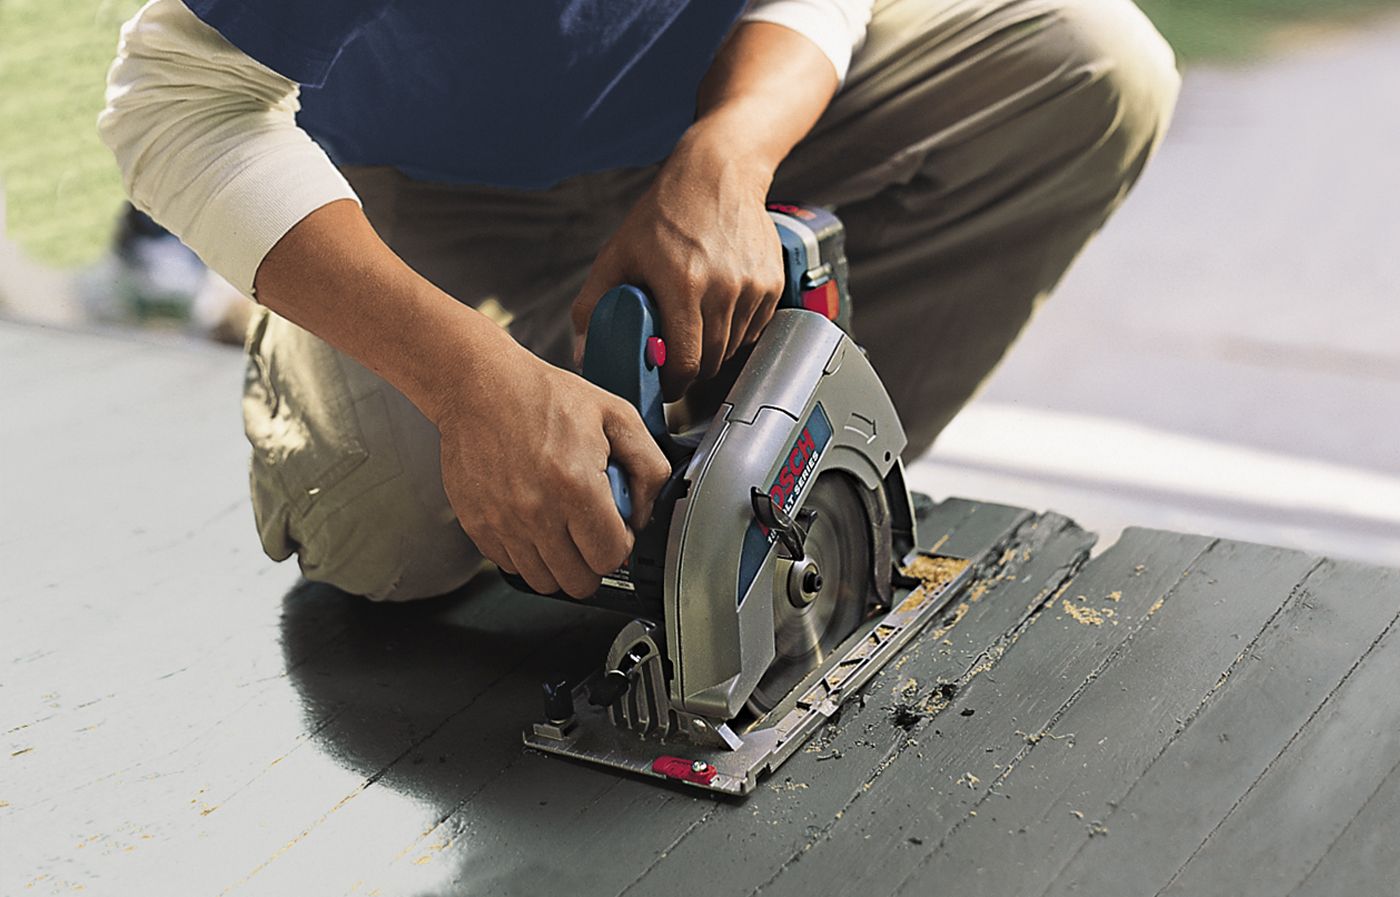
Step-By-Step Guide To Replacing Damaged Porch Flooring
Replacing porch decking is achievable for a DIYer who’s used a circular saw and a table saw, particularly if you can buy replacement boards milled to the same thickness as the originals. Just resist the temptation to cut out only the damaged areas. Short patches leave obvious and unsightly seams.
Instead, follow the steps of This Old House technical editor Mark Powers, who used only full-length boards on a porch he installed in Montclair, New Jersey. The new vertical-grain Douglas fir blends perfectly with the old wood and, if given a coat of paint regularly, should survive at least another hundred years. Here’s how he did it.
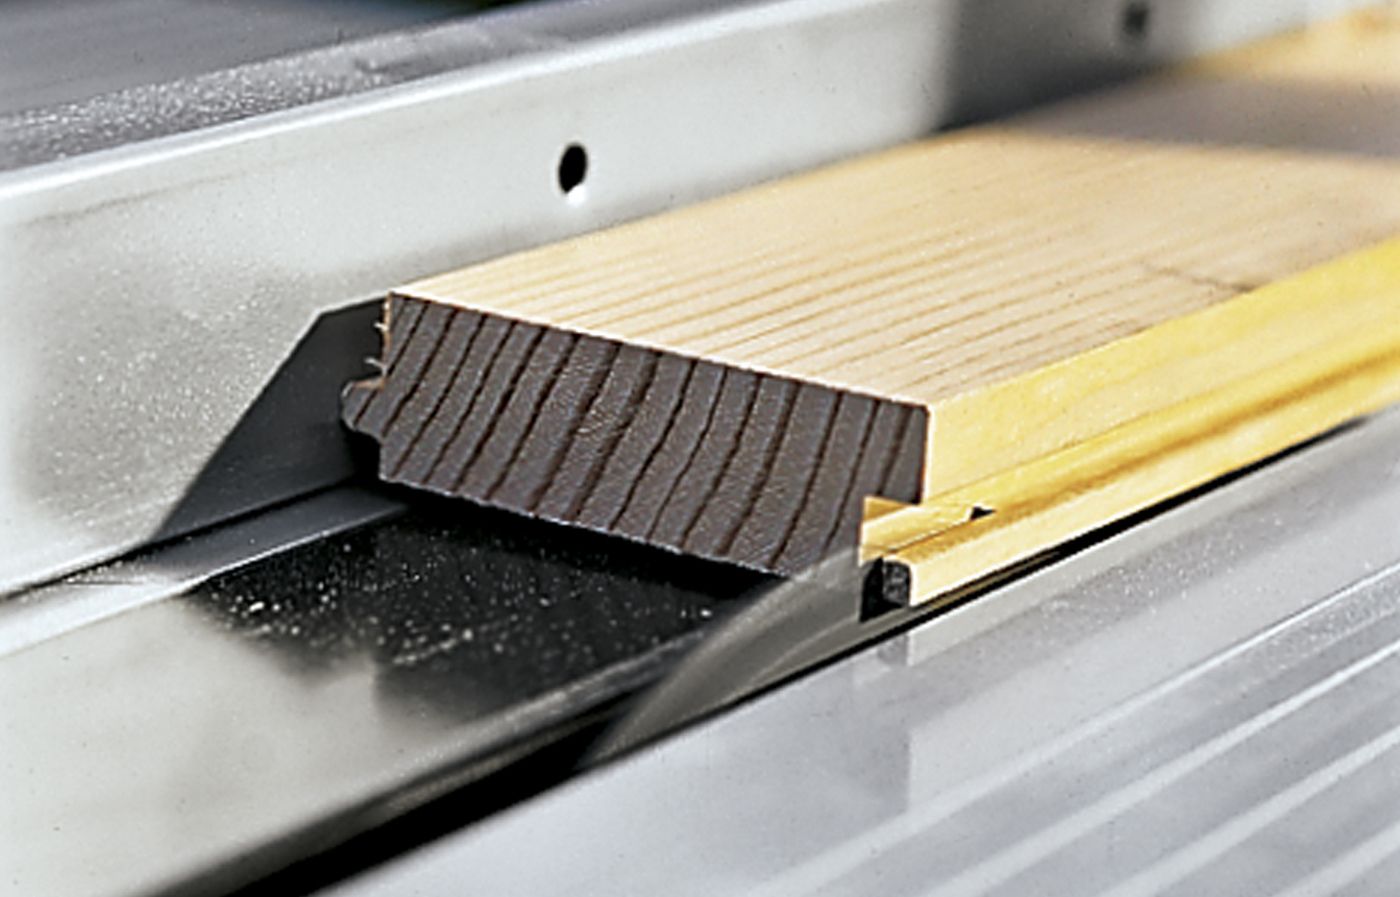
Step 1: Cut the First Damaged Board
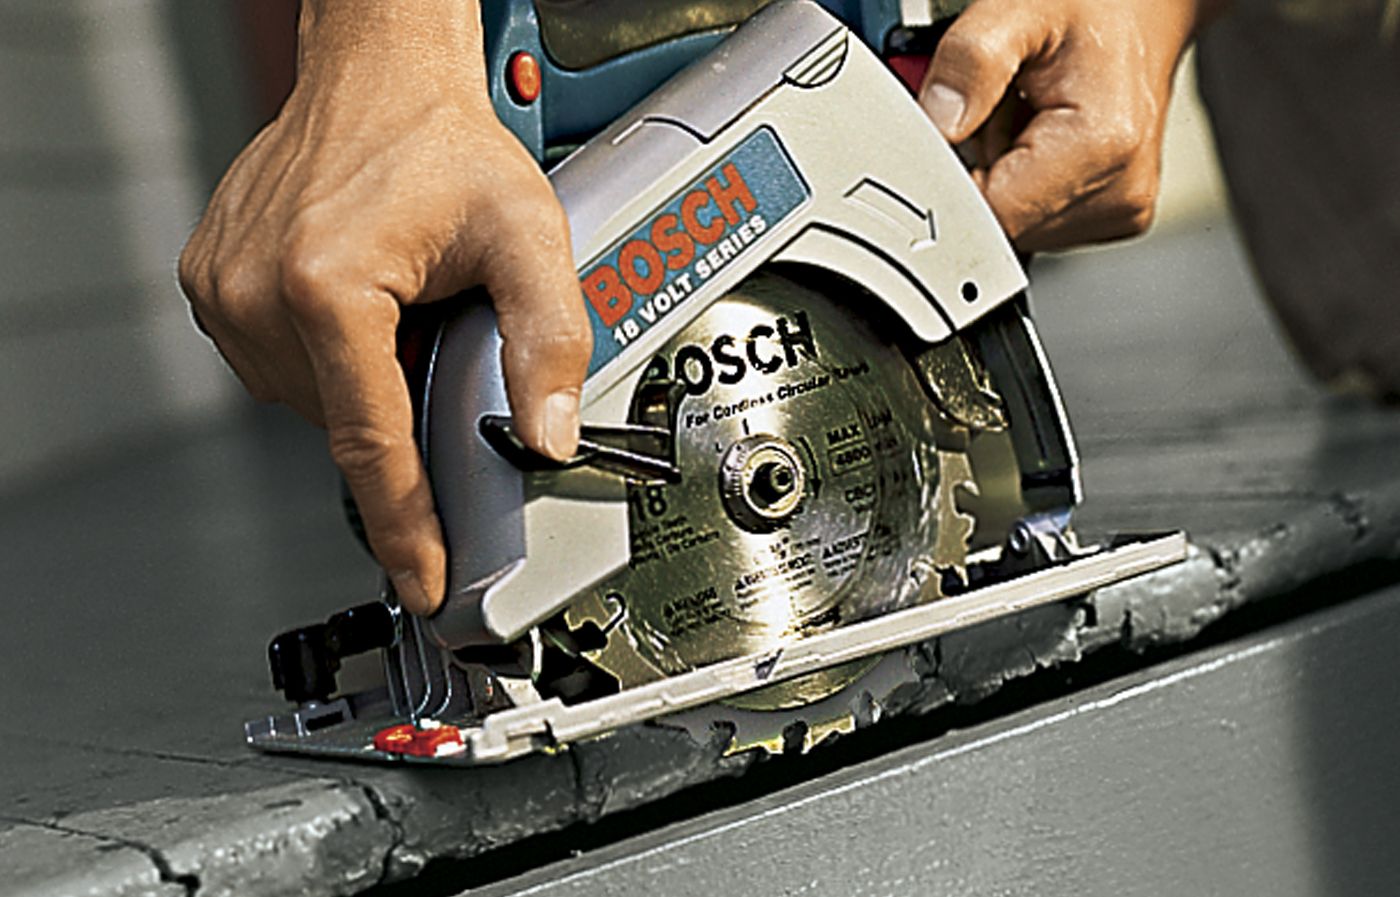
Cut into a damaged board that’s next to a good one and whose groove faces the other boards that will be replaced. You can spot the tongues and grooves at the ends of the decking along the front edge of the porch.
Starting at the porch edge, run the saw down the center of the damaged board to avoid hitting nails. Stop when you reach the house wall. Remove the saw and drive a 1-inch demolition chisel into the kerf to split the final few inches.
Step 2: Pry up Old Decking
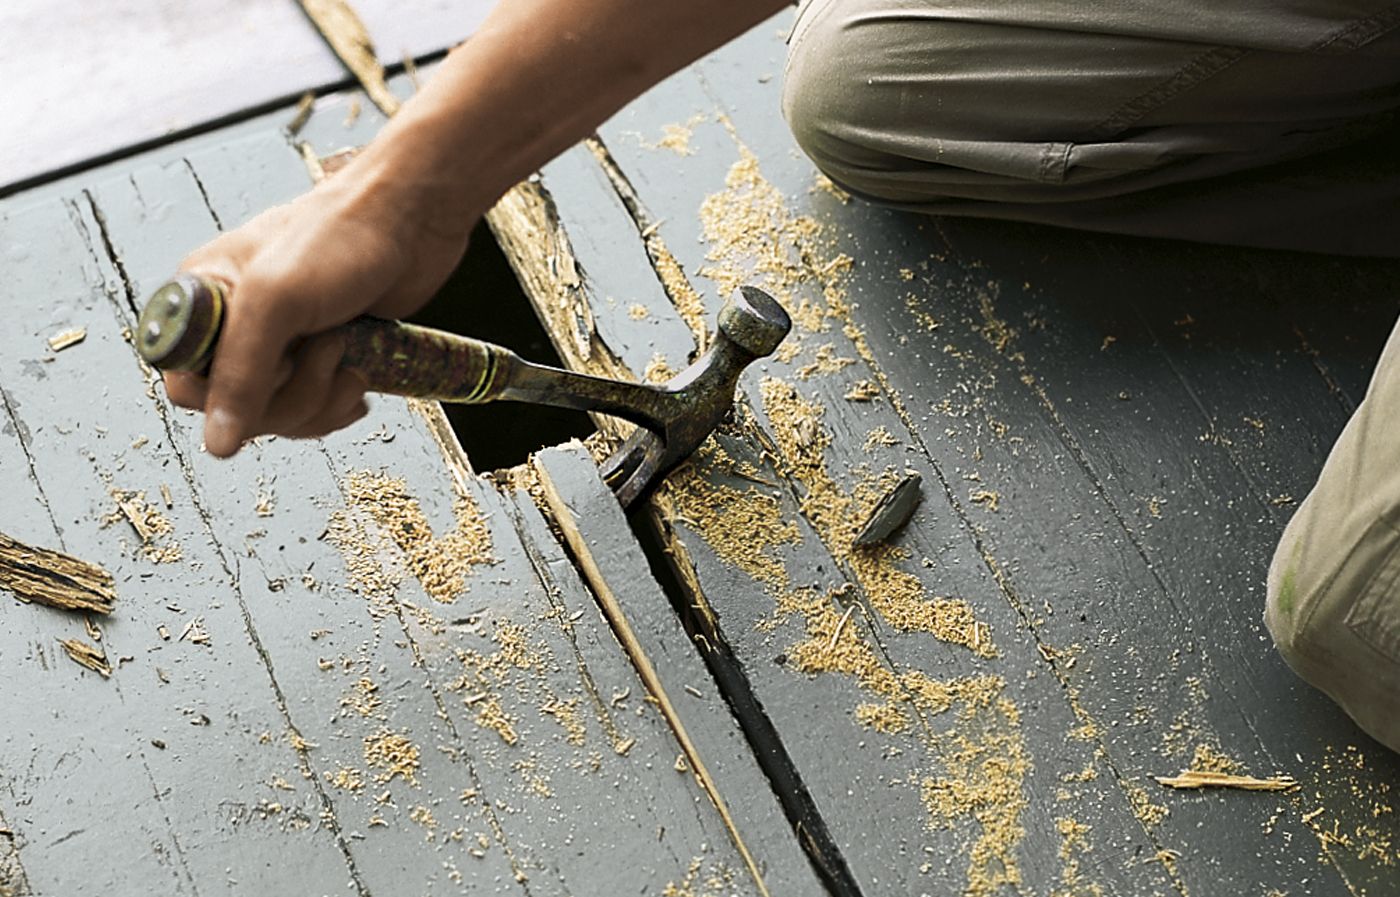
Using a pry bar and hammer, remove the old wood on both sides of the cut. Be careful not to harm the tongue of the undamaged deck board. Once the waste is clear, drive the bar’s curved end between the joist and the underside of the next damaged board and pry it up.
Start at the edge of the porch and work toward the house until the board pops loose. If necessary, chisel out the end nearest the house, and pull any nails left in the framing.
Repeat these steps on the remaining damaged boards. Then scrape clean the exposed tongues and grooves of the old boards with a 5-in-1 tool.
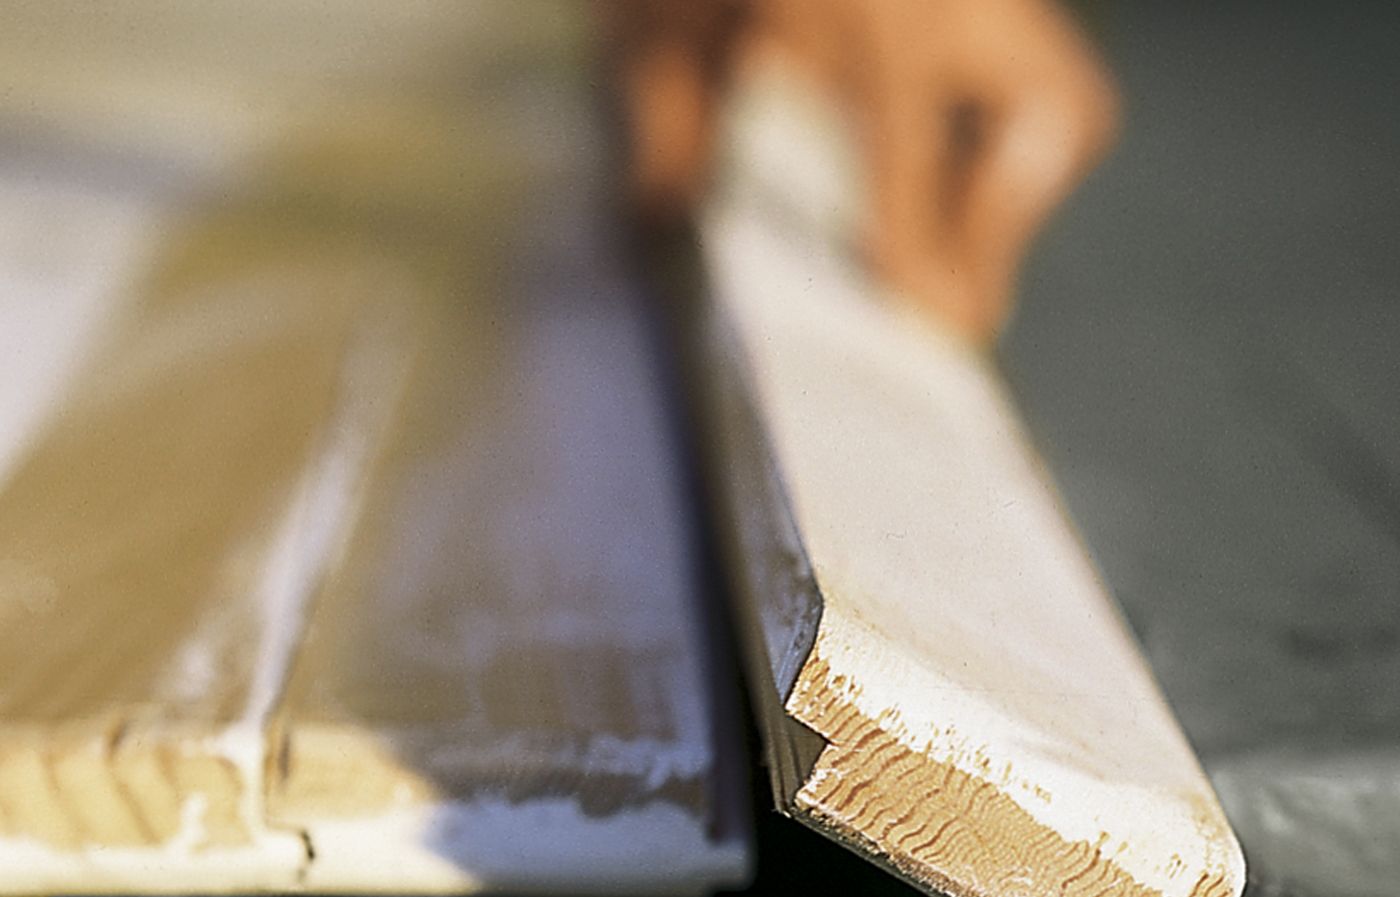
Step 3: Match New Boards to Old
Vertical-grain Douglas fir is widely used for porch decking because it’s rot- and dent-resistant, easy to work, and holds paint well. When this porch deck was laid, boards of clear, quartersawn Douglas fir were readily available. Your porch may have other types of wood or composite materials.
Whatever new boards you choose, they should be the same size as the old boards. An experienced carpenter can mill the new boards down to size on a table saw, or you can do it yourself.
Step 4: Install the New Decking

Prime all the boards’ edges and lower faces with fast-drying, oil-based primer to protect them from moisture. Squeeze a bead of polyurethane construction adhesive on all the exposed joists, then place the groove of a replacement board over the tongue of an old deck board and press the new piece into the adhesive.
Toenail (pound at an angle) a stainless-steel ring-shark siding nail through the tongue of the new board and into each joist. Recess the nailheads with a nailset and hammer. Continue installing the new decking until you can put in the last piece.
Step 5: Trim the Last Board
The last replacement piece cannot be toenailed, so mark the location of each joist on the faces of the neighboring boards.
Then cut off the bottom edge of the last board’s groove so it can rest on top of the last exposed tongue. To do this, adjust the table saw’s blade depth and fence position so this sliver of wood will be lopped off in one pass as you slide the tongue along the fence.
Step 6: Install the Last Piece
Tilt the trimmed piece and slide its tongue all the way into the groove of the old decking. Gently tap the groove side into place until it rests on the adjacent tongue.
Drive the siding nails vertically, down through the face of the new piece and in line with the joist-location marks. Pound the heads below the wood surface with a nailset and fill with putty.
Step 7: Sand the Patch Flush
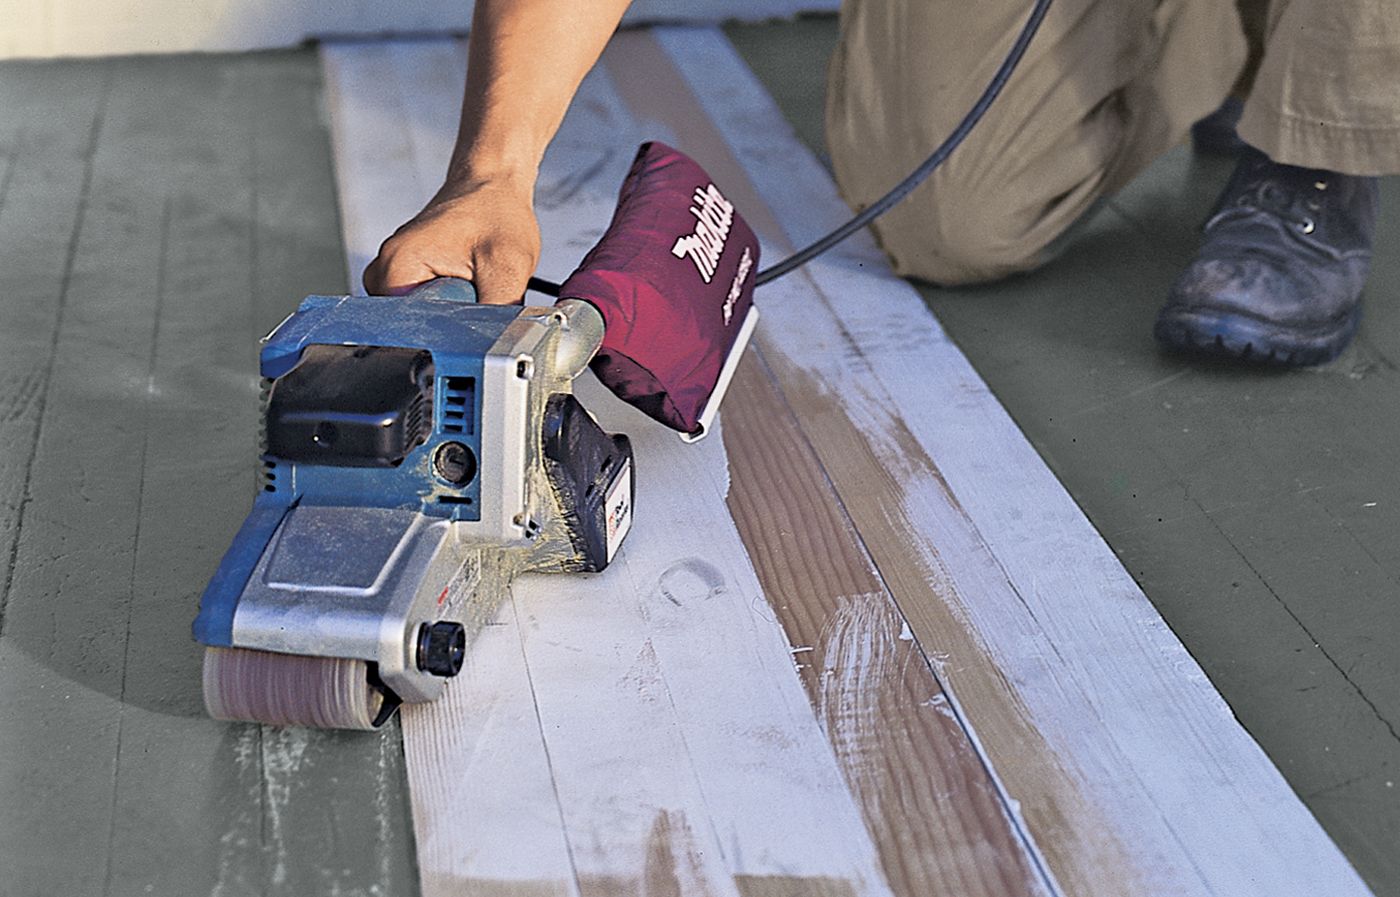
Using 80-grit paper, run a belt sander diagonally across the new boards until they’re nearly flush with the old ones. Then, switch to a random-orbit sander with 100-grit paper and smooth away the belt sander scratches.
Vacuum up the sawdust, wipe the wood with a tack cloth, and brush on a matching oil-based deck paint.
Inexpensive Front Porch Remodeling Ideas
If a complete renovation isn’t in your budget, there are still plenty of affordable ways to give your porch a facelift.
Painting and Staining
A fresh coat of paint or stain can work wonders for your porch’s appearance. For added durability, consider using a porch and floor enamel that resists scuffing and weathering.
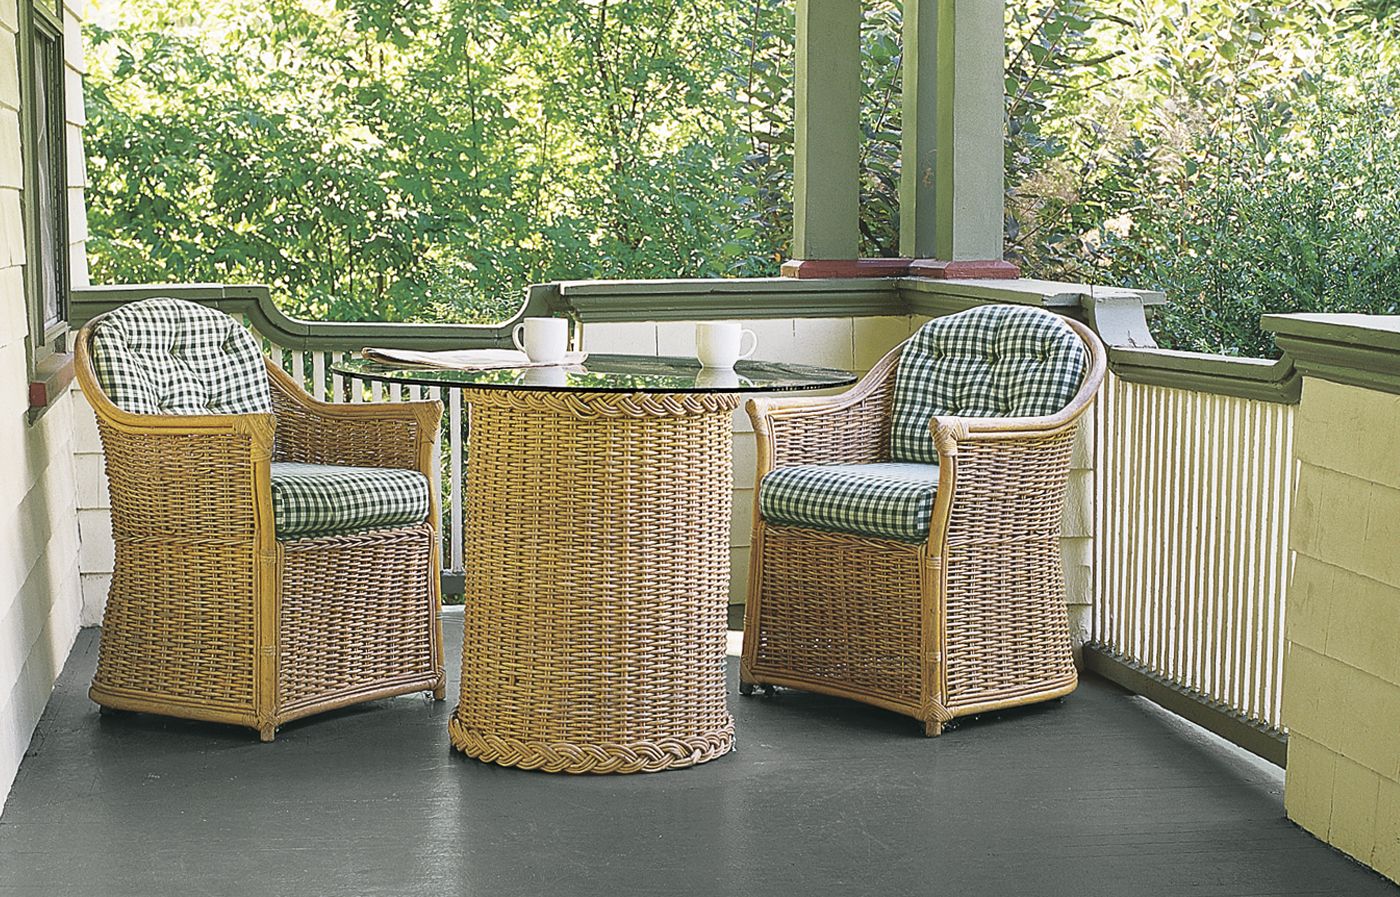
Plants and Furniture
Enhance your porch’s appeal with these decorative touches:
- Add potted plants or hanging baskets
- Install window boxes
- Place a comfortable seating area with weather-resistant furniture
- Use outdoor rugs to define spaces
- Incorporate seasonal decor
Choose plants and furniture that can withstand your local climate and complement your home’s style.
Update Porch Railings and Columns
Railings and columns are focal points of your porch’s design. Consider these updates:
- Replace dated wooden balusters with sleek metal or glass panels
- Upgrade to chunky, craftsman-style columns for a more substantial look
- Add decorative post caps or column wraps
- Paint railings and columns in contrasting colors
When selecting new railings, ensure they meet local building codes for safety and spacing.
Add or Replace Light Fixtures
Proper lighting enhances both the aesthetics and functionality of your porch. Try these lighting ideas:
- Install pendant lights for a welcoming glow
- Add sconces on either side of the front door
- Use recessed lighting in the ceiling for a clean, modern look
- Incorporate step lights for safety
Choose fixtures that complement your home’s architectural style and use warm-toned LED bulbs for energy efficiency and a cozy atmosphere.
Front Porch Maintenance Tips
Shield your porch from the elements with these protective strategies:
- Apply a water-repellent sealer to wood surfaces every few years
- Install gutters and downspouts to direct water away from the porch
- Use weather stripping around doors to prevent water infiltration
- Consider adding a roof or awning for additional protection
By taking proactive steps to protect your porch, you can significantly extend its lifespan and maintain its appearance.
Our Conclusion
Revitalizing your front porch is a rewarding project that can dramatically improve your home’s curb appeal and create a welcoming entryway for family and guests. Remember to assess your porch’s condition carefully, choose durable materials, and follow proper techniques for repairs and upgrades.