Project details
Skill
Cost
Estimated Time
We may be compensated if you purchase through links on our website. Our team is committed to delivering honest, objective, and independent reviews on home products and services.
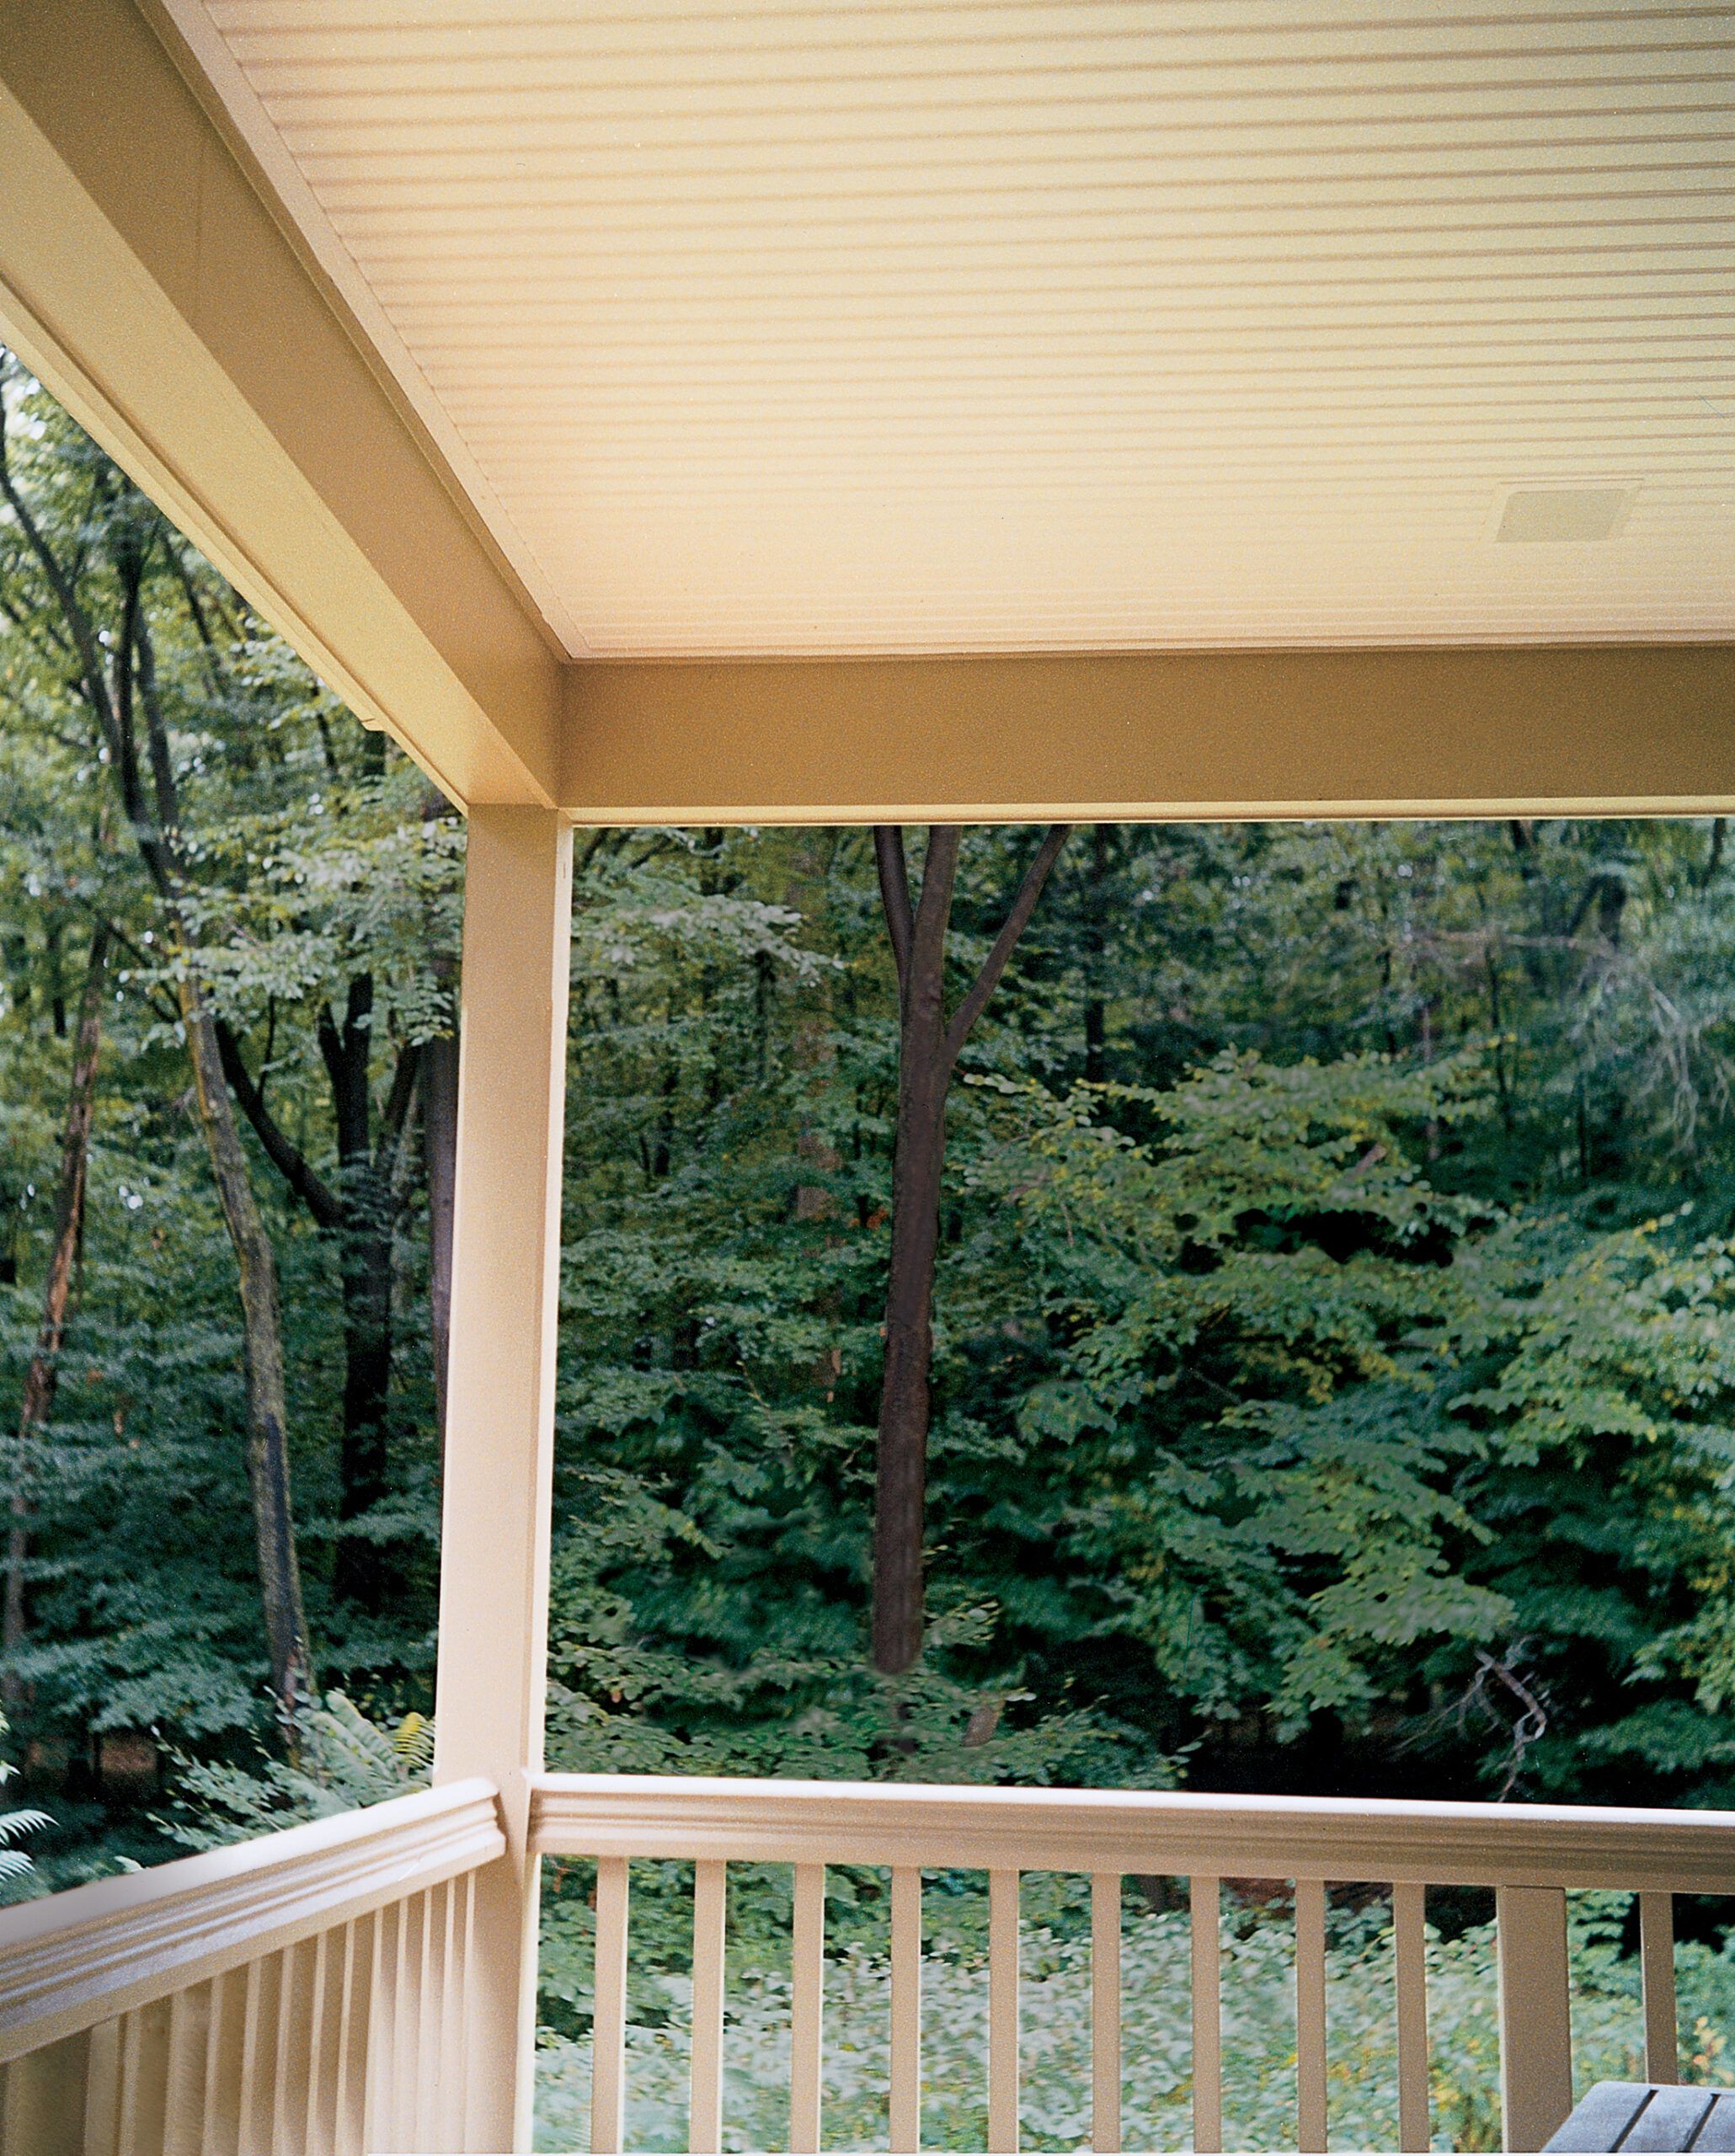
Beadboard is a type of decorative paneling characterized by narrow wooden planks with a distinctive bead or indentation running along the length of each board.
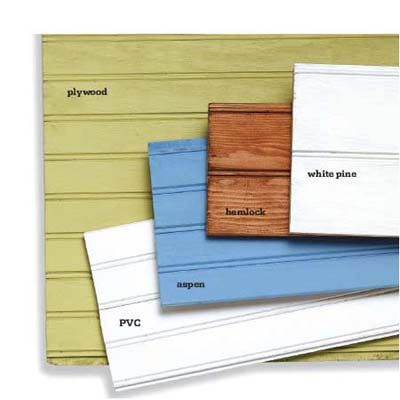
Traditionally made from wood, beadboard is now available in PVC and medium-density fiberboard (MDF). Its versatile design is suitable for walls, ceilings, and furniture accents.
In this comprehensive guide, we’ll walk you through the process of installing a beadboard porch ceiling. We’ll also break down the costs of materials and professional installation to help you decide if this is a good DIY project for your skills and budget.
Preparing for Beadboard Ceiling Installation
Most porch ceilings are covered, at the least, with plywood — which is the perfect backing for a high-grade finish like beadboard. However, if the joists of your porch roof are exposed, you can either put up sheets of plywood first or, if your joists run parallel to the house, tack the beadboard right to them.
Consider renting a couple of nail guns and a compressor, if you don’t already have them. You can complete this project with a simple hammer, but with a pneumatic nailgun, fasteners will go in quickly, straight, and without splitting the wood.
Using preprimed beadboard will also limit your labor on this project. If you want to be extra vigilant, you can take a page out of This Old House master carpenter Norm Abram’s book and prime the ends of the boards after you cut them. This seals the wood against warp and rot — a good idea in an exterior application.
Measuring and Planning Your Layout
Measure the length and width of your porch ceiling, accounting for any obstacles like light fixtures or speakers. Calculate the number of beadboard strips needed by dividing the longest span of the porch by the width of your chosen beadboard. Add 10% to this figure to account for mistakes and offcuts.
In the video below, several apprentices demonstrate installing a beadboard porch ceiling.
Gathering Your Tools
The tool list isn’t extensive. Most experienced DIYers should have these in their garage already.


Beadboard Porch Ceiling Installation Process
Below, carpenter John Fitzpatrick of Stone Ridge, New York, shows how to install beadboard simply and quickly. The process doesn’t require complicated engineering, but be careful and precise if you want the final result to look neat and even.
Step 1: Cut the Beadboard to Length
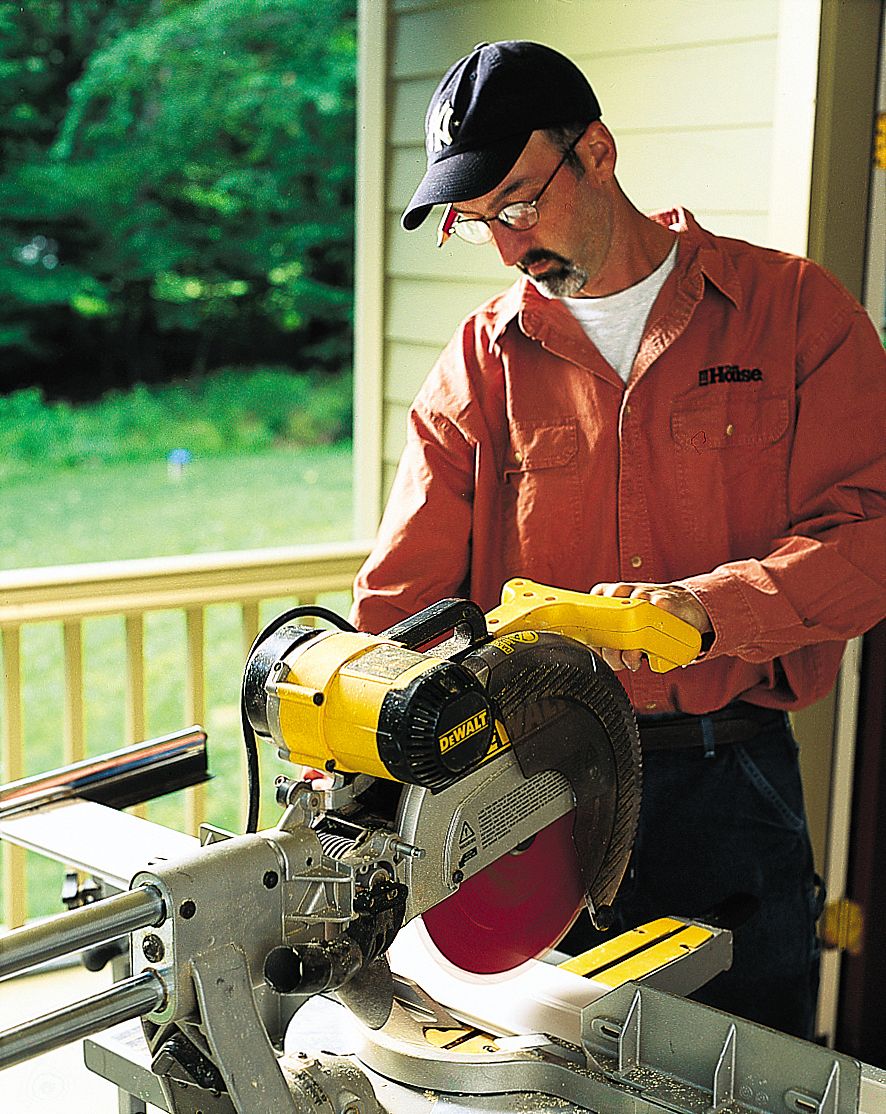
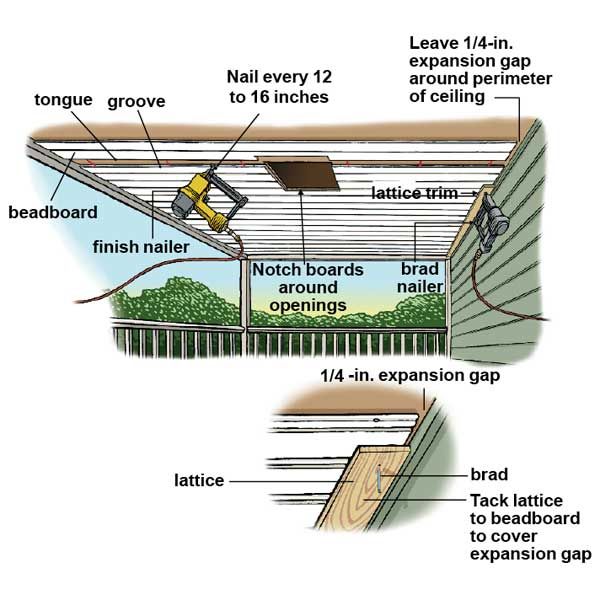
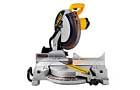
Measure the depth of the porch front to back where you will start installing the beadboard. Subtract ½- inch from this measurement to account for the ¼-inch gap you want to leave around the perimeter of the ceiling to allow the wood to expand. Using a miter saw, cut a piece of beadboard to this measurement.
Step 2: Trim the First Board
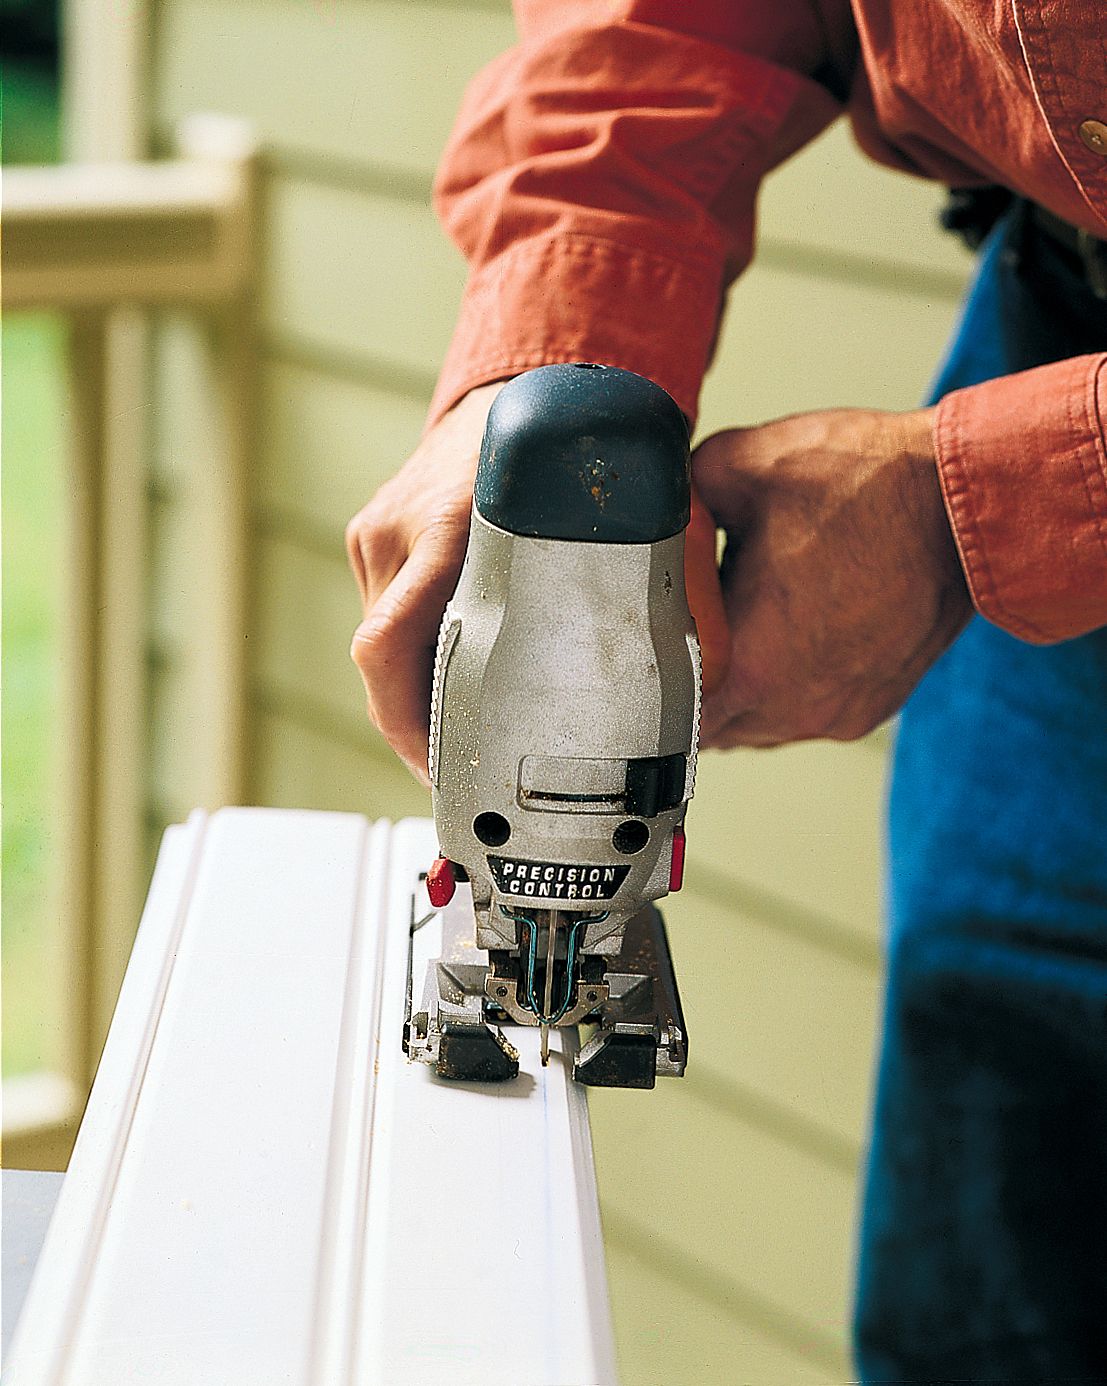
Before you put up the first piece, calculate how many boards it will take to cover the ceiling. Measure the width of several pieces of beadboard and average these out to get the true width of the wood after shrinkage. Divide the width of the porch ceiling by the true width of the beadboard to get the number of whole boards that will cover the ceiling.
If the last board will end up less than 2 inches, then you trim down both the first and last board to make the ceiling look evenly spaced. To do that, add the width of the last board to the width of a full board. Subtract ½ inch to account for the expansion gap. Then divide by two. This final figure is the width of each end board. Using a jigsaw, trim the first board to this width.
Step 3: Saw Off the Grooved Edge
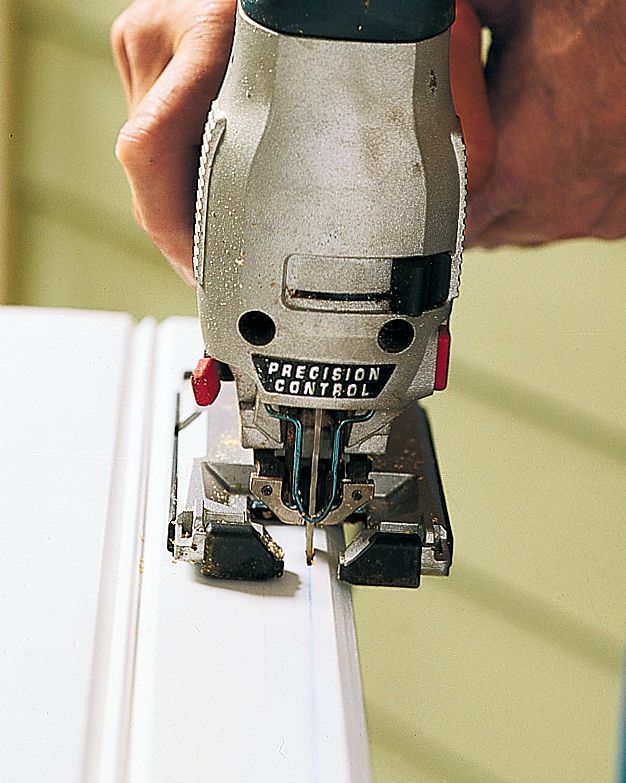
When trimming the first board to width, be sure to cut off the groove side of the board. That will leave the tongue edge for nailing.
If your calculations from Step 3 show that the last board will end up wider than 2 inches, start with a full board.
Tip: When using a jigsaw, you can prevent chipping on the face of the board by first scoring your cut lines with a utility knife or by cutting on the backside.
Step 4: Face Nail the First Board

Position the first board on the ceiling, groove side (or the side you cut) against the wall, ¼ inch away from it. Using a pneumatic gun and 2-inch finish nails, face nail the board to the plywood underlayment every 12 to 16 inches. Position the nails ½ inch to ¾ inch from the outer edge of the beadboard so they can be covered later by the lattice trim.
Tip: To keep the beadboard looking smooth across the ceiling, don’t put nails too close together or the wood will contour to dips in the plywood. Instead, keep nails at least a foot apart to let the weight of the board pull it down level.
Step 5: Toenail Remaining Boards
All the boards, including the first one, should be nailed every 12 to 16 inches through the tongue for the most secure assembly. Position the pneumatic gun at the back edge of the board’s tongue, then angle it away from the tongue and to one side. This will keep the nail from pulling out and blocking the tongue when you fit the groove of the next board over it.
Measure for and cut the next board. Slide its groove over the tongue of the previous board. If necessary, tap it tightly in place with a hammer on a woodblock. Nail it through the tongue as detailed above. Continue installing the beadboard in this manner.
Tip: Use a scrap of beadboard as your woodblock so you can fit the groove over the tongue and keep the tongue from mushrooming when you hammer it.
Step 6: Trim Beadboard Around Openings
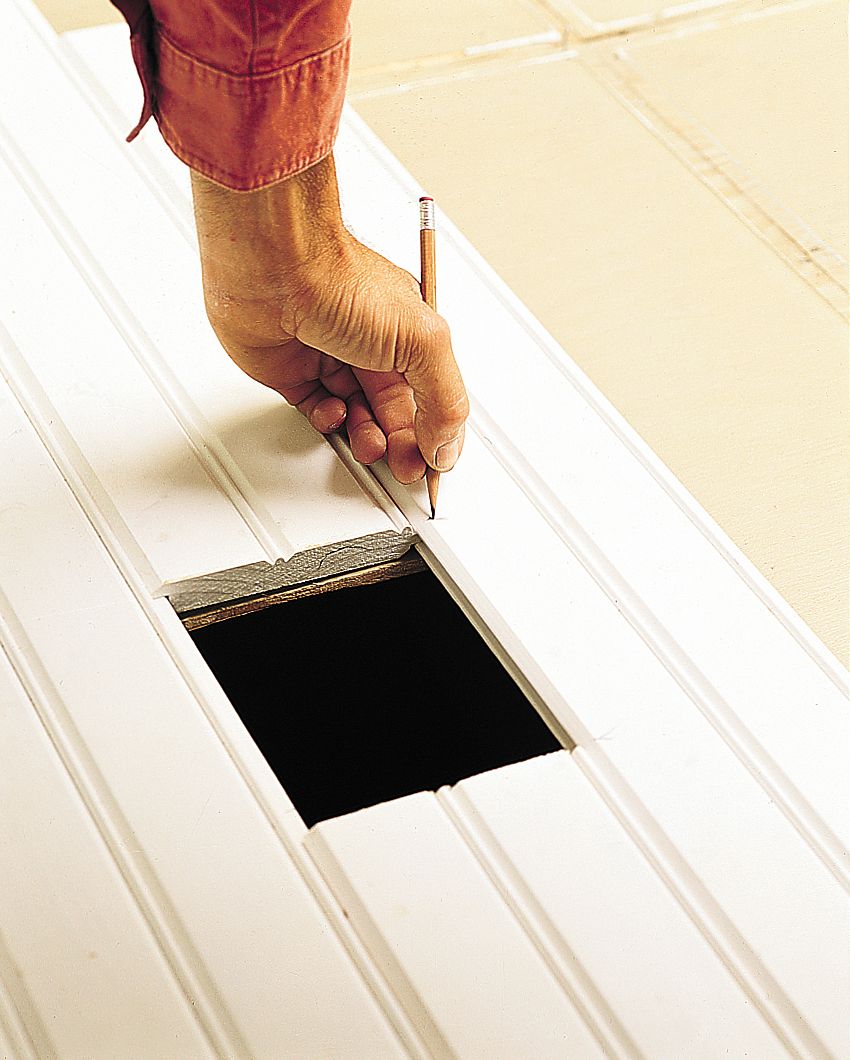
If you come to a light fixture or speaker, you’ll need to cut an opening in the beadboard. For a square opening, measure the distance from the edge of the last board (not including the tongue) to the edge of the opening. Then dry fit a piece of beadboard in place, letting it overlap the hole. Mark the beadboard where it meets the opening’s sides.
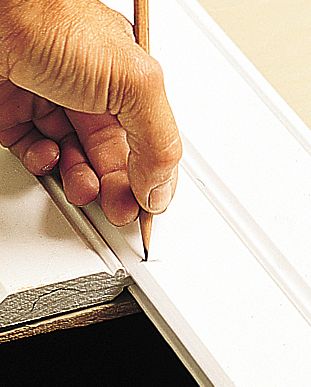
After marking the beadboard at the sides of the opening, mark the distance between the last board and the edge of the hole onto the face of the board. Take the board down and use a square to extend your marks to meet each other. Notch the board with a jigsaw. If the opening is big enough, install cut boards butted against the sides of the hole, then finish with another notched board.
For a circular opening, dry fit each piece individually. Reach into the hole with a marker and trace the shape of the opening on the back of the board.
Step 7: Finishing Touches
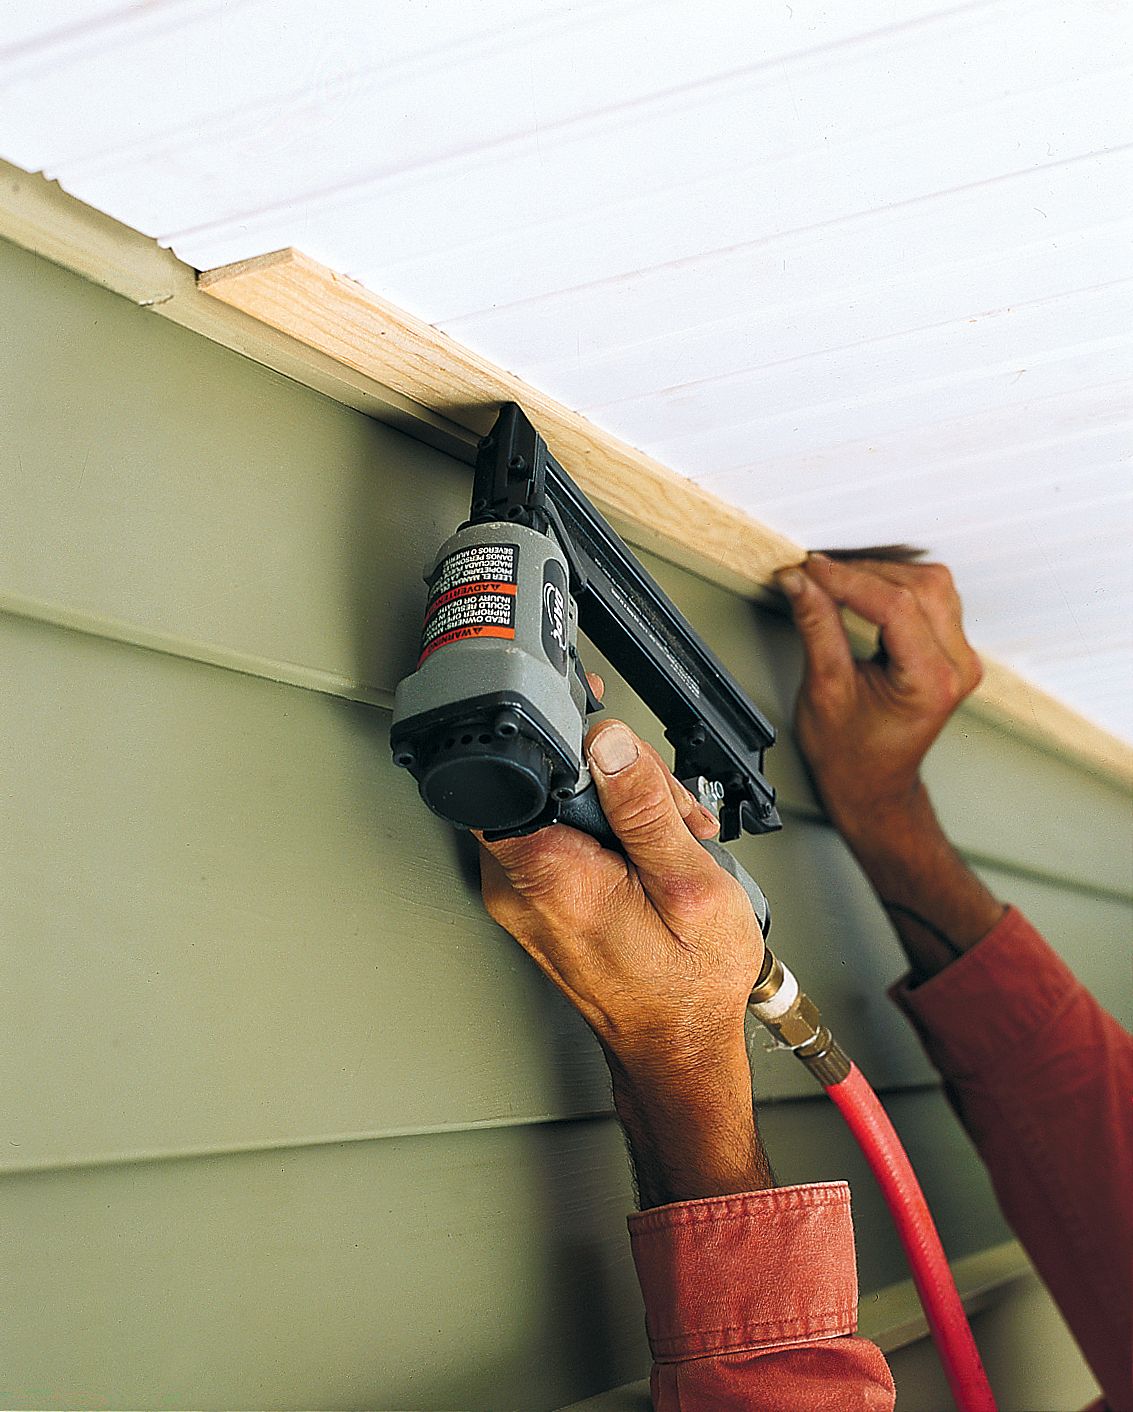
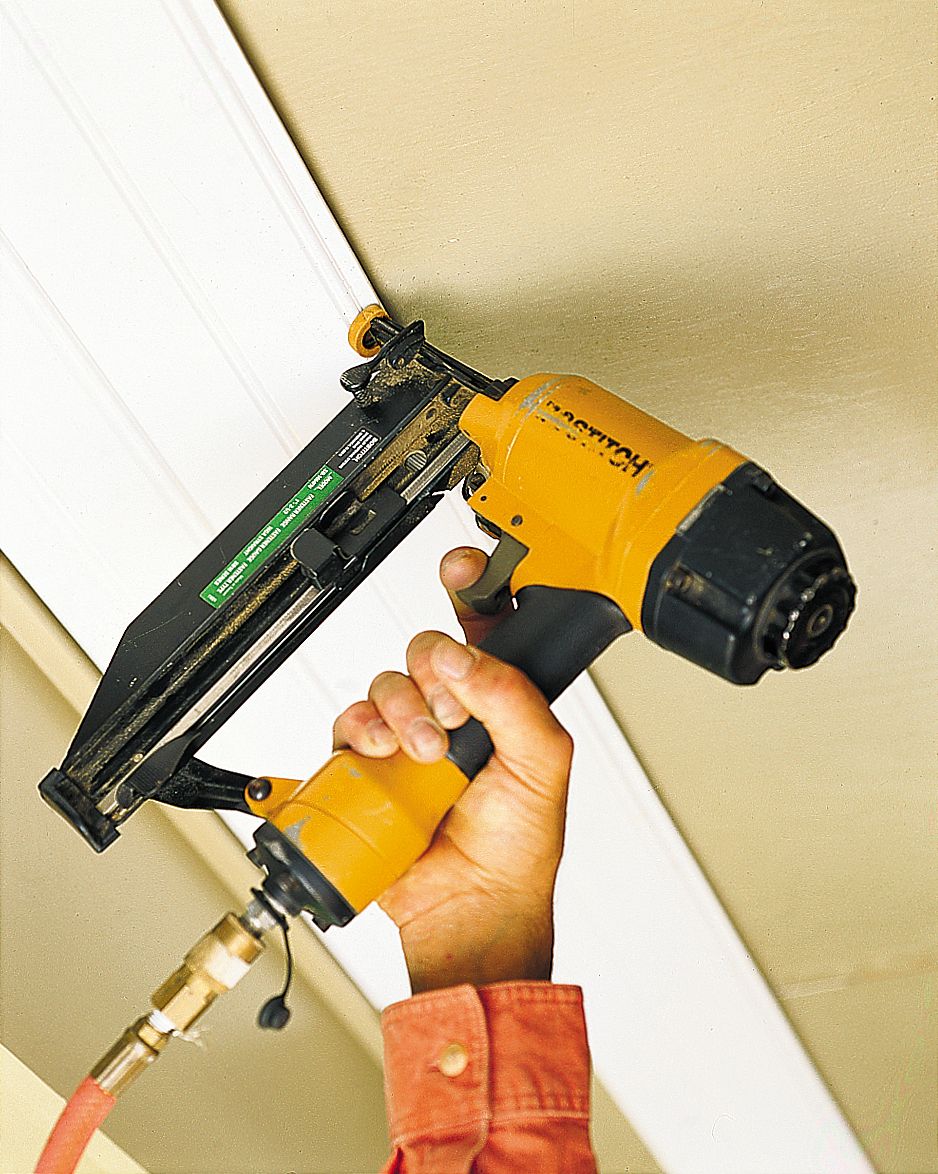
Finish installing the beadboard to cover the ceiling. Trim the final board, if necessary, from the tongue side. Install lattice trim around the perimeter of the ceiling, tight against the siding to cover the expansion gap. Cut the pieces of lattice with a miter saw.
Using a brad nailer, tack the lattice to the beadboard. Again, nail the trim every 12 to 16 inches, and make sure to only nail into the beadboard, not the wall, so that the trim will expand and contract with the rest of the wood.
Once all the trim is in place, paint the whole ceiling. Because brad nails are so small, the paint should cover their holes in the lattice.
Beadboard Porch Ceiling Cost
Beadboard ceiling costs are generally low if you self-install. The size of your ceiling and beadboard type will impact the overall cost. The beadboard ceiling cost estimates described below are provided by Angi, based on their database of real-life projects.
Estimating Beadboard Costs
- MDF beadboard: $1–$5 per square foot
- Vinyl beadboard: $2–$5 per square foot
- Pine tongue and groove: $3–$9 per square foot
- Stained oak raised panel: $30–$40 per square foot
Maintenance Tips for Your Beadboard Porch Ceiling
Implement regular cleaning and inspections to keep your beadboard ceiling in good shape for as long as possible.
- Dust the ceiling with a soft brush attachment on your vacuum cleaner.
- Wipe down the beadboard with a damp cloth and mild soap solution as needed.
- Avoid using harsh chemicals that could damage the paint or wood.
- Inspect your ceiling annually for signs of moisture damage or loose boards.
- Touch up paint as needed to protect the wood and maintain appearance.
- Replace any damaged boards promptly to prevent further issues.
Our Conclusion
With proper planning, the right tools, and attention to detail, you can achieve professional-looking results by installing your own beadboard ceiling. Remember to choose quality materials, take accurate measurements, and allow for proper expansion. If the process described above seems beyond your ability, hire a professional to install your beadboard ceiling.