Modern front-load washers and dryers are both smart and efficient. They can clean up to 20 pounds of clothing in a single cycle, but that’s a lot to have to load and retrieve. A pedestal can raise the machines to a comfortable working height and offer valuable storage space with a shelf of baskets. This Old House expert, Mark Powers, shows you how to build one yourself in just two days.
An Overview of the Laundry Pedestal Project
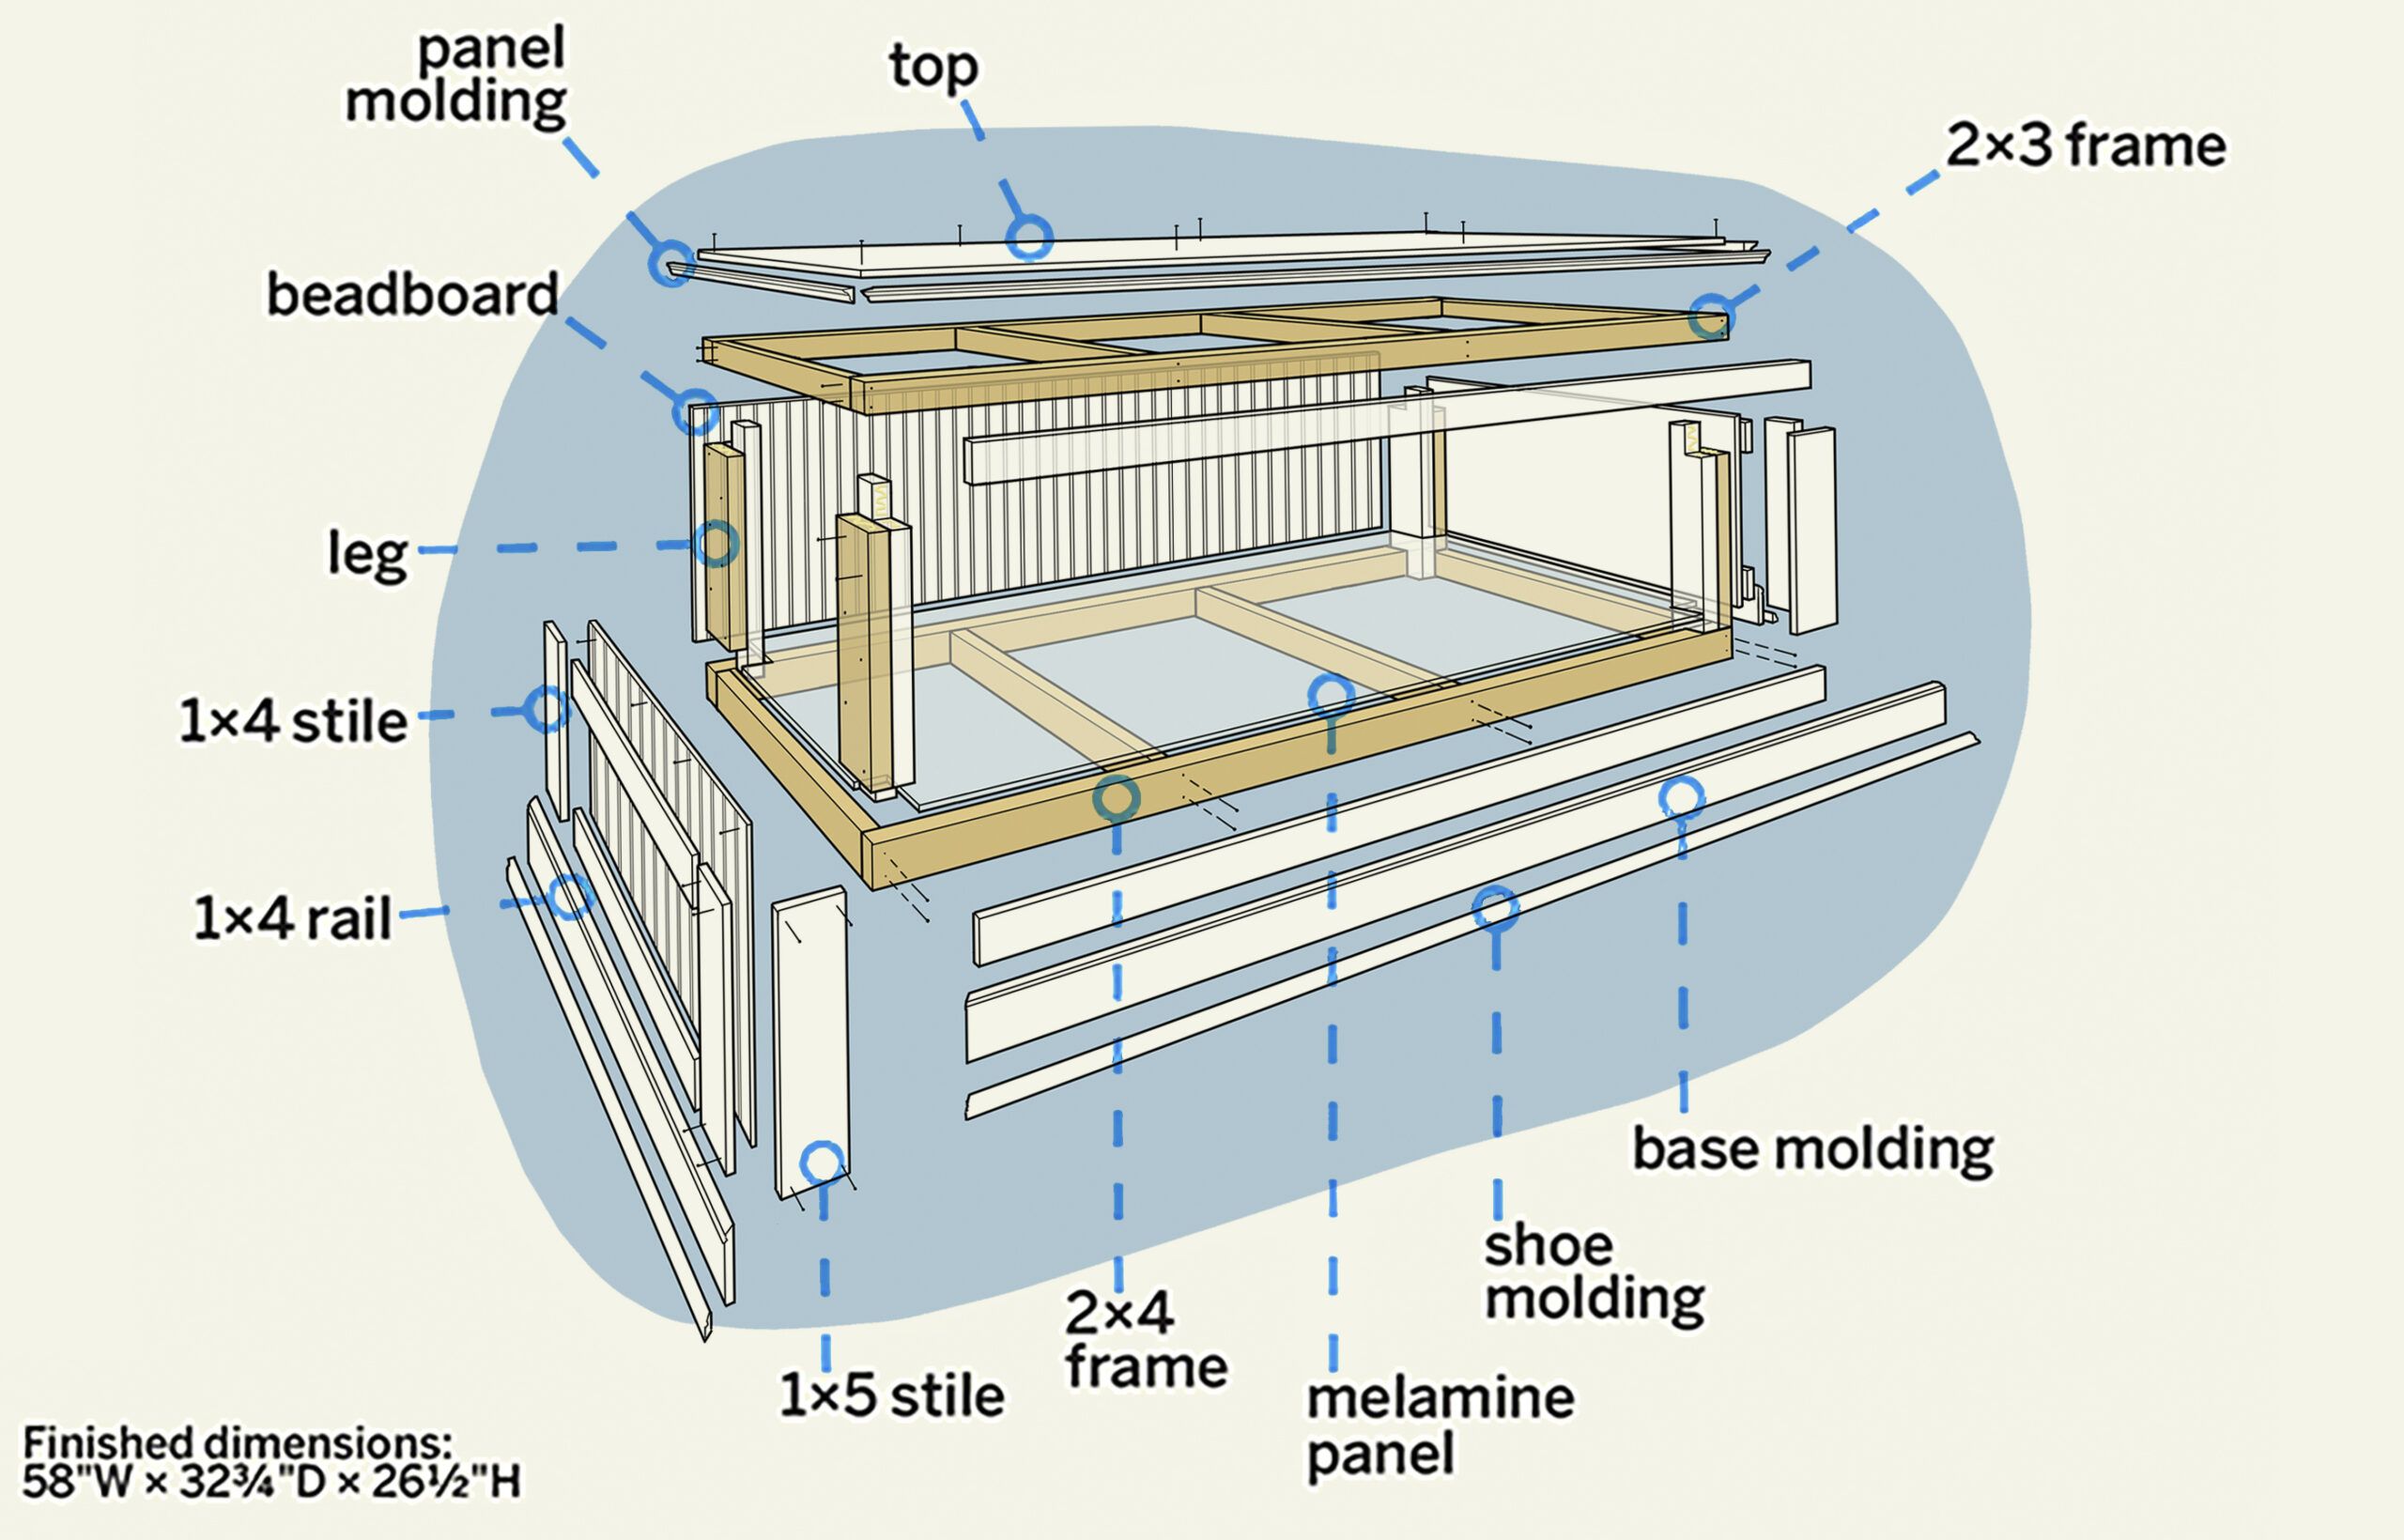
You only need a few simple materials and tools to build the pedestal. Our example design uses these items.
Materials
- 1×4 and 1×5 primed boards
- 2-inch 18-gauge nails
- 2×3 lumber
- 2×4 lumber
- 3/4-inch melamine
- 3/4-inch plywood
- 3/8-inch beadboard
- Base molding
- Construction adhesive
- Deck screws (3-inch, 2 1/2-inch, and 1 1/4-inch)
- Latex primer and paint
- Paintable caulk
- Panel molding
- Shoe molding
- Spray paint-and-primer-in-one
Tools
- Brad nail gun (18-gauge)
- Caulk gun
- Circular saw
- Clamps
- Drill/driver
- Jigsaw
- Miter saw
- Paint roller and brush
- Pencil
- Straight edge
- Tape measure
Download and print the cut list here.
Planning Your Laundry Pedestal
Before you head to the store for parts, take accurate measurements of your washer and dryer. Add at least 2 inches to the length and width to determine the size of your pedestal.
The pedestal’s height will depend on your personal preferences and how high your storage baskets will be. A typical pedestal raises appliances by 12 to 16 inches. Measure the baskets, then add about an inch to estimate the best height.
Building the Laundry Pedestal Frame
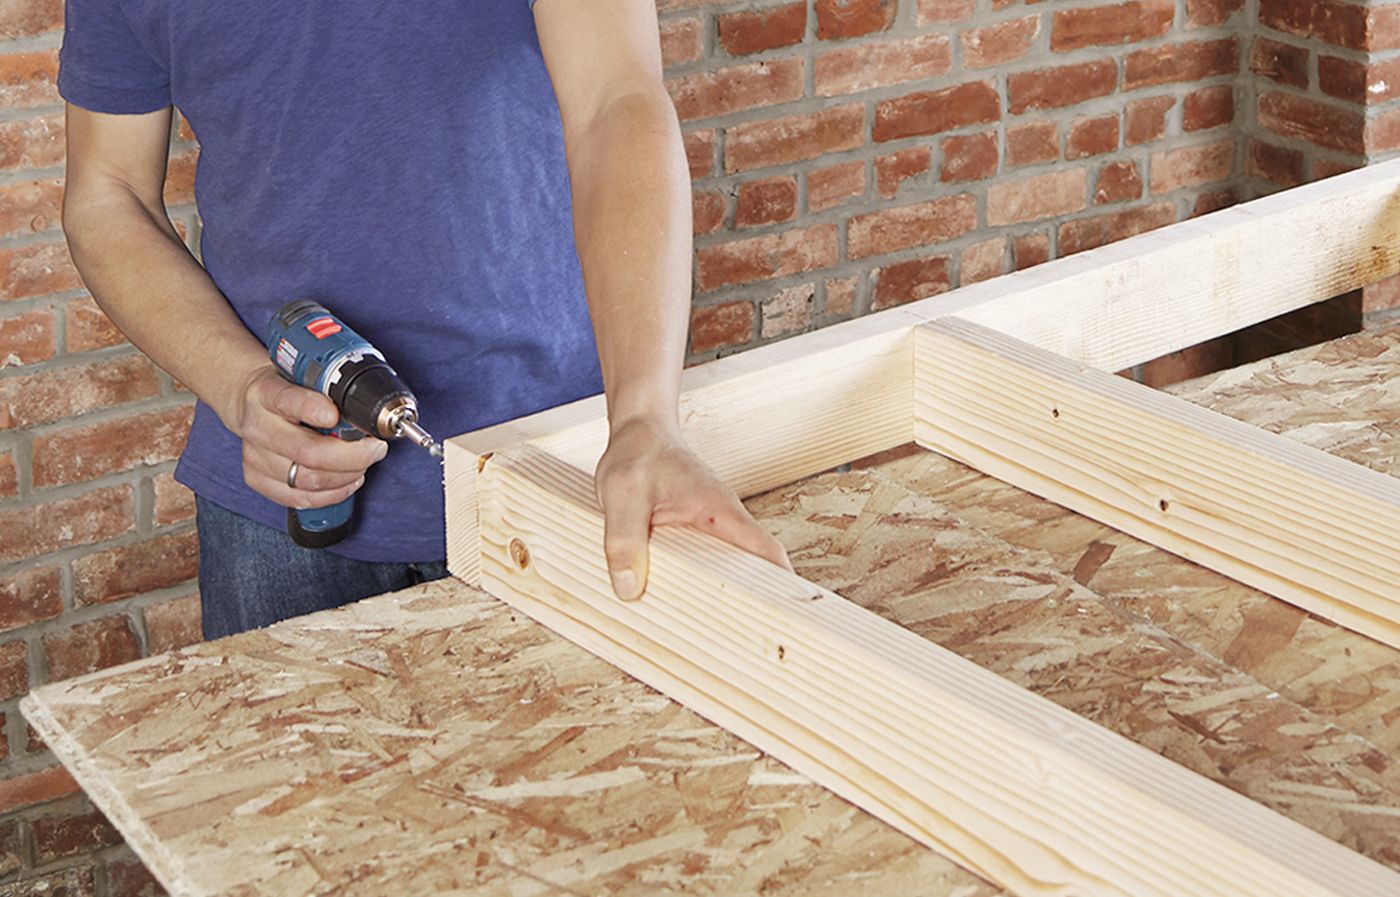
Add at least 2 inches to the combined length and width of your washer and dryer, and build two frames that size. Use 2x3s for one and 2x4s for the other. Then cut two supports to fit inside the frames, dividing the space roughly into thirds. Attach the parts with a pair of 3-inch deck screws at each butt joint, as shown.
Cutting the Legs
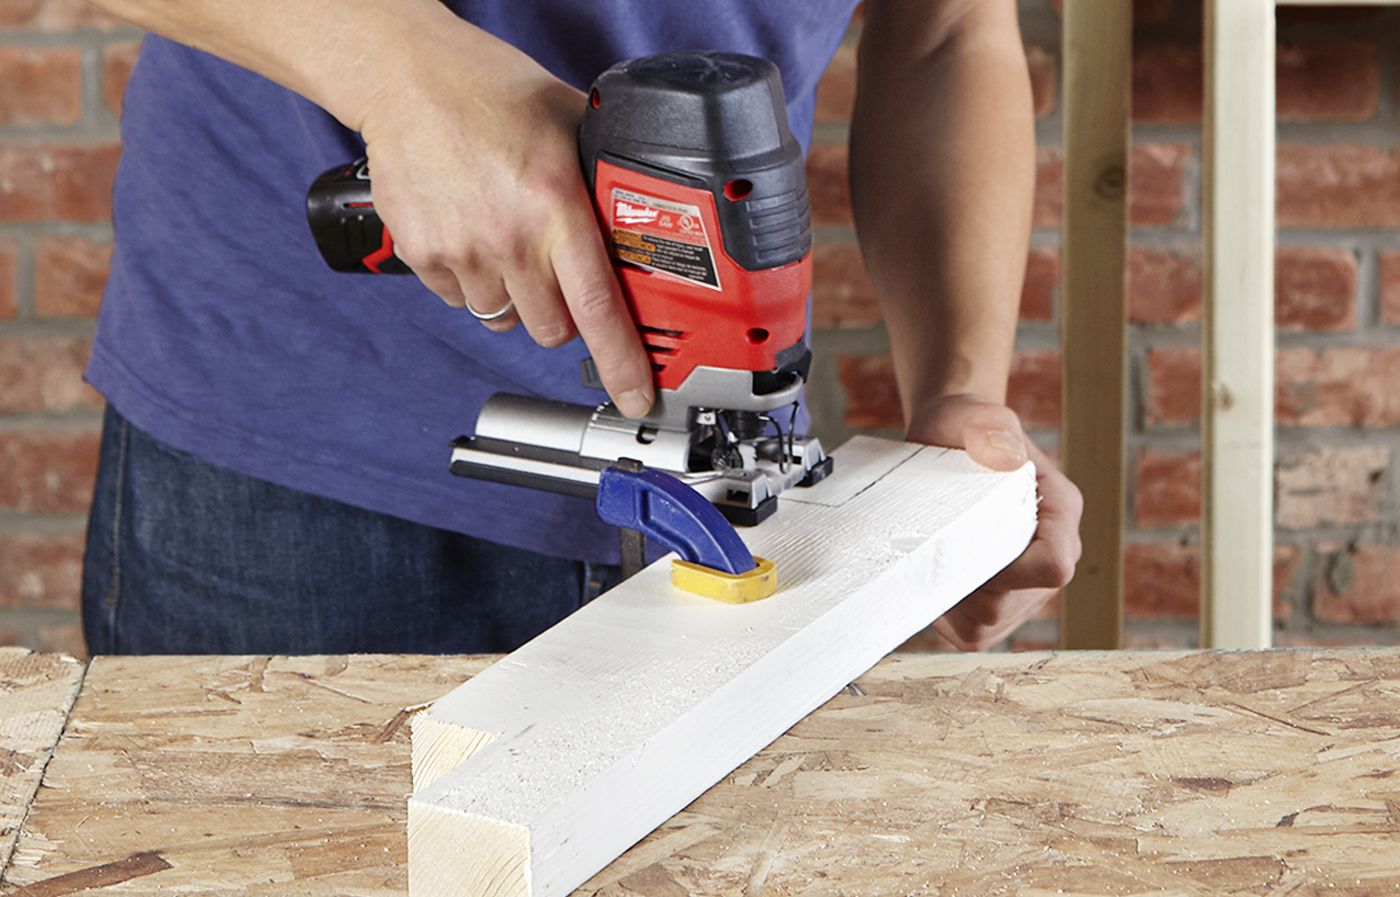
The legs must be tall enough for your baskets to fit between the frames. Measure the baskets, add about an inch to the height, and cut a 2×4 to that measurement. Cut another piece 6 inches longer, and spray it with paint-and-primer-in-one for a finished look. Once that dries, trace a notch on one end to fit over the 2×4 frame and a second notch on the other end to fit over the 2x3s. Cut the notches with a jigsaw, as shown. Repeat the process for the other three corners.
Building the Legs
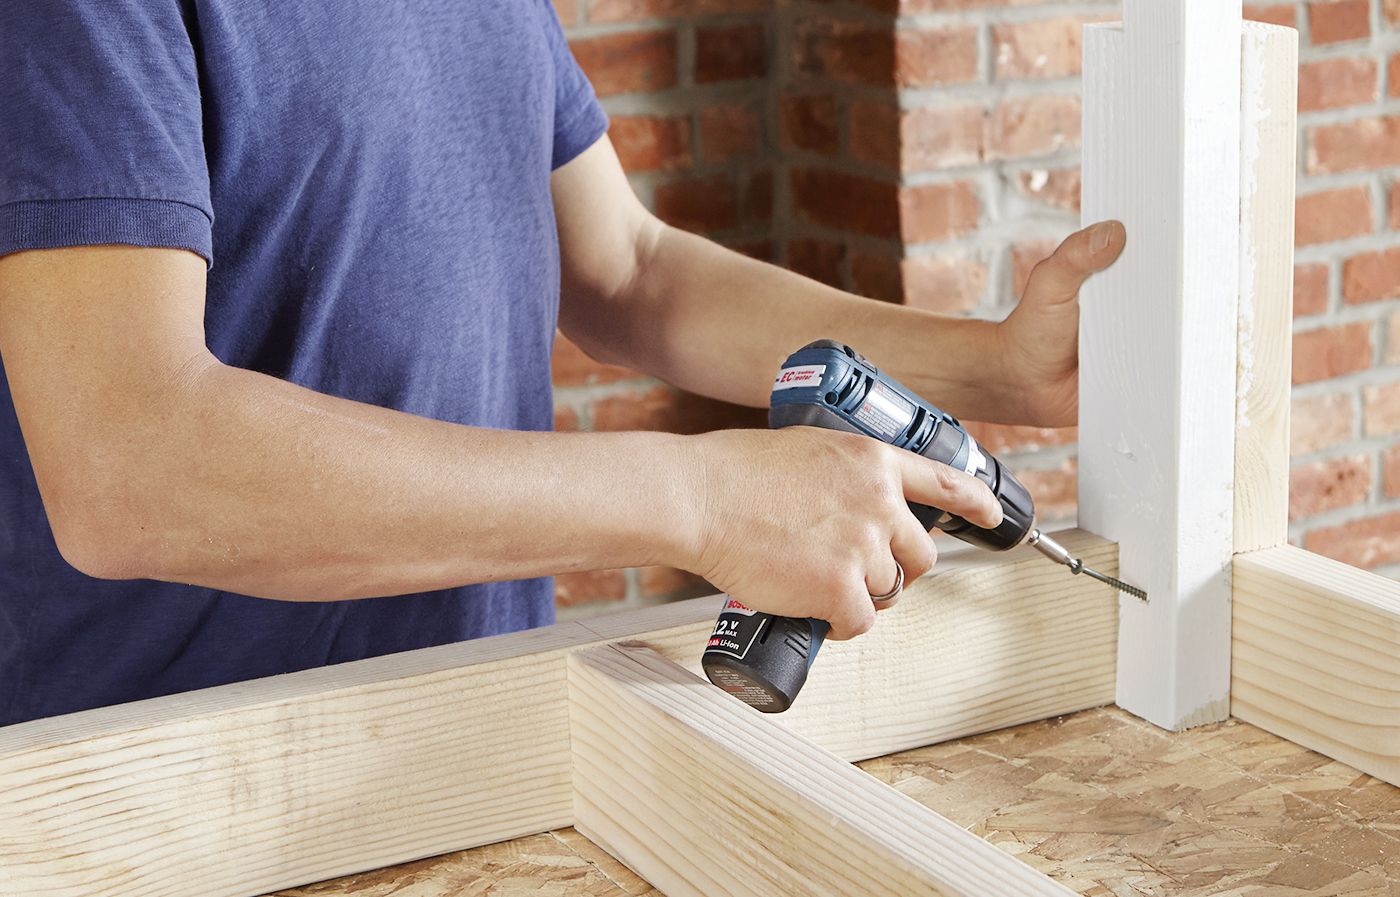
Use 2½-inch deck screws to attach the shorter legs to the longer ones between the notches, creating legs for each corner with the painted portion facing inside the pedestal. Add construction adhesive to the longer notch and place the leg in a corner to fit the 2×4 frame. Drill pilot holes through the leg, then attach it to the frame with 2½-inch deck screws, as shown. Repeat with the remaining legs. Repeat the process for the other three corners.
Attaching the Lower Shelf
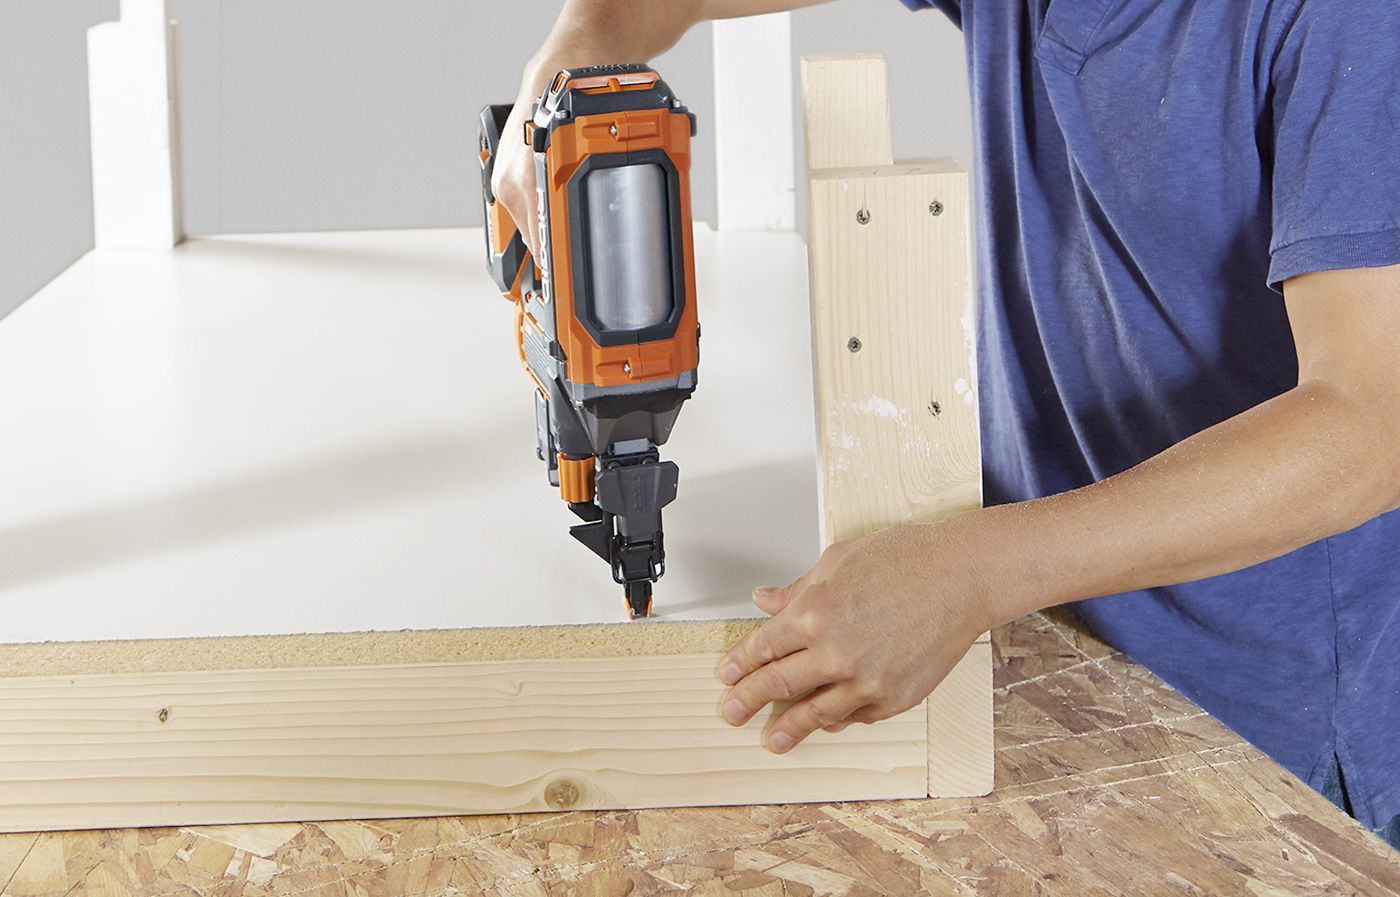
Cut the melamine panel to the dimensions of the lower frame using a circular saw and a straightedge. Screw two scraps of 2×4 together and use them to mark notches at the corners of the panel so that it will fit around the legs. Cut the notches with a jigsaw. Drop the panel in place, then fasten it to the frame with 2-inch finish nails every few inches along both sides and the back, as shown.
Adding the Upper Frame
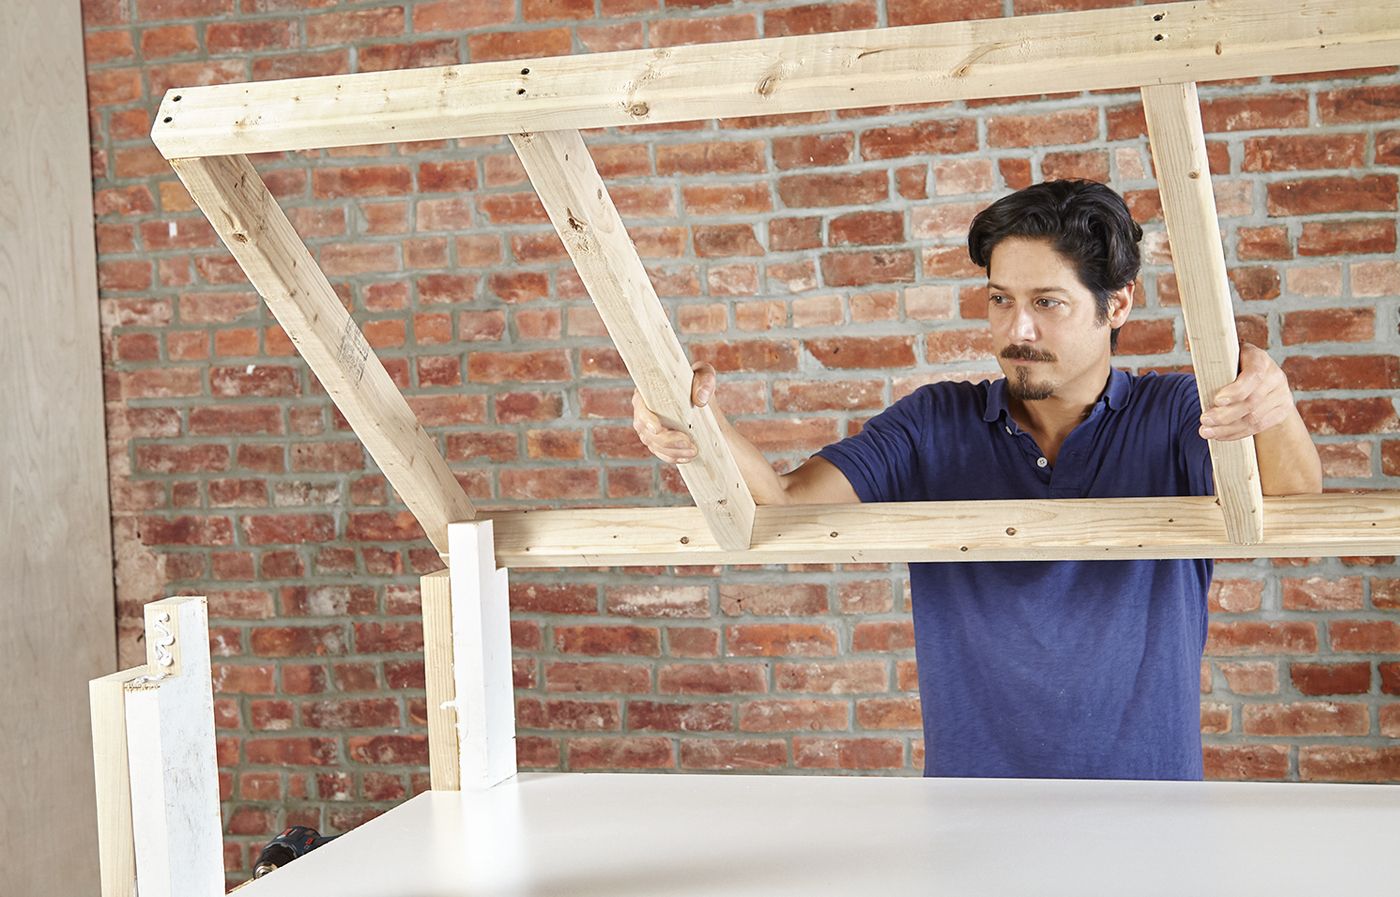
Apply construction adhesive to the notches at the tops of the legs. Then fit the 2×3 frame in place, as shown. Screw through the outside of the frame and into the legs with 2½-inch deck screws.
Preparing the Beadboard

Measure the length and width of each side, then use a circular saw to cut beadboard pieces to fit. Cut two pieces for the back the same way, then prime and paint the beadboard. Let it dry.
Attaching the Beadboard
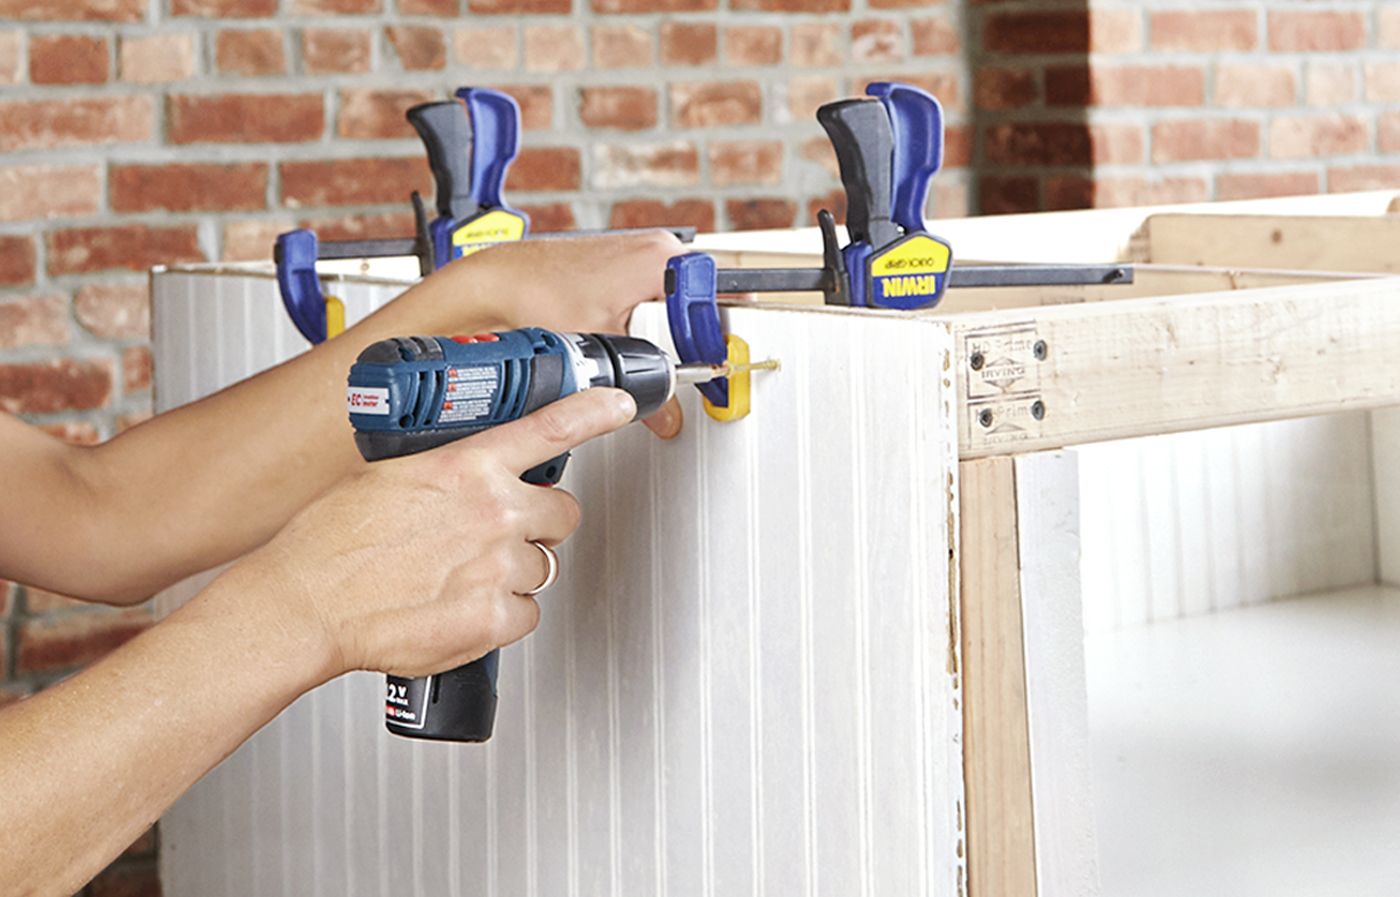
Use clamps to hold a piece of beadboard on the back, flush with the top of the frame and a corner, so the pattern faces in. Attach the panel with 1¼-inch deck screws every few inches. Butt the second back panel next to the first and attach it the same way. Repeat the process for the sides with the beads facing out, as shown.
Making the Stiles
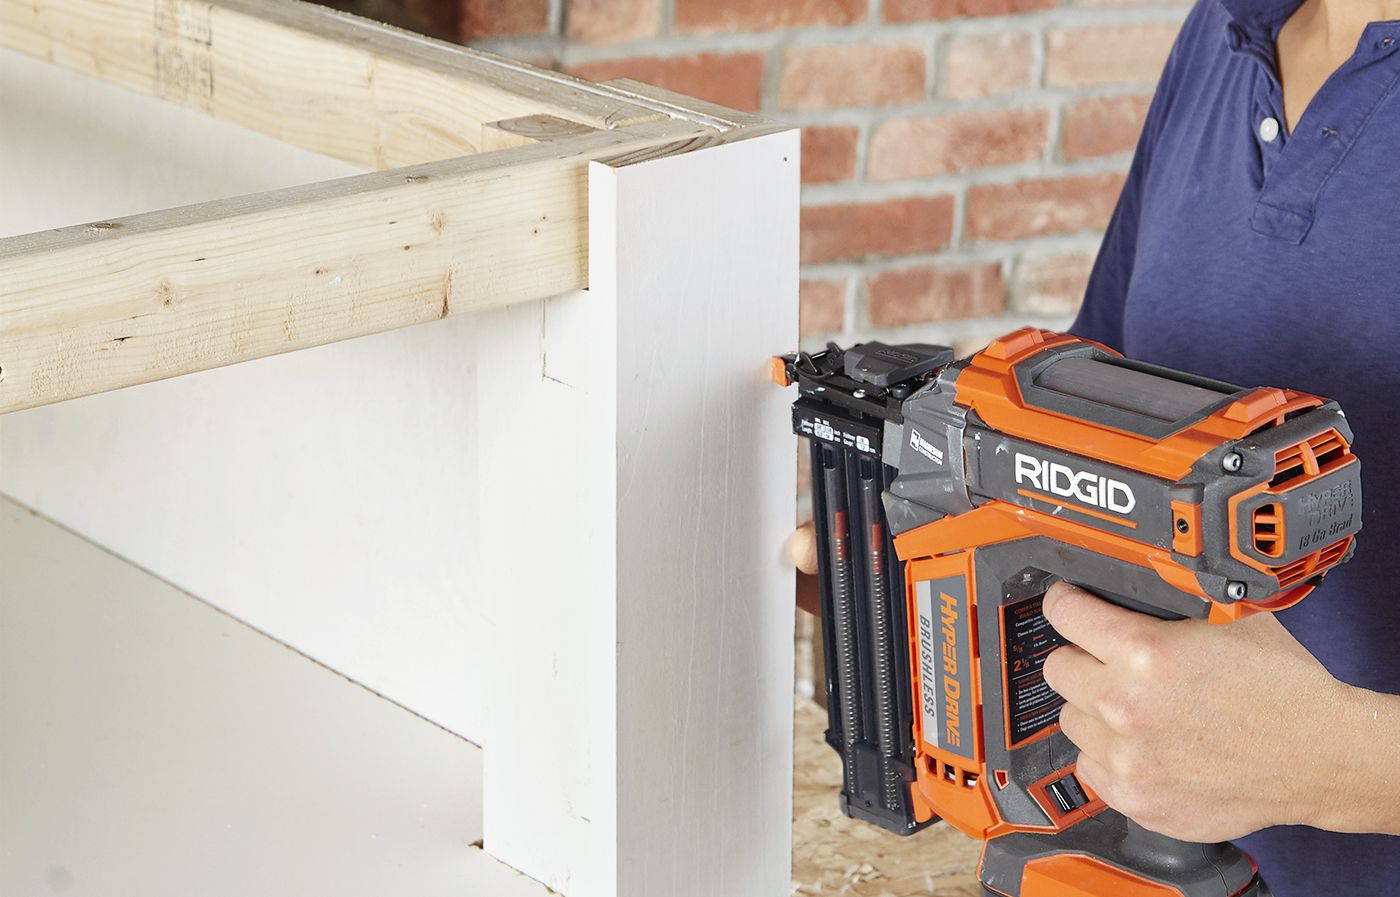
Cut two 1x4s and four 1x5s to the height of the pedestal. Position a 1×4 along a side with its edge flush with the front corner, and fasten it with nails. Next, make a corner board by nailing a 1×5 on the front face of the pedestal to cover the flush edge of the 1×4. Repeat the process for the other front corner, then add a 1×5 to the back edge of both sides.
Adding the Rails
Mark each of the 1×4 side rails to fit between the stiles, as shown. Cut them to length and attach them with nails. Repeat the process for the two front rails and install the lower one to cover the melamine panel’s edge. In the next step, the exposed frame under the lower rail will be hidden with molding.
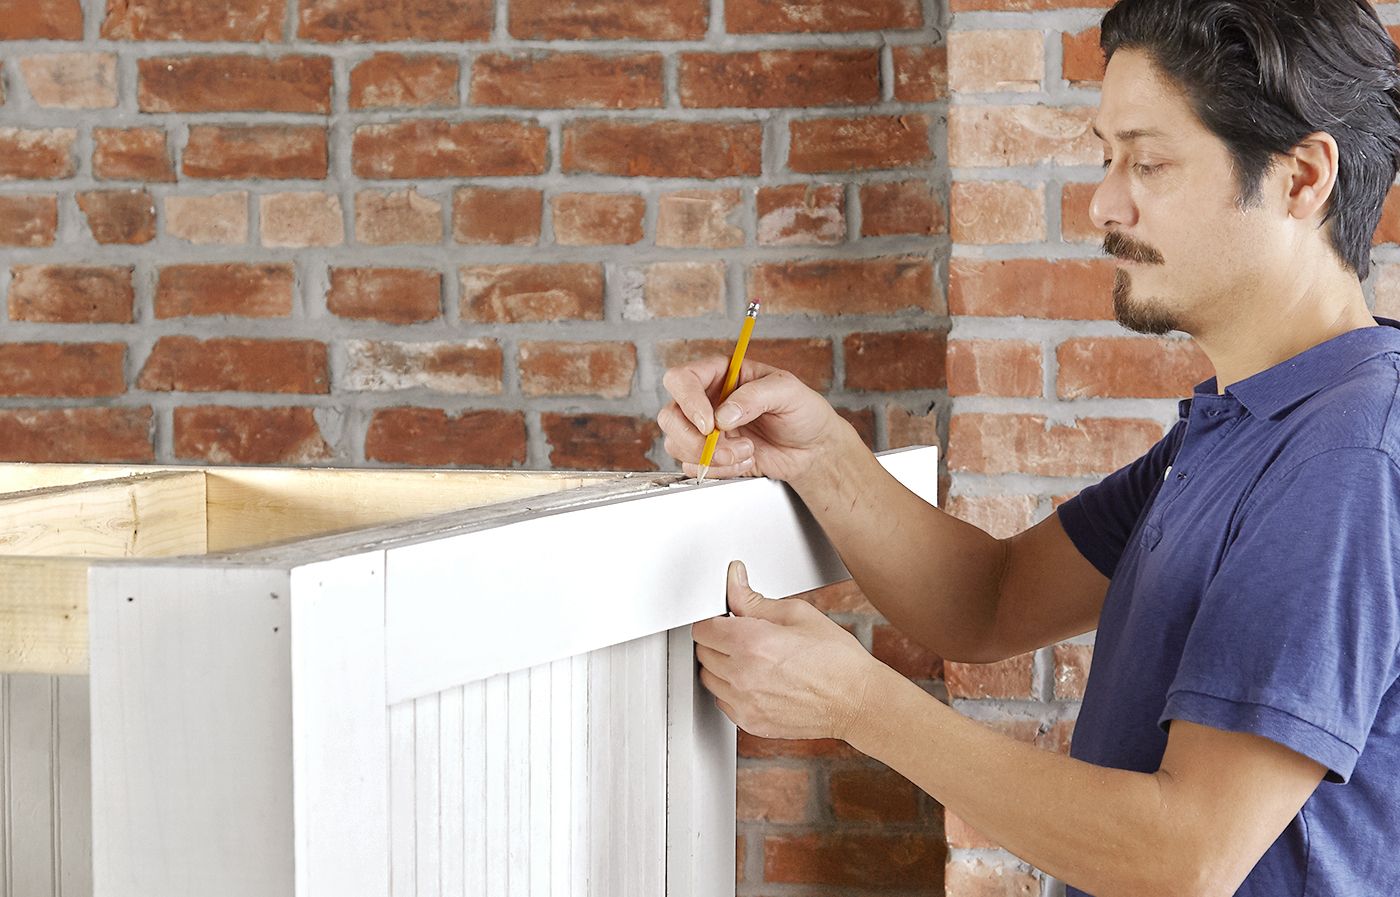
Cutting the Plywood
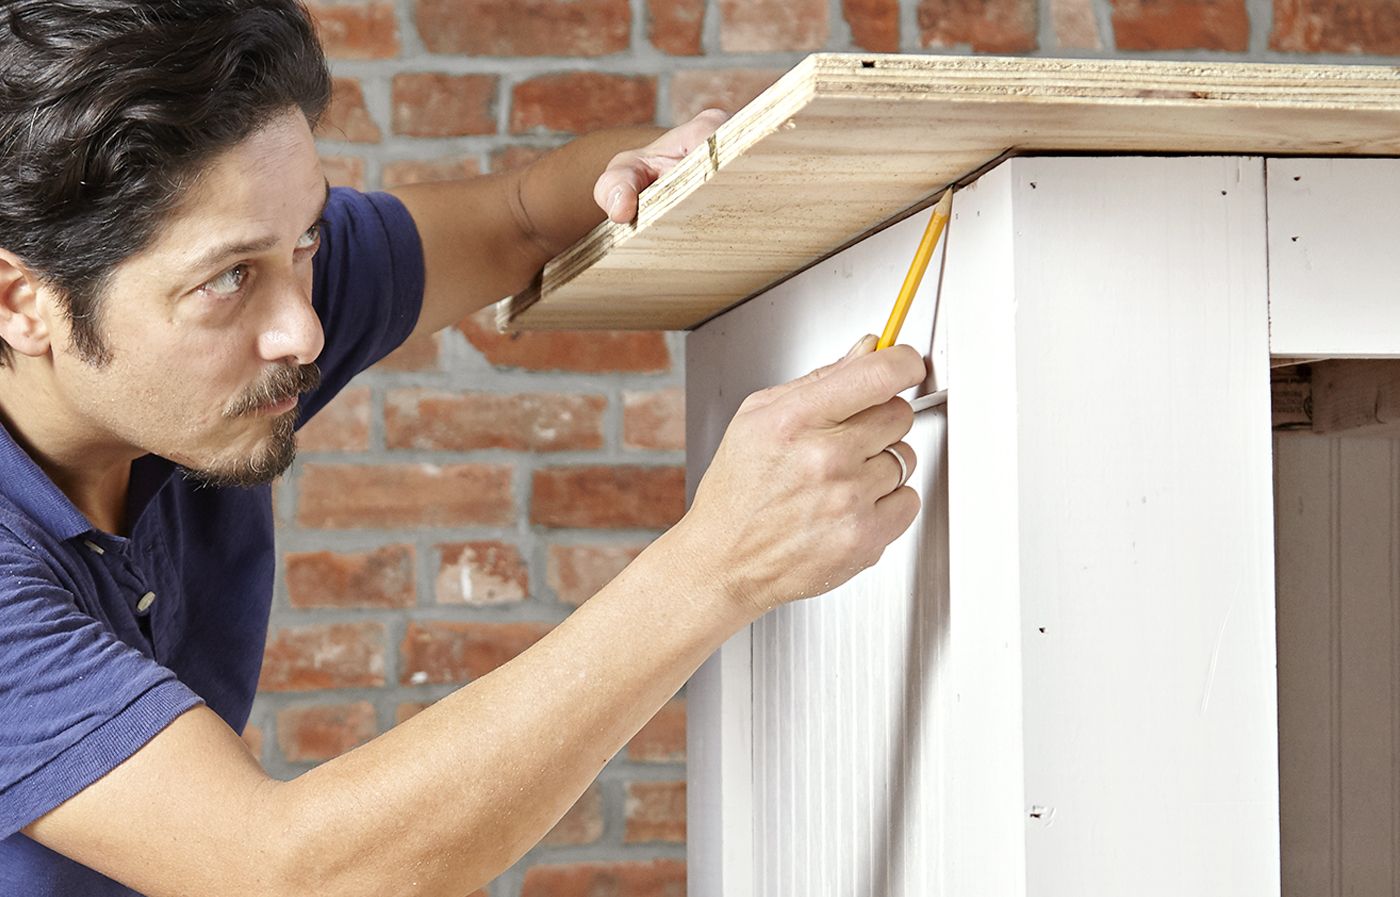
Place the plywood top on the pedestal and scribe cutlines using the face of the trim, as shown. Remove the top and cut it with a circular saw. Drive 1¼-inch deck screws through the plywood and into the upper frame.
Marking the Base Molding
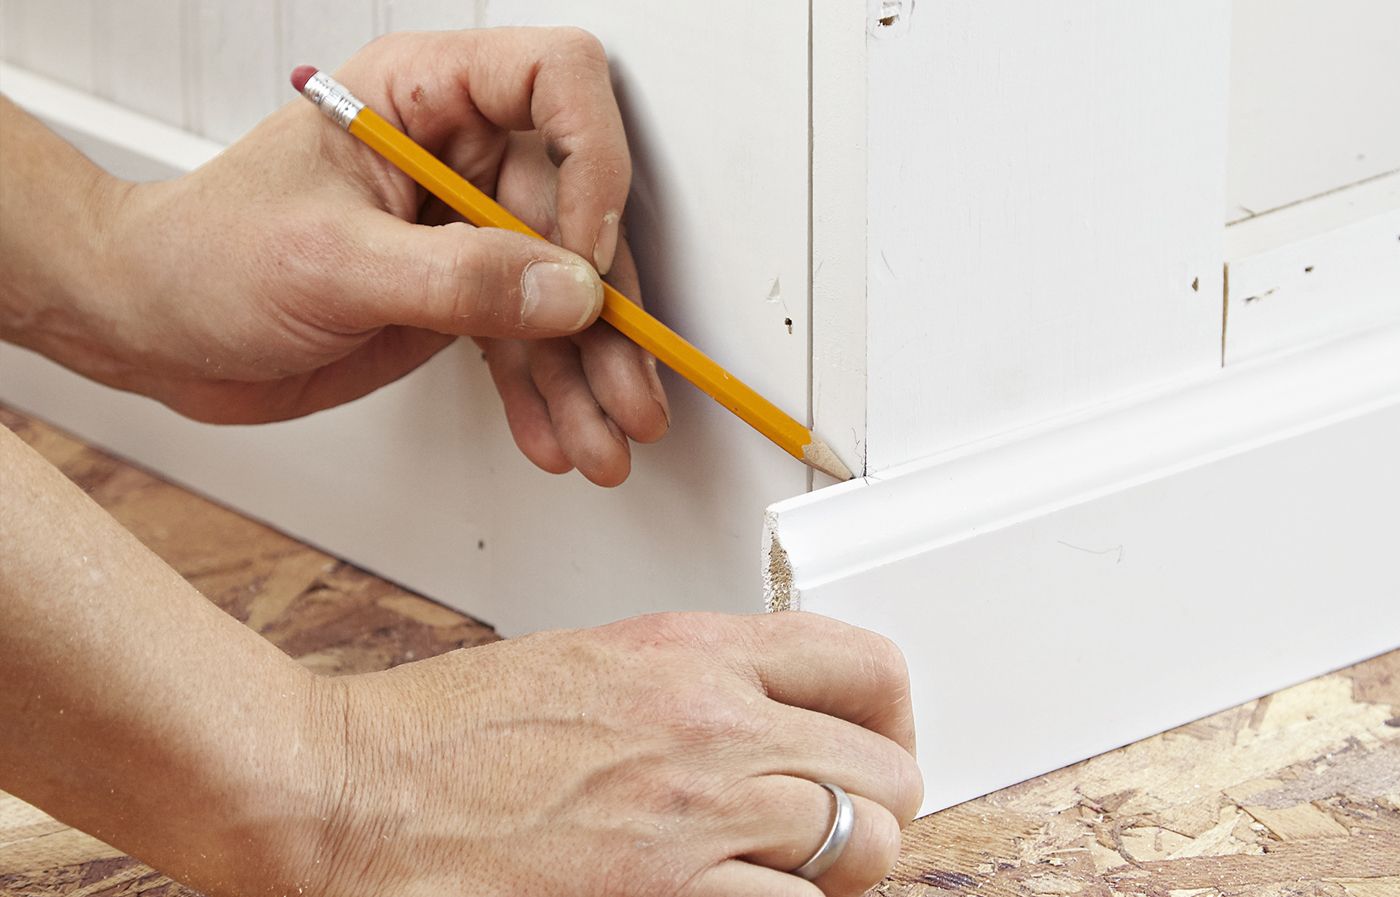
Hold a strip of base molding across the front of the pedestal, overlapping both ends. Mark the locations of the 45-degree outside miters on the back side of each end and cut them with the miter saw. Attach the piece with nails. Cut the two side pieces with a miter at the front end and a straight cut at the back. Nail them in place. Repeat the process for the shoe molding.
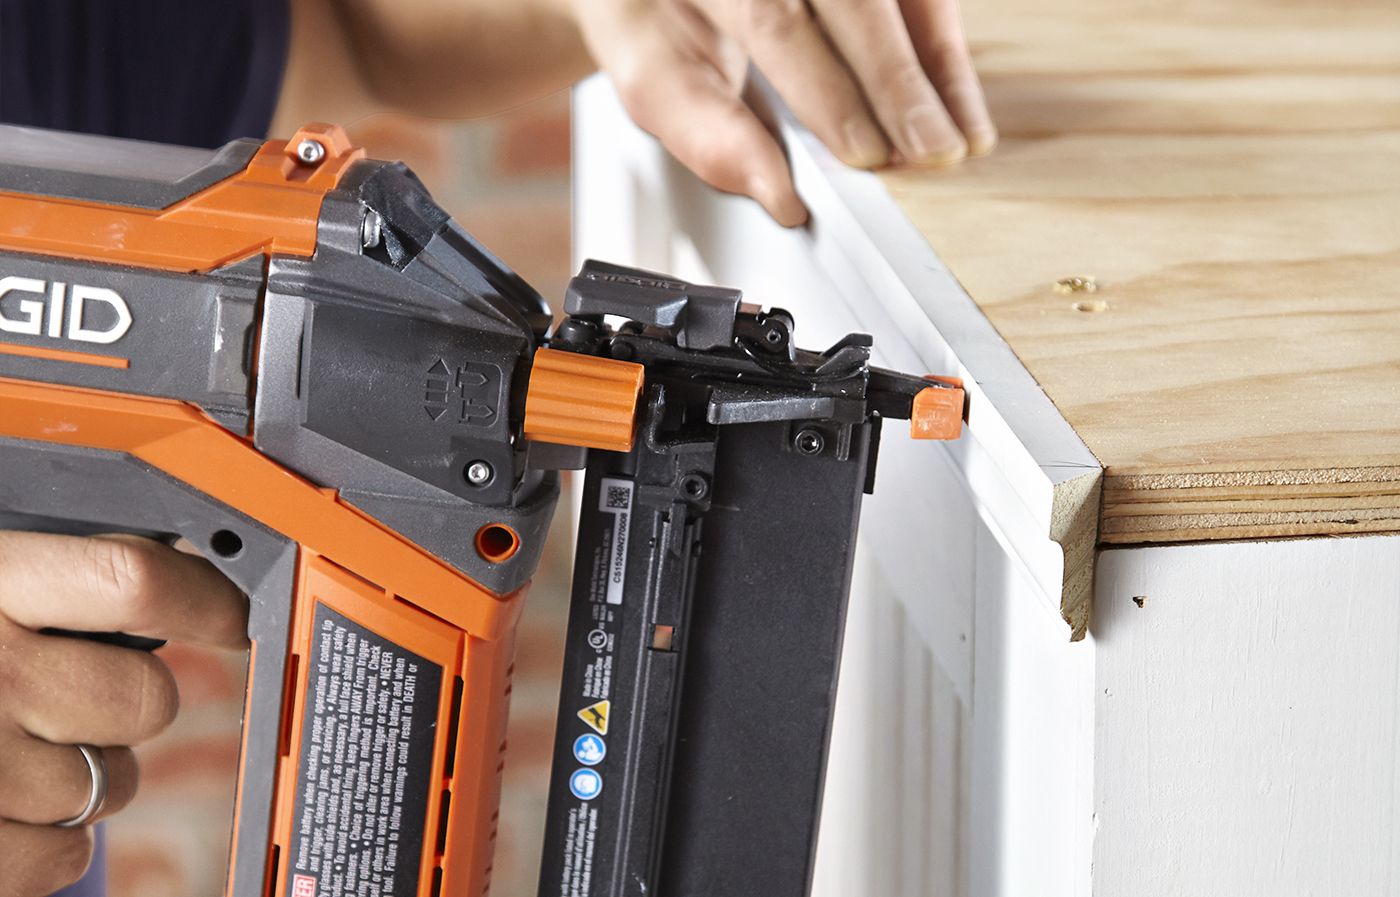
Adding the Panel Molding
Mark, miter, and install the front and side pieces of panel molding flush with the top of the plywood. Fill all joints, nail holes, and screw holes with paintable caulk. Prime the plywood top, then paint the pedestal. Call in a strong buddy to help lift the machines in place.