We may be compensated if you purchase through links on our website. Our team is committed to delivering honest, objective, and independent reviews on home products and services.
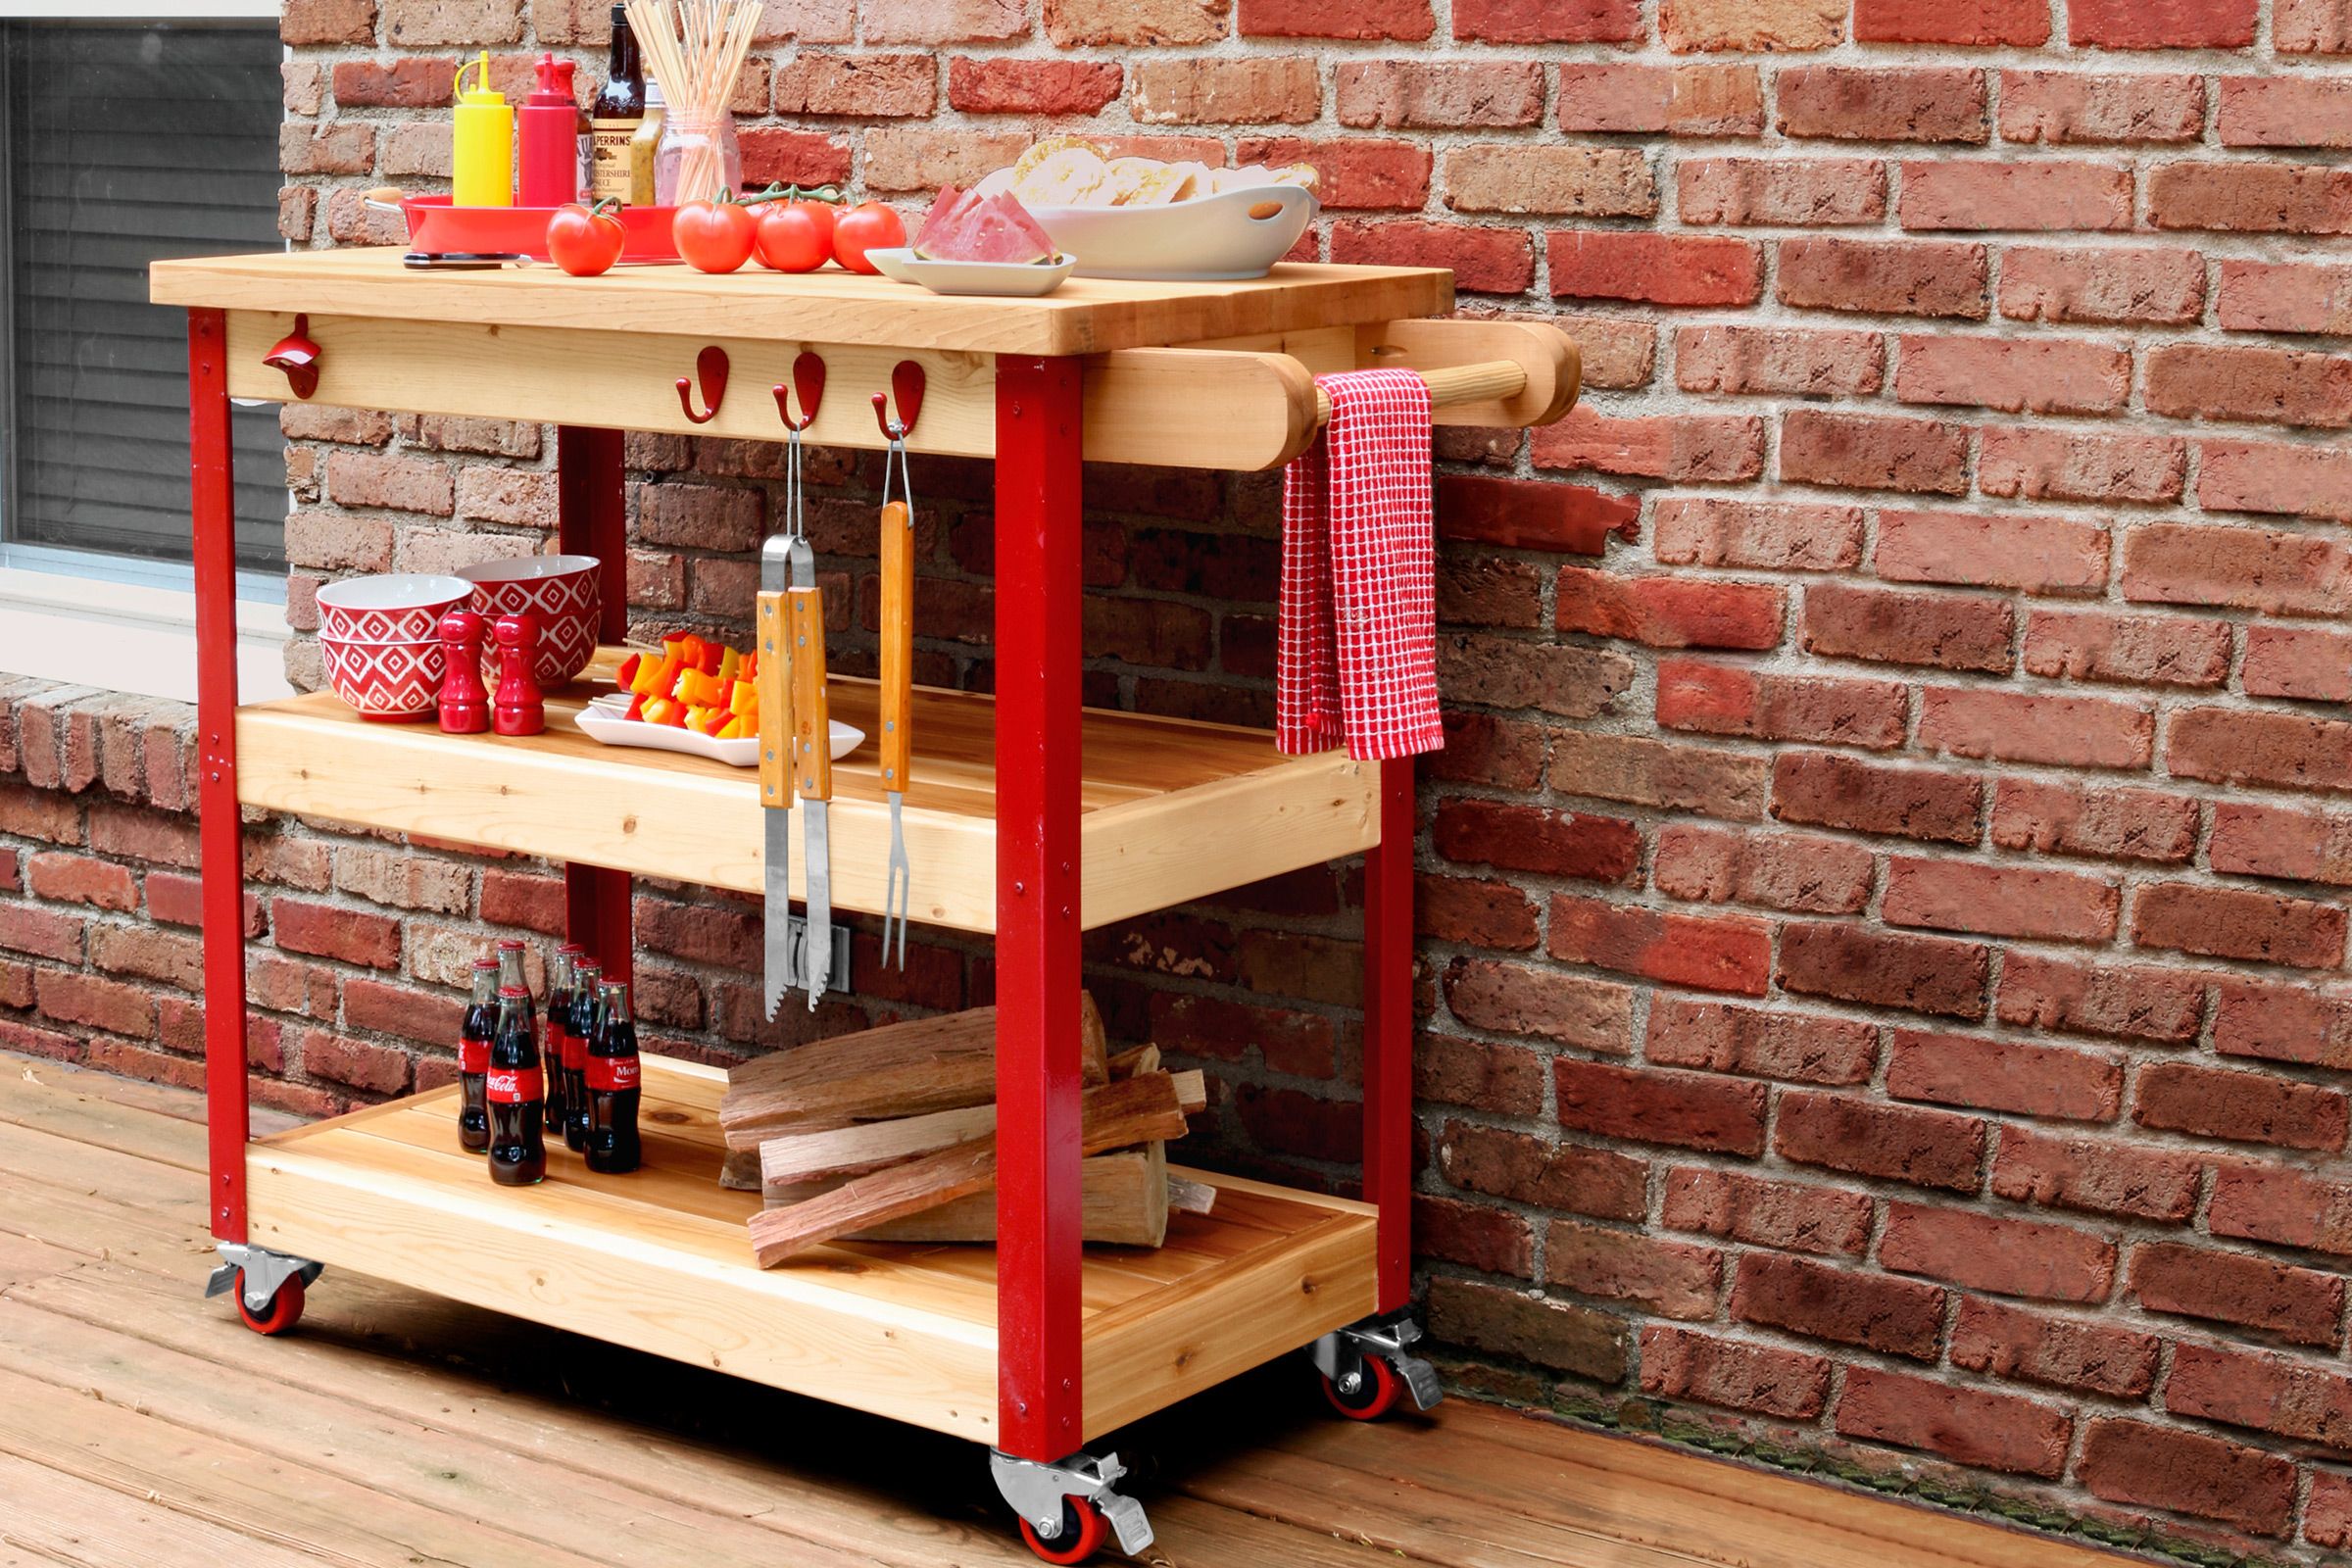
No matter what food you’re cooking on the grill, having a surface to work on and store things outdoors can make things more convenient. If you’re not looking for a full outdoor kitchen, a grill cart can serve your needs for prepping and grilling—and you can make one yourself. A do-it-yourself (DIY) rolling grill cart is a fun summer project for backyard barbecues and can provide utility, storage, and style for your outdoor space. In this guide, we’ll walk you through building a wood and metal cart, created by blogger Jen Woodhouse, that you can complete in just a few days.
Materials and Tools for Your Grill Cart
To build your rolling grill cart, you’ll need the following materials:
- 1×4 cedar boards for the shelves
- 1 1/4-inch wooden dowel for the handle
- 2×4 lumber for the frame
- 2 1/2-inch deck screws
- 3-inch locking casters
- Angle iron for the legs
- Butcher block for the top surface
- Hooks and accessories for storage
- Pocket-hole screws
Here are a list of tools you’ll need:
- Circular or miter saw
- Drill/driver with various bits
- Drill press (optional): It can make adding the metal legs easier, but a standard drill/driver with a 3/16-inch bit works fine.
- Jigsaw
- Level
- Measuring tape
- Paint supplies (if painting the metal components)
- Pocket-hole jig
- Safety gear (goggles, gloves, and dust mask)
- Sander
Steps for Building a Rolling Cart for Your Grill
Here’s an overview of how the cart comes together. Find the full step-by-step and cut list at jenwoodhouse.com.
Step 1: Build Three Shelves

- Cut all the pieces to length, then assemble three rectangular frames using 2x4s and 2 1/2 inch deck screws.
- Use pocket-hole screws to attach 1×4 cedar across two of the three frames to form shelves.
- Attach blocking under one shelf’s corners for casters to be screwed into.
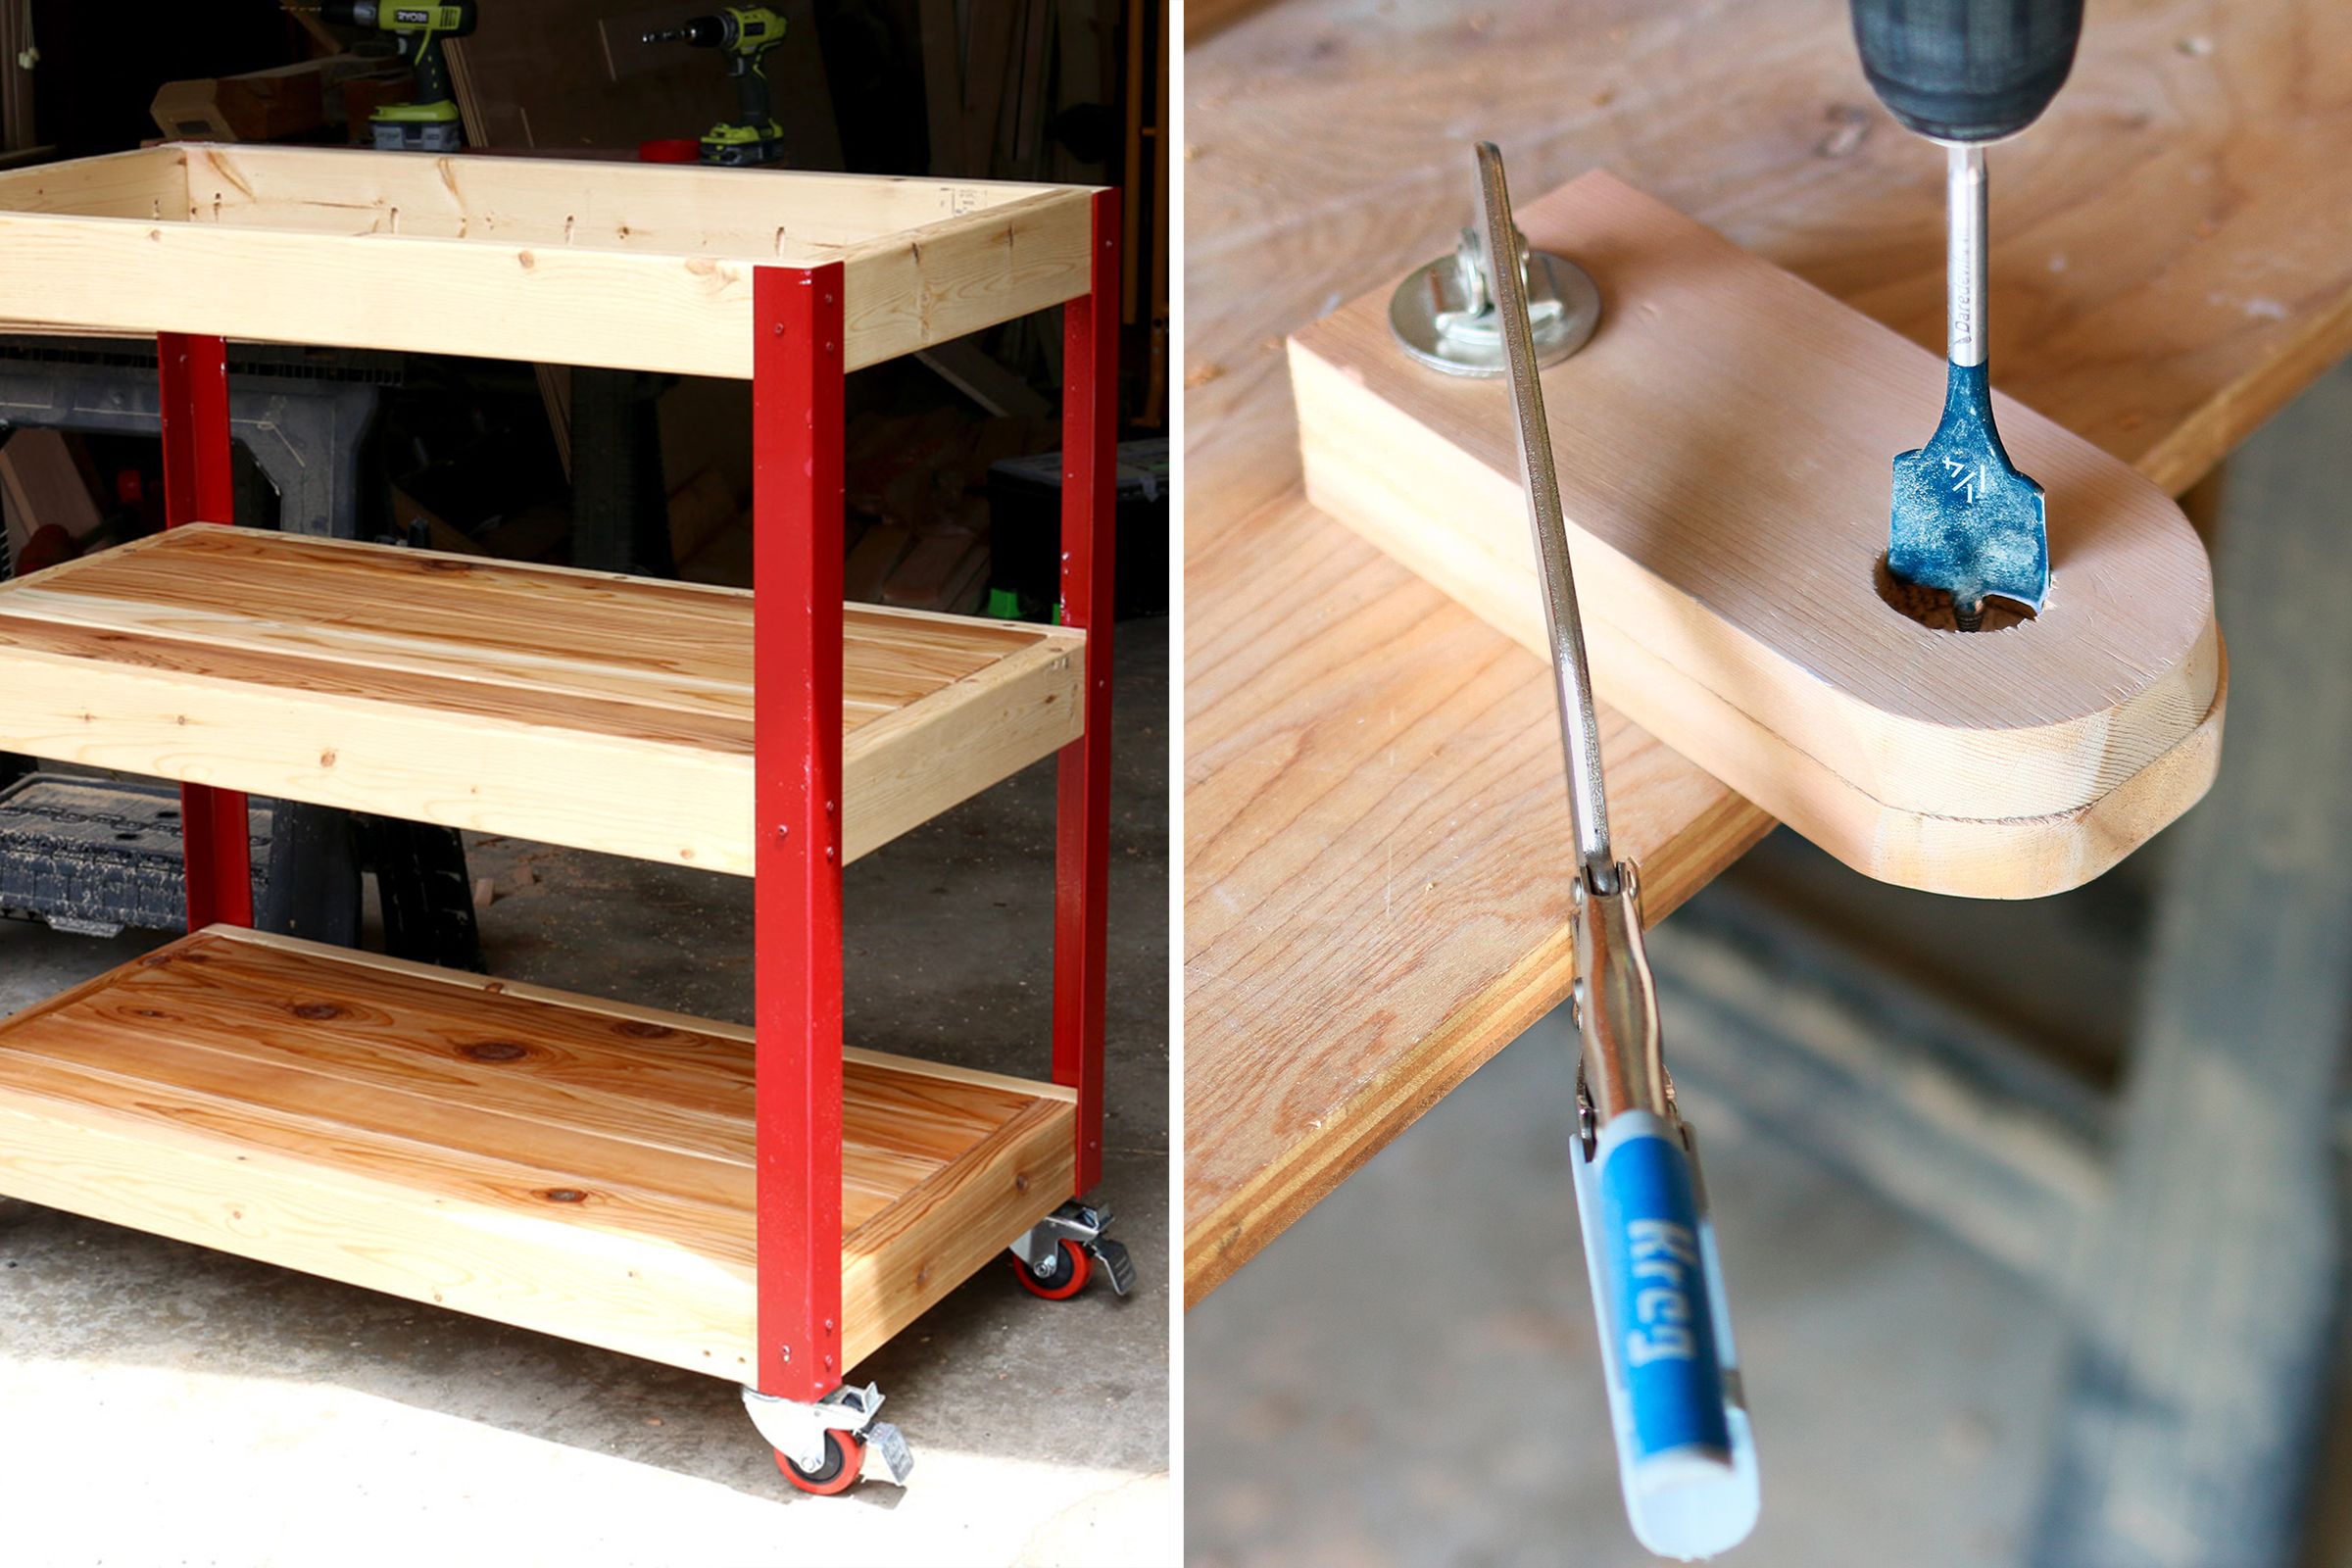
Step 2: Attach the Legs and Casters
- Cut, clean, and paint the angle irons, then drill holes where the top frame and lower shelves will go.
- Attach them with 2 1/2-inch deck screws.
- Add 3-inch locking casters to the bottom corners.
Step 3: Add the Handle and Top
- Use a jigsaw to cut out four rounded supports for the dowel.
- Make holes in two of them for the dowel ends using a 1 1/4-inch spade bit; cover with the other two.
- Attach the handle to the cart with pocket-hole screws.
- Attach a butcher-block top finished with food-safe oil; finish the rest of the wood with tung oil. Let all finishes cure completely before using the cart.
- Add accessories such as wheels, hooks and racks, and compartments for all of your grilling accessories.
Customizing Features for Your Needs
Think about how you’ll use the cart and what features would be most beneficial. What are you always reaching for while in the middle of grilling? In Jen’s finished example, she added hooks for hanging utensils, a bottle opener, and a paper towel holder made from galvanized pipe. Consider adding a heat-resistant surface for hot utensils or a place to store cleaning accessories. The beauty of a custom cart over one that you can buy in the store is that you can make it with all the features that you want and need.
Safety and Your DIY Grill Cart
Safety should be a top priority when building and using your grill cart.
Stability and Weight Distribution
Keep your cart from tipping or collapsing by doing the following:
- Avoid overloading the top shelf.
- Distribute the weight evenly across the shelves to prevent tipping.
- Lock the casters when the cart is stationary.
- Regularly check and tighten all screws and connections.
Heat-Resistant Features and Precautions
Protect your cart and yourself from fire-related hazards by doing the following:
- Always follow proper grill safety guidelines when using your cart.
- Install heat shields or barriers between the grill and any wooden parts of the cart.
- Keep flammable items stored in lower compartments, away from heat sources.
- Use heat-resistant materials for areas close to the grill, such as ceramic tiles or metal sheets.
Taking Care of Your Rolling Grill Cart
Keep your grill cart in top condition with these cleaning tips.
- Lubricate the caster wheels to maintain smooth rolling.
- Oil the wooden surfaces periodically to prevent drying and cracking.
- Use a mild soap and water solution for general cleaning, avoiding harsh chemicals.
- Wipe down the surfaces after each use to prevent grease and food buildup.
Weatherproofing for Outdoor Use
It’s likely your grill cart will be kept outdoors. To keep it in good shape, follow these tips to protect your cart from the elements:
- Apply a water-resistant sealant to all wooden surfaces annually.
- Cover the cart when it is not in use, especially during harsh weather.
- Inspect the cart regularly for any signs of wear or water damage and fix any issues immediately.
- Store the cart in a sheltered area during the off-season if possible.
Our Conclusion
You can create a custom cart that provides extra cooking space, storage, and a personal touch to your yard. Make sure to construct and use your cart safely. Regular care and maintenance will keep your grill cart in great shape for future cookouts and gatherings. For more space or storage needs, check out our guide on how to build a rolling grill table.