Project details
Skill
Cost
Estimated Time
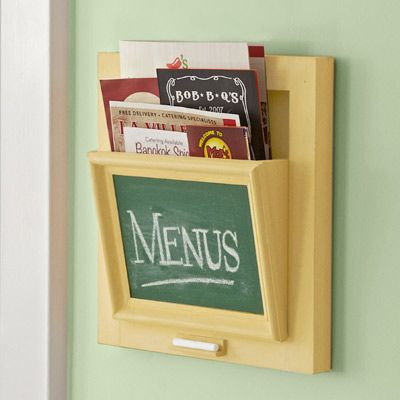
It’s easy enough to look up a takeout menu online, but displaying menus from your favorite restaurants can be a neat way to decorate your kitchen. This DIY project will guide you through creating a functional and attractive takeout menu holder for your kitchen wall in just a few hours. We’ve also included other menu holder ideas you can use in your home.
Step 1: Gather Materials and Tools
This holder features a plywood back framed with one-by-twos, an angled bin made from a one-by-four, and a front panel made of lauan with a chalkboard surface for notes. We recommend using milk paint to give it a unique look while protecting the wood.
Here’s a breakdown of the wood you’ll need and the cuts you should plan for:
- One 1/2-inch plywood back (13 1/2 by 14 inches)
- One 3/16-inch lauan front (10 1/2 by 8 1/4 inches)
- Two 1×2 stiles (14 inches)
- Two 1×2 rails (10 1/2 inches)
- One 1×4 for bin sides (8 inches)
- Two 5/8-by-one 1/8-inch base-cap molding for the frame (mitered to 10 1/2 inches between long points)
- Two 5/8-by-one 1/8-inch base-cap molding for the frame (mitered to 8 1/4 inches between long points)
- 3/4-inch outside corner molding for the chalk holder (3 inches)
Other tools and materials you’ll need include:
- Brad nailer and nails
- Chalkboard paint
- Circular saw
- Clamps
- Milk paint
- Mini paint roller
- Safety goggles
- Sandpaper
- Small chip brush
- Super glue
- Wood glue
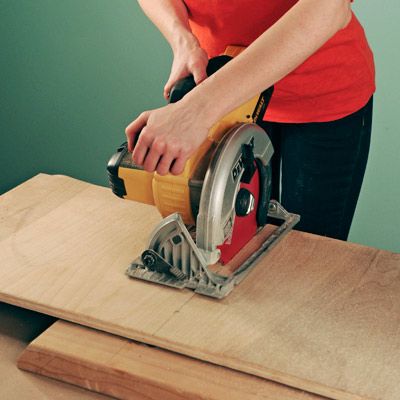
Step 2: Cut the Plywood Backing and Lauan
Remember to wear safety glasses and follow proper saw safety procedures throughout the cutting process. Keep your work area clean to avoid accidents.
Begin by cutting the plywood backing to size:
- Lay scrap material under your plywood board for full support.
- Clamp the board securely to prevent movement during cutting.
- Set your circular saw blade depth so that the teeth extend about 1/8-inch beyond the material.
- Carefully cut the 1/2-inch plywood to 13 1/2 by 14 inches.
Step 3: Cut the Frame Pieces
To create the frame, first use a miter saw to cut two one-by-twos to 14 inches in length for the vertical stiles. Next, cut two more one-by-twos to 10 1/2 inches for the horizontal rails. These will create the border around the plywood backing.
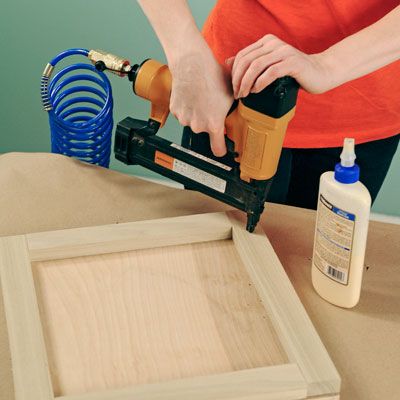
Step 4: Frame the Plywood
The frame needs to be carefully aligned to balance your takeout menu holder.
- Dry-fit the frame pieces and plywood to make sure the pieces are cut correctly.
- Apply a thin, even layer of wood glue along the edges of the plywood where the frame pieces will be attached.
- Position the one-by-two frame pieces flush with the edges of the plywood.
- Use a brad nailer to secure the frame pieces in place, driving nails every six to eight inches along the length of each piece.
- Wipe away any excess glue with a damp cloth before it dries.
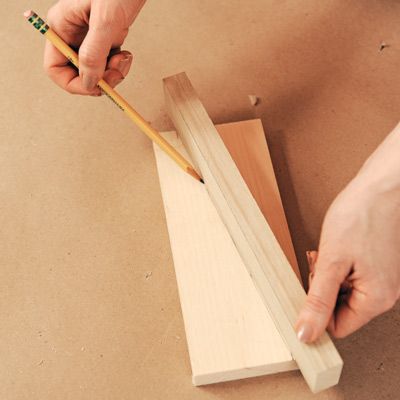
Step 5: Measure the Sides of the Menu Bin
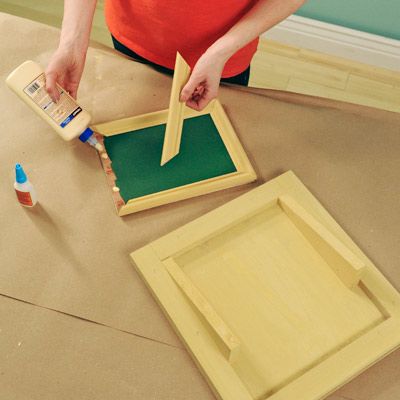
The bin will hold your takeout menus. To create the bin sides:
- Cut a one-by-four board to 8 inches in length.
- Use a one-by-two scrap as a guide to mark 3/4 inches from the top left and bottom right corners of the board.
- Draw a diagonal line connecting these two points.
This diagonal line will guide your cut in the next step, creating the perfect angle for the bin.
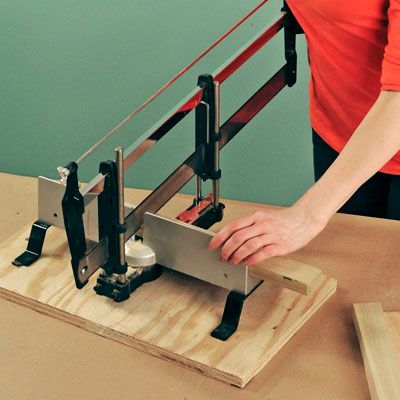
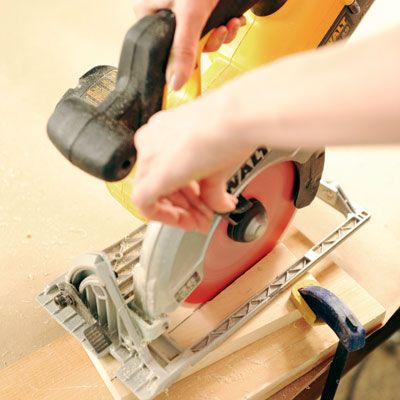
Step 6: Cut the Bin Sides
Use the diagonal line you drew as a guide for cutting. Here are the steps:
- Securely clamp the marked one-by-four to a scrap board.
- Set your circular saw blade depth.
- Carefully align the saw blade with the diagonal line.
- Hold the saw up on its front edge and slowly plunge the blade down, following the line to cut the board into two wedge-shaped pieces.
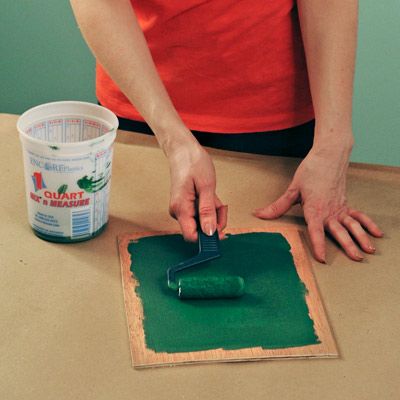
Step 7: Paint the Lauan
The lauan front panel will feature a chalkboard surface for notes or menu specials. To prepare it:
- Sand the lauan panel lightly to allow for good paint adhesion.
- Apply two coats of green chalkboard paint to the center of the panel, leaving about a 1/2-inch border unpainted around the edges. Allow each coat to dry completely before applying the next.
- Once dry, condition the chalkboard surface by rubbing the side of a piece of chalk over the entire painted area and then erasing it.
The unpainted border will help the wood glue adhere better when attaching the frame in the next step.
Step 8: Frame the Lauan
Using a miter saw, cut base-cap molding to create a frame for the lauan:
- Cut two pieces to 10 1/2 inches for the top and bottom.
- Cut two pieces at 8 1/4 inches for the sides
- Make 45-degree miter cuts at the ends of each piece for clean corners.
- Cut a 3-inch piece of outside corner molding for the chalk holder.

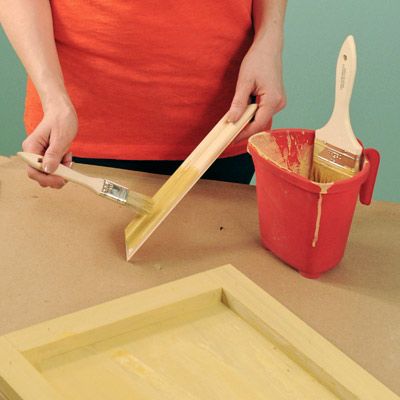
Step 9: Paint the Parts
Adding color to your menu holder will make it a standout piece in your kitchen. Follow these painting steps:
- Sand all wooden parts lightly to allow for good paint adhesion.
- Apply milk paint to the plywood back, menu-bin walls, and molding pieces.
- Use a mini paint roller for larger surfaces and a small chip brush for detailed areas.
- Apply two to three thin coats, allowing each to dry completely between applications.
- For a distressed look, lightly sand some edges after the paint has dried.
Step 10: Assemble the Parts
Now it’s time to bring all the pieces together:
- Attach the menu-bin walls to the plywood back using wood glue and brad nails, nailing from the inside for a clean look.
- Glue the frame molding to the lauan front panel, using a combination of wood glue and super glue for a strong bond.
- Once dry, attach the framed chalkboard front to the menu-bin walls with wood glue and secure with brad nails.
- Glue the chalk holder to the bottom of the frame.
Step 11: Finishing Touches
To complete your takeout menu holder project:
- Fill any visible nail holes with wood filler and sand smooth once dry.
- Apply a clear sealer to protect the paint and enhance durability.
- Install a sturdy picture hanger on the back for easy wall mounting.
- Consider adding small hooks at the bottom to hang utensils or a notepad.
You can also customize it with decorative elements, such as stenciling or decals. Allow all glue and paint to dry completely before hanging or using your new menu holder.
Other Takeout Menu Holder Ideas
If you don’t have the tools for woodworking, you might want to purchase an already-built menu holder instead. If you’d prefer a holder that doesn’t hang on your wall, here are some other menu holder ideas:
- Craft or buy a menu box that can be stored in your kitchen.
- Design a menu binder with clear protector sheets.
- Use a magazine rack.
- Use an accordion folder.
Our Conclusion
Building a takeout menu holder is a creative DIY project that adds a little retro style to your kitchen. With basic woodworking skills and a few hours of effort, you can create a custom piece that keeps your favorite menus organized and easily accessible. If you’re not able to create your own, you can purchase one or opt for other ideas, such as binders, folders, boxes, and magazine racks.