We may be compensated if you purchase through links on our website. Our team is committed to delivering honest, objective, and independent reviews on home products and services.
Barn pulleys have been doing the heavy lifting for centuries—and now they can add a touch of rustic charm to your home decor. This guide will show you how to transform a vintage barn pulley into a unique wall-mount light fixture. With just a few tools and materials, you can create a custom piece that combines industrial style with functional lighting. Whether you’re looking to add character to your living room or brighten up a bedroom, this DIY project is an excellent way to upcycle a piece of agricultural history.
What Is a Barn Pulley?
A barn pulley is a simple machine consisting of a grooved wheel, called a sheave, housed inside a wood or cast-iron frame. These pulleys were designed to reduce the effort required to lift heavy loads, making them essential tools on farms and in barns. By using a system of ropes and pulleys, large amounts of hay or other materials could be moved with minimal effort.
Gathering Materials and Tools
To create your wall mount light fixture, you’ll first need to collect the right tools and materials.
Essential Tools for the Project
The tools required for this project are minimal, making it accessible for DIY enthusiasts of all levels. You’ll need:
- Screwdriver
- Wire stripper
- Pliers
- Rags for cleaning
Selecting the Right Barn Pulley
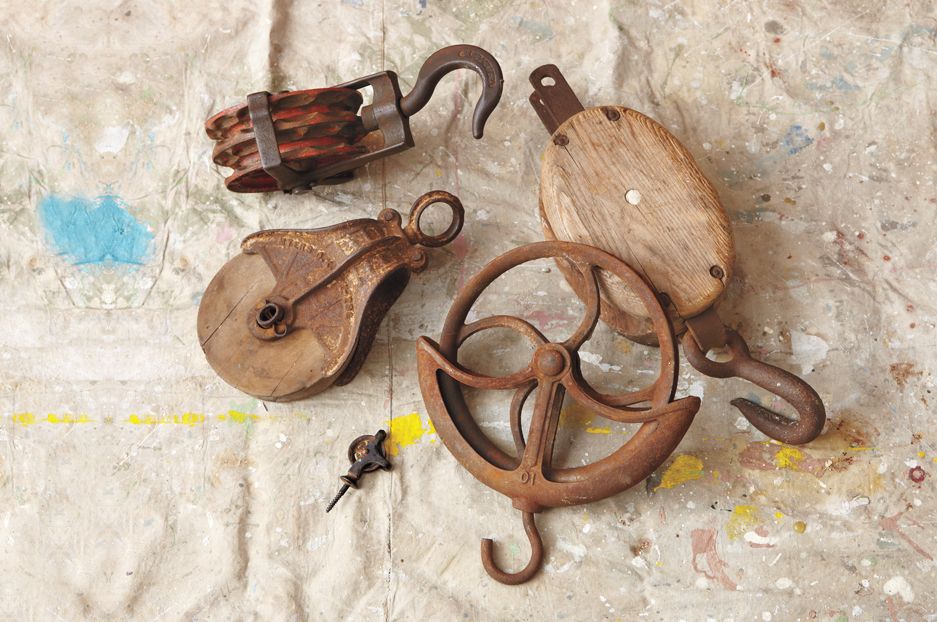
When choosing a barn pulley for your project, consider factors such as size, condition, and design. Look for pulleys at flea markets, salvage yards, or auctions. A pulley with a maker’s mark can add value and historical interest to your fixture. Antique stores often carry a variety of pulleys, each with unique wear and patina.
Additional Materials Needed
To complete your light fixture, you’ll also need:
- Cloth-covered electrical cord
- Brass light socket
- Edison-style bulb
- Cast-iron bracket
- Twine
- Small screw-mount pulley (optional)
- Electrical plug
Consider the color and style of your electrical components to match the vintage aesthetic of the barn pulley. Modern additions should complement, not overshadow, the historic charm of the pulley.
Steps for Making a Barn Pulley Light Fixture
Step 1: Find a Vintage Pulley
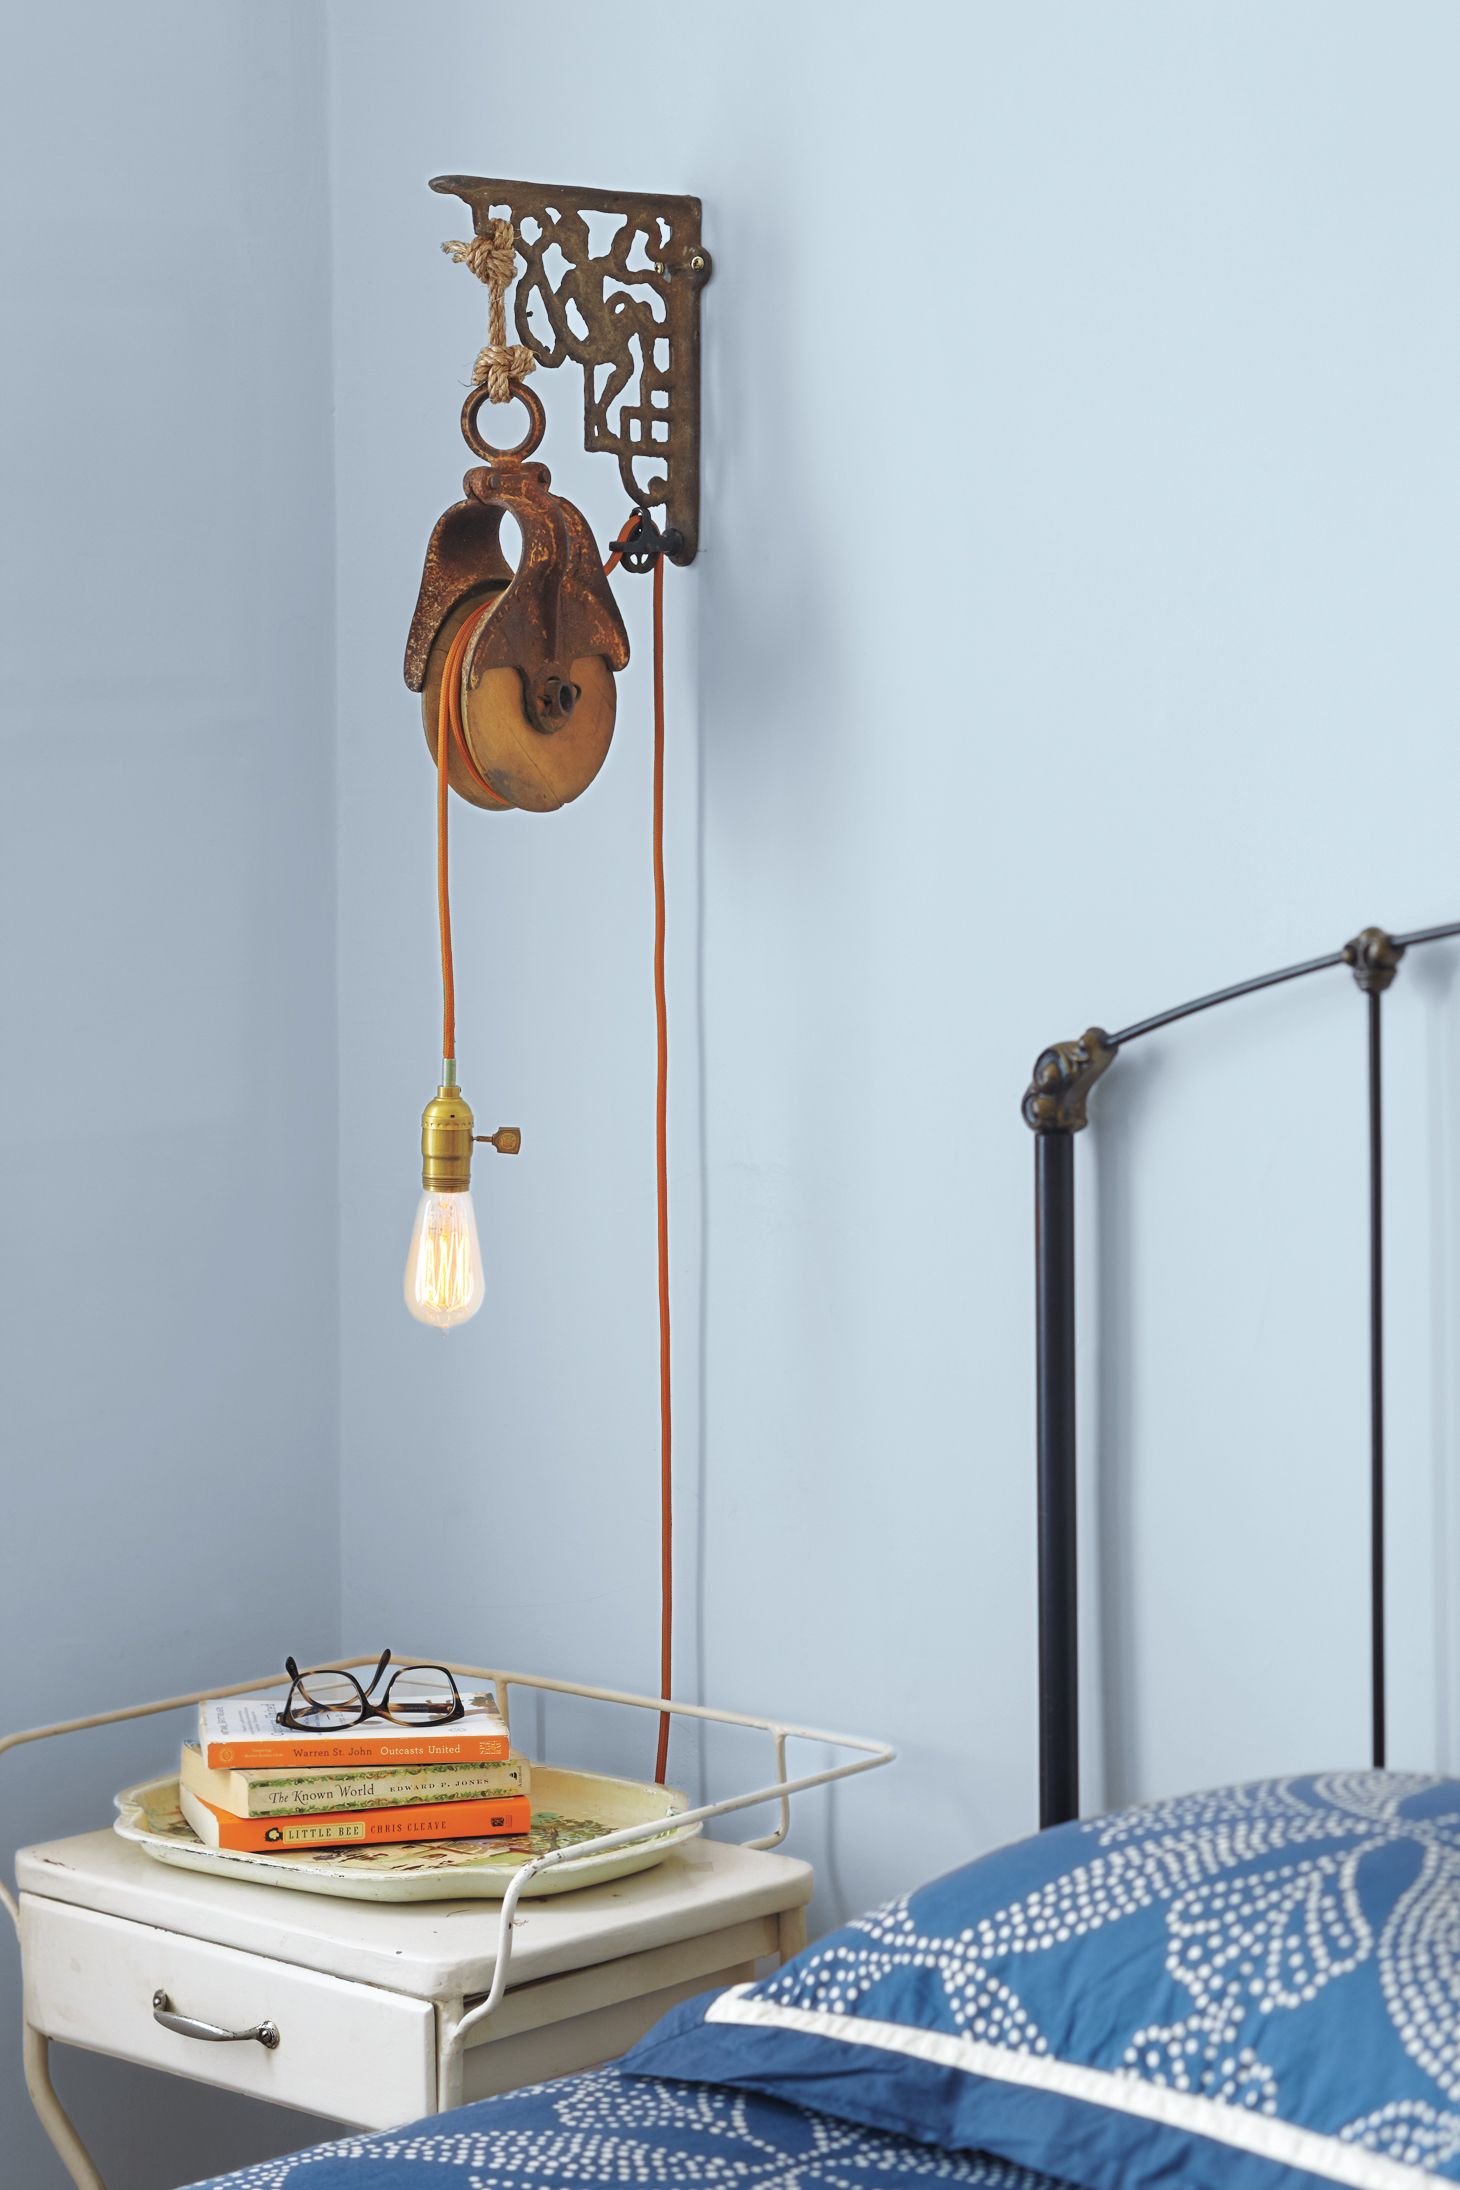
Inspired by a $500 industrial-look fixture in a catalog, I made this sconce for a fraction of the cost using a barn pulley. At $22, it wasn’t the cheapest pulley, but it was clean, had a nice patina, and was stamped “Myers O.K.” on the side. Such maker’s marks add value and can also reveal a pulley’s age—mine dates to the 1920s. A second, smaller screw-base pulley and the cast-iron bracket were $8 at a garage sale, and the cloth-covered cord, brass light socket, and Edison-style bulb totaled $42 from a lamp supply shop. To protect the bulb and yourself (it can get hot), you might consider adding a metal bulb cage. You can also find LED Edison-style bulbs in most hardware and home improvement stores that won’t get as hot.
Shown: Clockwise from top: Dual-sheave industrial pulley; nautical wood block with hook; well pulley; screw-in shade or clothesline pulley; and barn pulley.
Step 2: Clean the Pulley
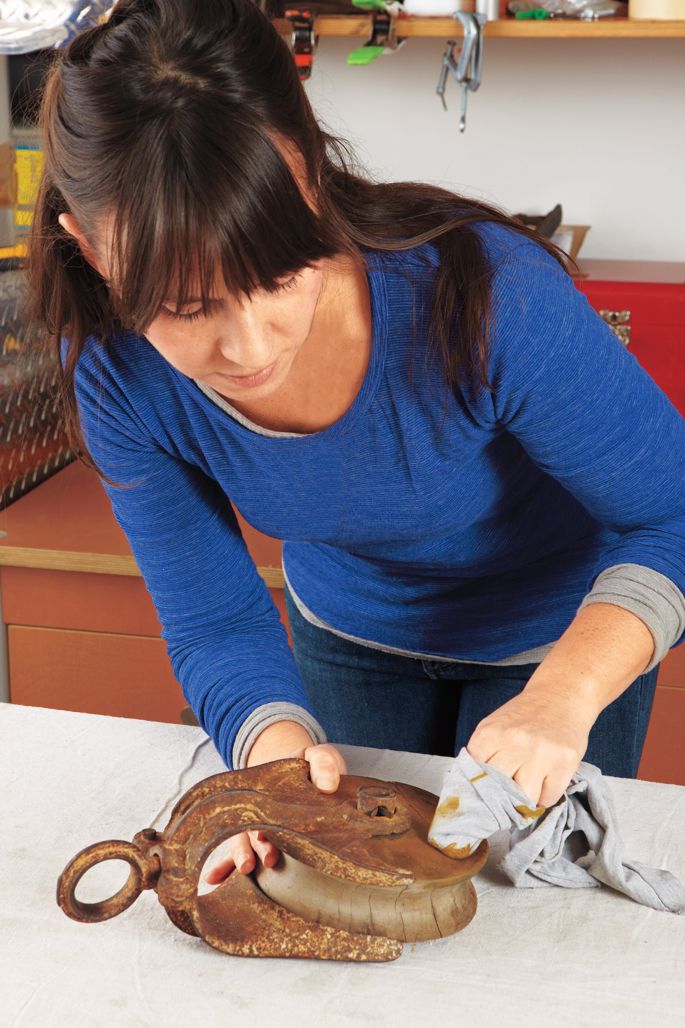
To protect the wood sheave and give it a nice sheen, rub it with beeswax polish. Linseed or tung oil will also do the trick. Wipe the cast-iron frame with WD-40 to clean it and highlight the metal’s patina.
Step 3: Wire the Socket
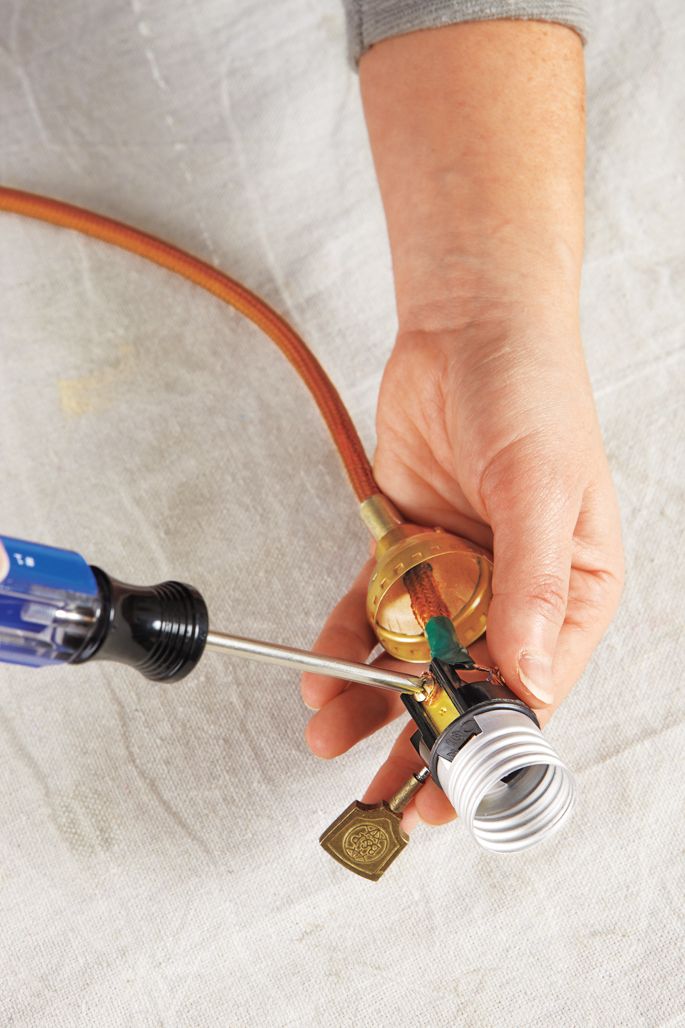
Strip ½ inch of insulation from each wire to reveal bare copper. Wind the neutral wire clockwise around the socket’s silver screw and the hot wire around the brass screw. Tighten the screws, and fit the brass housing over the socket.
Step 4: Coil the Cord
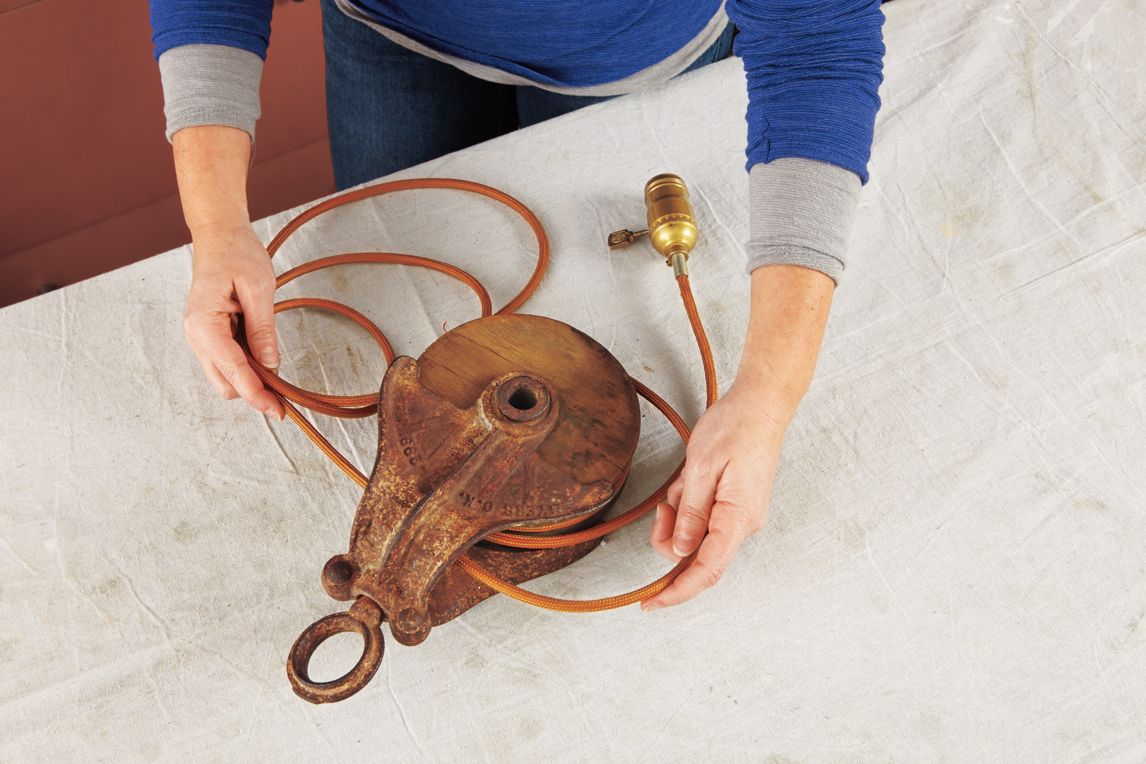
Next, fish the bare end of the electrical cord through the cast-iron pulley frame and loosely loop it around the grooved wood sheave a few times.
Step 5: Attach the Pulley to the Bracket
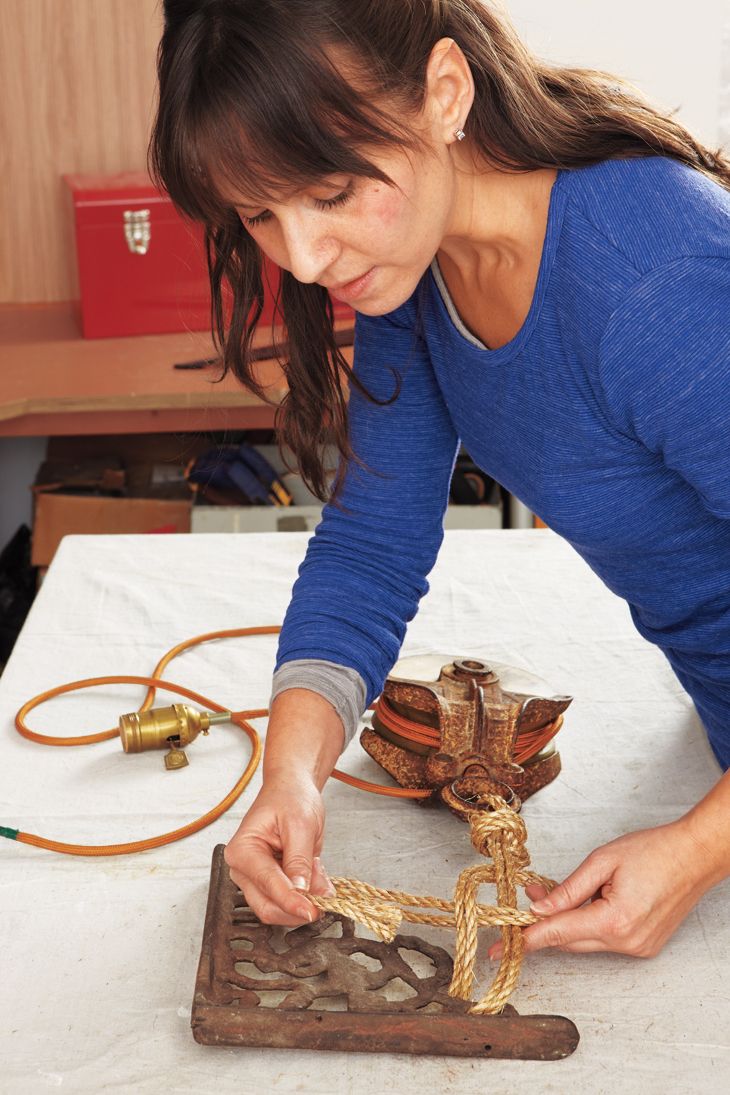
Secure one end of a doubled-up length of twine to the top of the pulley and the other to the bracket using knots of your choice. Ensure the connection is sturdy and can support the weight of the pulley and electrical components.
Step 6: Add a Second Pulley
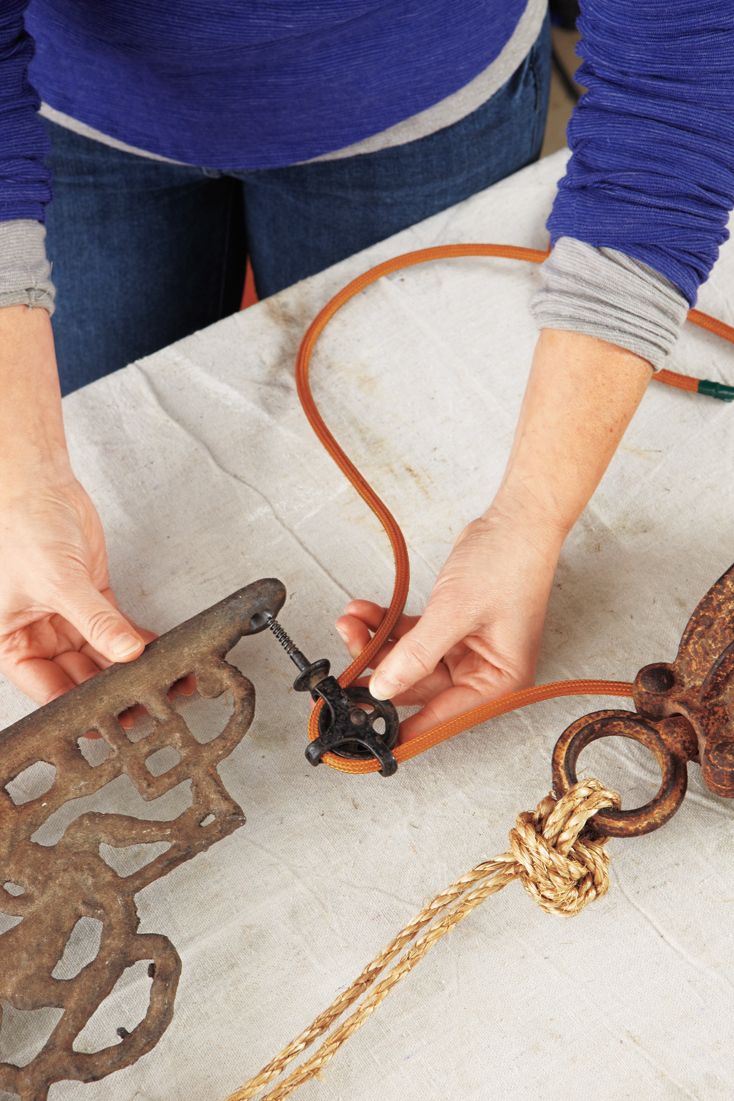
To guide the cord to a wall socket, insert the fastener end of a small screw-mount pulley through the existing drill-out on the lower portion of the bracket. Thread the electrical cord through both pulleys for a clean, organized look.
Step 7: Hook Up the Plug
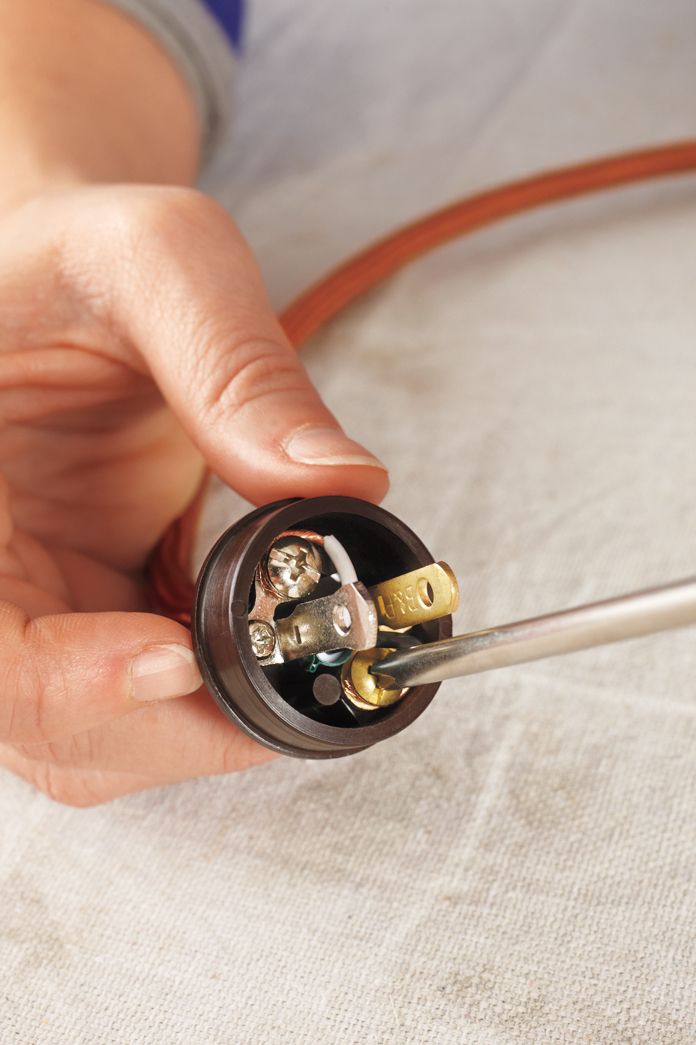
Once the cord has been threaded through both pulleys, complete the fixture by attaching the plug. The neutral wire wraps around the plug’s silver screw, and the hot wire around the brass screw. Congrats! Your new pulley sconce is now ready to hang.
Selecting the Perfect Location
When determining where to put your wall-mount light fixture, choose a spot that not only complements your decor but also provides adequate lighting for the space. Consider the length of your cord and proximity to an electrical outlet. If you need to add an overhead light, this project can be adapted for that purpose as well. The right placement will highlight the rustic charm of the pulley and provide functional lighting.
Styling and Decorating With Your New Light Fixture
Your barn pulley fixture is more than just a light source—it’s a statement piece that can enhance your home’s decor. It fits well with rooms that have an industrial or rustic style.
Complementary Decor Ideas
Pair your new light fixture with other rustic or industrial elements to create a cohesive look. Consider adding:
- Vintage signage
- Reclaimed wood shelving
- Antique farm tools as wall art
- Galvanized metal accents
Bulb Selection
The type of bulb you choose can significantly impact the mood of your space. Options include:
- Warm white Edison bulbs for a cozy atmosphere
- Clear globe bulbs for a more modern look
- Dimmable LED filament bulbs for energy efficiency and versatility
Maintenance and Care Tips
To keep your barn pulley light fixture looking its best, you should perform regular maintenance, such as:
- Dust regularly with a soft, dry cloth
- Periodically check and tighten any loose connections
- Reapply wood protectant to the sheave annually
- Inspect the cord for any signs of wear and replace if necessary
Safety Considerations When Working With Electrical Fixtures
Safety should always be your top priority when working on electrical projects. Keep these points in mind:
- Turn off power at the circuit breaker before beginning any electrical work.
- Use properly rated electrical components.
- Avoid overloading the circuit.
- Consider adding a metal bulb cage to protect the bulb and prevent accidental contact.
- If you’re unsure about any aspect of the electrical work, don’t hesitate to consult a professional.