We may be compensated if you purchase through links on our website. Our team is committed to delivering honest, objective, and independent reviews on home products and services.
Project details
Skill
Cost
Estimated Time
Under-cabinet lighting can transform your kitchen, providing task lighting for food preparation and creating a warm ambiance. In the video, This Old House master electrician Scott Caron demonstrates how to upgrade outdated under-cabinet lighting and install convenient power strips. Although a job of this magnitude requires a licensed electrician, we’ll outline the basic steps and offer more information on your lighting options.
Under-Cabinet Lighting Options
In the clip, Caron replaces the homeowner’s fluorescent light fixtures with new LED strips and power outlets. Here’s why Caron made that switch and what to consider before picking your new under-cabinet lights.
LED vs. Fluorescent Lighting
LED lighting has become the preferred choice for under-cabinet installations due to its numerous advantages.
- Energy efficiency: LEDs consume less power than fluorescent bulbs.
- Longevity: LED fixtures can last for years without needing replacement, significantly reducing maintenance.
- Low heat emission: LEDs produce minimal heat, making them safer for cabinet installations and preventing any potential damage to cabinet contents.
- Dimmability: Many LED fixtures are compatible with dimmer switches, providing customizable lighting levels for different tasks and times of day.
Fluorescent lighting, while still available, is becoming less common due to its shorter lifespan and higher energy consumption. Even so, some homeowners may consider it for its lower upfront cost. Also, when LED fixtures burn out, the entire fixture must be replaced, though this can take up to a decade depending on how often you use the lights. We do recommend LED lights for this application, but the choice is up to you.
LED Fixture Styles and Mounting Options
Under-cabinet LED lighting comes in various styles to suit different kitchen designs and personal preferences.
- Linear fixtures: Long, slim units that provide even illumination across the countertop, ideal for those who seek uniform light distribution.
- Puck lights: Small, circular fixtures that create focused pools of light, perfect for highlighting specific work areas.
- Tape lights: Flexible LED strips that can be cut to size and easily hidden, offering ultimate customization in light positioning and coverage.
When choosing a fixture style, consider the depth of your cabinets and the desired light coverage. The mounting method can also vary, with some fixtures attaching directly to the cabinet bottom and others requiring a slight recess for a cleaner look. Assess each type’s advantages and decide which best meets your needs.
DIY vs. Professional Installation
If your home’s wiring already fits this setup and all you need to do is swap out light fixtures, you may be able to do this job yourself. However, if you’re like the homeowner in the video and your cabinets need rewiring and additional power, you must hire a licensed electrician. These highly trained professionals can complete the job safely, ensuring the new installation is up-to-code.
Preparing to Install Under-Cabinet Lighting
Although most of the preparation and installation should be done by a licensed electrician, we’ll still outline the steps and materials that Caron used to show you what goes into a project like this.
Assessing Your Current Electrical Setup
This is one step you may be able to do yourself. At this point, you’re simply taking a look at your existing electrical configuration and figuring out what you need.
- Identify the power source for your current under-cabinet lighting, noting whether it is on a dedicated circuit.
- Locate existing junction boxes and wiring, checking for any signs of wear or damage that may need attention.
- Determine if your current setup can support the new lighting and power strips, particularly the demands of LED fixtures and any additional power outlets.
However, you may not be able to get a clear picture without cutting into walls or cabinets. That’s when you should call in the professionals to identify any wiring changes needed to support the installation.
Pro tip: Never run electrical cords over cooktops or other heat sources. In addition to simply getting in the way, they could sustain heat damage and become dangerous.
Tools and Materials Needed
Your project specifics will vary based on your wiring, kitchen layout, and new fixtures. Here’s what Caron needed to complete this project.
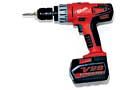
- Cordless drill/driver
- Drywall saw
- Electrical boxes, covers, and suitable nonmetallic electrical cables
- Electrical tape
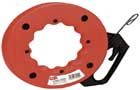
- Fish tape
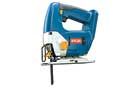
- Jigsaw or oscillating multi-tool
- LED under-cabinet fixtures
- LED-compatible dimmer switch
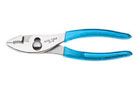
- Pliers
- Power strip with USB outlets
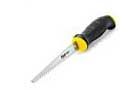
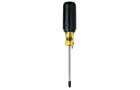
- Screwdriver set
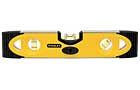
- Torpedo level
- Wire connectors
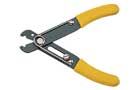
- Wire stripper
 Jigsaw
- Drywall saw
- Screwdriver
- Torpedo level
- Pliers
- Cordless drill/driver
- Fish tape
- Wire stripper
Under-Cabinet Lighting and Power Installation Process
Here’s how Caron replaced the old fluorescent fixture with LED lights and power strips.
Step 1: Removing Old Fixtures and Preparing Cabinets
- First, Caron turned off power to the existing under-cabinet lights and outlets at the main electrical panel.
- He removed the old light fixtures from the cabinets’ underside, being careful to avoid damaging the cabinetry.
- Using a jigsaw, he cut holes in the cabinet backs for new junction boxes where needed for additional wiring access.
- He cut corresponding holes in the wall above the cabinets for wire routing.
Step 2: Wiring and Switch Installation
- Caron ran nonmetallic electrical cables through the newly cut holes, connecting the power source to the new fixture locations.
- He installed an old-work switch box in the kitchen wall for the new dimmer switch.
- Using fish tape, he pulled the necessary cables into the switch box.
- He wired the compatible dimmer switch.
- Following local electrical codes, he connected the wires in the junction boxes inside the cabinets.
Pro tip: If you purchase a dimmer switch, make sure it’s specifically designed for LED lights to minimize flickering or other control issues.
Step 3: Mounting New Fixtures and Power Strips
- Caron connected the wires to the new LED fixtures using the provided push-in connectors.
- He secured the fixtures to the underside of the cabinets using the captive mounting screws provided.
- He installed joiner connectors between fixtures to carry power along the entire run.
- To minimize cord visibility, he mounted the new power strips under the cabinets, positioned close to the wall.
- He concluded the project by wiring the power strips to the existing electrical supply and testing the new fixtures.
Benefits of Upgraded Under-Cabinet Lighting
Finally, here’s an overall look at what the homeowner gained by installing new under-cabinet LED lights and power strips.
- Improved task lighting: Provides bright, direct illumination for food preparation and cooking tasks, reducing eye strain.
- Energy savings: Efficient LED technology dramatically lowers energy usage compared to traditional lighting, translating to cost savings.
- Reduced need for overhead lighting: Creates a more pleasant, natural ambiance by reducing reliance on harsh overhead fixtures.
- Convenient access to power outlets: Includes USB charging ports to accommodate modern electronic devices without additional adapters.
- Enhanced kitchen aesthetics: Modern, sleek fixtures elevate your kitchen’s look, aligning with updated interior trends.
- Increased home value: These types of kitchen upgrades can contribute to your home value by adding popular, modern features that may appeal to buyers.