Project details
Skill
Cost
Estimated Time
*Costs in this article sourced from Angi.
 Circular saw
- Drill/driver
- Bar clamps
- yardstick
- Scissors
- Staple gun


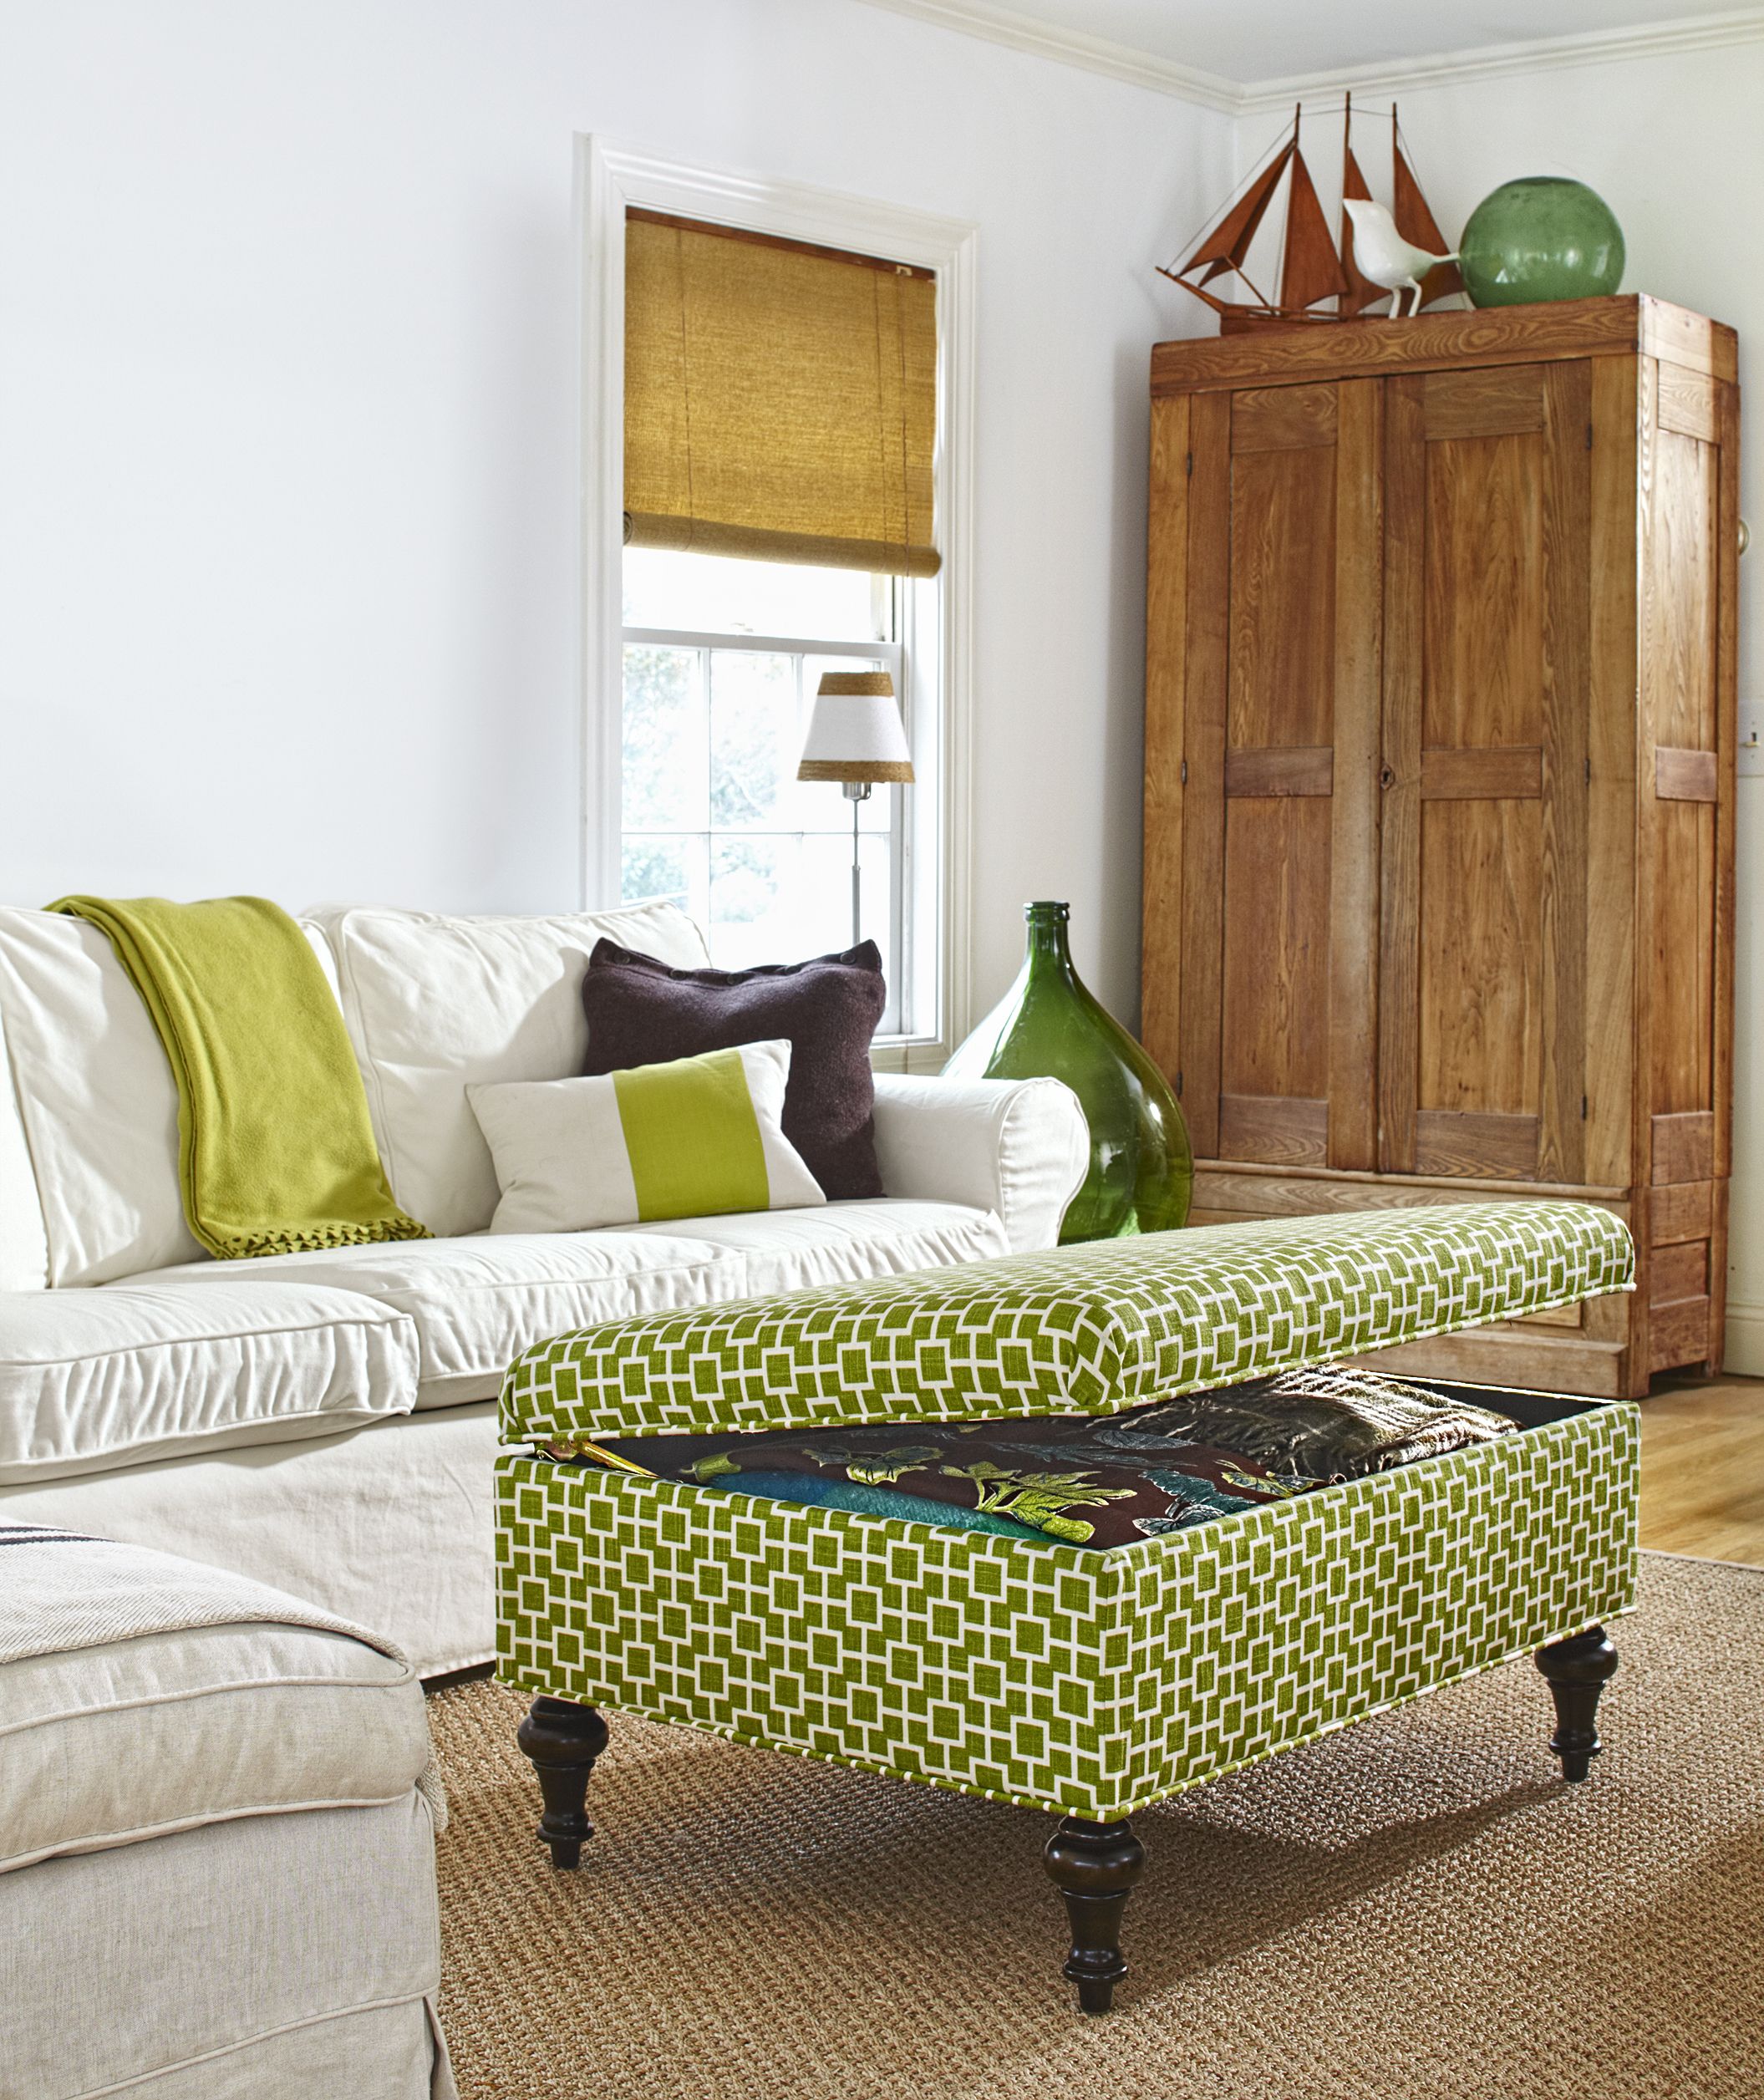
Storage ottomans serve as extra seating, a footrest, and a clever storage solution for blankets, books, or other household items. With some basic woodworking skills and patience for upholstery, you can create a custom ottoman that perfectly complements your home decor.
In this guide, we’ll walk you through the process of constructing a storage ottoman, from selecting materials to adding the finishing touches.
Materials and Tools Needed To Build a Storage Ottoman
To build a storage ottoman, you’ll need specific materials and tools. Gathering everything before you start will ensure a smooth building process.
Essential Materials
- Batting
- Continuous hinge
- Ottoman feet (e.g., 5-inch maple coronet bun feet)
- Toy-box lid support
- Staples
- Wood glue
- Wood screws
Required Tools
- Bar clamps
- Circular saw
- Drill/driver
- Measuring tape
- Safety glasses
- Scissors
- Pencil
- Staple gun
- Work gloves
- Yardstick
Preparing To Build a Storage Ottoman
Proper preparation is key to a successful ottoman build. This section covers how to determine the right size for your space and select suitable fabric.
Determining Ottoman Size
Consider the following when deciding on your ottoman’s dimensions:
- Available space in the room
- Intended use (seating, footrest, or coffee table)
- Storage needs
- Proportion to surrounding furniture
The standard size for an ottoman is approximately 27 1/2 inches wide by 38 1/4 inches long, which are the dimensions we’ll be using in this guide, but adjust as needed to fit your space.
Choosing the Right Fabric
Select a fabric that complements your decor and meets your practical needs:
- Durability: Choose stain-resistant fabrics for high-traffic areas or homes with pets and children.
- Texture: Consider suede for a luxurious feel or leather for easy cleaning.
- Pattern: Geometric designs can make a bold statement, while solid colors offer versatility.
- Color: Select a shade that coordinates with your existing furniture and wall colors.
How To Build a Storage Ottoman
Below are the steps to build a storage ottoman.
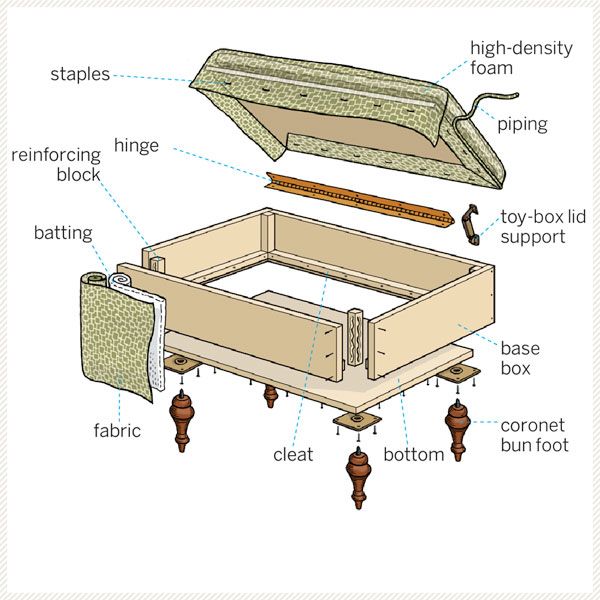
Step 1: Overview of How To Build an Upholstered Storage Ottoman
Cut List
- ¾-inch birch plywood top: one @ 27½ x 38¼ inches
- ¾-inch birch plywood bottom: one @ 26 x 36¾ inches
- ¾-inch birch plywood side pieces: two @ 11½ x 27½ inches
- ¾-inch birch plywood front and back pieces: two @ 11½ x 36¾ inches
- 1×1 pine cleats: two @ 26 inches
- 1×1 pine cleats: two @ 35¼ inches
- 1×1 pine corner blocks: four @ 10 inches
- Batting: 10 square feet
- Fabric: one piece @ 3¾ yards*
- Fabric: one piece @ 6¼ yards*
- 2-inch high-density foam rubber cushion: one @ 27½ x 38¼ inches
*The amount of material needed may change depending on the pattern that you choose.
Step 2: Build the Base
Cut ¾-inch birch plywood for the base, top, and bottom. Glue and clamp the four sides together to form the base box, then drill pilot holes and secure the pieces with screws. Cut 1×1 pine cleats and install them around the base’s interior, ¾ inch above the bottom edge. Attach reinforcing pine blocks to each inside corner. Glue, drill, and screw the bottom piece to the cleats.
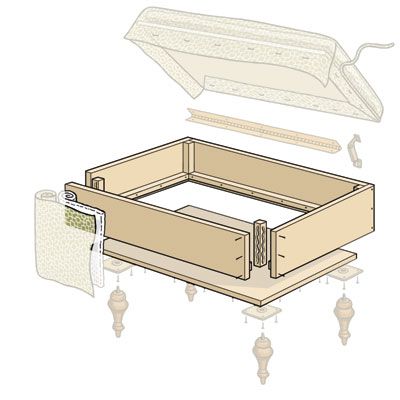
Step 3: Upholster the Base
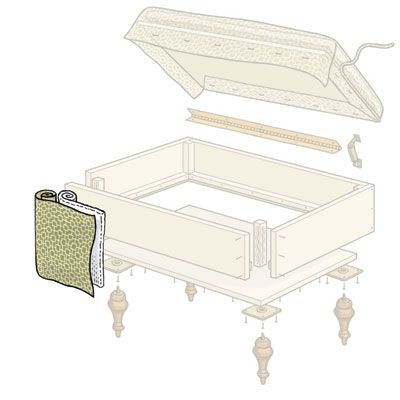
Cut batting and upholstery to wrap the base. Coat the back of the fabric with fast-drying spray adhesive and stick the batting onto it. Spray the batting and, starting at the center rear of the box, wrap the material around the sides and overlap it at the seam by ½ inches. Fold the material over the top and bottom and staple it in place.
Step 4: Upholster the Lid
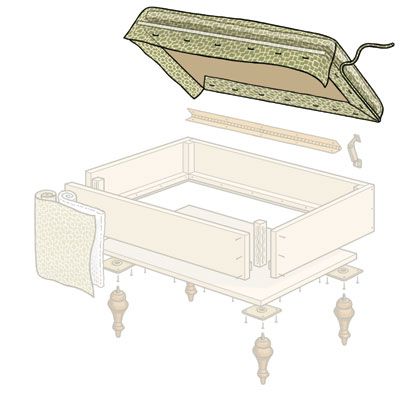
Trim 2-inch-thick high-density foam to cover the lid, and use spray adhesive to stick all but the perimeter to the plywood. Then, spray the foam’s edges with adhesive and fold them down to meet the plywood. Wrap the top in fabric and staple it on the underside. Starting at the rear seam, line the perimeter with piping and staple it in place.
Step 5: Add the Top and Feet
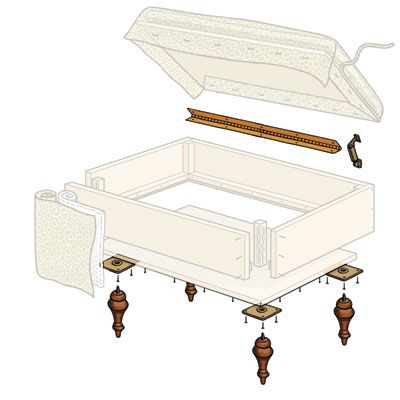
Join the upholstered top to the base with a continuous hinge and a toy-box lid support. Attach four 5-inch maple coronet bun feet, painted or stained to your taste.
Storage Ottoman Customization Options
One advantage of building your own storage ottoman is the ability to customize it to your preferences. Consider these options to make your ottoman unique.
Selecting Different Fabrics
Experiment with various fabrics to achieve different looks:
- Leather for a classic, easy-to-clean surface
- Velvet for a luxurious touch
- Patterned fabrics to add visual interest
- Outdoor fabrics for durability in high-traffic areas
Varying Ottoman Heights
Adjust the height of your ottoman to suit different purposes:
- Lower height (16–18 inches) for use as a coffee table
- Standard height (18–20 inches) for comfortable seating
- Taller height (20–22 inches) to match higher sofas or chairs
Storage Ottoman Maintenance and Care Tips
Proper care will ensure your storage ottoman remains beautiful and functional for years to come.
Cleaning Your Storage Ottoman
- Vacuum regularly to remove dust and debris.
- Spot clean spills immediately with a damp cloth.
- Use fabric-appropriate cleaners for deeper cleaning.
- Consider professional cleaning for stubborn stains.
Preserving the Upholstery
- Rotate the ottoman periodically to distribute wear evenly.
- Avoid placing the ottoman in direct sunlight to prevent fabric fading.
- Use fabric protector spray to guard against stains.
- Address any loose threads or small tears promptly to prevent further damage.
Storage Ottomans: Troubleshooting Common Issues
Even well-built ottomans may encounter issues over time. Here are some common problems and their solutions.
Fixing Loose Hinges
- Tighten any loose screws.
- If screws won’t tighten, fill the holes with wood filler and redrill.
- Replace the hinge if it’s damaged or worn.
Repairing Fabric Tears
- For small tears, use fabric glue or iron-on patches.
- Larger tears may require reupholstering the affected section.
- Consider slipcovers as a quick fix for extensive fabric damage.
Building an Ottoman With Storage: Our Conclusion
Building a storage ottoman is a rewarding project that combines craftsmanship with practical design. By following this guide, you can create a custom piece of furniture that serves multiple purposes in your home. The satisfaction of constructing your own ottoman, tailored to your specific needs and style, is unmatched by store-bought alternatives.
Remember that patience and attention to detail are key to a successful build. Take your time with each step, especially the upholstery process, to ensure a professional-looking result. The skills you sharpen with this project might even inspire you to tackle other DIY furniture projects, such as building a small bookcase or constructing a ladder bookshelf to complement your ottoman.