Project details
Skill
Cost
Estimated Time
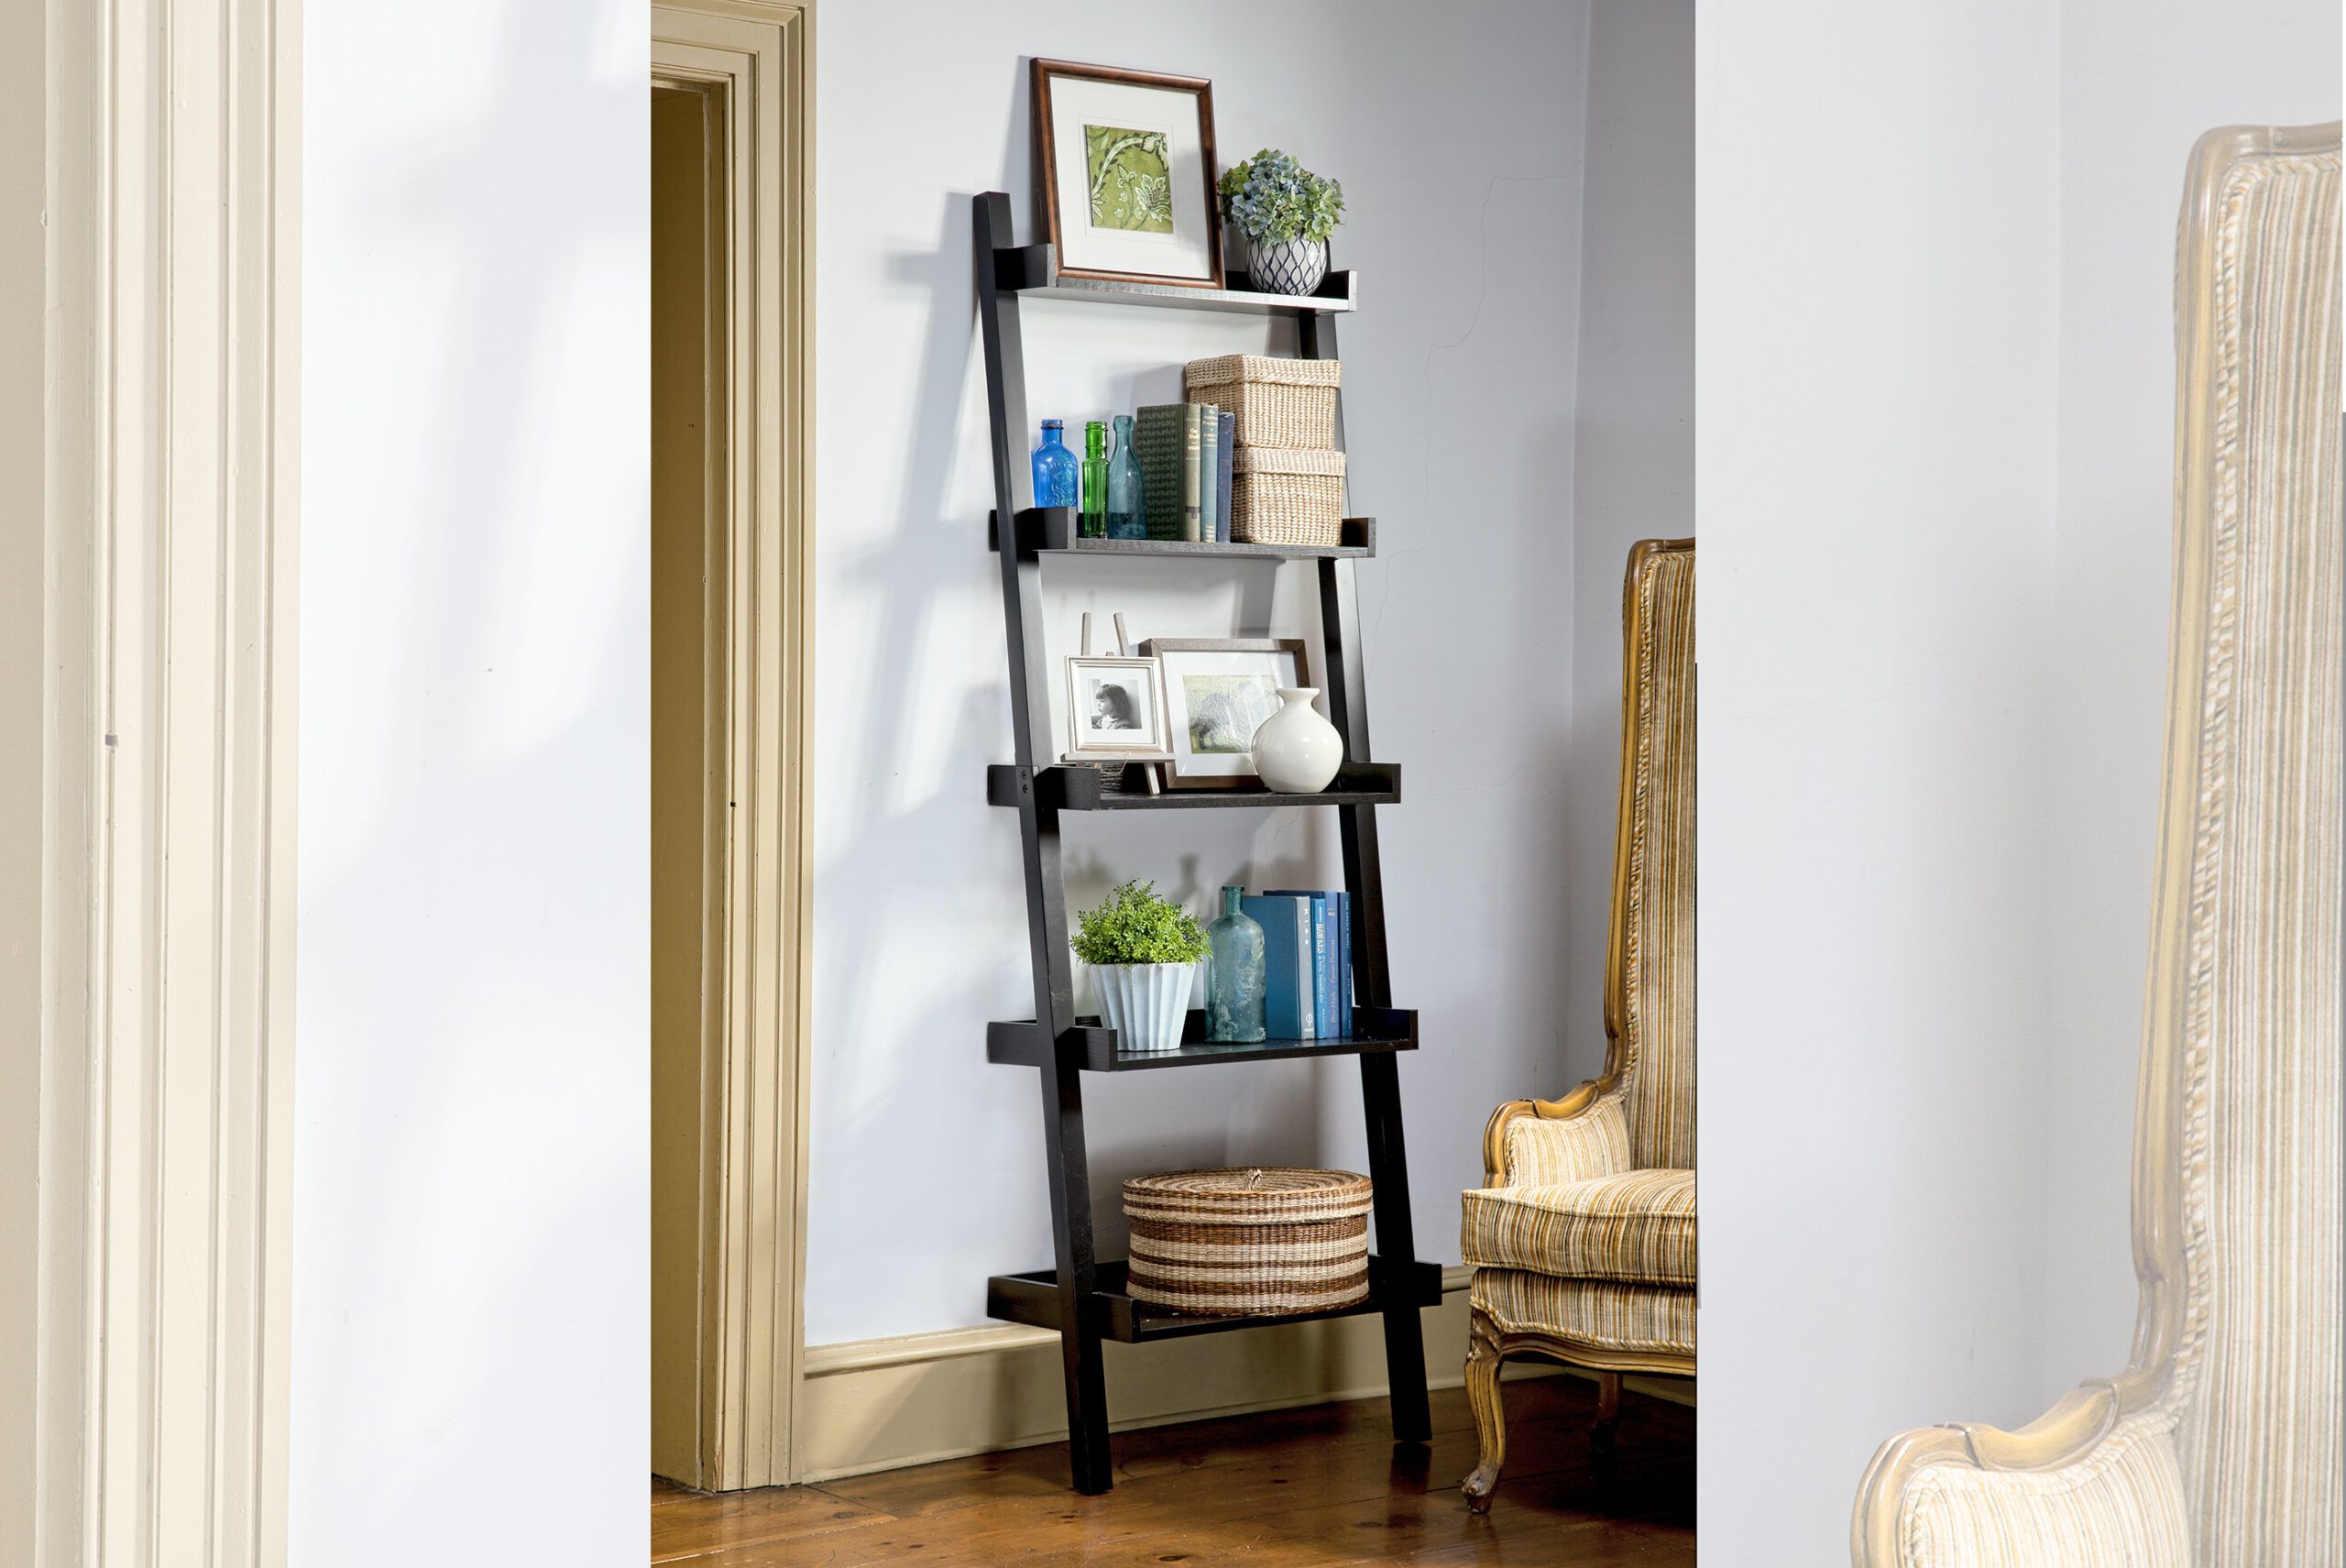
Building a ladder bookshelf is an excellent project for homeowners looking to add stylish storage to their space. With its leaning design, a ladder bookshelf easily adapts to various wall spaces and adds a touch of modern charm. In this guide, we’ll walk you through the process of creating your own ladder bookshelf, from gathering materials to adding the finishing touches.
Advantages of a Ladder Bookshelf
A ladder bookshelf offers numerous benefits beyond its practical storage capabilities.
Stylish and Contemporary Design
Ladder bookshelves add a modern touch to any room. Their sleek, angled design sets them apart from traditional bookcases, making them an attractive option for contemporary homes.
Space Efficiency
Ladder bookshelves can fit into smaller spaces where traditional bookcases might not be practical. This makes them an excellent choice for apartments, dorm rooms, or any area with limited space.
Versatility in Display
The varying shelf depths of a ladder bookshelf allow for creative displays. You can showcase a mix of books, plants, and decorative items, adding visual interest and personal flair to your design.
Materials and Tools Needed for a Ladder Bookshelf
Before diving into the project, gather all the necessary materials and tools. Having everything on hand will streamline the building process and ensure you can complete the project efficiently.
Essential Materials
- 3/4-inch poplar panels for shelves
- 1 x 3 poplar boards for shelf backs, sides, uprights, and cleats
- Wood glue
- 2-inch and 1 1/4-inch brad nails
- 1 1/4-inch screws
- Wood filler
- Paint or stain of your choice
- Non-skid foam pads
Optional Materials
- Corner braces for added stability
- Decorative molding for enhanced aesthetics
- Felt pads for additional floor protection
Required Tools
- Miter saw
- Drill
- Brad nailer
- Sandpaper (various grits)
- Measuring tape
- Pencil
- Level
- Safety glasses and hearing protection
Preparing Your Workspace
Before you begin construction, set up a clean, well-lit workspace with ample room to maneuver. Ensure you have a sturdy work surface and all your tools within reach. Lay out your materials and double-check your measurements against the cut list to avoid any mistakes.
Safety Considerations
Always wear safety glasses and hearing protection when using power tools. Keep your workspace organized to prevent accidents, and ensure all tools are in good working order.
Cutting the Bookshelf Pieces
The first step in building your ladder bookshelf is cutting all the necessary pieces to size.
Cut List
- 3/4-inch poplar panel for shelf A: one at 21 by 4 3/4 inches
- 3/4-inch poplar panel for shelf B: one at 21 by 6 3/4 inches
- 3/4-inch poplar panel for shelf C: one at 21 by 8 3/4 inches
- 3/4-inch poplar panel for shelf D: one at 21 by 10 3/4 inches
- 3/4-inch poplar panel for shelf E: one at 21 by 12 3/4 inches
- 1-by-3 poplar shelf backs: five at 21 inches
- 1-by-3 poplar shelf sides: two at 5 1/2 inches, two at 7 1/2 inches, two at 9 1/2 inches, two at 11 1/2 inches, two at 13 1/2 inches
- 1-by-3 poplar uprights: two at 6 feet from point to point, cut the ends at parallel 10-degree angles
- 1-by-3 poplar top cleats: two at 3 1/2 inches from point to point, cut the ends at parallel 10-degree angles
- 1-by-3 poplar bottom cleats: two at 8 inches from point to point, cut at parallel 10-degree angles
- 1-by-3 poplar spacer cleats: eight at 12 inches from point to point, cut at parallel 10-degree angles
Cutting Shelves and Uprights
Start by cutting the poplar panels for your shelves. You’ll need five shelves of increasing width, ranging from 21 by 4 3/4 inches for the top shelf to 21 by 12 3/4 inches for the bottom shelf. Next, cut the 1 x 3 poplar boards for the shelf backs and sides according to the dimensions in your cut list.
Making Angled Cuts for Cleats
Set your miter saw blade to a 10-degree angle for cutting the uprights and cleats. The uprights should be 6 feet long from point to point, with parallel 10-degree angles at each end. Cut the top cleats to 3 1/2 inches, bottom cleats to 8 inches, and spacer cleats to 12 inches, all with parallel 10-degree angles.
Assembling the Shelves
After cutting all the pieces, it’s time to assemble the individual shelves.
Building Individual Shelves
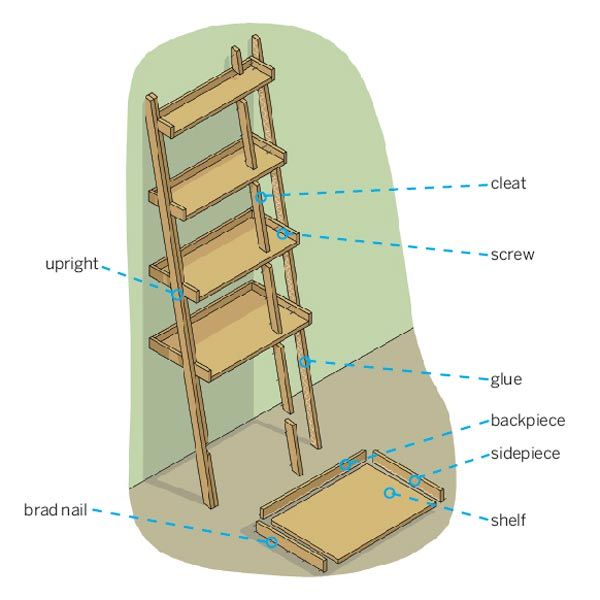
Begin by applying wood glue along the back edge of a shelf panel. Align and attach the corresponding backpiece, securing it with 2-inch brad nails. Wipe away any excess glue to ensure a clean finish.
Attaching Shelf Backs and Sides
Next, glue and nail the sidepieces to the shelf, ensuring they’re flush with the back and bottom. Repeat this process for all five shelves, working from the smallest to the largest.
Constructing the Bookshelf Frame
The frame of your ladder bookshelf provides its distinctive angled look and stability.
Position the Cleats
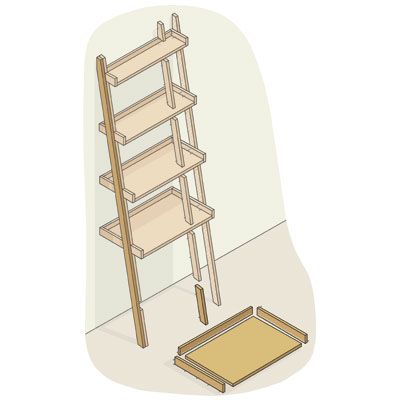
Starting at the bottom of the uprights, glue the cleats in place. Use scrap 1 x 3s as spacers to provide consistent shelf spacing. Secure each cleat with 1 1/4-inch brad nails. Trim 1/4 inch off their back edges perpendicular to the 10-degree end cuts to make the tops of the uprights sit flat against the wall.
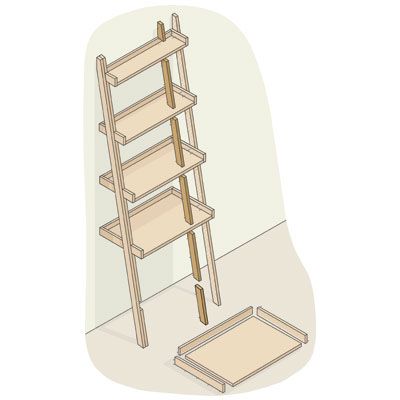
Joining Shelves to Uprights
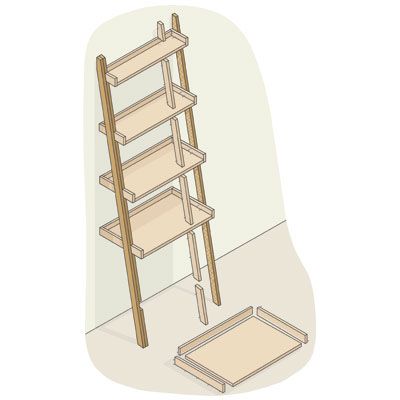
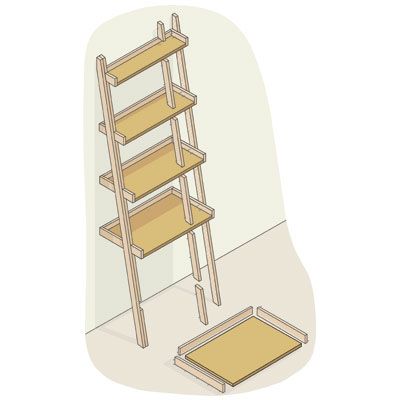
Arrange your tiered shelves on their backs, from shortest to tallest, on a level surface. Dry-fit the shelves into the notches on the uprights, ensuring the trimmed wall-side edges of the uprights rest flat. Once satisfied with the alignment, glue the shelves to the uprights and drive two 1 1/4-inch screws through each shelf’s sidepieces into the uprights.
Adding Corner Braces for Stability
For added stability, you can attach corner braces to the inside corners where each shelf meets the uprights. This is not necessary but recommended if you plan to store extra-heavy items on the shelves.
Finishing Touches
The final steps in creating your ladder bookshelf involve refining its appearance.
Sanding and Painting
Fill any visible screw or nail holes with wood filler and allow it to dry completely. Sand the entire bookshelf, starting with coarse-grit sandpaper and progressing to finer grits for a smooth finish. Apply your chosen paint or stain, following the manufacturer’s instructions for the best results.
Adding Non-Slip Features
To prevent your ladder bookshelf from sliding, add non-skid foam pads to the feet and the wall-side edge of each upright. This will protect your floors and walls while keeping the bookshelf securely in place.
Enhancing with Decorative Molding
For an added touch of elegance, you can attach decorative molding to the front edges of the shelves.
Ladder Bookshelf Customization Options
One advantage of building your own ladder bookshelf is the ability to customize it to your specific needs and style preferences.
Adjusting Shelf Sizes
You can easily modify the shelf dimensions to accommodate larger items or create a different visual effect. Just remember to adjust your cut list accordingly and maintain the overall balance of the piece.
Exploring Different Wood Types
While poplar is an excellent choice for its affordability and workability, you might consider other wood types for different aesthetics or durability. Oak or maple can provide a more robust structure, while pine offers a rustic charm.
Painting and Staining Techniques
Experimenting with different painting and staining techniques can give your ladder bookshelf a distinct look. We recommend using a distressed paint technique for a vintage feel or a high-gloss finish for a modern touch.
Adding Personalization
Personalize your bookshelf by adding stenciled designs or decals. You can even add built-in lighting to highlight certain display items and areas. Here are some tips:
- LED strip lights:
- Install under each shelf for a sleek, modern look
- Easy to hide and provide even illumination
- Low heat output, energy-efficient
- Puck lights:
- Mount on the underside of shelves
- Offer focused lighting on specific areas or objects
- Available in battery-operated versions for easy installation
- Picture lights:
- Attach to the top of the bookshelf to illuminate downward
- Provide a traditional, elegant look
- Great for highlighting artwork or special book displays
- Consider dimmable options:
- Allows adjustment of brightness for different times of day or moods
- Use warm white lights:
- Creates a cozy, inviting atmosphere
- Complements wood tones well
Proper Bookshelf Installation and Safety
Securing to the Wall
Although the angled design provides stability, it’s wise to secure the bookshelf to the wall, especially in homes with children or pets. Use appropriate wall anchors and screws to fasten the top of the bookshelf to the wall studs.
Weight Distribution Considerations
When arranging items on your ladder bookshelf, distribute weight evenly across the shelves. Place heavier items on the lower shelves and lighter objects towards the top to maintain stability and prevent tipping.
Regular Safety Checks
Perform regular safety checks to confirm that the bookshelf remains securely fastened to the wall and that all shelves are stable. Tighten any loose screws or fittings as needed.
Ladder Bookshelf Maintenance and Care Tips
To keep your ladder bookshelf looking its best, dust it regularly with a soft cloth. Avoid using harsh chemicals that might damage the finish. Periodically check and tighten any loose screws or fittings to maintain structural integrity.
Preventing Damage
Avoid placing excessively heavy items on the shelves and handle the bookshelf with care when moving it. To protect the shelves’ finish, use coasters or felt pads under items.
Touch-Up Paint and Stain
Keep some touch-up paint or stain on hand to address any nicks or scratches that may occur over time.
Our Conclusion
Building a ladder bookshelf is a rewarding do-it-yourself project that combines craftsmanship with practical design. By following this guide, you can create a unique piece of furniture that serves as a functional storage solution and enhances the appeal of your living space.