We may be compensated if you purchase through links on our website. Our team is committed to delivering honest, objective, and independent reviews on home products and services.
Project details
Skill
Cost
Estimated Time
Whether you need to save space on your table or want to give a handmade gift to a loved one, a tiered serving tray is a functional and elegant way to display appetizers, desserts, or even small decorative items. You may think you need advanced woodworking skills to create one, but we have some tips and tricks that make it a lot easier than you’d imagine. In our guide and video, we’ll tell you how to build a tiered serving tray using furniture legs sourced from a home center.
*Unless otherwise noted, costs in this article reflect an average of prices that our team found from hardware stores like Lowes and Home Depot, and on Amazon.com.
Materials and Tools Needed for Tiered Serving Trays
Before we walk you through the process of building your tiered serving tray, here’s a list of all the materials and tools you need.
Materials
- 1/2-inch thick oak board (12 inches wide)
- 1×2 oak board
- 5/16-inch dowel screws
- 5/16-inch nut and washer
- Oak shelf-edge trim (1/4 inch by 3/4 inch)
- Stain or finish of your choice
- Super glue
- Turned furniture legs (3)
- Wood glue
Tools
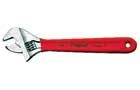
- Adjustable wrench
- Clamps
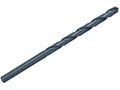
- Drill/driver with various bits (5/16-inch, 1/8-inch, 1/4-inch)
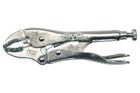
- Locking pliers
- Miter saw
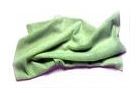
- Rags for finishing
- Sandpaper (medium and fine grit)
Preparing the Serving Tray Pieces
The first step to creating your tiered serving tray is to prepare the individual tray pieces. You’ll have to cut the oak boards to size and drill some holes for assembly.
Cutting the Trays
Grab your miter saw and cut the 1/2-inch thick oak board into three square trays. Here are the measurements:
- The top tray is 8 inches by 8 inches
- The middle tray is 10 inches by 10 inches
- The base tray is 11 1/2 inches by 11 1/2 inches
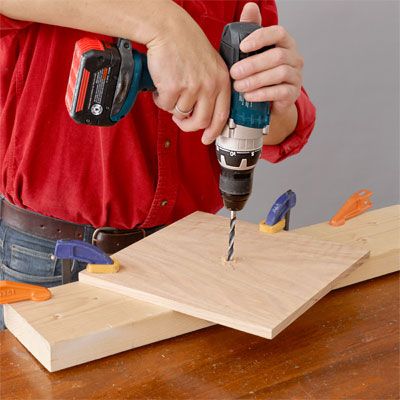
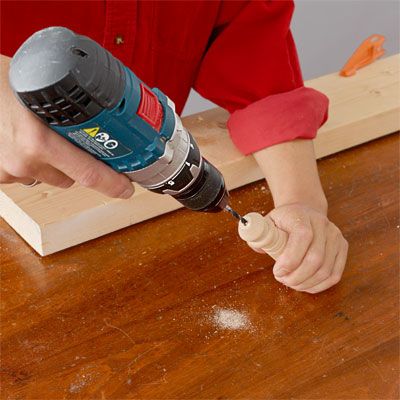
After you’ve created those trays, make a hole through each tray’s center with a drill/driver fitted with a 5/16-inch bit. You’ll put the support posts through the holes to connect the tiers. Remember to drill with care because you could otherwise splinter the wood.
Adding Trim to the Trays
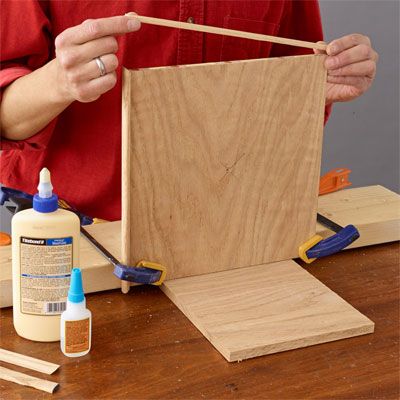
An oak shelf-edge trim will give your tray a finished look while also keeping each tier in place. Here’s how to add some trim:
- Measure and mark the oak shelf-edge trim to fit the perimeter of each tray.
- Use your miter saw to cut trim pieces at 45-degree angles. This will create clean corners.
- Apply alternating dabs of wood glue and super glue to the back of the edge trim.
- Attach the trim to the edges of all three trays.
- Check that the edges are flush with the bottoms.
Since you’re combining wood glue and super glue, you won’t need to use a more complex tool, such as a nail gun.
Creating the Base and Support Structure for a Tiered Serving Tray
The base and support structure will keep your tray stable and give it some more height. You need to prepare the feet and make some changes to your turned legs before you build a support post. Follow the steps below.
Preparing the Feet
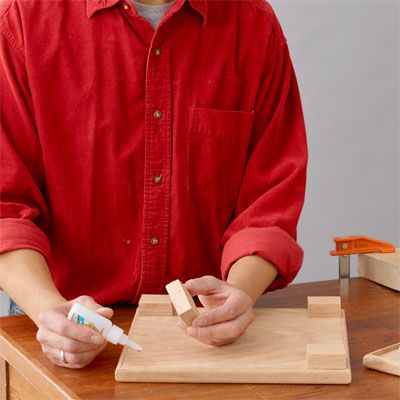
The feet will help to balance the tiered tray. Here’s how to prepare them:
- Cut four 1 1/2-inch squares from the oak 1×2 board.
- Measure and mark off where you’re going to glue the feet. Remember that placing them evenly will keep the tray from rocking or tipping over.
- Super-glue the squares to each corner to the bottom of the base on your markings.
Modifying the Turned Legs
Turned furniture legs make supportive posts, and you won’t need a lathe to create them. All you need to do is modify the furniture legs to fit the tray’s dimensions. Our instructions to do that are as follows:
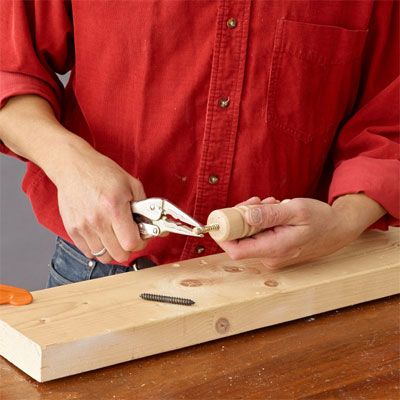
- Using locking pliers, remove the bolt from the legs to be used for the top and middle posts.
- Leave the bolt on the bottom post because you’ll use that to secure the base.
- Screw a 5/16-inch dowel screw into the spots on the top and middle posts.
Preparing the Support Posts
Keeping uniform depth for the holes will stop the tray from wobbling. Check that you have tight connections once you’ve drilled at both ends of each post.
- Bore a 1/8-inch pilot hole into the top of each post using a drill/driver.
- Follow up with a 1/4-inch drill bit, creating a 3/4-inch deep hole. These holes will accommodate dowel screws from the post above.
Assembling the Tiered Serving Tray
Your tray is almost finished. You might find that assembly is a little meticulous, but the end result is an effective and beautiful tray.
Connecting the Tiers
Make sure all the tiers line up before you assemble it. This helps to simplify the process.
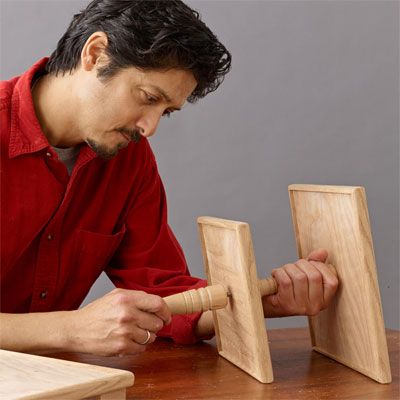
- For the top tier, thread the top post’s dowel screw through the 8-inch tray’s center hole.
- Attach the middle post onto the top post’s dowel screw, securing the top tray between them.
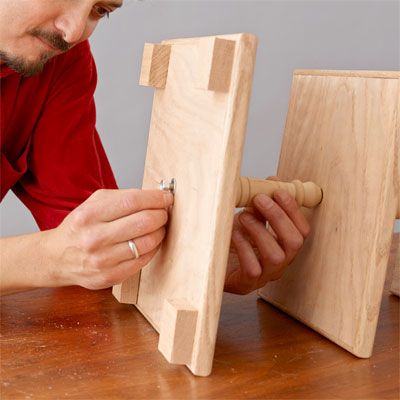
- Repeat for the middle tier by threading the bottom post’s dowel screw through the 10-inch tray and into the middle post.
Attaching the Base
Time to attach the base. Once you’ve done that, your assembly phase is complete.
- Position the 11 1/2-inch tray on the bolt extending from the lowest post’s bottom.
- Secure the base tray by fastening a 5/16-inch nut and washer to the underside bolt.
Finishing Your Tiered Serving Tray
With all the trays, posts, feet, nuts, and bolts in place, you can personalize it. Depending on which stain you’ve picked out, you can give your tray a modern design or rustic look. Opt for the finish that suits your style.

We’ve included the instructions to give your tray a more rustic feel below:
- Soak medium steel wool in white vinegar for a week. This step provides an aged, rustic look as it interacts with the oak’s tannins.
- Test on a scrap piece of oak to gauge the tone. Adjust by diluting if necessary for desired shade.
- Apply the stain with a clean rag, following the wood grain.
- Make sure you allow it to dry, then add a coat of white wax for extra protection and a subtle sheen.
No matter which one you choose, most of the steps to stain are the same. Remember to test it on a scrap piece of oak. If you’re happy with the color, apply it with a rag, and add some wax after it’s dry.
Our Conclusion
If you have some do-it-yourself (DIY) woodworking experience, you can create a beautiful tiered tray. The steps we’ve included in this article help make the process a little easier because you’re saving time and energy by using turned furniture legs. Once you’ve completed the work and assembled the tray, pick out a stain that reflects your style.
Tools
 Miter saw
- Clamps
- Drill/driver
- 5/16-inch drill bit
- 1/8-inch drill bit
- Locking pliers
- Adjustable wrench
- Rags