We may be compensated if you purchase through links on our website. Our team is committed to delivering honest, objective, and independent reviews on home products and services.
Project details
Skill
Cost
Estimated Time
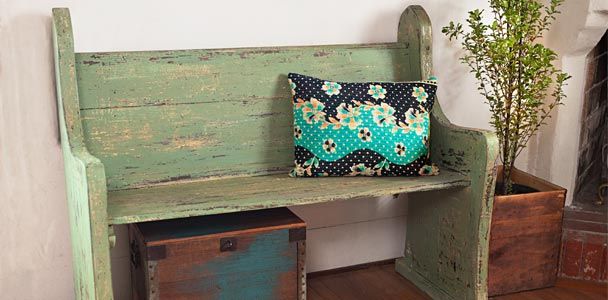
Creating a chippy, layered-finish patina on furniture can add character and charm to your home decor. Having multiple colors and some bare wood showing suggests an item that has passed through many hands. By allowing this, you can transform ordinary furniture into unique, vintage-inspired statement pieces. Follow our step-by-step guide on how to create a chippy, layered patina on furniture.
*Unless otherwise noted, costs in this article reflect an average of prices that our team found from hardware stores like Lowes and Home Depot, and on Amazon.com.
What Is a Chippy Layered Finish?
A chippy layered finish mimics the natural wear and tear that occurs on painted furniture over time. This technique involves applying multiple layers of paint and then strategically distressing the surface to reveal glimpses of the underlying colors and wood. The result is a textured, multi-toned finish on your furniture. This three-color look is particularly well-suited for worn wood pieces that may already have a less-than-perfect finish or even cracks, such as old pews, dressers, or side tables.
Tools and Materials Needed
 Paintbrush
- Rags
- Chip brush
- Paint scraper
- Wax brush
Gather all the necessary tools and materials before you begin your chippy layered finish project.
- Paintbrushes of various sizes
- Chip brush for textured application
- Wax brush for finishing
- Rags for wiping and blending
- Milk paint in three colors (e.g., white, yellow, and green)
- Finishing wax or hemp oil for sealing
- Sandpaper (various grits)
- Paint scraper
- Protective gear (gloves, dust mask, eye protection)
- Drop cloth or newspaper to protect your work area
Step 1: Prepare Your Furniture Piece
Take time to clean and prepare your furniture for better paint adhesion and a more professional-looking result.
Start by thoroughly cleaning your furniture piece to remove any dirt, grime, or oils that may interfere with paint adhesion. Once clean, sand the entire surface to remove any existing finish and create a smooth base for your new paint layers. Use a progressively finer grit sandpaper to achieve a smooth surface.
While the chippy finish is forgiving of minor imperfections, major damage should be addressed before painting. Fill any deep scratches or holes with wood filler, and allow it to dry completely before sanding smooth.
Step 2: Apply the Base Layer
The base layer sets the foundation for your chippy layered finish. It’s the color that will peek through in places once you’ve completed the distressing process.
Choose Your Base Color
Select a color that complements your overall design scheme. White is a classic choice for a base layer, as it provides a bright contrast to darker top layers. However, don’t be afraid to experiment with other light colors or even bold hues for a more dramatic effect.
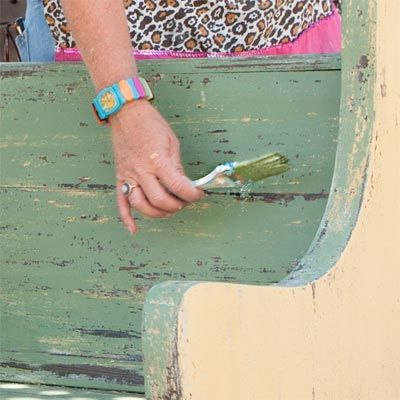
Dry-Brushing Technique
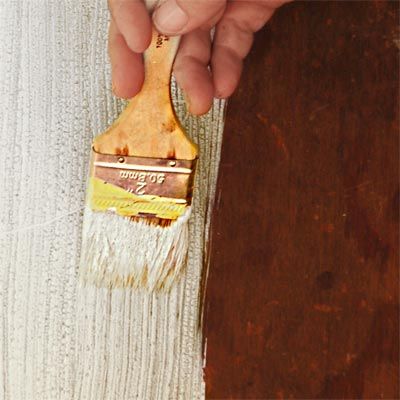
Apply your base color using the dry-brush technique. This method involves using a minimal amount of paint on your brush to create a textured, uneven coverage. To dry-brush, dip your paintbrush into the paint, then wipe most of it off on a rag before applying it to the furniture in light, feathery strokes. Allow this layer to dry completely before moving on to the next step.
Step 3: Create a Layered Effect
Building up layers of color is what gives the chippy finish its depth and character. Each layer contributes to the overall patina of the piece.
Add the Second Color
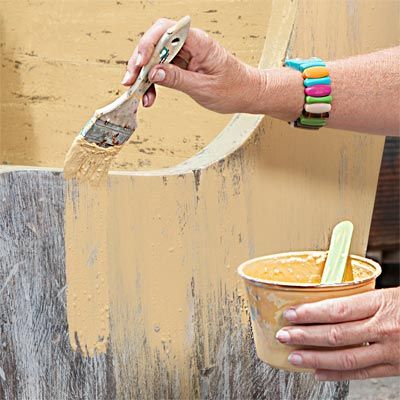
Once your base layer is dry, lightly sand the surface to create a smooth foundation for the next color. Apply your second color using a chip brush, which will help create an uneven, textured appearance. Allow this layer to dry completely before sanding lightly to reveal hints of the base color underneath.
Apply the Final Paint Layer
For the top layer, choose a color that contrasts well with your base and second colors. Apply this final coat using a rag or brush, depending on the level of coverage and texture you desire. The goal is to create an imperfect finish that will chip and distress naturally over time.
Use Vaseline for Paint Resistance
For a more controlled chipping effect, apply a thin layer of Vaseline to select areas before painting your top coat. The paint won’t adhere to these spots, making it easy to chip away later. This technique allows you to create intentional patterns or highlight specific areas of your furniture.
Step 4: Distressing Techniques for a Chippy Look
Distressing is where you really bring out the character in your piece. This step allows you to control where and how much of each layer is revealed.
Sanding and Scraping
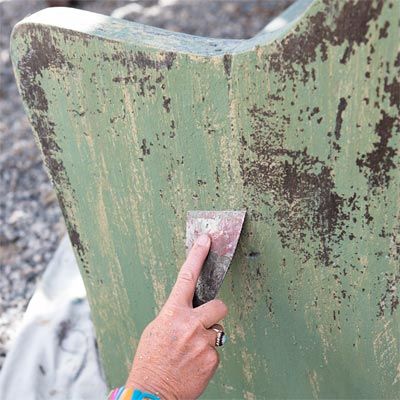
Once your final paint layer is completely dry, use sandpaper and a paint scraper to selectively remove paint in areas that would naturally wear over time. Focus on edges, corners, and high-use areas. Be careful not to overdo it—the key is to create a natural-looking wear pattern.
Step 5: Finishing Touches

Properly sealing your chippy layered finish will protect your hard work.
Waxing for Indoor Pieces
For indoor furniture, apply a coat of finishing wax using a wax brush. Work in small sections, applying the wax in a circular motion and wiping away any excess with a clean rag. This will give your piece a subtle sheen and protect the paint layers from wear.
Sealing for Outdoor Use
If you’re using the furniture outdoors, opt for a more durable sealant like hemp oil. Apply a thin coat, allowing the wood to absorb only what it needs. Let the piece cure for 30 days before placing it outside to ensure maximum protection against the elements.
Troubleshooting Common Issues
Even with careful application, you may encounter some challenges when creating a chippy layered finish.
If you find that your paint is chipping unevenly or in undesired areas, you can control the process by using a damp cloth to reactivate the milk paint. Gently rub the areas where you want more chipping to occur, then use a scraper to remove the loosened paint.
If you’ve distressed an area too much, you can touch up these spots with a small brush and some of your top coat color. Blend the edges carefully to maintain the overall distressed look while covering any overly bare patches.
Creative Color Combinations for Patina Effects
Experimenting with different color combinations can lead to stunning patina effects. Consider these pairings for inspiration:
- Rustic farmhouse: White base, sage green middle, and dark gray top
- Coastal charm: Pale blue base, sand middle, and white top
- Vintage elegance: Cream base, dusty rose middle, and antique gold top
- Industrial chic: Charcoal base, rust middle, and metallic silver top
Maintaining Your Chippy Layered Finish
To keep your chippy layered finish looking its best, dust regularly with a soft, dry cloth. Avoid using harsh cleaners or excessive moisture, which can damage the finish. For indoor pieces, reapply wax every six to 12 months to maintain protection. Outdoor pieces may require more frequent touch-ups with hemp oil to withstand the elements.
Our Conclusion
The key to a successful chippy layered finish patina on furniture look is embracing imperfection. This technique makes each piece unique, reflecting your personal style and the natural aging process you’ve simulated. By following the steps outlined in this guide, you can achieve a beautifully aged look that adds character and charm to your home decor.