A salvaged door can add character and charm to your home — plus, it’s an eco-friendly do-it-yourself (DIY) project. To prehang a salvaged door, you must assemble the door, jamb, and casing to achieve a perfect fit in your doorway. Keep reading to find out how you can tackle this project. You can also watch This Old House expert Tom Silva demonstrate the process in the video above.
Preparing for Door Installation
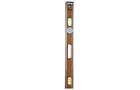
Accurate measurements are the key to a successful door installation. Check the floor level using a 4-foot level to identify any deviations. Measure the distance from the floor to the underside of the level at multiple points. Then, measure the height of the jamb header of your existing doors to ensure the new door aligns with them.
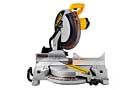
Once you have your measurements, it’s time to prepare the jambs. Use a miter saw to cut the jambs to the appropriate length—adjust for any slope in the floor by cutting one jamb longer than the other. Make sure the jamb header will be level when installed.
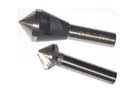
With the jambs cut to size, you can now assemble them. Use a countersinking drill bit to predrill holes in the jamb pieces. Connect the jambs using 3-inch screws, and confirm that they’re tightly secured. Double-check that the assembly is square to avoid any misalignment during installation.
Attaching the Door Casing
Before attaching the casing, mark a 1/4-inch reveal around the edge of the jamb. This small gap creates an attractive shadow line, adding depth to the installation. With the reveal marked, you can attach the casing by following these steps:
- Position the side casing on the marked line.
- Secure it with 8-penny finish nails.
- Allow the head casing to overhang the side casing by 1/4 inch on each side.
- Attach the head casing with finish nails.
Installing the Door Assembly
Proper installation of the door assembly requires meticulous preparation and fitting. Follow these steps to prepare the opening:
- Remove any old trim or hardware that may obstruct the new installation.
- Clean the opening thoroughly.
- Check for any damage to the framing and repair if necessary.
It’s time to fit the assembled door unit into the opening. Add a temporary filler strip across the bottom of the jamb to maintain squareness. Test fit the jamb assembly in the opening, making any necessary adjustments for a snug fit. Make sure there are no gaps, and the door operates smoothly.
To achieve a level installation, you should shim your door frame. Follow these steps:
- Add wood shims to one side of the door framing, adjusting for uneven surfaces.
- Use a level to ensure the jamb is plumb—adjust if not.
- Clamp the jamb flush with the drywall or plaster to align it perfectly.
- Screw the jamb through the shims into the framing.
- Repeat the process on the other side of the jamb.
Hanging the Door
Remove the temporary filler strip that was maintaining the jamb’s shape. Carefully place the door into the opening, aligning the hinges for smooth operation. Add shims behind the lock set for additional support and to prevent sagging.
Finishing Touches for Your Door
For a clean look, trim any excess shim material. Use a utility knife or saw to cut the shims flush with the jamb. Be careful not to damage the jamb or surrounding wall, maintaining a neat appearance.
With the shims trimmed, add the casing to the other side of the door frame. Follow the same process used for the first side. Then, install or reattach the door hardware, including the original lockset and strike plate, if you have them. You may also want to add weatherstripping or door stops.
Salvaging and Refinishing Old Doors
One of the joys of working with salvaged materials is the opportunity to preserve and enhance the character of your home. Salvaged doors often come with unique details and craftsmanship that are difficult to find in modern doors. However, they may also require some tender loving care before they’re ready to be rehung.
Cleaning and Refinishing
Salvaged doors may have layers of old paint or varnish that need to be removed. You can use a paint stripper or sander to get down to the bare wood. Once cleaned, you can stain or paint the door to match your home’s decor. Applying a protective finish will help prolong the life of the wood—especially if the door will be exposed to the elements.
Repairing Damages
Older doors may have dings, cracks, or other damages. Wood filler can be used to repair minor defects, while more extensive damage may require a wood patch or even professional restoration.
Reusing Hardware
Original hardware, such as hinges and doorknobs, can add to the authenticity of a salvaged door installation. Clean and restore these pieces or find similar vintage hardware to complement the door.
Custom Fitting
Salvaged doors may not always fit standard door openings. Be prepared to trim the door or modify the door frame to achieve a proper fit. Accurate measurements and careful planning will help you overcome these challenges.
Our Conclusion
Prehanging a salvaged door is a project that combines craftsmanship with sustainability. By following these steps and paying attention to detail, you can successfully install a piece of history in your home.
 level – 4-foot
- Tape measure
- Miter saw
- Cordless drill/driver
- Pneumatic nailer
- Countersink drill bit
- Clamps
- Pencil