Project details
Skill
Cost
Estimated Time
We may be compensated if you purchase through links on our website. Our team is committed to delivering honest, objective, and independent reviews on home products and services.
 Hammer
- Drill/driver
- Circular saw
- Hacksaw

First impressions matter, especially when it comes to your home. Your front entryway welcomes friends, family, and visitors while setting the tone for the entire visit. In this guide, we’ll explore creative DIY ways to transform an ordinary entryway into something both beautiful and functional that makes a lasting impression.
Planning Your New Entryway
Before diving into your renovation project, carefully evaluate your existing entryway and identify areas that need improvement or upgrades. Make a list of these issues in your project plan, such as poor lighting and wear and tear on the door and trim so that you can decide what to address.
Think about how you want your entryway to go with the overall style of your home. Do you prefer a classic, traditional look or a more modern aesthetic? Choose colors, materials, and design elements that align with your vision.
Important Elements of an Inviting Doorway
Creating a welcoming entryway involves more than just a fresh coat of paint. Here are some important factors to consider when redesigning your entryway.
Lighting Your Space
Energy-efficient lighting, such as LED bulbs, can reduce energy consumption and lower your utility bills. Solar-powered lights are another eco-friendly option that can light up your entryway without adding to your electric bill.
Secure Your Home
Consider upgrading the security features of your front door. High-security locks, smart doorbells with cameras, and motion sensor lights can provide peace of mind. These features not only make your home safer but can also be attractive selling points for future homebuyers.
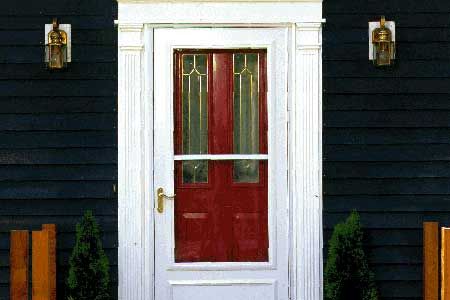
Choose the Right Door Style
Your door style should complement your home’s architecture and reflect your personal taste. Consider factors such as material (wood, fiberglass, or steel), color, and decorative elements such as glass inserts or hardware when picking your door. Materials such as reclaimed wood, eco-friendly paint, and recycled metal hardware look great and reduce environmental impact.
Steps for Installing a New Exterior Door and Trim
Step 1: Remove the Old Door and Threshold
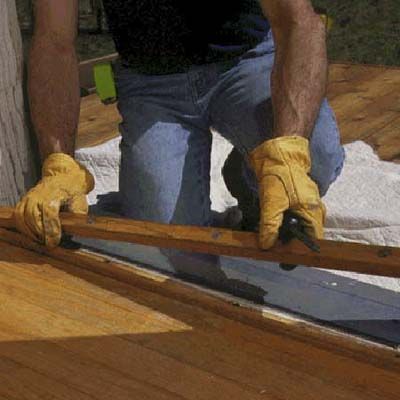
Start by removing the old door from the opening; be sure to have someone hold the unit as you back out the last few screws. Then unscrew the old strike plate from the side jamb. Prepare the sill by removing the adjustable wood strip from the original threshold. If there’s no adjustable part, you’ll have to chisel the surface flush or cut out the whole sill.
Step 2: Prep for New Door Install
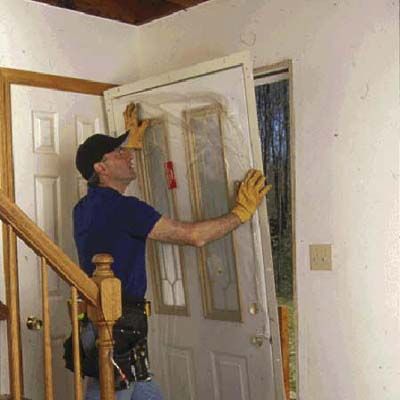
Sweep the sill clean and apply two thick beads of caulk where the new threshold will sit. Set the bottom of the new prehung replacement door onto the sill and tilt it into the opening. Check that the frame is square and the door is plumb.
Step 3: Secure the New Door
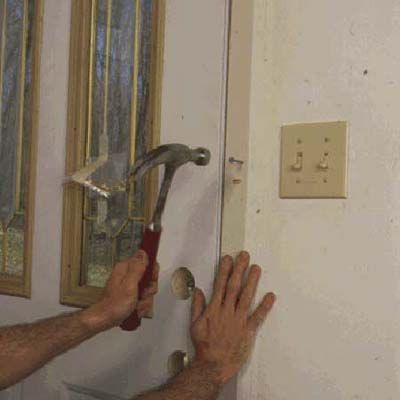
Temporarily secure the door by nailing through the predrilled holes in the steel frame and into the wall framing. Use roofing nails, which have large heads.
Step 4: Install Door and Lockset
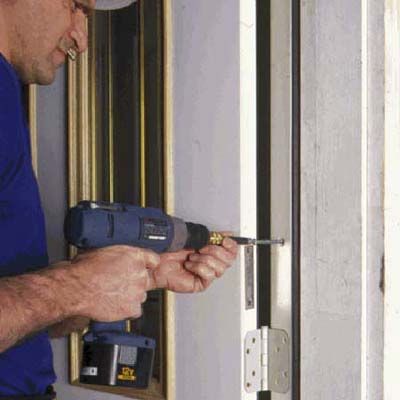
Swing open the door and drive long screws through the frame and into the original side jambs and head jamb. Don’t overtighten the screws or you’ll distort the steel doorframe. To finish, install a lockset and nail on the magnetic weather stripping that comes with the door.
Step 5: Prep for Exterior Trim Install
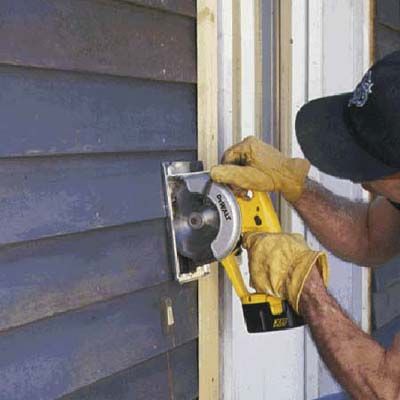
Tack a straightedge board to the house as a saw guide. Run a circular saw along the guide, cutting only through the siding. Pry off the severed siding pieces and strip away the house wrap or building felt to expose the sheathing.
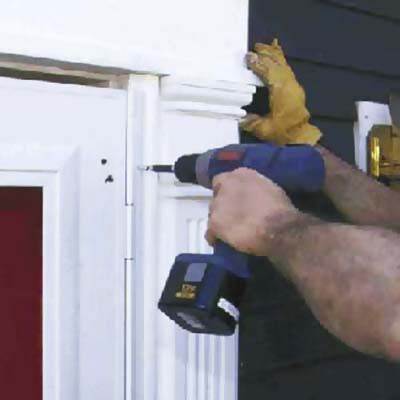
Step 6: Install the Crosshead Pediment
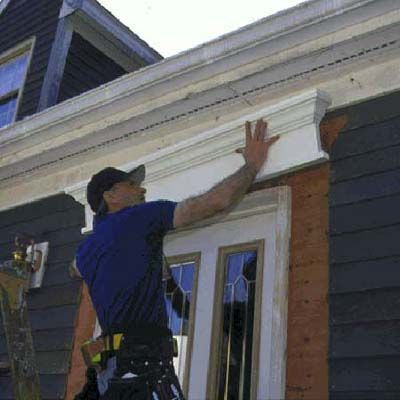
Apply a bead of urethane adhesive to the back of the pediment, press it into position above the door and fasten it with eight galvanized finishing nails.
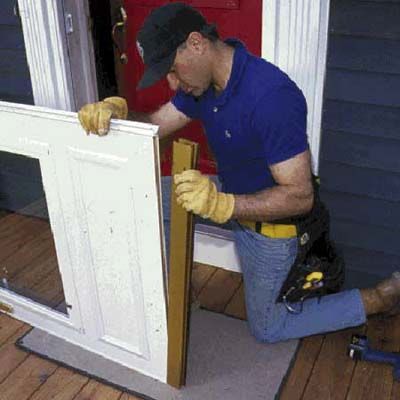
Step 7: Install Fluted Columns
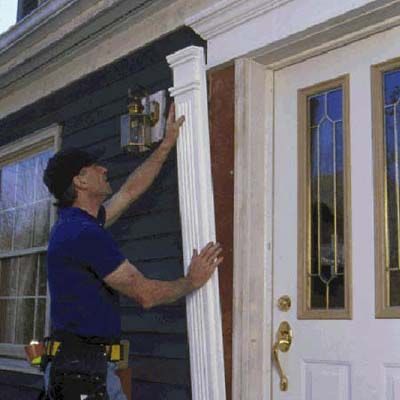
Cut the fluted columns to size with a circular saw or handsaw, and install them with urethane adhesive and galvanized finishing nails (as with the pediment).
Step 8: Install Plinth Blocks
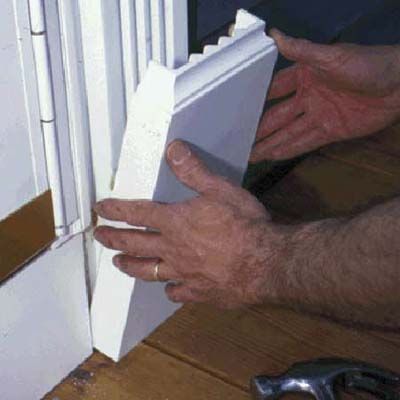
Plinth blocks at the base of your columns provide a finished look and protect against moisture. Apply adhesive to the back of the plinth blocks and nail one to the bottom of each column. Set all the nail heads and fill the holes with exterior-grade putty.
Step 9: Prep Storm Door for Install
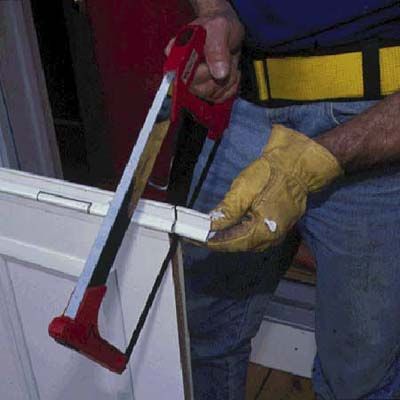
Screw the combination hinge/mounting flange to the edge of the door. Then cut the flange with a hacksaw to match the height of the door opening.
Step 10: Install Storm Door Expander Sweep
Insert the flexible rubber fin into the slot in the expander sweep and slip the expander onto the bottom of the door. Attach the expander with screws driven into the inside surface of the door.
Step 11: Install Storm Door
Set the door into the opening and drive screws through the mounting flange and into the existing wood brick mold. Install the latch-side and head-mounting flanges the same way. Finish by installing the two door closers and the lockset.
Create a Welcoming Atmosphere With Your Entryway
There are several creative and nonstructural ways to add your personal style to your doorway.
Select the Perfect Welcome Mat
Choose a durable, weather-resistant welcome mat that complements your door and trim. Pick a size proportionate to your entryway and a design that reflects your personality or home style.
Plants and Greenery
Add life to your entryway with potted plants or hanging baskets arranged at different heights for a cohesive look. Choose plants that thrive in your climate and match your home’s exterior.
Art Out Front
Seasonal wreaths, house numbers with unique designs, or a small piece of outdoor art are all easy ways to show off your style and make guests feel at home.
DIY vs. Professional Installation of Entryway Doors
Below, we explore the factors that can impact whether or not you decide to tackle this project yourself or hire a professional.
Cost Comparison
DIY projects can save money on labor costs, but professional installation ensures quality work and may come with warranties. Compare the cost of materials and tools for a DIY project against quotes from reputable contractors. Keep in mind that while DIY may appear more affordable initially, mistakes can be expensive.
Time Investment
Installing a new door and trim will take several hours of your time. If you have a busy schedule or want to minimize disruption, you may want to hire someone. If you can dedicate time to the project, then this is a relatively manageable project for an amateur DIYer.
Physical Strength
Doors can be heavy and unwieldy, making them difficult to install if you don’t have a helping hand or you’re out of shape. If you’re not sure about your ability to complete certain tasks, it may be best to hire professionals.
Maintain Your Newly Spruced-Up Entryway
Regular maintenance keeps your entryway looking nice and helps prevent damage over time.
Day-to-Day Care Tips
- Sweep the porch and steps regularly to prevent dirt buildup.
- Clean your front door and trim with the right cleaners for the material.
- Wash windows and glass inserts to keep them sparkling.
Long-Term Upkeep
- Inspect your door and trim annually for signs of wear or damage.
- Touch up paint or stain as needed to protect surfaces.
- Check weather stripping and replace it if worn to maintain energy efficiency.
- Lubricate door hinges and locks to keep them from sticking.