We may be compensated if you purchase through links on our website. Our team is committed to delivering honest, objective, and independent reviews on home products and services.
Replacing deck stair balusters is a great way to refresh your outdoor space’s look and improve safety. This project requires moderate carpentry skills but can be completed in a day or two with the right tools and materials. In the video above, This Old House general contractor Tom Silva demonstrates how to accurately cut and assemble railing supports.
Preparing for the Deck Stair Balusters Project
Gather the necessary tools and materials before you begin to ensure a smooth and efficient project. Silva made his deck balusters out of cedar. Many homeowners like cedar’s appearance and durability. It’s naturally resistant to rot and insects, making it a good choice for outdoor projects.
Tools Needed
- Brad nailer
- Drill/driver
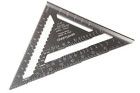
- Layout square
- Miter saw
- One-handed bar clamps
- Paintbrush
- Sliding T-bevel
- Sliding T-bevel
- Two-foot level
- Utility knife
Materials Required
- 1 1/2-inch brads
- Acrylic primer
- Cedar balusters (2×2, 36 inches long)
- Latex paint
- Pressure-treated 2×4 for nailing strips
- Stainless steel screws (1 1/2-inch and 2-inch)
- Wood filler


Measuring and Planning for Balusters
Measure your deck stairs’ length and count how many balusters you must replace. Balusters are typically spaced 4 inches on center for safety reasons. Check local building codes to ensure your new balusters meet regulations. Local codes will dictate the spacing and height requirements for deck balusters so your staircase can be safe and up to code.
Removing Old Balusters
- Inspect the old balusters to determine how they’re attached to the rails.
- Use a pry bar or claw hammer to carefully remove any nails or screws securing the balusters.
- Gently wiggle the balusters to loosen them from the rails.
- Remove any remaining fasteners or adhesive from the rails.
- Clean the area where the old balusters were attached to prepare for the new installation.
- Examine the surrounding structure for any repairs or reinforcements needed before installing the new balusters.
Preparing the Nailing Strips
- Use a sliding T-bevel to determine the angle between the lower rail and the deck post.
- Transfer this angle to the miter saw by rotating the saw blade to match the T-bevel.
- Rip two 3/8-inch-thick x 1 1/2-inch-wide strips from a pressure-treated 2×4.
- Miter-cut the nailing strips to fit between the first two posts.
- Set one strip into place atop the lower rail.
Marking Baluster Positions
- Determine the on-center dimension for the balusters (5 inches in the video).
- Clamp a baluster to the bottom post, keeping it flush on the inside.
- Stretch a tape measure from the clamped baluster to the next post.
- Adjust the tape measure until the reading at the second post is easily divisible by your chosen spacing (e.g., 50 inches for 5-inch spacing).
- Mark the nailing strip every 5 inches using a level to ensure plumb lines. You’ll probably need a friend to help hold the tape measure.
- Remove the lower nailing strip and hold it against the upper nailing strip. Transfer your marks to the upper nailing strip.
Cutting and Preparing Balusters
- Miter-cut the bottom ends of all cedar balusters to match the angle of the nailing strips.
- Place both nailing strips on the lower rail and stand the balusters on top.
- Mark the underside of the upper rail onto the balusters.
- Miter-cut the balusters to length using the miter saw.
- Prime and paint all baluster surfaces and ends for weather protection. This helps prevent moisture from penetrating the wood, reducing the risk of rot and decay. Silva mentions that the top and bottom are the most important to stop water from wicking.
In the video, Silva paints the balusters with an acrylic primer and a latex top coat. Make sure the balusters are completely dry before you start painting, and allow the primer to dry completely before applying the top coat. We recommend two coats of paint for a durable finish.
Assembling and Installing the New Balusters
- Use a layout square and utility knife to score lines on the nailing strips, indicating baluster positions.
- Prime and paint all surfaces and ends of the nailing strips.
- Nail each baluster to the upper and lower nailing strips using a brad nailer and 1 1/2-inch brads.
- Secure each end of the balusters to the strips with two 2-inch stainless steel screws.
- Carefully slide the pre-assembled baluster system between the upper and lower rails to avoid scratching the painted surfaces.
- Fasten the system in place by driving 1 1/2-inch stainless steel screws through the nailing strips and into the rails.
Finishing Touches on Deck Stair Balusters
Get a polished look by properly finishing the balusters and surrounding structure:
- Fill any visible nail or screw holes with wood filler.
- Sand the filled areas smooth once dry.
- Touch up the paint on the balusters and nailing strips as needed.
- Apply a clear sealant to protect the wood from moisture and UV damage.
- Inspect the entire railing system to make sure all components are secure.
- Gently push on the new balusters to check that they’re firmly attached.
Baluster Longevity and Durability
Here are some tips for a long-lasting deck railing system:
- Add post caps to the tops of the posts to prevent water infiltration and prolong the life of the posts and balusters.
- Install gutters or overhangs above the deck to shield your balusters from excessive moisture.
- Make sure that all cuts and drilled holes are treated with primer and paint to seal the exposed wood.
- Use high-quality stainless steel screws and brads to prevent rust and corrosion, especially in humid or coastal areas.
Maintenance Tips for Deck Stair Balusters
Follow these best practices to keep your new deck stair balusters looking great and functioning safely:
- Check for any signs of rot or insect damage, especially in moisture-prone areas.
- Clean the balusters regularly with mild soap and water to prevent dirt buildup.
- Inspect the balusters annually for any wear, damage, or loose fasteners.
- Reapply paint or sealant every few years to protect the wood from weathering.
- Remove any debris or leaves that accumulate around the balusters’ bases, as trapped moisture can lead to decay.
- Tighten any loose screws or nails promptly to maintain structural integrity.
Incorporating Design Elements With Balusters
Replacing your deck stair balusters is an excellent opportunity to incorporate design elements that can enhance the overall look of your deck. Consider the following:
- Color contrast: Use a different color for the balusters and frame to make them stand out.
- Decorative caps: Add decorative caps to the balusters for an elegant touch.
- Patterned balusters: Create visual interest by alternating plain and patterned balusters.