Project details
Skill
Cost
Estimated Time
*Cost information in this article sourced from Angi.
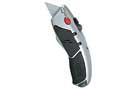
 Utility knife
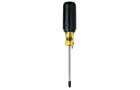
- Screwdriver
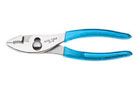
- Pliers
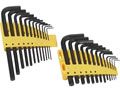
- hex keys
A faulty shower mixing valve can lead to frustrating temperature and pressure issues, turning your relaxing shower into an unpleasant experience. Fortunately, replacing a shower mixing valve is a manageable DIY repair.
This guide will walk you through the process of replacing your shower mixing valve. In the video above, This Old House plumbing and heating expert Richard Trethewey demonstrates how to replace this simple part.
Understanding Shower Mixing Valves
Mixing valves are crucial components of your shower system, responsible for regulating water temperature and pressure.
When functioning correctly, they blend hot and cold water to achieve your desired temperature. However, these valves can wear out or sustain damage over time, leading to various issues like low pressure, temperature irregularities, or leaks.
Regular inspection of these valves can help identify problems before they become severe.
Signs of a Faulty Mixing Valve
It can be easy to overlook problems with mixing valves, but spotting issues early can help you prevent more expensive issues. Some common signs your valve might be failing include:
- Difficulty adjusting the temperature
- Inconsistent water temperature
- Leaks around the shower handle
- Reduced water pressure
- Strange noises when adjusting the water
If you notice any of these problems, it may be time to replace your shower mixing valve.
Preparing for the Mixing Valve Replacement
Before diving into the replacement, you’ll need to determine if your county requires you to obtain a plumbing permit, gather the necessary tools and materials, and take proper safety precautions.
Plumbing Permit
Some counties in the U.S. require you to purchase a “faucet permit” before you can carry out your own valve repairs. Performing even a minor repair without a permit could result in legal penalties and create delays should you try to resell your home in the future.
Contact your city’s municipal office or local watershed management department to determine if you need to purchase a permit. Many municipalities today allow you to apply for your permit online.
If you are required to obtain a permit, expect the permit approval process to take anywhere from a few days to several weeks. Typically, minor plumbing permits cost between $10 and $25.
Tools and Materials Needed
To replace your shower mixing valve, you’ll need the following items:
- Hex keys
- New shower mixing valve
- Paper plate (for flushing debris)
- Pliers
- Plumber’s grease
- Replacement O-rings (if not included with the new valve)
- Screwdriver
- Utility knife
Safety Precautions
Before starting your repair, we recommend taking the following safety precautions:
- Cover the drain to prevent small parts from falling in
- Have towels or a bucket ready to catch any water
- Turn off the water supply to the shower
- Wear safety glasses to protect your eyes from debris
Step-By-Step Shower Mixing Value Replacement Process
Replacing a shower mixing valve involves several steps. Follow this guide carefully to ensure a successful installation.
Removing the Old Valve
Removing the old valve is the first step. You’ll need to be careful to avoid damaging your shower. To safely remove the old valve, do the following:
- Use a utility knife to remove the protective cap from the shower valve handle.
- Unscrew and remove the handle.
- Unscrew and remove the plate from the shower wall.
- Turn the screws on the shut-off valves to the right to stop the flow of water.
- Remove the cap from the valve by unscrewing the brass screws from each side.
- Use pliers to pull the pressure-balancing unit from the valve.
Flushing the Pipes
Before installing the new valve, you’ll need to flush out any debris from the pipes. This step removes any blockages that may affect the performance of your new valve:
- Hold a paper plate under the valve opening.
- Briefly open each shut-off valve for a few seconds to allow water to flush through.
Installing the New Valve
Now, it’s time to install the new valve. Follow Tretheway’s process by taking the following steps:
- Press the rubber O-rings into the rear of the new pressure-balancing unit.
- Insert the pressure-balancing unit into the valve, aligning its notch with the key inside the valve.
- Use plumber’s grease to lubricate the large O-ring on the new shower valve.
- Insert the new valve into the wall and secure it with the stainless-steel mounting plate and brass screws.
- Open both water shut-off valves with a screwdriver.
Attaching the Trim and Handle
Attaching the trim and handle is the final part of the installation process, requiring the following steps:
- Screw the sub-base to the stainless-steel mounting plate.
- Attach the chrome cover plate to the valve by tightening its mounting nut with the chrome sleeve.
- Fasten the handle base to the valve, tightening it with a hex-key wrench.
- Press the handle onto the stem, aligning it to the “off” position.
- Secure the handle with a single screw and snap the small index cover over it.
Testing the New Mixing Valve
After installation, it’s crucial to test the new valve to ensure it works correctly and is free of leaks.
Start by turning on the water supply and adjusting the position from cold to hot. While doing so, keep a close eye out for leaks. You can place some dry paper towels along the base of the valve, which will help you spot small amounts of dripping water more easily.
Troubleshooting Common Mixing Valve Issues
Even with careful installation, you might encounter a few issues with your new mixing valve. There are several common issues that you can often solve on your own, such as a leaky faucet handle, fluctuating water temperature, and low water pressure.
If you are experiencing leaks around the handle, tighten the handle screw or replace the O-ring.
If you notice inconsistent water temperature, check the pressure-balancing unit for proper installation.
To address low water pressure, ensure the shut-off valves are open fully, and the pipes are clear of debris.
If any of the above problems persist, or you’re experiencing an unlisted mixing valve issue, we recommend calling on a professional plumber.
Maintaining Your New Shower Mixing Valve
To extend the life of your new shower mixing valve and maintain its performance, follow these maintenance tips:
- Avoid using harsh chemicals that could damage the valve’s finish or internal components.
- Check for leaks periodically and address them promptly to prevent water damage and mildewing.
- Consider having a professional plumber inspect your shower plumbing system every few years.
- Clean the valve and surrounding area regularly to prevent buildup of soap scum and mineral deposits.
Routine maintenance ensures that your shower mixing valve remains in top condition, providing consistent water temperature and pressure.