Transforming a simple wall-mount sink into a stylish cedar vanity can help level up an otherwise bland bathroom. Cedar is great for bathroom furniture because it naturally resists decay and moisture resistance, making it perfect for withstanding a humid environment. In this guide, we’ll walk you through the process of creating a cedar vanity that not only looks great but also provides storage space.
Tools and Materials
Here’s what you’ll need for this project.
 Tape measure
- Pencil
- Miter saw
- brad nail gun – 18-gauge
- Drill/driver
- Caulk gun
- Wrench


Step 1: Cut the Cedar Pieces of the Vanity
The first step in creating your cedar vanity is to cut the necessary parts. This process requires precision. Begin by measuring the underside of the sink carefully. Using these measurements, cut three lengths of 2-by-2 cedar, ensuring that the ends are mitered at the joining points. These pieces will form a U-shaped frame that supports the sink along its sides and front edge. The mitered ends allow for a clean, professional-looking joint that adds to the vanity’s overall look.
Label each piece to avoid confusion during assembly. Ensure that your cuts are smooth and accurate to get a seamless fit later on.
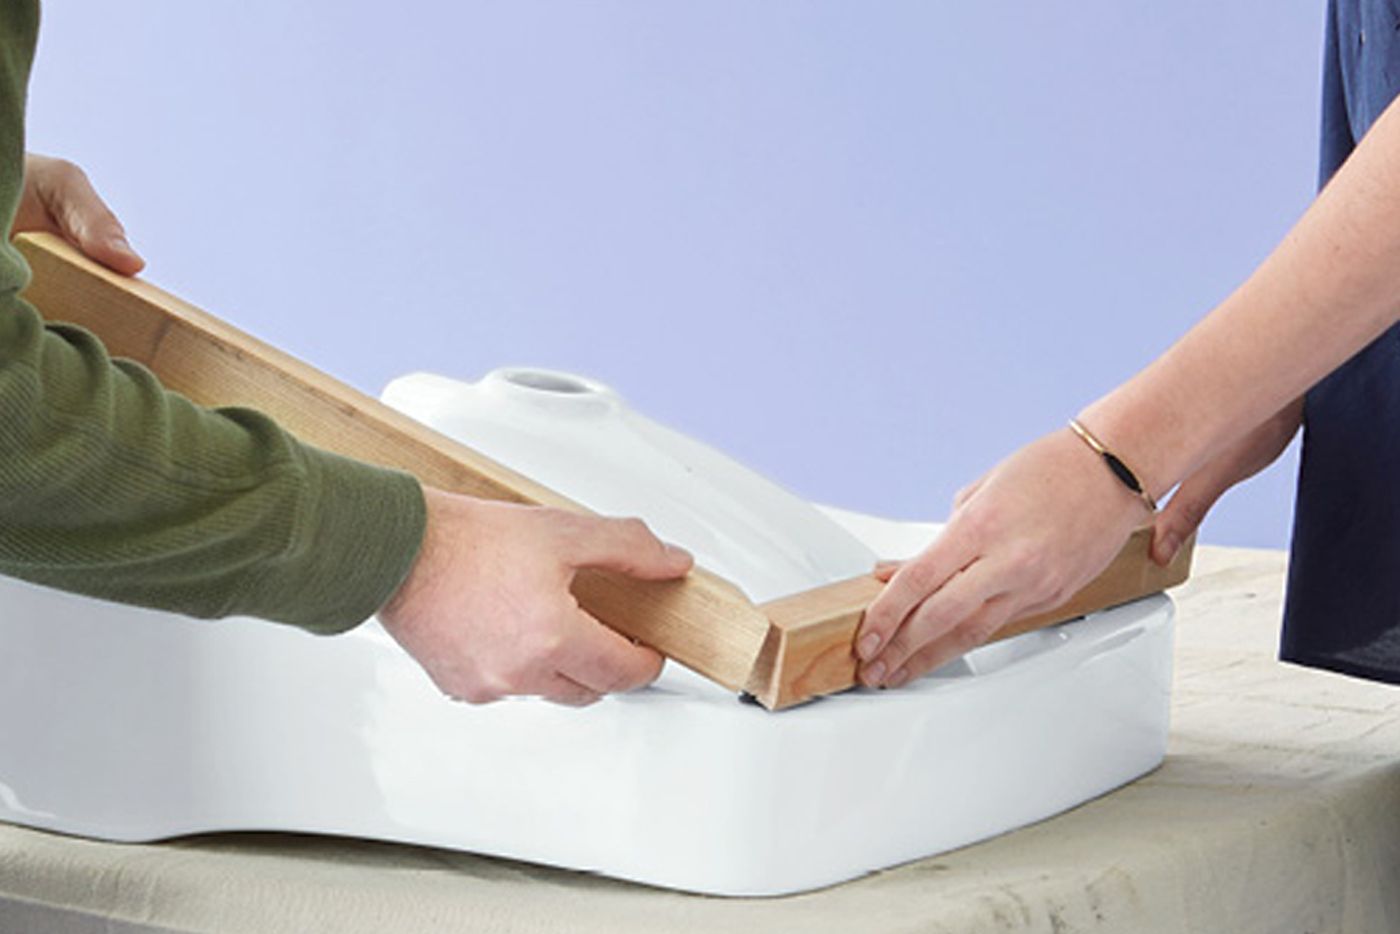
Step 2: Make the Cedar Sink Frame

After cutting the parts, it’s time to assemble the frame that will support the sink. Start by dry-fitting the parts to make sure everything aligns correctly. Once satisfied with the fit, apply wood glue to the end grain of the miters. The glue will create a strong bond between the pieces, ensuring the frame’s stability. To hold the joints in place while the glue dries, use 18-gauge finish nails. This combination of glue and nails creates a robust frame that can support the sink’s weight and withstand daily use.
Then, double-check each joined section for any gaps. Ensure the frame sits evenly on a flat surface to guarantee the final product will be level and secure.
Step 3: Build the Cedar Vanity Shelf

Adding a shelf to your cedar vanity adds a bit more storage space to your bathroom. To create the shelf, start by cutting four more lengths of 2-by-2 cedar to form a rectangular frame. Make this frame slightly smaller than the sink to ensure it fits neatly underneath. Next, use a table saw or router to cut rabbets along the inside edges of the frame pieces. These rabbets should be 1 inch deep and 1 inch wide, providing a ledge to support the shelf’s decking.
Once the frame is prepared, assemble it using wood glue and finish nails for added strength. For the shelf’s surface, cut 5/4-inch lengths of cedar decking to fit inside the frame. Attach these decking pieces to the frame using nails, creating a sturdy and attractive shelf. Remember, the shelf needs to sit level and be firmly secured to hold various bathroom items.
Step 4: Notch the Cedar Vanity Legs

To create the legs, measure the height of the sink’s front edge. Subtract this measurement from 36 inches (standard vanity height) to determine your leg length. Using a miter saw, cut two 4-by-4 cedar posts for the front legs and two 2-by-2 cedar pieces for the back legs.
Next, create notches in the legs to accommodate both the sink frame and the shelf. Use the miter saw to cut these notches carefully. At one end of all four legs, cut notches that will accept the sink’s frame. About 6 inches from the other end, cut additional notches to hold the shelf. These notches ensure that both the sink and shelf are securely supported by the legs.
Lastly, smooth out the notched areas to remove any sharp edges or splinters, which will help the pieces fit snugly. This step is essential for the frame’s stability.
For added functionality, drill a pair of matching holes in the front legs. Attach a wooden dowel to use as a towel bar for extra practicality. The dowels should fit securely but allow easy removal for maintenance or replacement.
Step 5: Join the Cedar Legs to the Vanity Frame
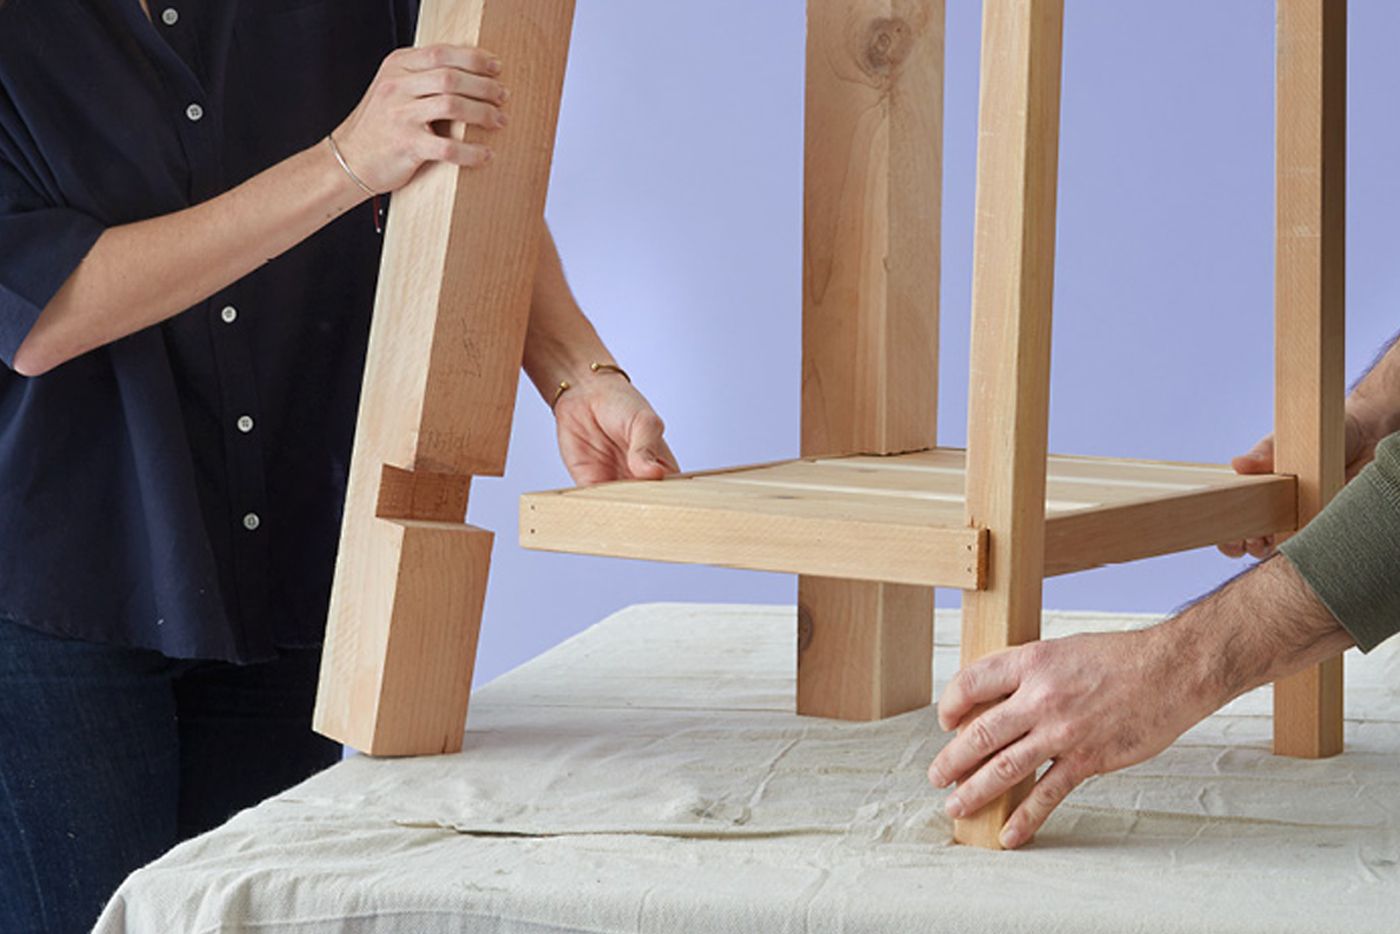
Begin by applying wood glue to the shelf notches you cut in the legs. Carefully press the shelf into these notches, ensuring it’s level and properly aligned. To reinforce the connection and provide additional strength, use finish nails to fasten the shelf to the legs. This step creates a solid base for your vanity, ensuring it can support the weight of the sink and any items stored on the shelf.
Double-check each joint for alignment and stability as you go. This way, you’ll avoid having to make corrections later in the process.
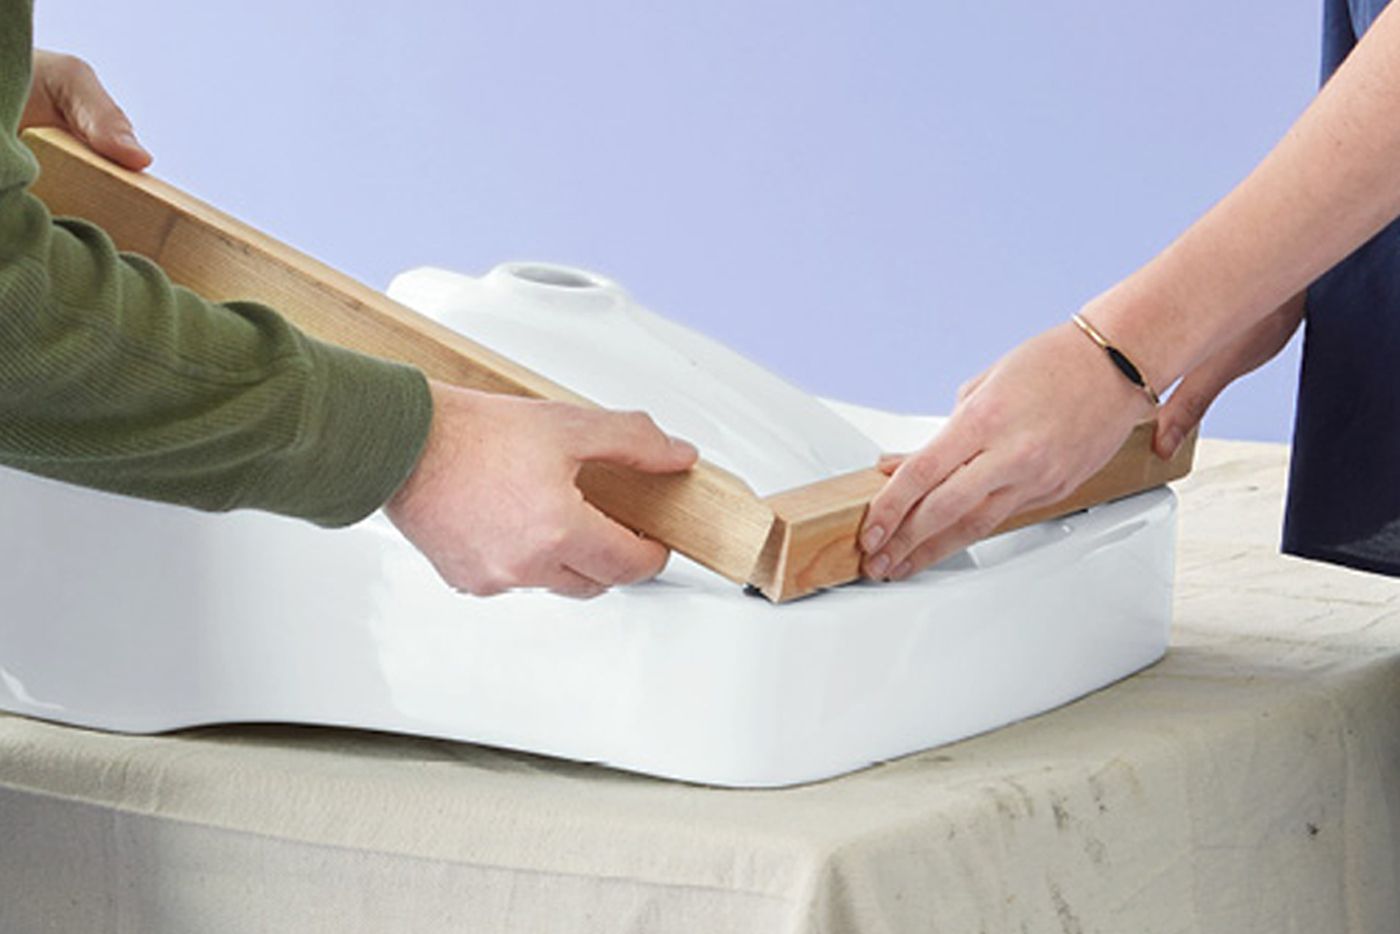
Step 6: Add the Top Cedar Sink Frame

With the base of your vanity assembled, it’s time to add the top frame that will support the sink. Apply wood glue to the upper notches you cut in the legs. Carefully lower the sink frame you previously constructed onto these notches, ensuring it’s level and properly aligned with the legs.
At this point, you can also add the towel rod to complete the vanity’s functionality. Fit the wooden dowel into the predrilled holes in the front legs. There’s no need to use glue for this step, as the snug fit should keep the dowel in place while allowing for easy removal if needed in the future.
Step 7: Buff Tung Oil on the Cedar
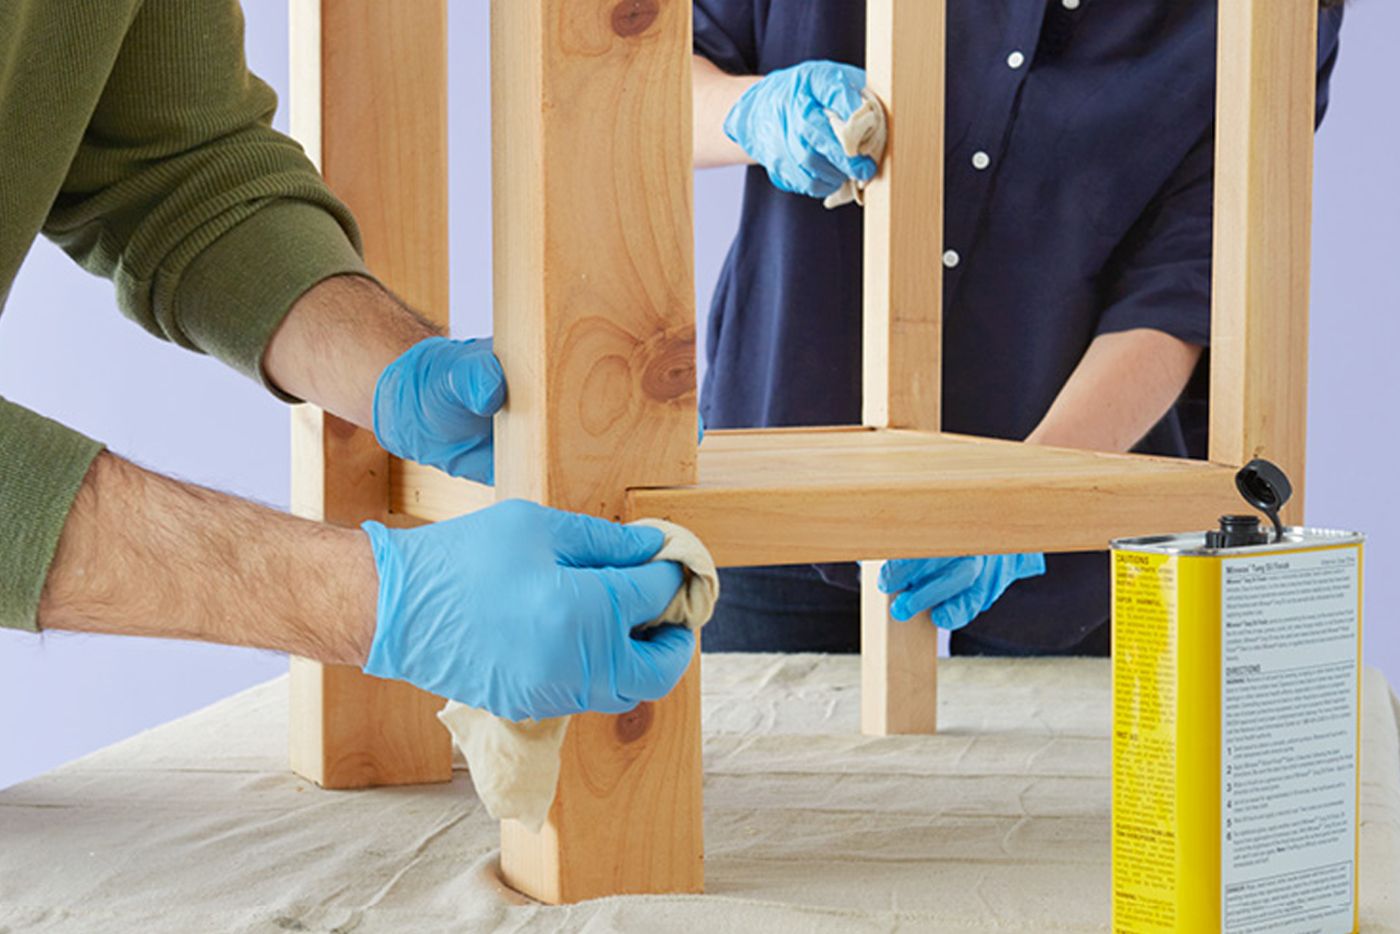
Applying a finish to your cedar vanity protects the wood and enhances its natural beauty. Tung oil is an excellent choice since it penetrates the wood, providing protection from moisture while highlighting cedar’s rich color and grain patterns. Once the glue has fully dried, use a lint-free rag to buff on two coats of tung oil finish. Apply the oil in thin, even layers, allowing each coat to dry completely before applying the next.
For extra protection, rest the vanity on its side and coat the bottom of each leg with tung oil. This step prevents the legs from absorbing water from the bathroom floor, which could lead to damage over time.
Step 8: Add the Faucet to the Cedar Vanity
The final step in creating your cedar vanity is installing the faucet and securing the sink. While the tung oil finish is drying, take the opportunity to install the faucet according to the manufacturer’s instructions. This typically involves inserting the faucet through the pre-drilled holes in the sink and securing it from underneath.
Once the faucet is in place and the finish is dry, you can attach the sink to the vanity frame. Apply a bead of silicone caulk along the sink frame’s top edge. This creates a watertight seal that prevents moisture from seeping between the sink and the frame. Carefully lower the sink onto the frame, ensuring its back edge sits flush with the frame. Press down gently to spread the silicone evenly and create a secure bond.
Make sure the faucet is securely attached and free from leaks. Double-check all connections and ensure the caulk is adequately sealing the sink to the frame.