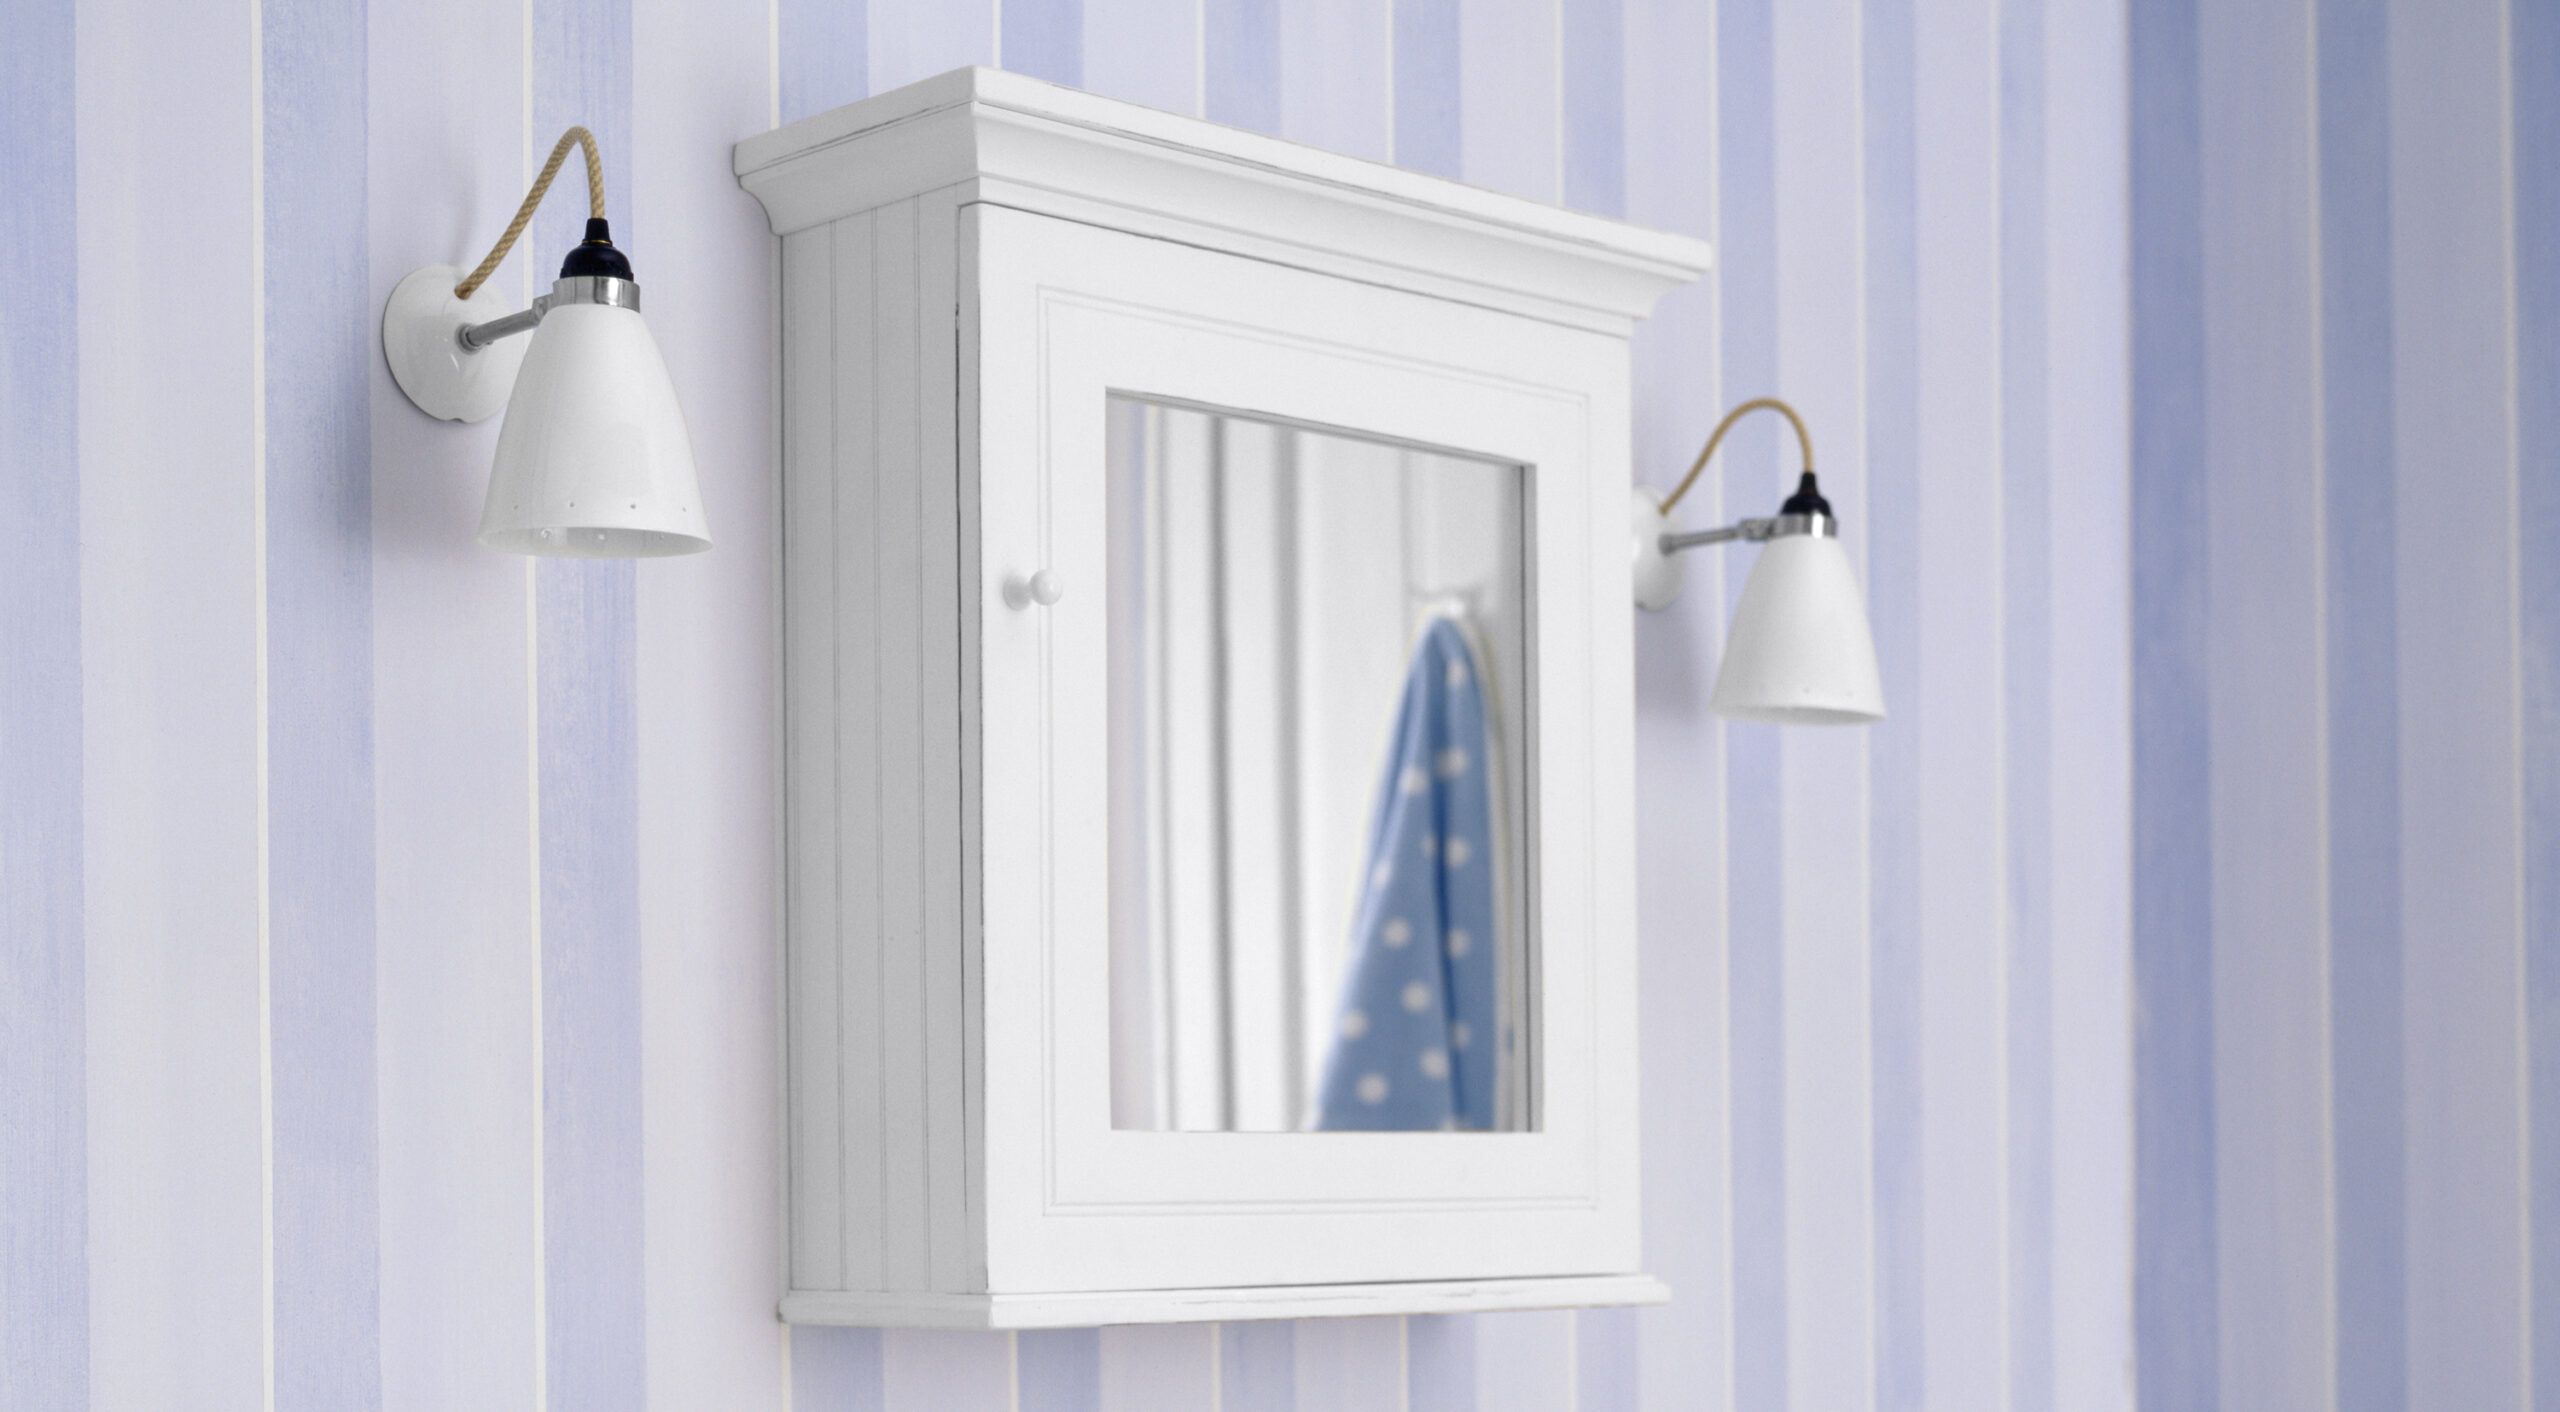
Bathrooms often have limited space, but if you build your own medicine cabinet, you can add more storage and tap into your do-it-yourself (DIY) skills. This guide will walk you through the process of constructing a custom medicine cabinet from start to finish. With some basic woodworking skills and the right tools, you can create a functional and attractive medicine cabinet for your bathroom.
Tools and Materials
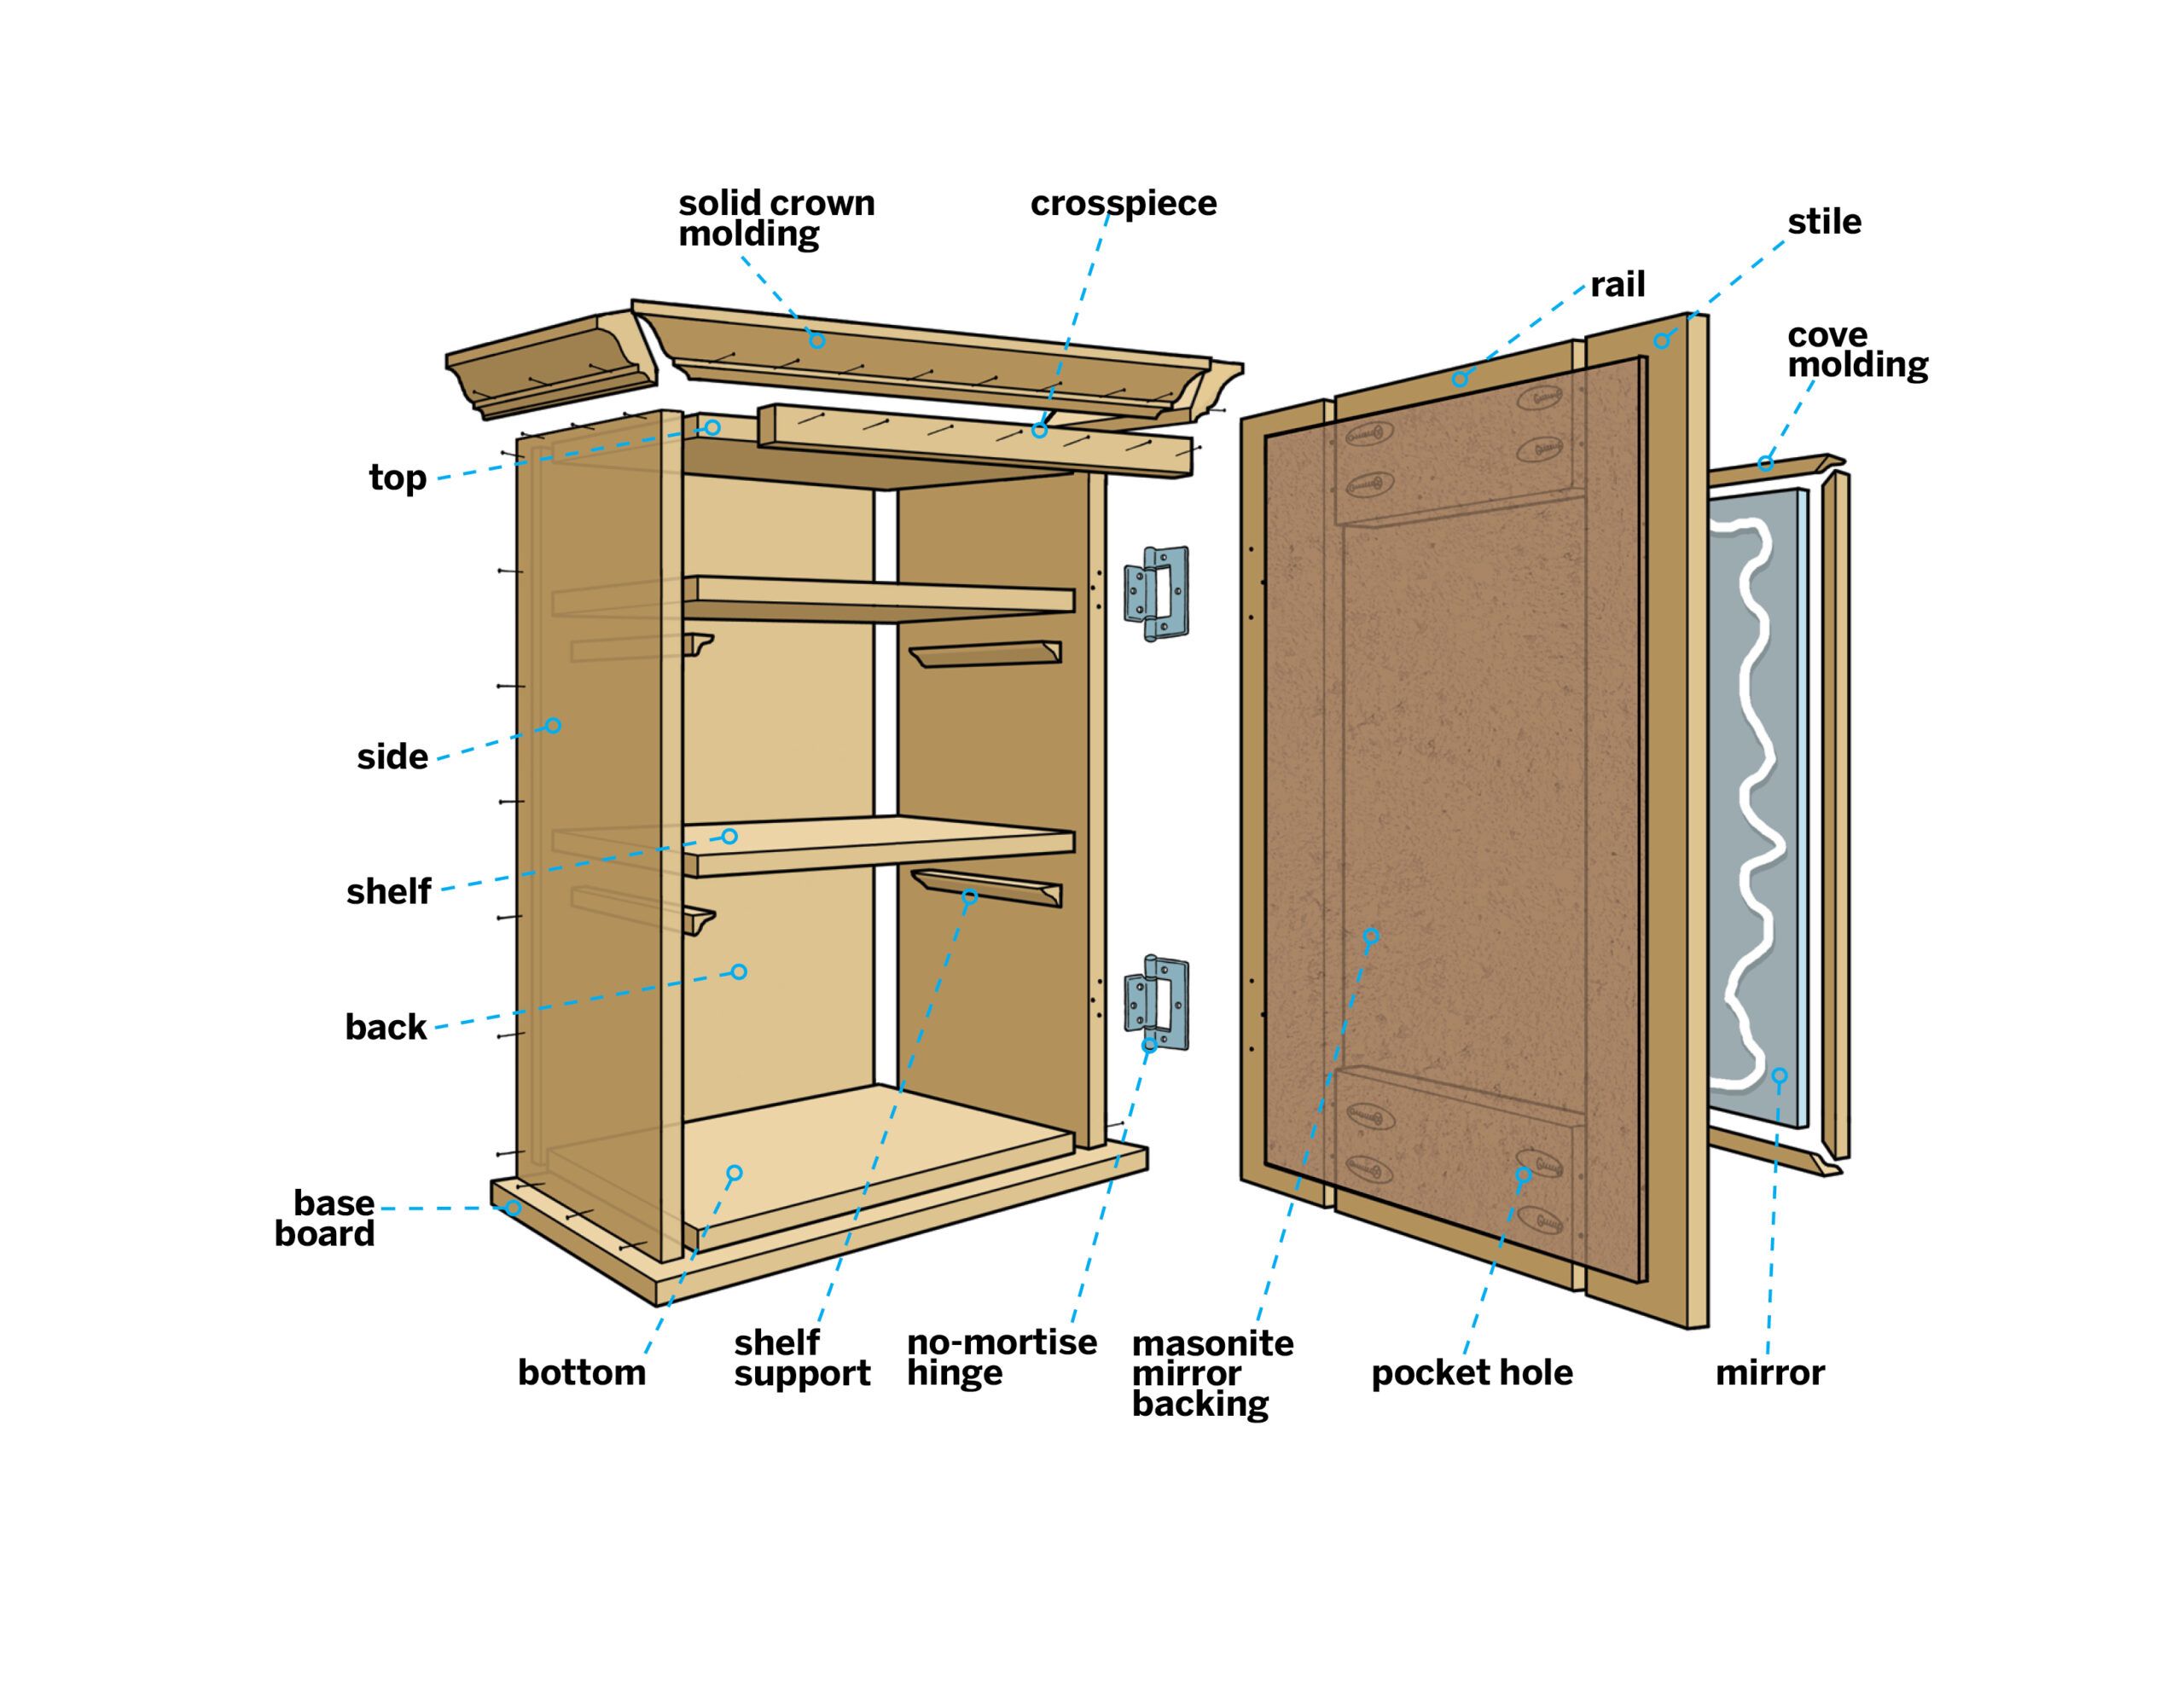
Here’s what you’ll need to build a medicine cabinet with a frame 20 inches wide, 5-and-3/4 inches deep, and 30-and-3/4 inches tall. Counting the crown molding, the finished cabinet will measure 25-and-1/2 inches wide, 8-and-1/2 inches deep, and 32-and-3/4 inches tall.)
Gather the following tools:
- Compound miter saw
- Circular saw
- Pocket-hole jig
- Drill
- Brad nailer
- Measuring tape
- Level
- Sandpaper
- Clamps
For the frame, you’ll need the following materials:
- 1×6 clear pine top and bottom pieces
- 1/2-inch pine plywood back panel
- 1×6 clear pine side pieces
- 1×8 clear pine baseboard
- 3/8-inch pine cove molding for shelf supports
- 1×6 clear pine shelves
- 1×2 clear pine crosspiece
- 2-and-3/4-inch solid poplar crown molding cut to fit
Gather the following materials for the door:
- 1×4 clear pine rails
- 1×3 clear pine stiles
- 3/8-inch pine cove molding to trim mirror, cut to fit
- 1/4-inch high-density fiberboard (HDF) mirror backing
- Mirror
Choosing the Right Wood for Your Medicine Cabinet
Cabinets come in several wood types, but we recommend you use woods that are naturally resistant to moisture and warping for bathrooms. Good choices include cedar, cherry, maple, teak, and white oak. These woods hold up well in humid environments and are less likely to develop mold or rot over time.
You can also paint or stain your medicine cabinet to match your style. If painting, use a semi-gloss finish for moisture resistance and easy cleaning. For staining, apply a water-resistant sealer like lacquer or varnish to protect the wood.
Preparing Your Workspace and Materials
Clear a well-ventilated space with good lighting. You should have a sturdy work surface and easy access to power outlets for your tools.
Cutting the Wood to Size
Using your compound miter saw and circular saw, cut the wood pieces according to your cabinet’s dimensions. For a standard-sized cabinet (20 inches wide, 5-and-3/4 inches deep, and 30-and-3/4 inches tall), follow these measurements:
- Frame: Two 18-and-1/2-inch pieces (top and bottom), two 30-inch side pieces
- Back panel: 18-and-1/2 x 28-and-1/2 inches
- Baseboard: 21-and-1/2 inches long, ripped to 5-and-3/4 inches wide
- Shelves: Two 18-and-3/8-inch pieces, ripped to 4-and-1/4 inches wide
- Door frame: Two 15-inch rails, two 28-and-3/8-inch stiles
Sand all cut pieces for smooth surfaces and edges.
Building the Cabinet Frame
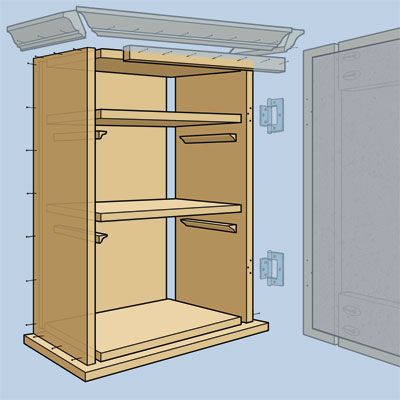
With your materials prepared, it’s time to assemble the basic structure of your medicine cabinet.
Constructing the Frame
Here are the steps to build the frame:
- Apply wood glue to the ends of the top and bottom pieces.
- Sandwich these pieces between the side pieces, creating a rectangular frame.
- Use 1-and-1/2-inch brad nails to secure the joints.
- Check for squareness using a carpenter’s square.
Adding the Back Panel and Baseboard
Next, add the back panel and baseboard. This frame is the foundation for your medicine cabinet. It will help with stability and proper alignment for the remaining components. Follow these steps:
- Place the plywood back panel within the frame, flush with the back edges.
- Secure it with 3/4-inch brad nails around the perimeter.
- Position the baseboard flush with the back, allowing a 3/4-inch overhang on the front and sides.
- Glue and nail the baseboard in place with 1 1/4-inch brad nails.
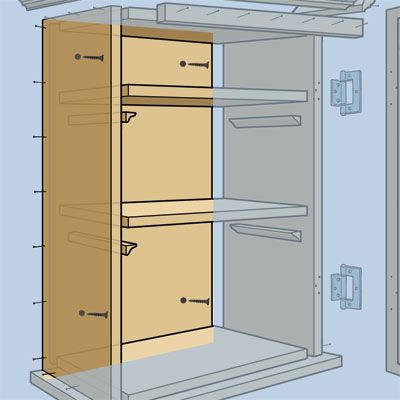
Building and Installing Shelves
Shelves are essential for organizing your medicine cabinet’s contents. Here’s how to create and install them:
- Cut four pieces of 3/8-inch pine cove molding to 4-and-1/4 inches long for shelf supports.
- Sand the cut ends smoothly to prevent snagging.
- Determine your desired shelf spacing within the cabinet.
- Mark the locations for shelf supports on the cabinet sides.
- Glue and tack the shelf supports in place using 3/4-inch brad nails.
- Place the pre-cut shelves on top of the supports.
- Secure shelves with a small dab of wood glue at each corner.
Installing a series of shelf pin holes instead of fixed supports allows for adjustable shelves and flexible storage options.
Crafting the Cabinet Door
Your cabinet door will keep your items secure and hidden away. Follow these steps to assemble your door frame:
- Apply glue to the ends of the door rails.
- Clamp the rails between the stiles to form a rectangular frame.
- Use a pocket-hole jig to drill pocket holes in the rails.
- Secure the joints with 1-and-1/4-inch pocket screws.
- Fill the pocket holes with wood plugs for a seamless appearance.
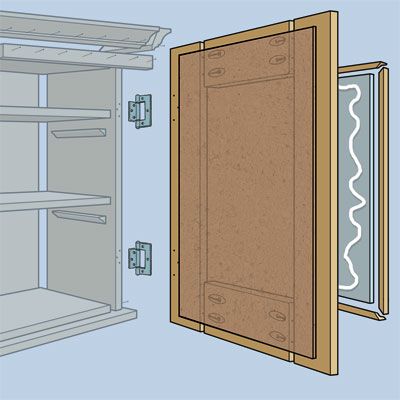
Installing the Mirror
Your medicine cabinet isn’t complete without a mirror. Here are the steps to install one:
- Cut the HDF mirror backing to fit inside the door frame with a 3/4-inch gap around the perimeter.
- Tack the backing in place with 1/2-inch brad nails.
- Flip the door over and apply mirror adhesive to the back of the mirror.
- Carefully place the mirror onto the backing, centering it within the frame.
- Cut cove molding to fit around the mirror, making 45-degree miters at the corners.
- Glue the cove molding in place to secure the mirror.
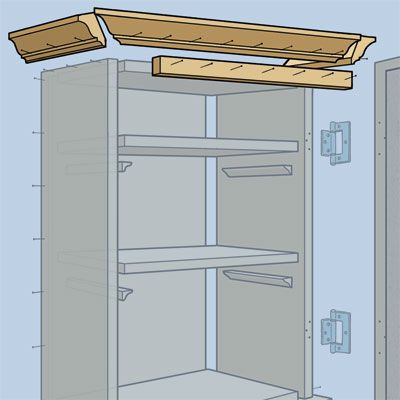
Adding Finishing Touches
The final details can elevate your medicine cabinet from functional to stylish.
Attaching Crown Molding
Crown molding can give your new medicine cabinet a polished look. To attach crown molding, complete the following steps:
- Measure and cut crown molding to fit the top of your cabinet.
- Make 45-degree miters at the corners.
- Install the molding 3/4 inch from the bottom of the top crosspiece.
- Secure with glue and 1-and-1/2-inch brad nails.
Installing Hardware
Attach hinges to the door, positioning them 3 inches from the top and bottom. Mount the hinges to the cabinet frame, ensuring the door hangs straight. Install the door pull in your preferred location on the door front. Consider using soft-close hinges for a luxurious touch and to prevent slamming.
Mounting Your Medicine Cabinet
All that’s left is to mount your new medicine cabinet.
Determining the Ideal Height
The ideal height for a medicine cabinet is typically eye level, about 57 inches from the floor to the center of the mirror. However, you can adjust this height based on your eye level and bathroom layout.
Securing the Cabinet to the Wall
Take these steps to secure your cabinet to the bathroom wall:
- Locate and mark wall studs using a stud finder.
- Hold the cabinet in place and mark screw locations—at least two screws should hit the studs.
- Pre-drill holes in the cabinet back.
- Use a combination countersink bit and 2-inch wood screws to fasten the cabinet to the wall.
- Use wall anchors for any screws not hitting studs.
Check that the cabinet is level before tightening the screws.
Customization Options
Personalizing your medicine cabinet can make it a standout feature in your bathroom. For painted cabinets, choose a semigloss finish in a color that complements your bathroom decor. If staining, select a shade that enhances the natural beauty of the wood grain.
To customize your medicine cabinet further, you could add additional features, such as LED lighting and cork backing. Magnetic strips are a great idea for holding small metal items, and customized organizers can help keep your cabinet tidy.
Maintenance and Care
Maintenance will keep your medicine cabinet looking great and functioning well for years to come. Regularly dust the exterior and interior with a soft, dry cloth, and clean the mirror with a glass cleaner and lint-free cloth. Wipe down shelves and the cabinet interior with a damp cloth and mild soap as needed. Avoid using harsh chemicals that could damage the wood finish.
Every few years, reapply a clear protective finish to the wood to maintain its water resistance. Also, check and tighten the hardware periodically so everything remains secure.