Infusing your home with vintage charm doesn’t have to break the bank. With a little creativity and elbow grease, you can transform your space into a cozy, character-filled haven. From distressed wood paneling to checkerboard floors, these 13 budget-friendly ideas will help you achieve that coveted old-house look without the hefty price tag.
1. Distressed Wood Wall Paneling
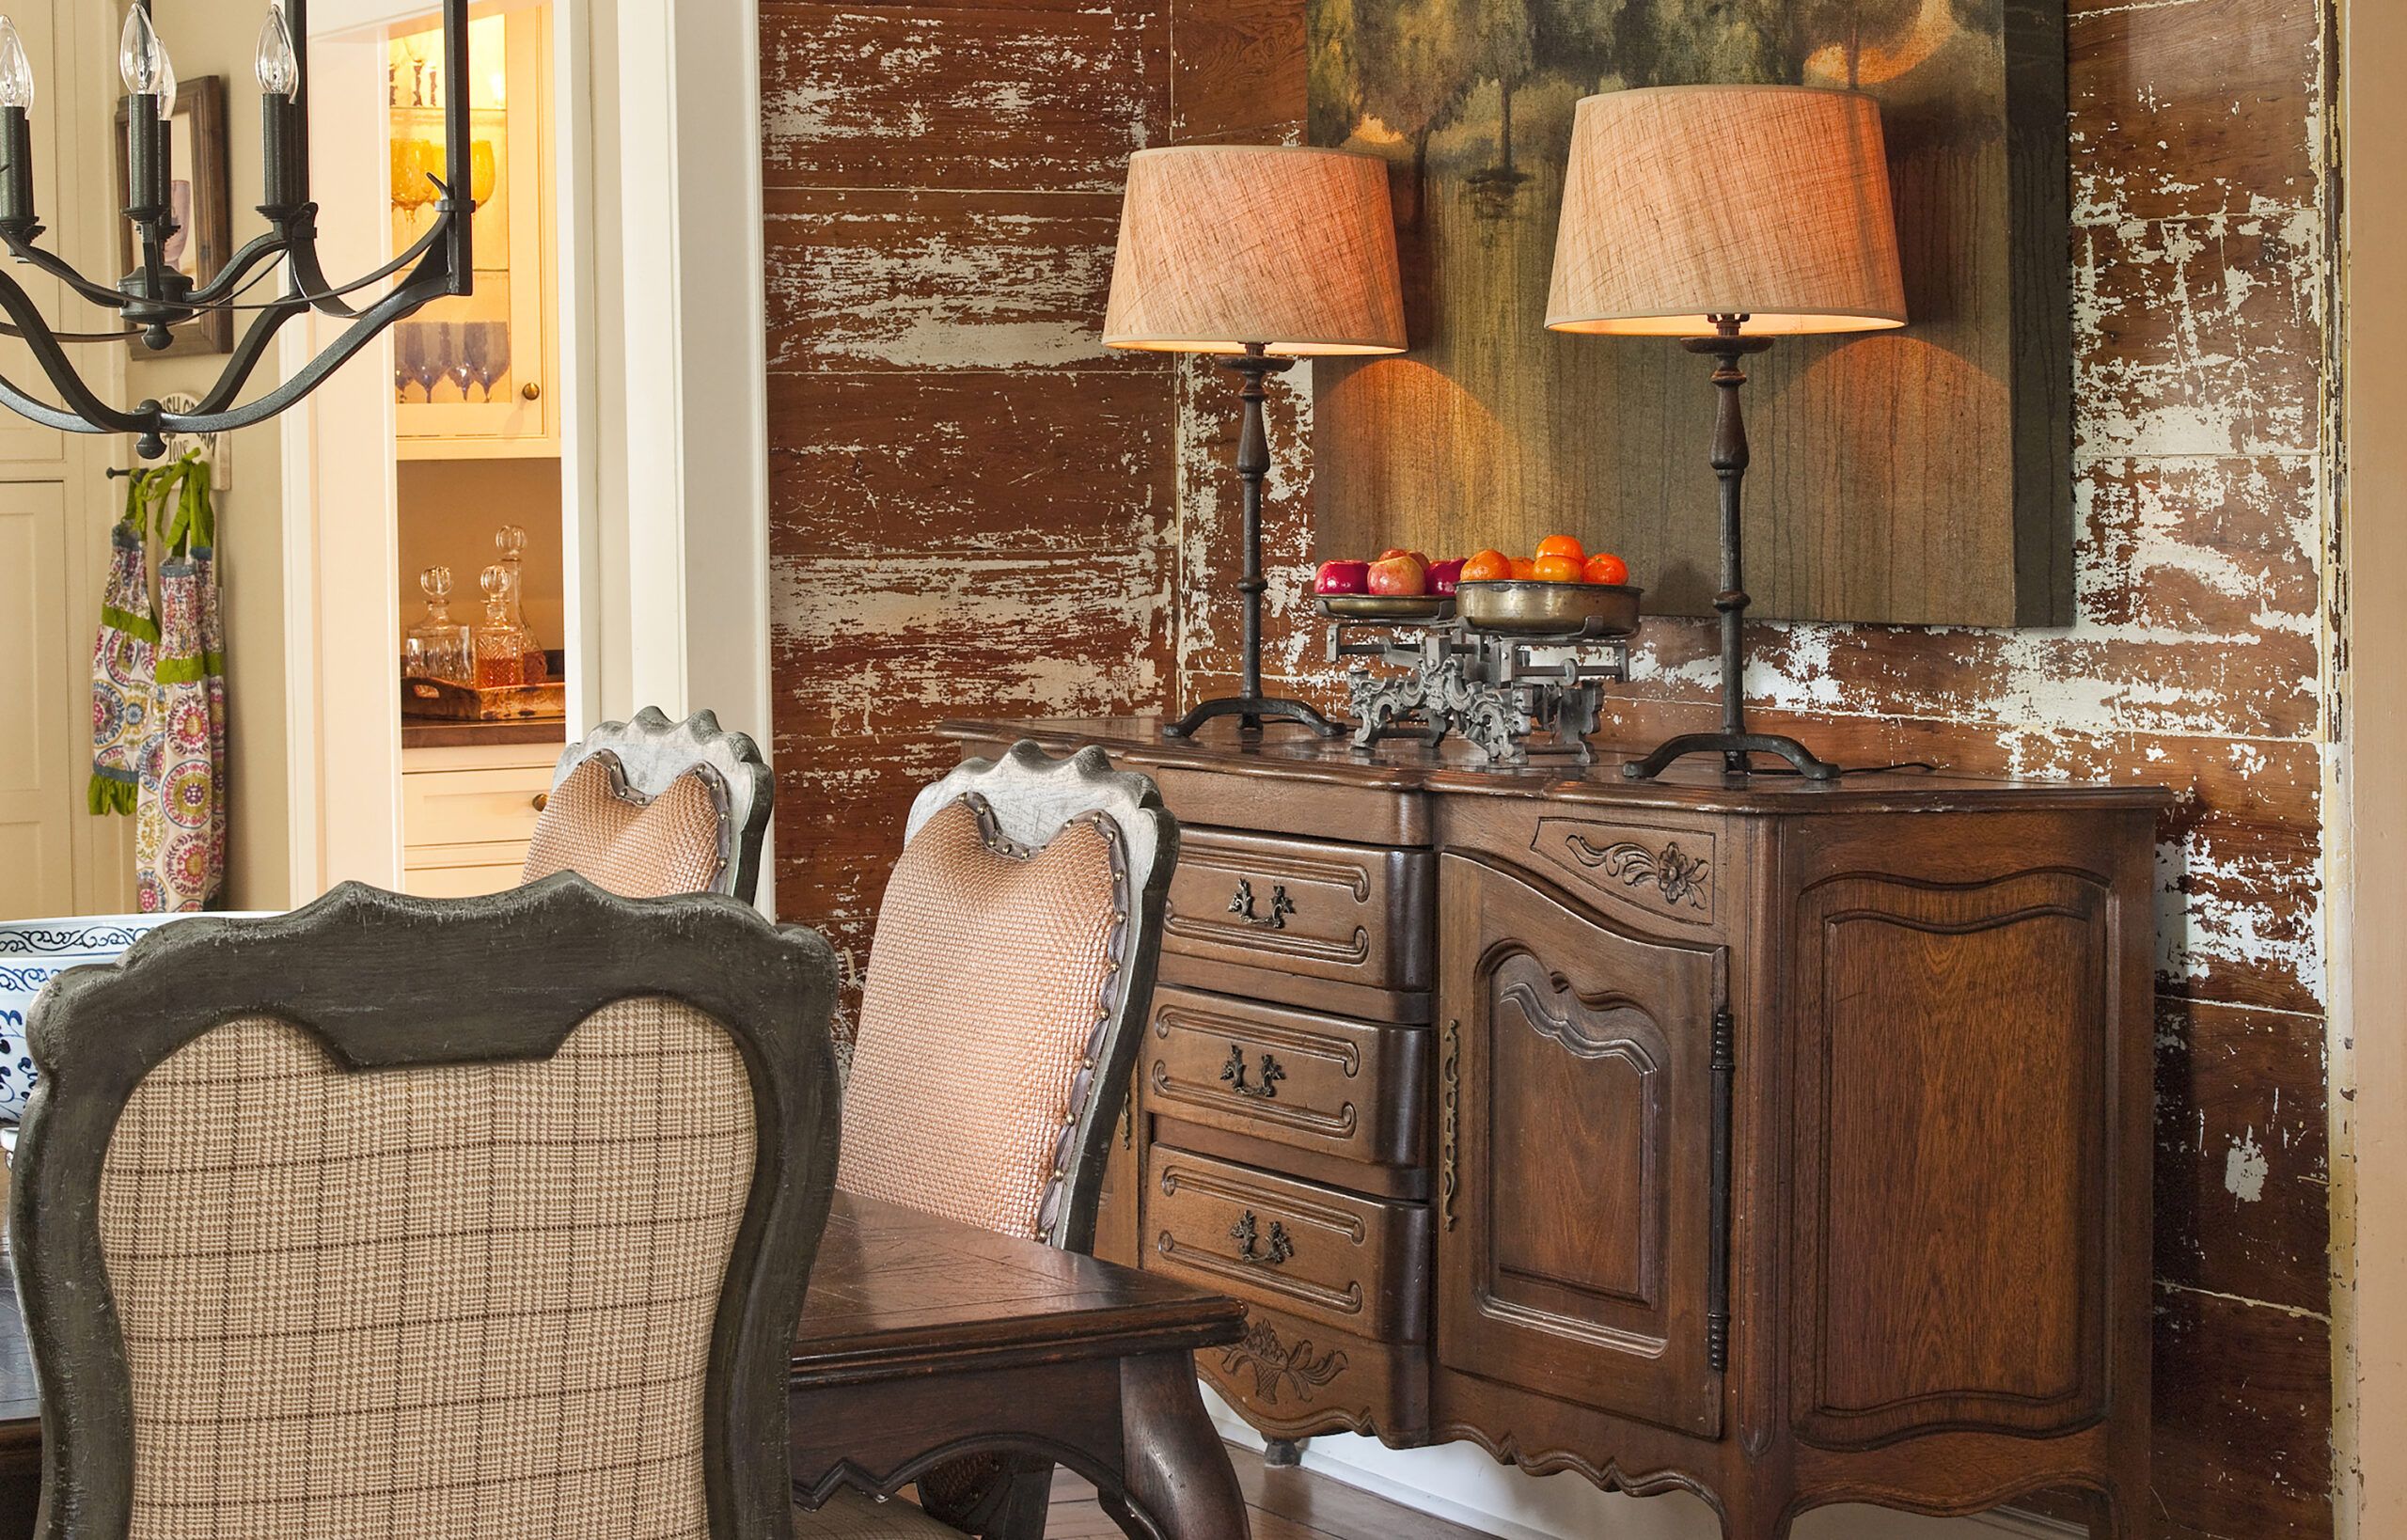
Creating a rustic farmhouse feel with wood-paneled walls is easier than you might think. Start by painting the panels—use a color from a historic palette for authenticity. Once dry, use a putty knife to scrape the finish in a random pattern, mimicking paint that’s peeled away over time. For added depth, brush on a clear glaze. This technique works particularly well when you choose contrasting colors, such as a lighter hue over dark wood paneling or vice versa.
For the best results, consider these tips:
- Use a high-quality paint that adheres well to wood surfaces
- Experiment with different scraping techniques to find the look you prefer
- Apply the glaze in thin layers for a more subtle, aged appearance
Remember, the key to a convincing distressed look is embracing imperfection. Don’t aim for uniformity. Instead, let the natural variations in your technique create an authentic, weathered appearance.
Cost: About $100 for an average-sized room.
2. Hang a Charming Screen Door
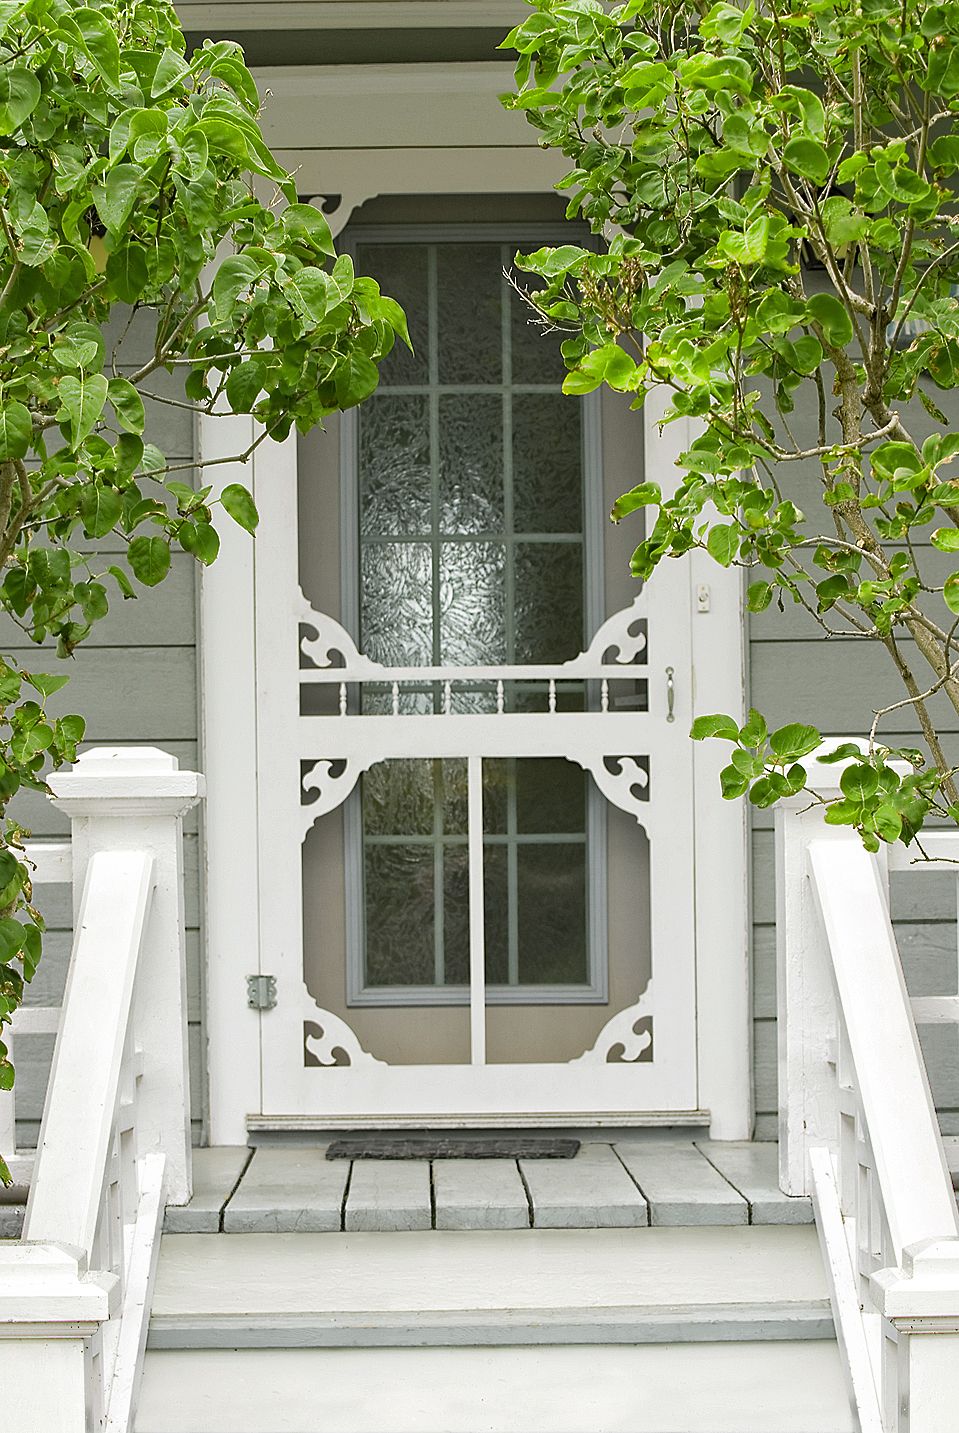
A decorative screen door can serve as a beautiful focal point for your home’s exterior. Instead of splurging on a custom door, get a basic wood-framed version from a home center and dress it up with ornamental trim. To recreate the look shown in the image, first choose a plain wood-framed screen door as your base. Get a gallery rail with spindles and corner brackets from a woodworking supply shop. Position the rail on the door’s face and secure it with wood glue and finishing nails. Attach the corner brackets the same way, then prime and paint the entire door with exterior latex paint.
Cost: About $200 per door.
3. Put Beadboard Overhead

Beadboard ceilings add instant cottage vibes to any room. For easier installation, use prefab medium-density fiberboard (MDF) planks instead of traditional stick-built beadboard. These embossed planks closely resemble the real thing and are much simpler to work with, especially when you’re on a ladder.
Follow these steps for a successful beadboard ceiling installation:
- Clean and prepare the ceiling surface.
- If working with a flat or peaked ceiling in good condition, use panel adhesive and nails to attach the beadboard directly.
- For ceilings in rough shape, install wood furring strips first as a solid framework.
- Start at a corner and leave a half-inch gap at the walls for trim.
- Fill nail holes and apply a top coat of paint to finish.
The lined pattern of beadboard can make a small room feel larger and a large room feel more proportionate.
Cost: About $200–$5,000, depending on the room’s size.
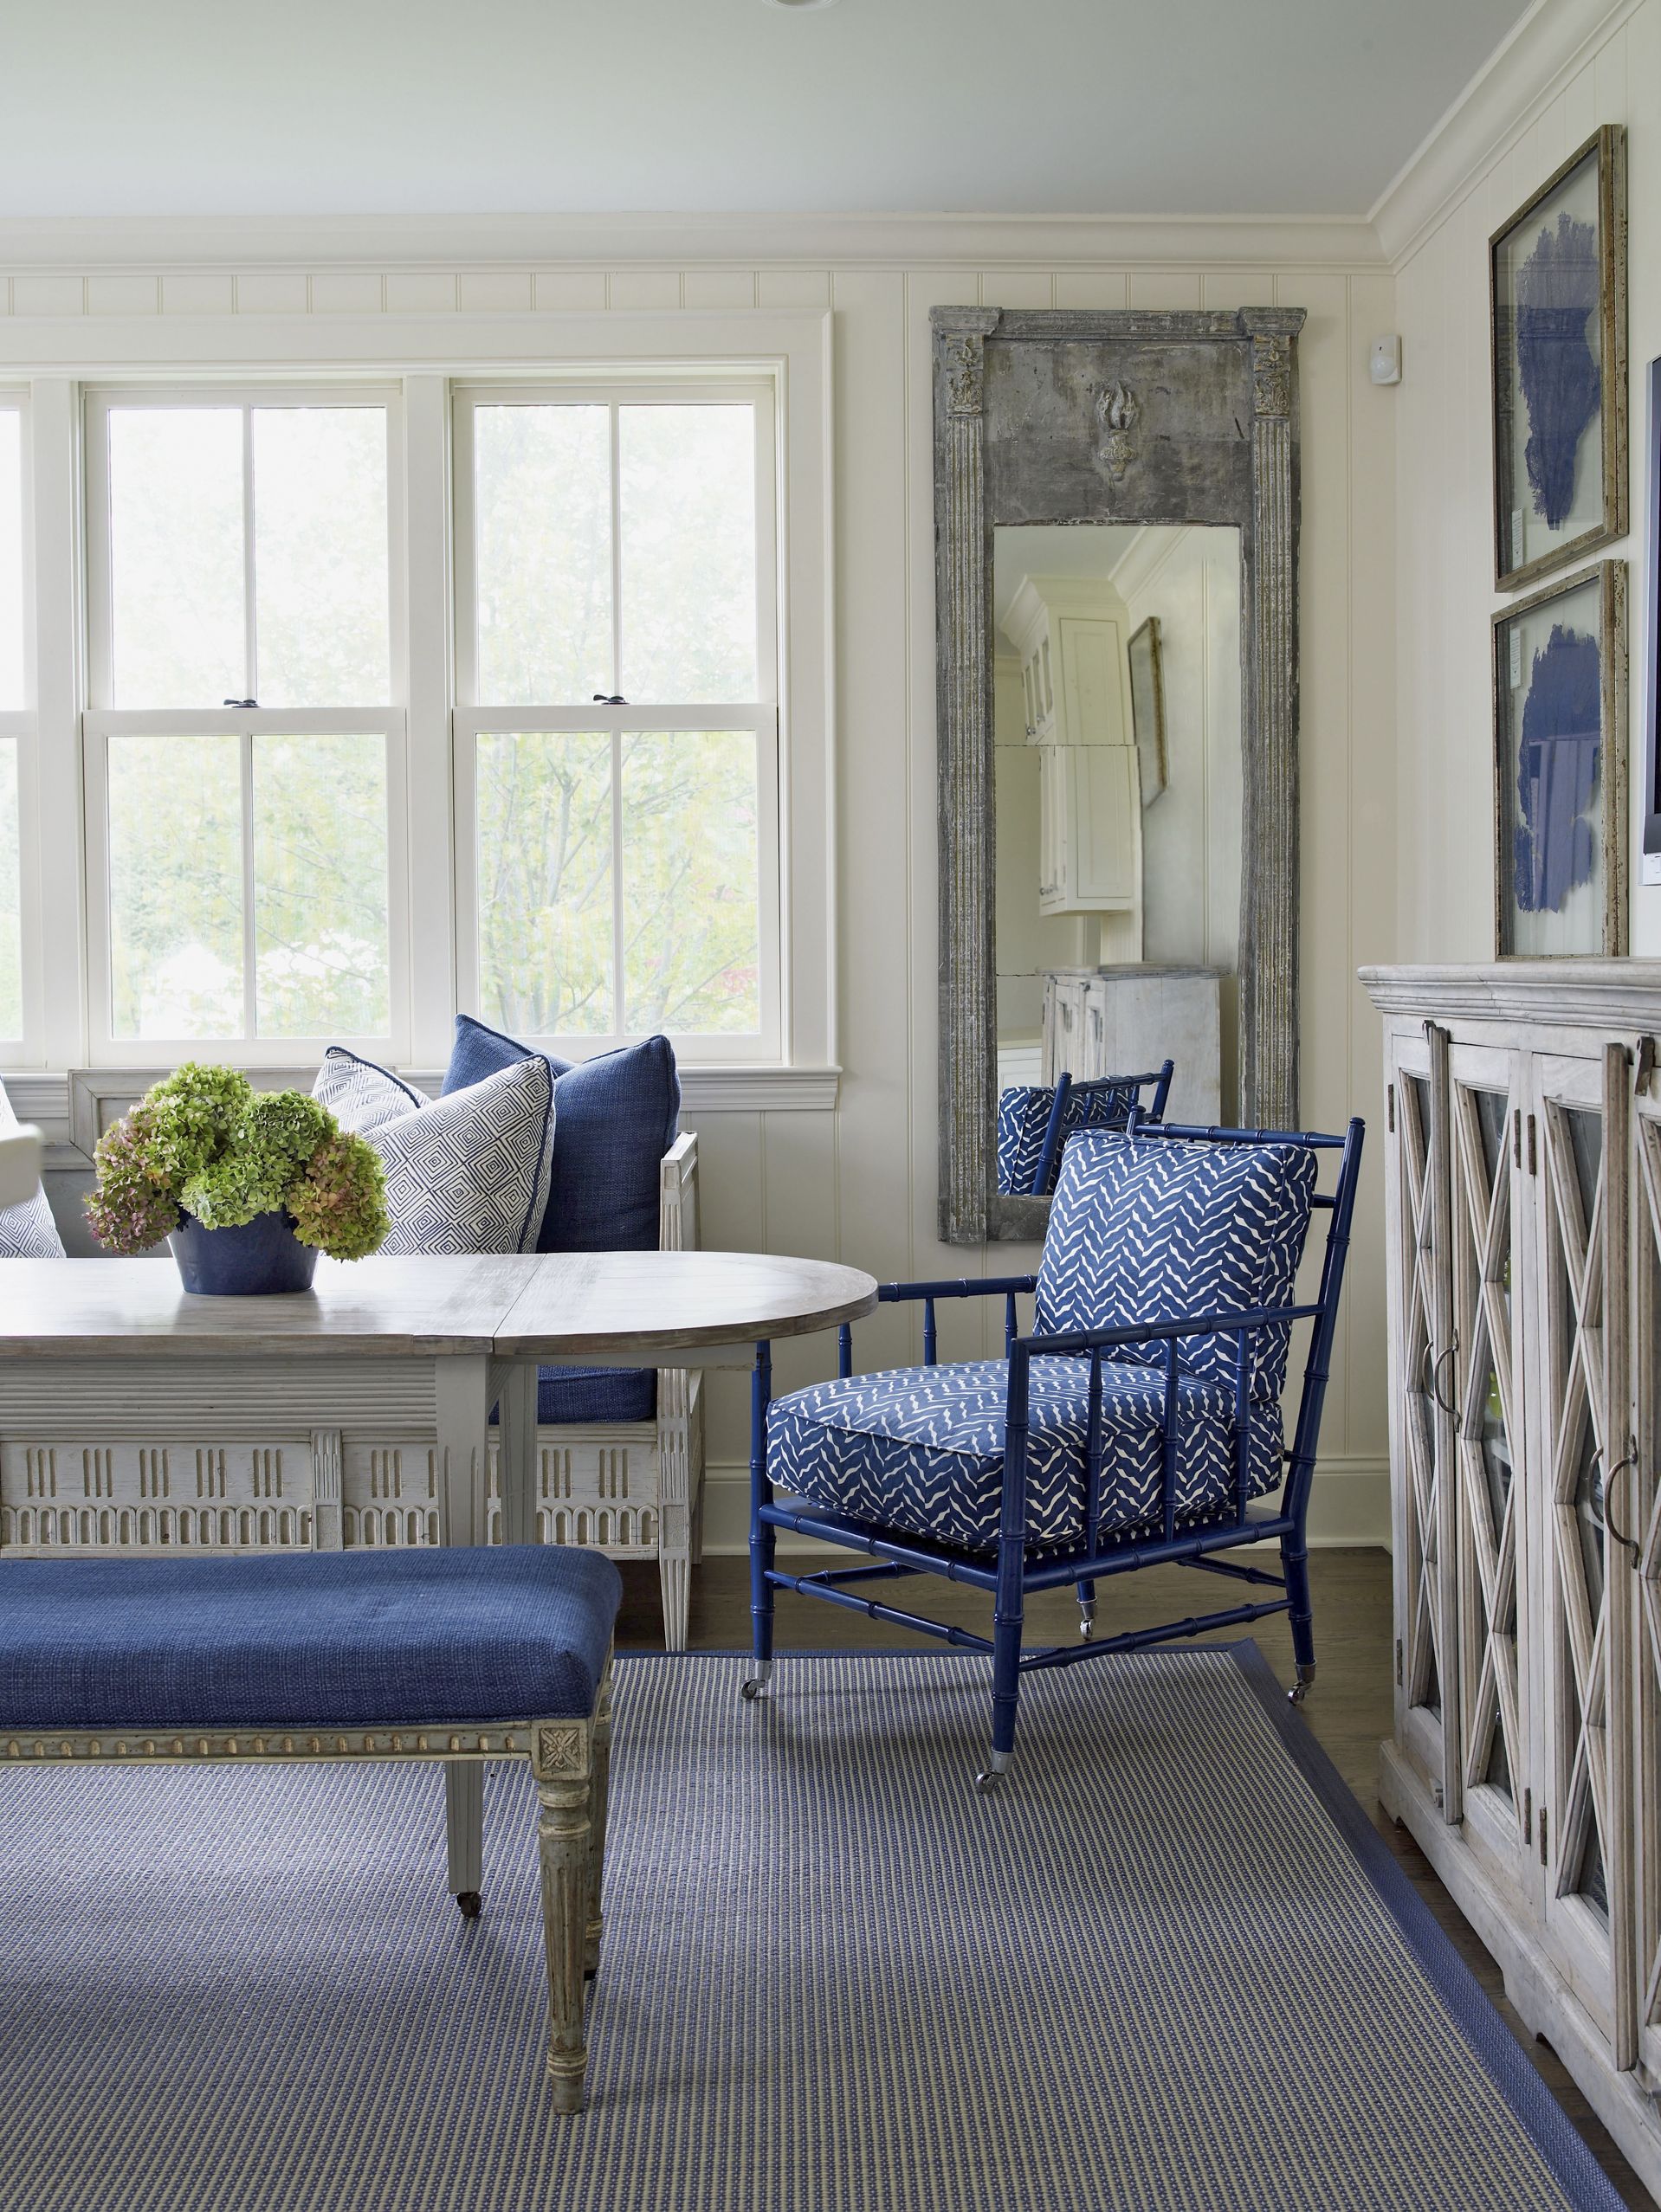
4. Paint Kitchen Cabinets in a Vintage Two-Tone Scheme
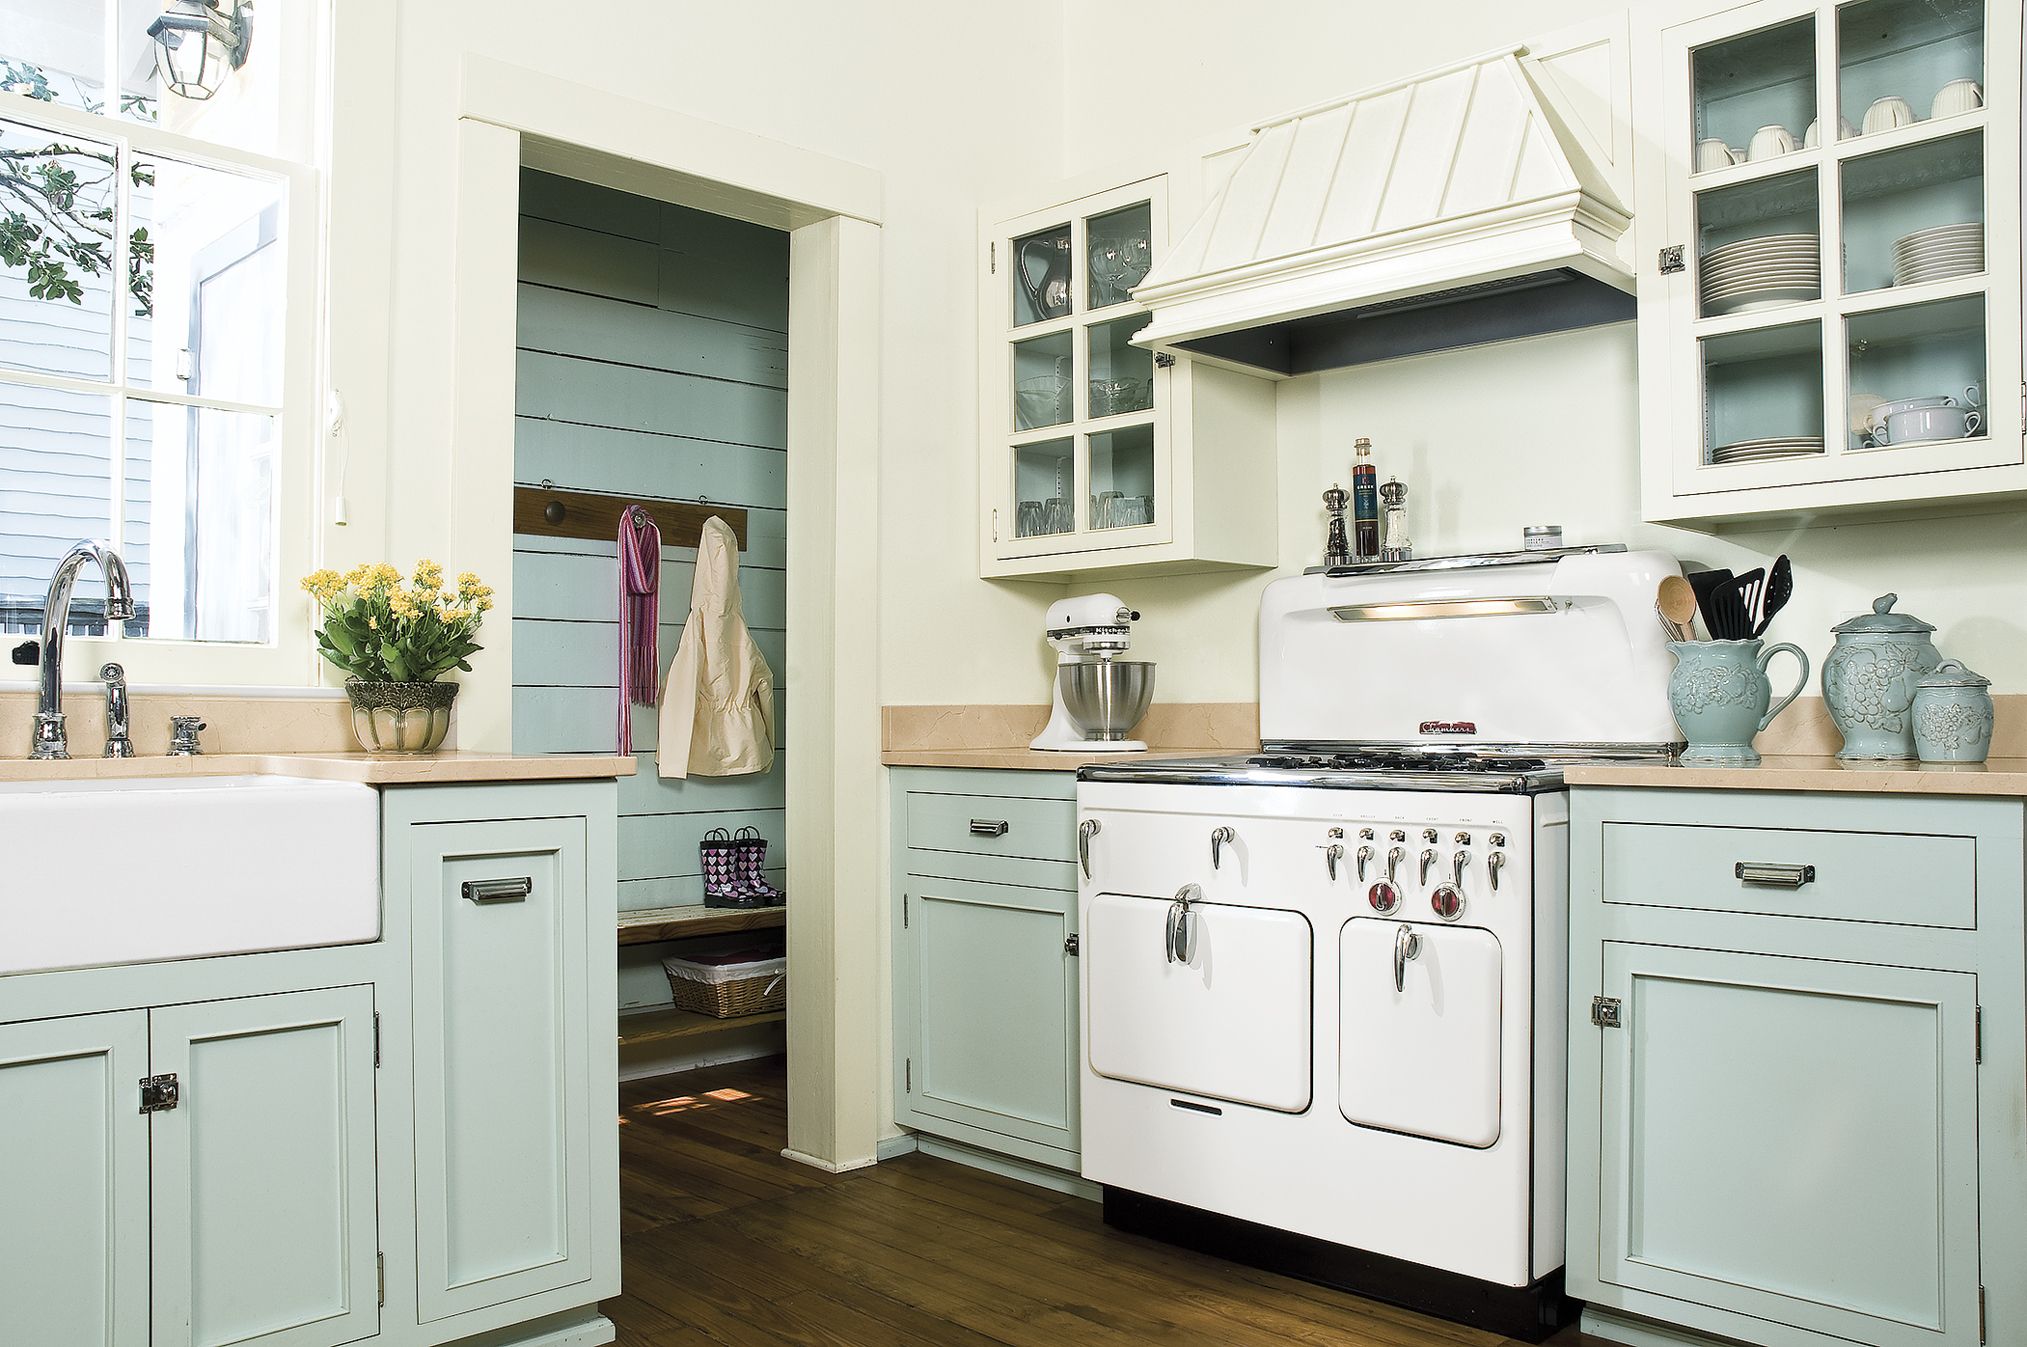
A two-tone cabinet color scheme can give your kitchen a charming, vintage look reminiscent of earlier times when kitchens were assembled from different furniture-like pieces. This can also make your space feel larger and more open.
Consider these tips when choosing your color scheme:
- Apply the darker or stronger hue to base cabinets to anchor the room.
- Opt for complementary colors for a bolder statement.
- Use a lighter shade on upper cabinets to create an open, airy feel.
- Use shades of the same color for a subtle, cohesive look.
Be sure to clean, sand, and prime your cabinets before applying a top coat specifically formulated for cabinetry. This keeps your new color scheme fresh and beautiful for years to come.
Cost: About $200–$400, depending on the number of cabinets.
5. Install a Stair Runner and Rods
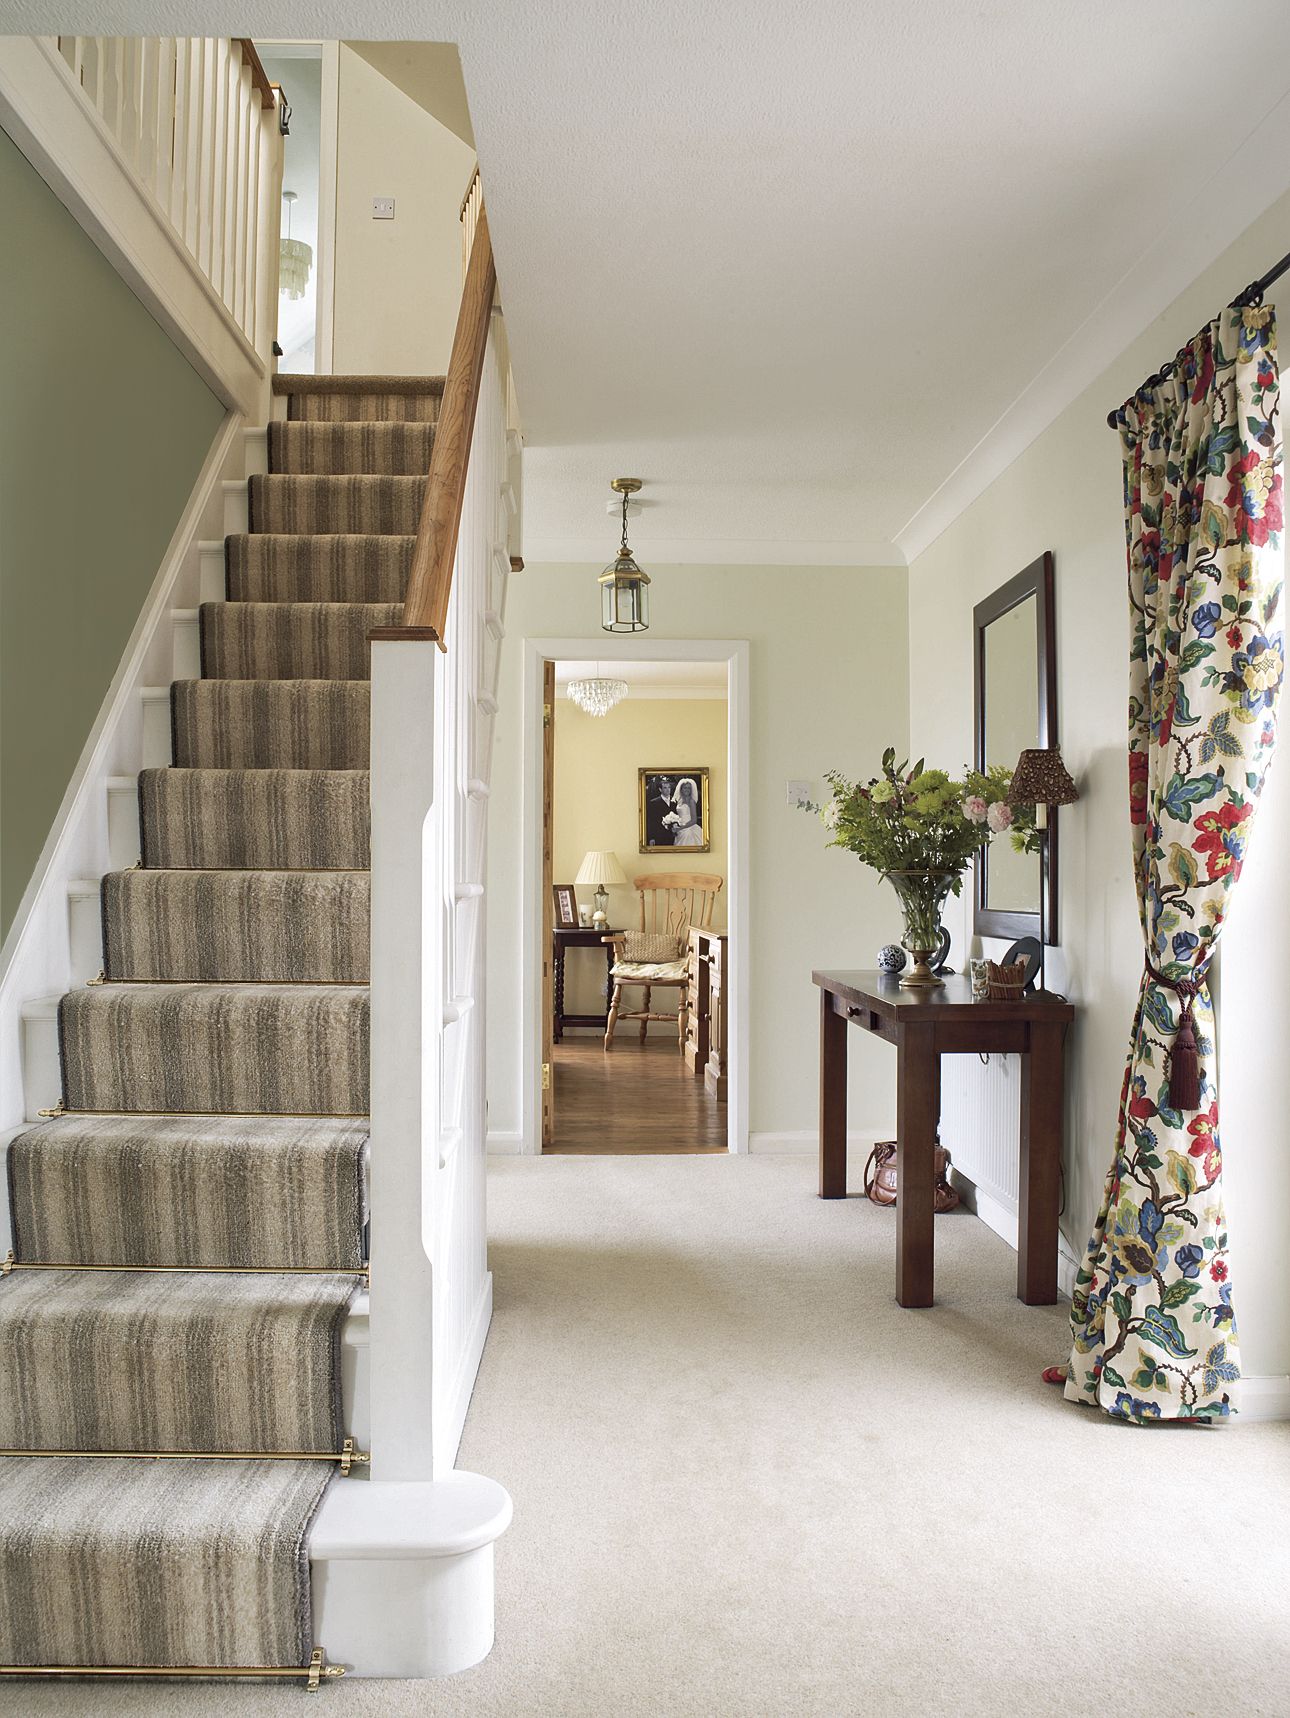
Carpet runners have been a staple in homes for centuries, adding safety and style to staircases. When paired with traditional metal rods, they create a classic look that’s both functional and visually appealing. Installing a runner on a straight staircase is a straightforward do-it-yourself (DIY) project, especially if you use the waterfall method:
- Choose a runner that complements your home’s style and color scheme.
- Measure your stairs carefully to determine the amount of runner needed.
- Install carpet padding on each step for extra cushioning.
- Secure the runner at the seams where the stair risers meet the tread.
- Add metal runner rods for a finishing touch, centering each over the runner.
Cost: About $350–$500, depending on the rug and the number of steps.
6. Add Divided Lights to Single-Pane Windows
Give new single-pane windows an old-house authenticity by creating your own wood grilles for a divided-light look. This simple project can dramatically change your windows’ appearance, adding character to your home’s interior and exterior.
Choose wood stock that matches the thickness of your window’s sash frame and cut it to size based on your desired pattern (e g., two-over-two, four-over-four). For more complex patterns, cut notches where horizontal and vertical pieces intersect, and use wood glue to secure joints. Attach the grilles to the window glass using heavy-duty reclosable fasteners. This lets you remove the grilles easily when cleaning the windows.
Cost: About $20–$35 per window, depending on the size and number of lights.
7. Stain a Wood Floor With a Vintage Checked Pattern
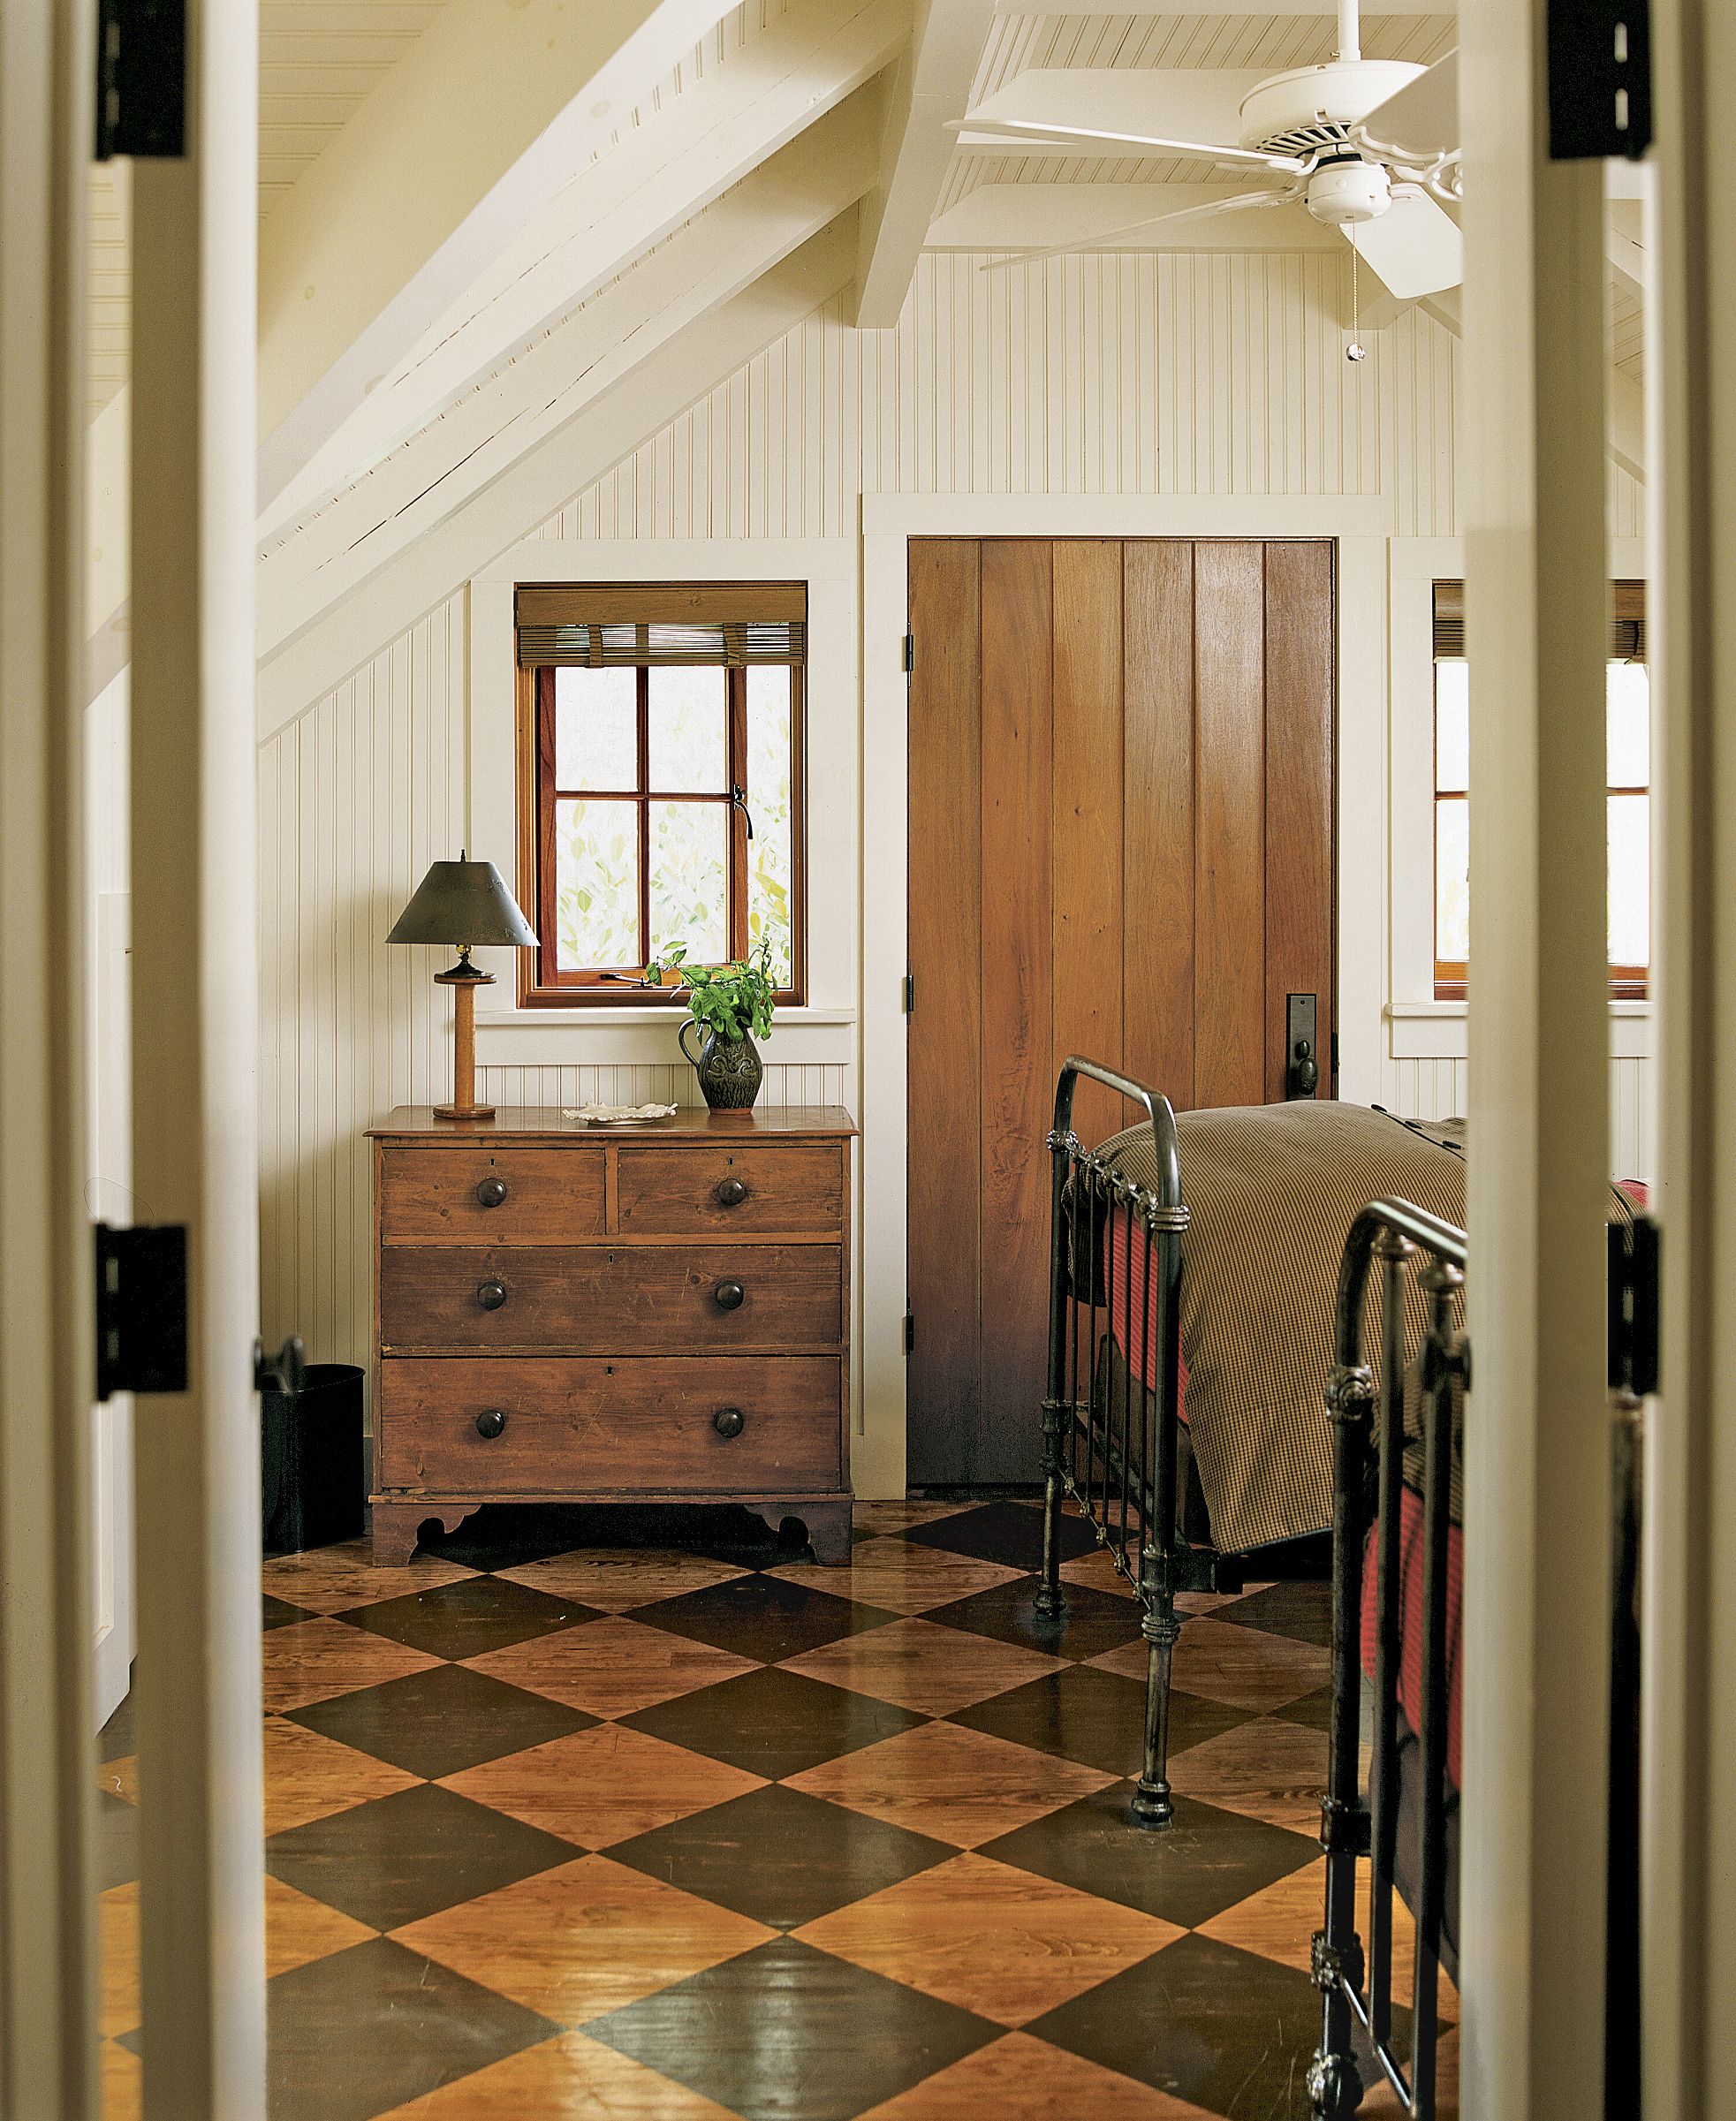
A checkerboard floor pattern adds a playful yet timeless touch to any room. While painted checkerboard floors were popular in colonial times, you can create a more modern look by using stain instead:
- Start with a clean, freshly sanded floor.
- Plan your pattern, mapping out square size and arrangement.
- Use painter’s tape to outline each square.
- Apply wood stain to alternate squares using a cloth or brush.
- Allow the stain to dry completely before removing the tape.
- Seal the floor with two to three coats of clear polyurethane for protection.
Cost: About $150 for an average-size room.
8. Top Wainscoting With a Vintage-Style Display Rail
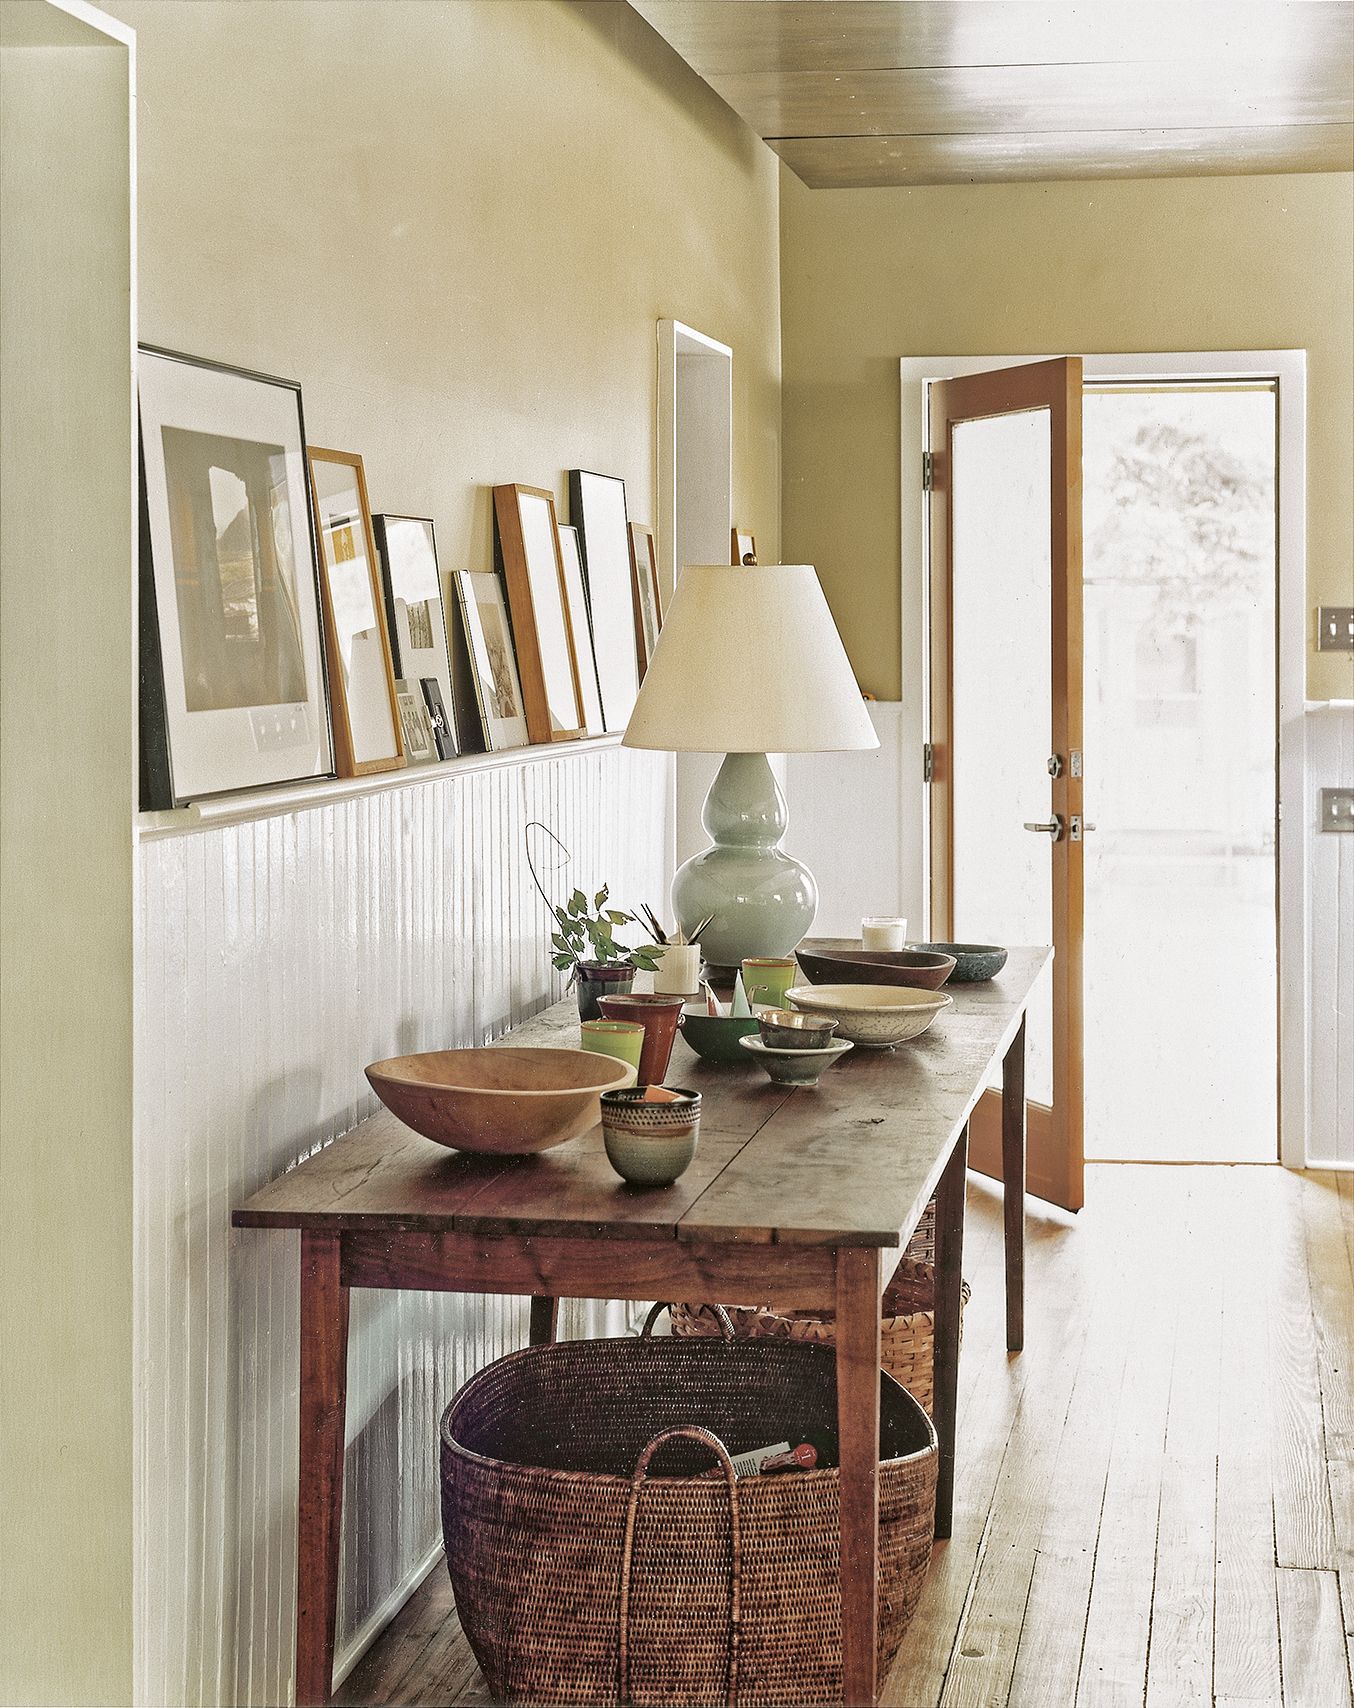
Adding a display rail to existing wainscoting is a simple way to add a display shelf for artwork, plates, or other decorative items.
Choose a 1-by-3 board for the ledge. If needed, add a strip of cove molding to the panel’s face for additional support. Apply construction adhesive to the back of the ledge and secure it to the top of the wainscoting with finishing nails. Paint the new addition to match the existing paneling for a seamless look.
Cost: About $25 for one 8-foot wall.
9. Sheathe Walls With Embossed Metal
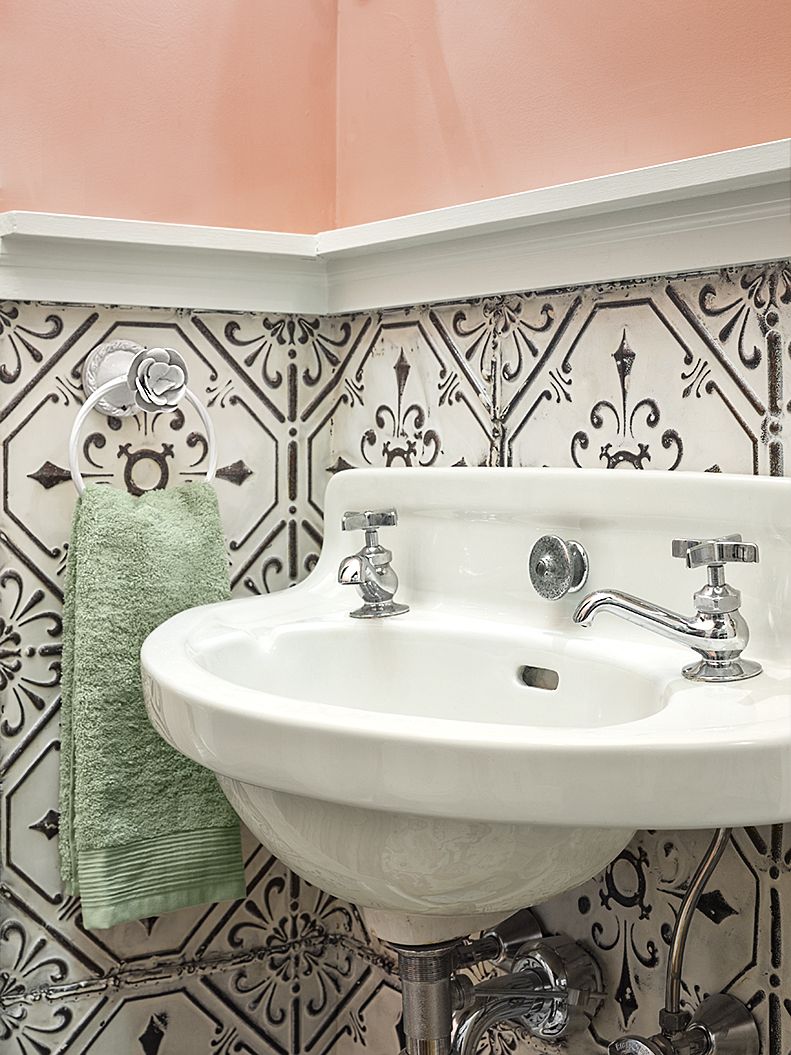
Embossed metal panels, reminiscent of Victorian-era tin ceilings, can create a stunning accent wall or wainscoting. These panels come in various patterns and finishes, allowing you to customize the look to suit your style.
Consider these tips when working with embossed metal panels:
- Choose a pattern that complements your room’s existing decor.
- Combine the panels with wood trim for a more traditional look.
- Opt for powder-coated, moisture-resistant panels for longevity.
- Use panels as wainscoting or to cover an entire accent wall.
This unique wall treatment adds texture and a touch of elegance that can make any room feel more sophisticated.
Cost: About $400 for a 6-by-8-foot room.
10. Give a New Lantern a Verdigris Patina

Transform a new porch light into a vintage-looking fixture by creating a verdigris patina. This makes metal look like aged copper, adding instant character to your home’s exterior.
Follow these steps to create a verdigris finish:
- Clean the metal surface thoroughly.
- Apply a base coat of flat charcoal or black paint.
- Once dry, brush on several coats of an antiquing solution.
- Allow the chemical reaction to occur over at least three days.
- Seal the finish with a clear protective coating.
Cost: About $20–$30 for the paint and antiquing solution.
11. Use Window Film to Fake Etched Glass
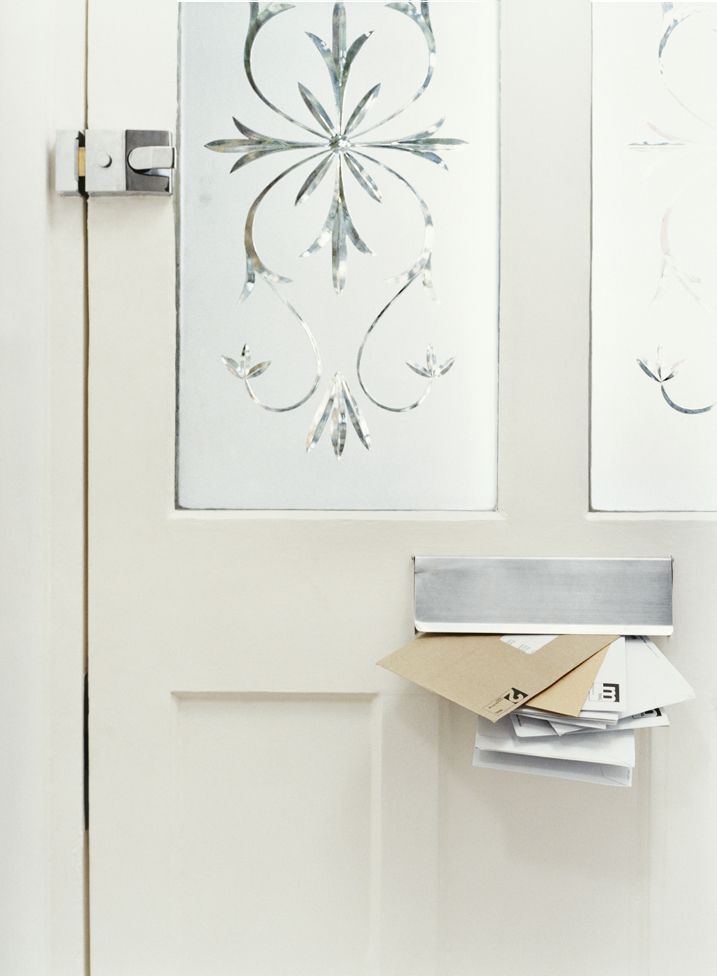
Patterned vinyl window film is an attractive and affordable way to add privacy to glass entry doors or sidelights. This easy-to-apply solution mimics the look of etched glass without the need for specialized skills or tools.
To apply window film, first clean the glass surface thoroughly. Measure and cut the film to size, spray the glass with water, and carefully apply the film, smoothing out air bubbles with a squeegee. Trim any excess film for a perfect fit.
Cost: About $30 per window panel.
12. Dress Up a Mantel With Charming Panel Molding
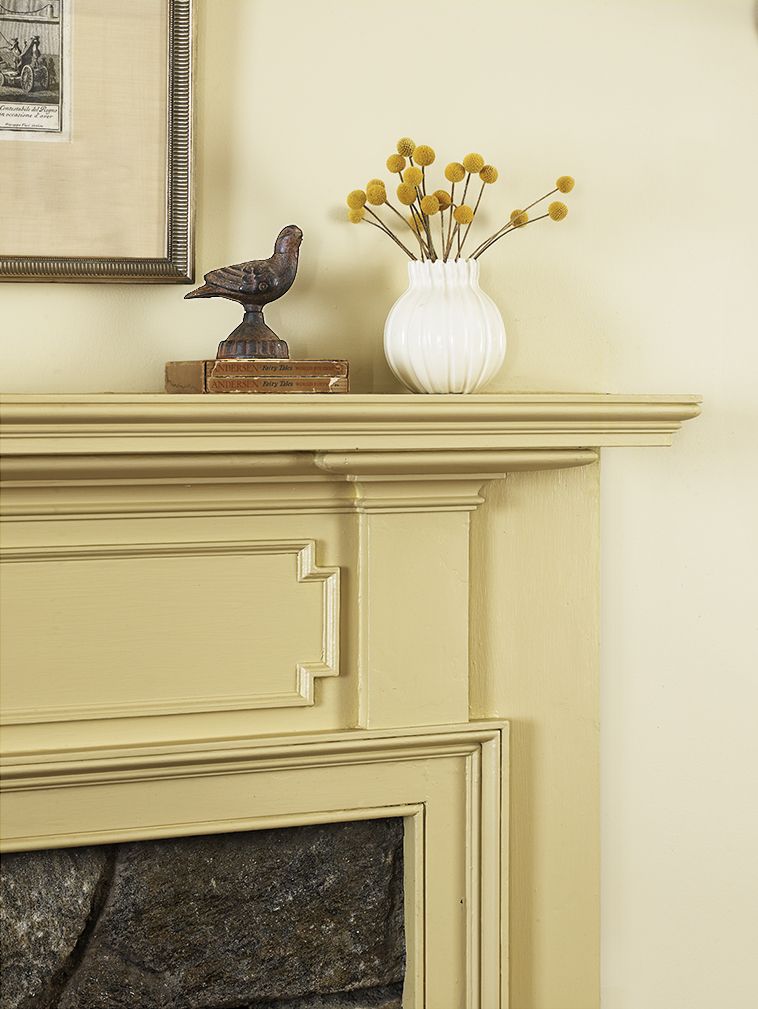
Adding panel molding to a plain mantel can transform it into a focal point that exudes vintage style. This project allows you to customize your fireplace surround to match your home’s look.
Sketch your design to scale on graph paper first. Then, draw layout lines on the mantel where the trim will go. Cut the molding to size and lightly sand the pieces. Secure the trim in place with wood glue and finishing nails, then fill the holes and paint the entire mantel for a cohesive look.
Cost: About $120.
13. Add Texture to a Prefab Medallion
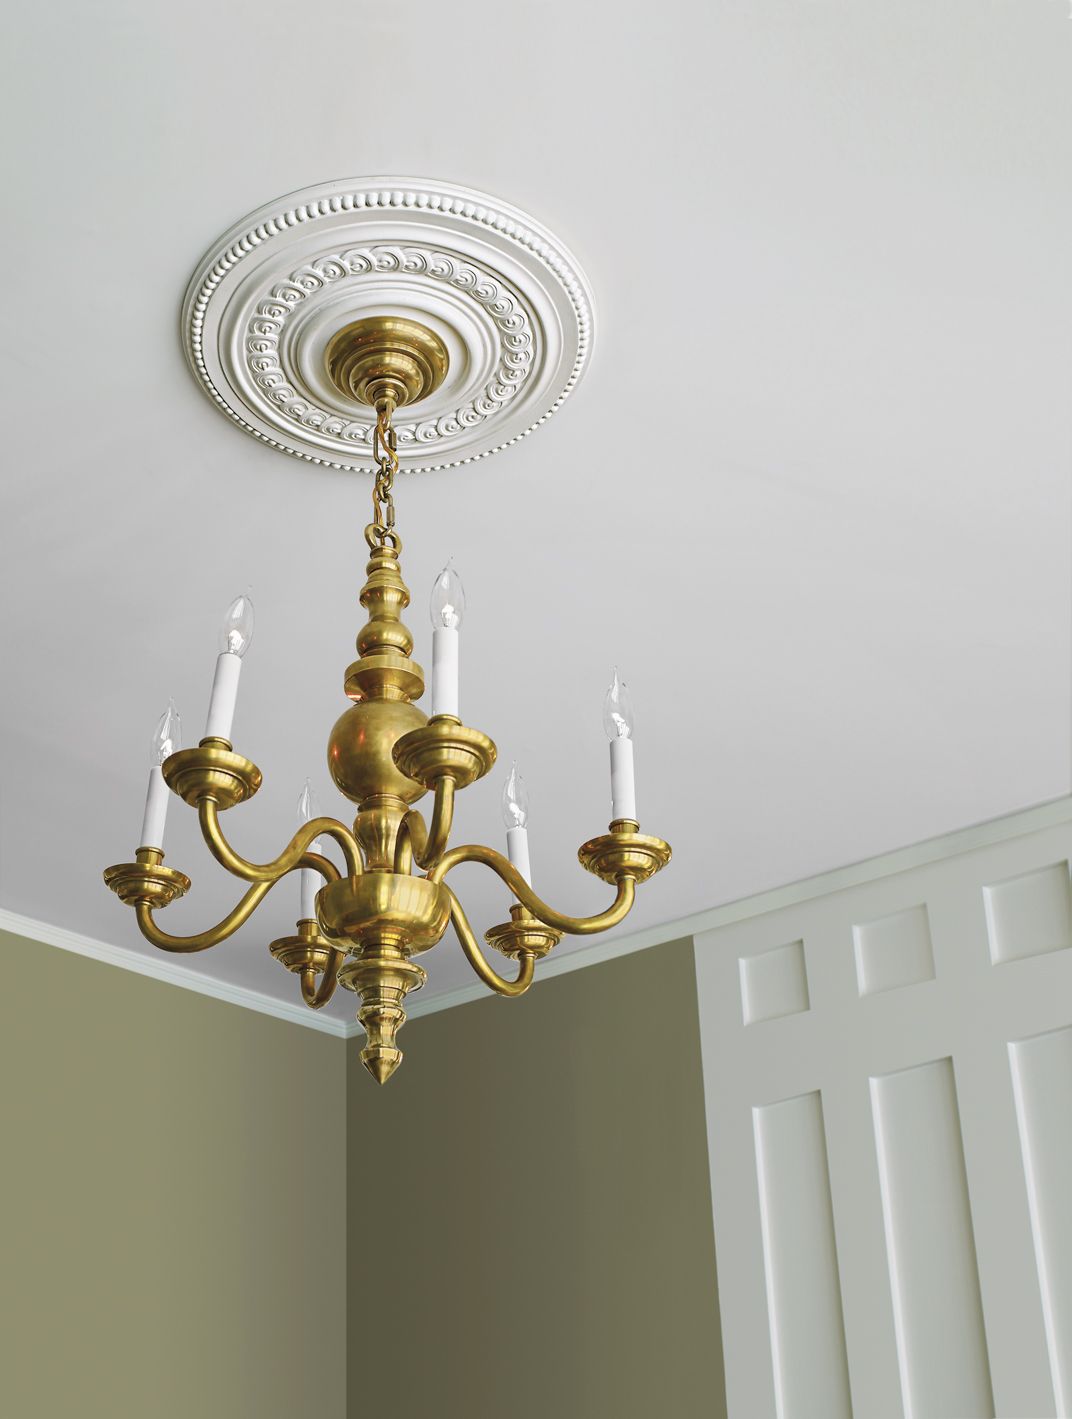
Create the look of vintage plaster with a prefabricated urethane ceiling medallion and some simple DIY techniques. This project adds an old-world touch to your ceiling fixtures without the weight and installation challenges of traditional plaster:
- Choose a urethane medallion in a style you like.
- Mix joint compound with water until it drips.
- Apply the thinned joint compound to the medallion, letting it drip and create texture.
- Let the compound dry completely.
- Install the medallion according to the manufacturer’s instructions.
Cost: About $40–$80 per medallion.