
For most Americans, warm weather means grill season. But if your grill hasn’t been used over winter, it might need some prep work before you fire it up. To ensure it cooks evenly and operates safely, follow this guide. We’ll cover common issues, expert tips for cooking, and cleaning advice.
Grill Prep Checklist
Let’s break down a good maintenance routine to get your grill primed for summer cookouts.
1. Deep-Clean Your Cooker
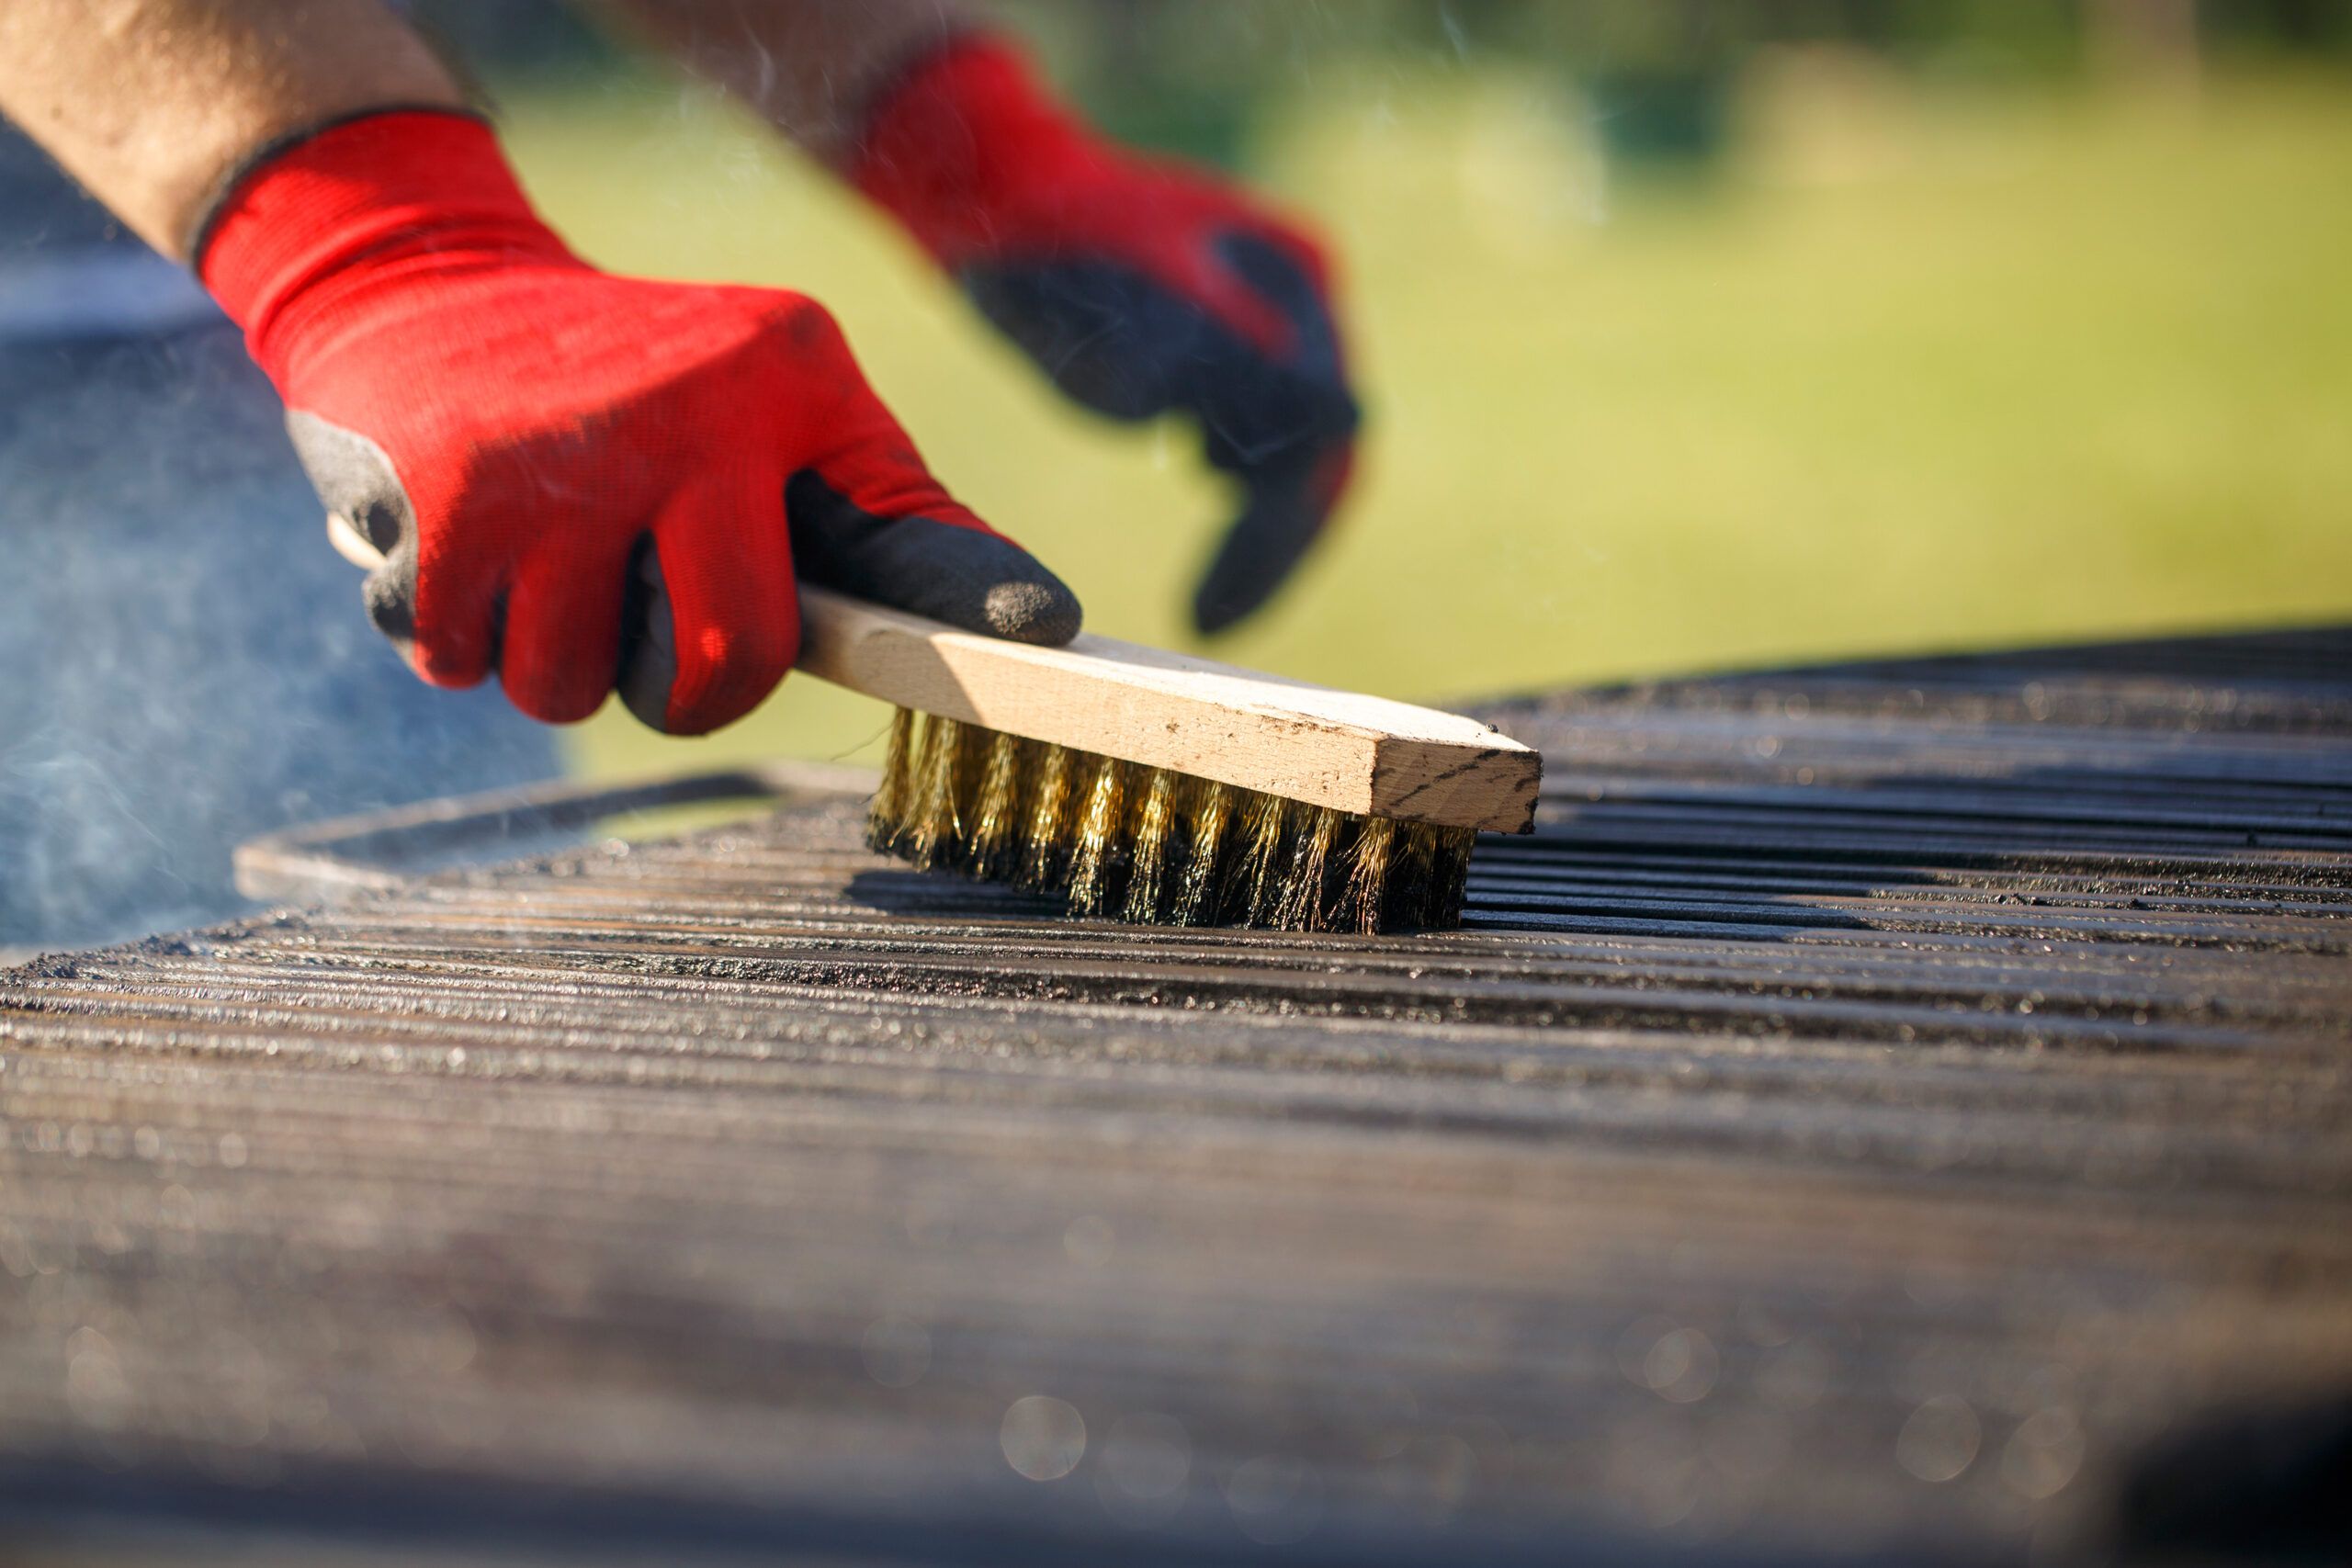
A thorough cleaning is a vital first step for grill prep. Over time, grills accumulate grease, food particles, and other debris that can affect flavor and performance. Barry “C.B.” Martin, Char-Broil’s chief grilling officer, says that a charred coating on grates doesn’t enhance flavor—it’s simply dirt. Here’s his step-by-step guide to deep-clean your grill effectively:
How To Clean the Inside of a Grill
- Begin by dry-scrubbing the grates, burners, and interior surfaces using a non-scratch sponge or nylon brush. For stubborn residue on uncoated steel or iron, you can use emery cloth or a wire brush.
- After scrubbing, wash all surfaces with warm, soapy water. Rinse thoroughly and dry completely to prevent rust.
- For cast-iron or metal grates, consider reseasoning with oil as you would a cast-iron pan. This helps protect the surface.
- Inspect your grates closely. If they show signs of significant rust or chipping, it may be time to replace them for the best possible grilling performance. New grates can make a big difference in cooking efficiency.
- After each use, run the burners on high for five minutes to burn off residue. Use a timer to avoid overheating and save on fuel.
- For a quick clean between uses, try this vinegar solution trick: Mix equal parts water and vinegar in a spray bottle, coat the interior, close the lid, and let it sit for an hour before scrubbing.
How To Clean the Outside of a Grill
- Clean stainless-steel and enameled exterior surfaces with warm, soapy water. To avoid streaking on stainless steel, wipe in the direction of the finish.
- For areas that don’t come into contact with food, touch up the paint using high-heat spray paint designed for grills.
- Avoid using harsh chemicals that will strip the surface of its finish.
2. Prep the Propane

Checking that your propane system is in good working order is important for both safety and performance. Start with a thorough inspection of all components by doing the following:
- Conduct a leak test by coating the regulator, valves, and hoses with soapy water.
- Turn on the tank to pressurize the system and look for bubbles, which indicate gas leaks.
- If you find leaks, tighten connections and retest. If leaks remain, replace the affected components or the entire tank if necessary.
- Check for spider webs and clear any debris or insect nests from the venturi tubes using a bottle brush. This step helps keep the fuel passage clear.
- Test each burner for even flame distribution. If you notice uneven flames, allow the grill to cool, then clear any blockages in the burner holes using a paperclip or small wire.
3. Check Propane Tank Gas Levels
It’s frustrating when you fire up the grill just to realize you’re out of propane, so check ahead of time to make sure you have enough. For grills without a built-in gauge, consider these methods:
- Use a propane scale like the Grill Gauge, which can accurately measure the remaining gas.
- Alternatively, weigh your tank on a bathroom scale and subtract the tare weight (TW) listed on the tank to determine the amount of propane left. This method is simple and effective.
- Remember that one pound of propane produces about 21,600 BTU per hour. Divide this by your grill’s maximum BTU output to estimate cooking time on high heat.
- Always keep a spare, full tank on hand. Store it upright in a shaded, outdoor area for safety.
4. Find and Fix Your Grill’s Hot Spots
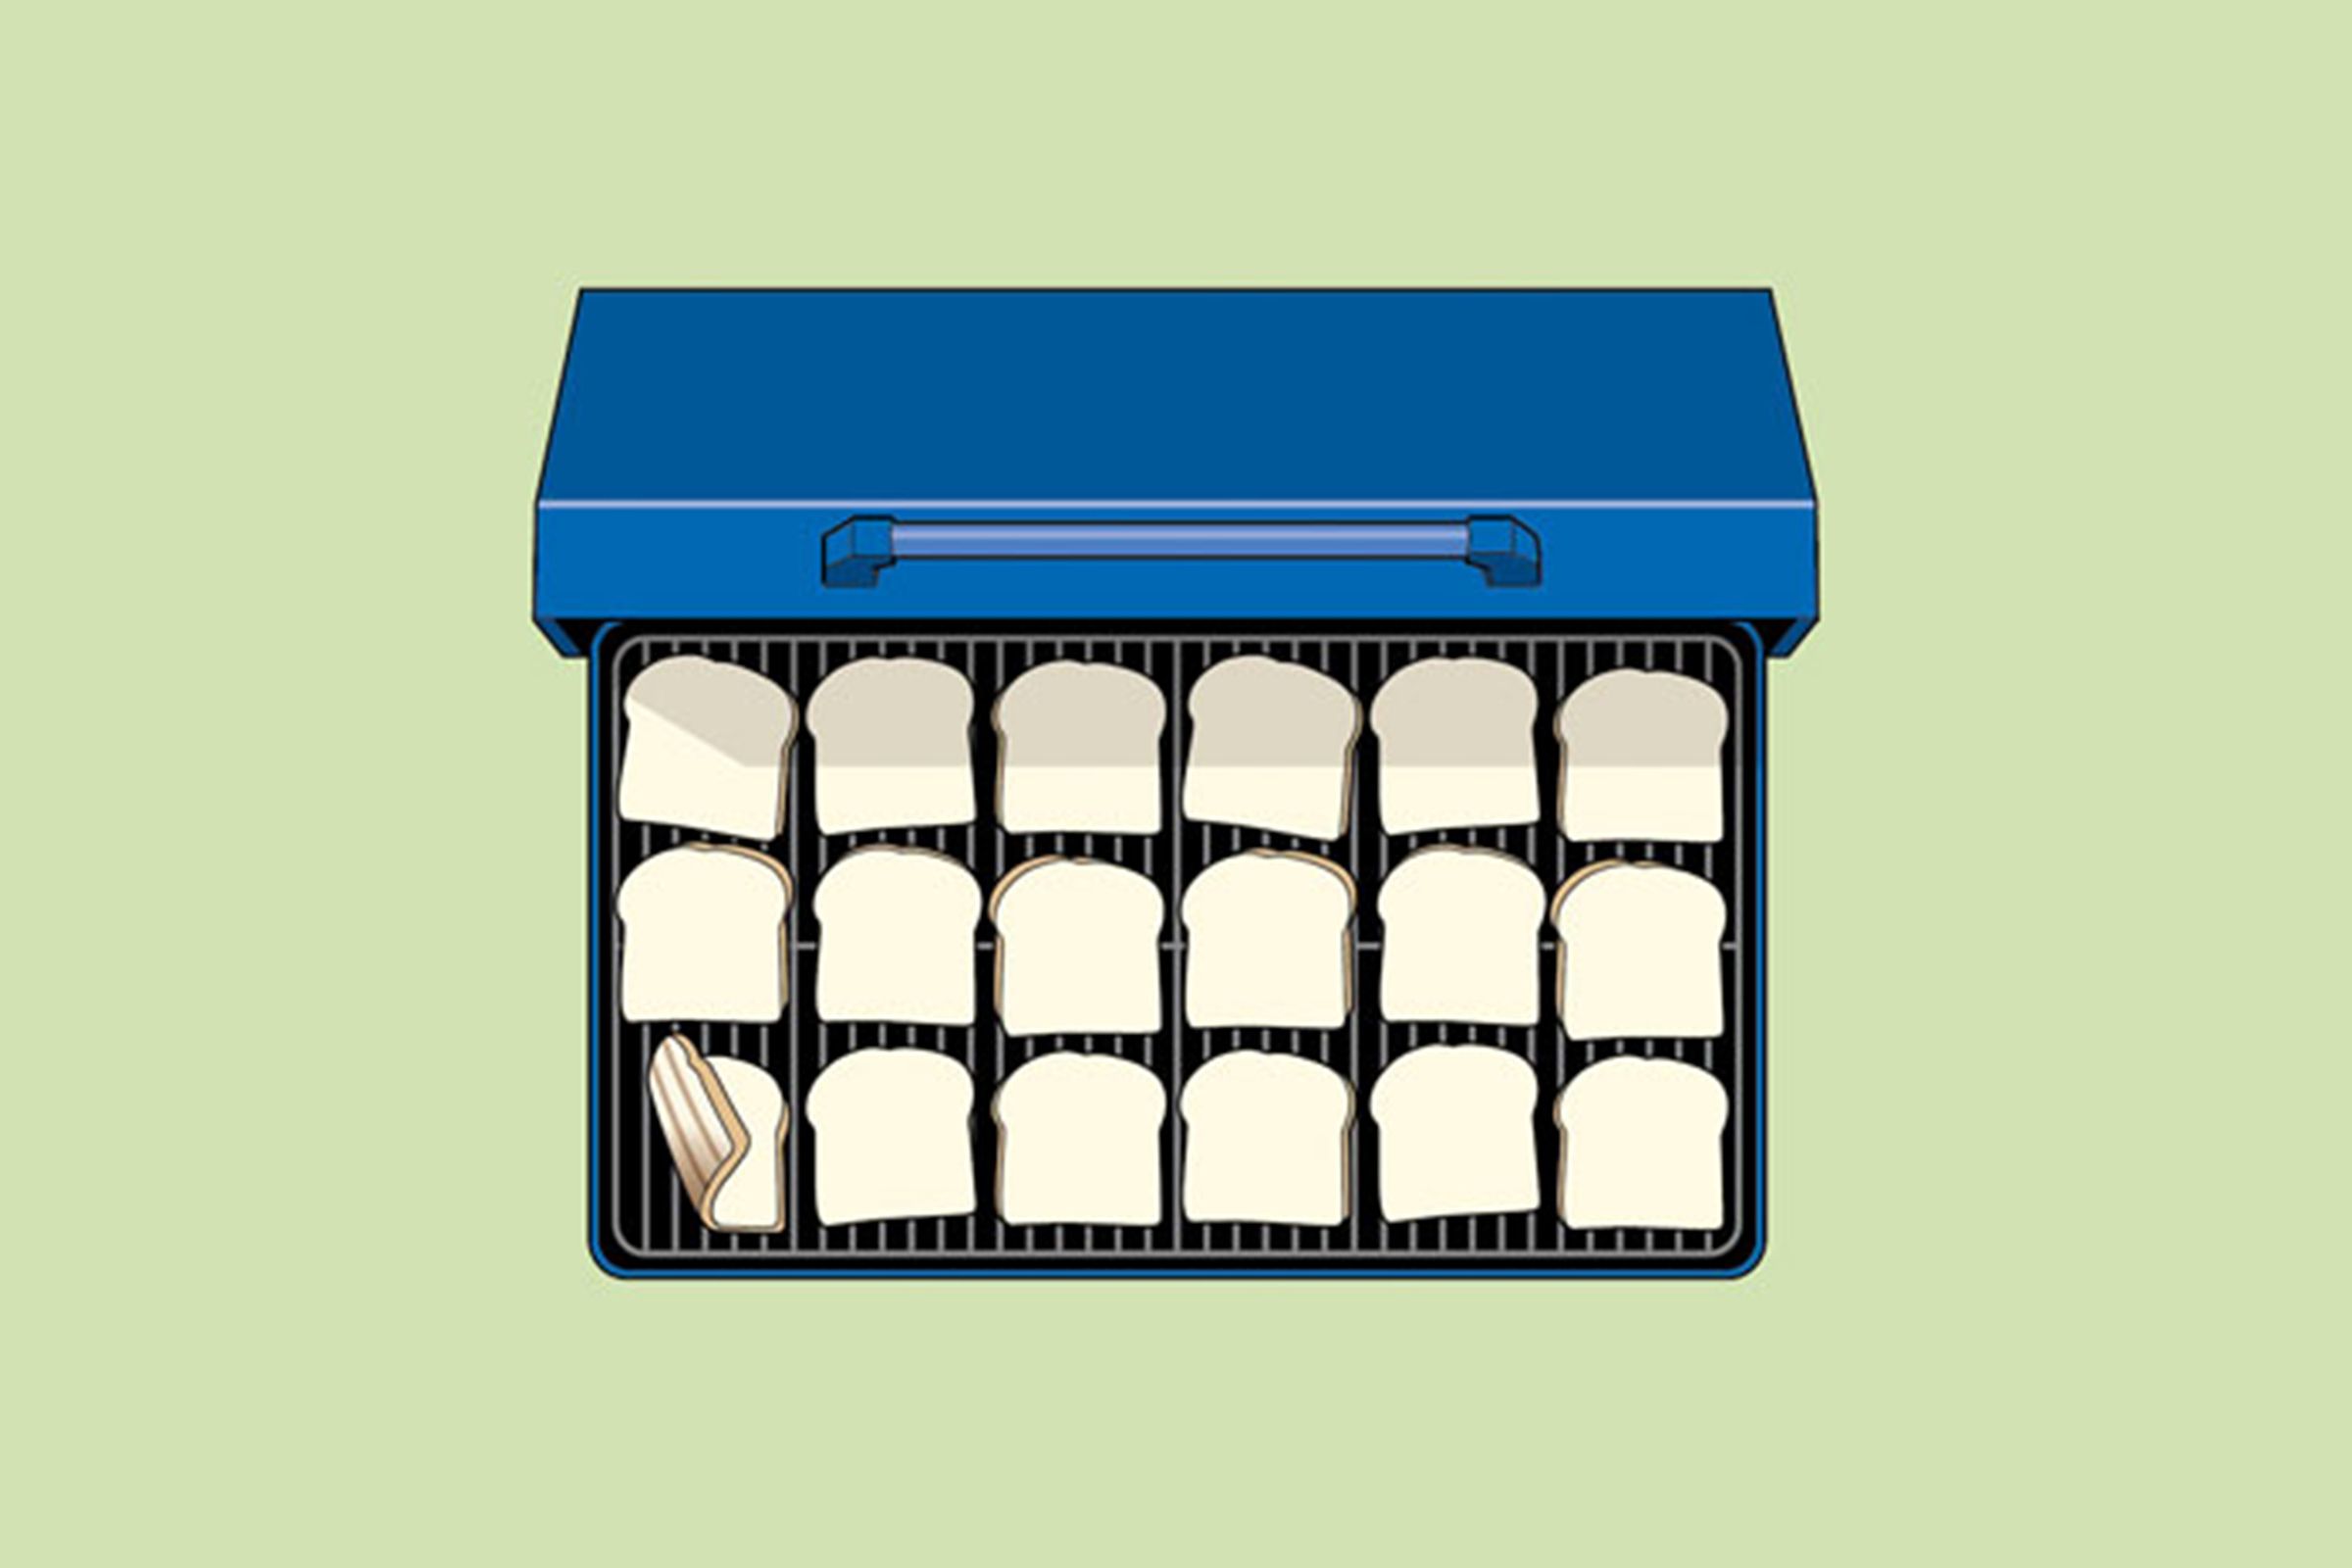
Even heat distribution is key to consistent cooking results. To identify and address hot spots:
- Cover your grates with slices of white bread in a grid pattern.
- Run all burners on high for a few minutes, then turn off the heat.
- Flip the bread slices to see which areas are most toasted, indicating hot spots.
- To even out heat distribution, consider adding grates made of hard-anodized aluminum, which conducts heat well.
- Alternatively, use the hot spots strategically by placing food requiring direct heat over these areas and items needing indirect heat in cooler zones. Experimenting with food placement can help you create perfect grilling outcomes.
5. Learn Your Burger Basics
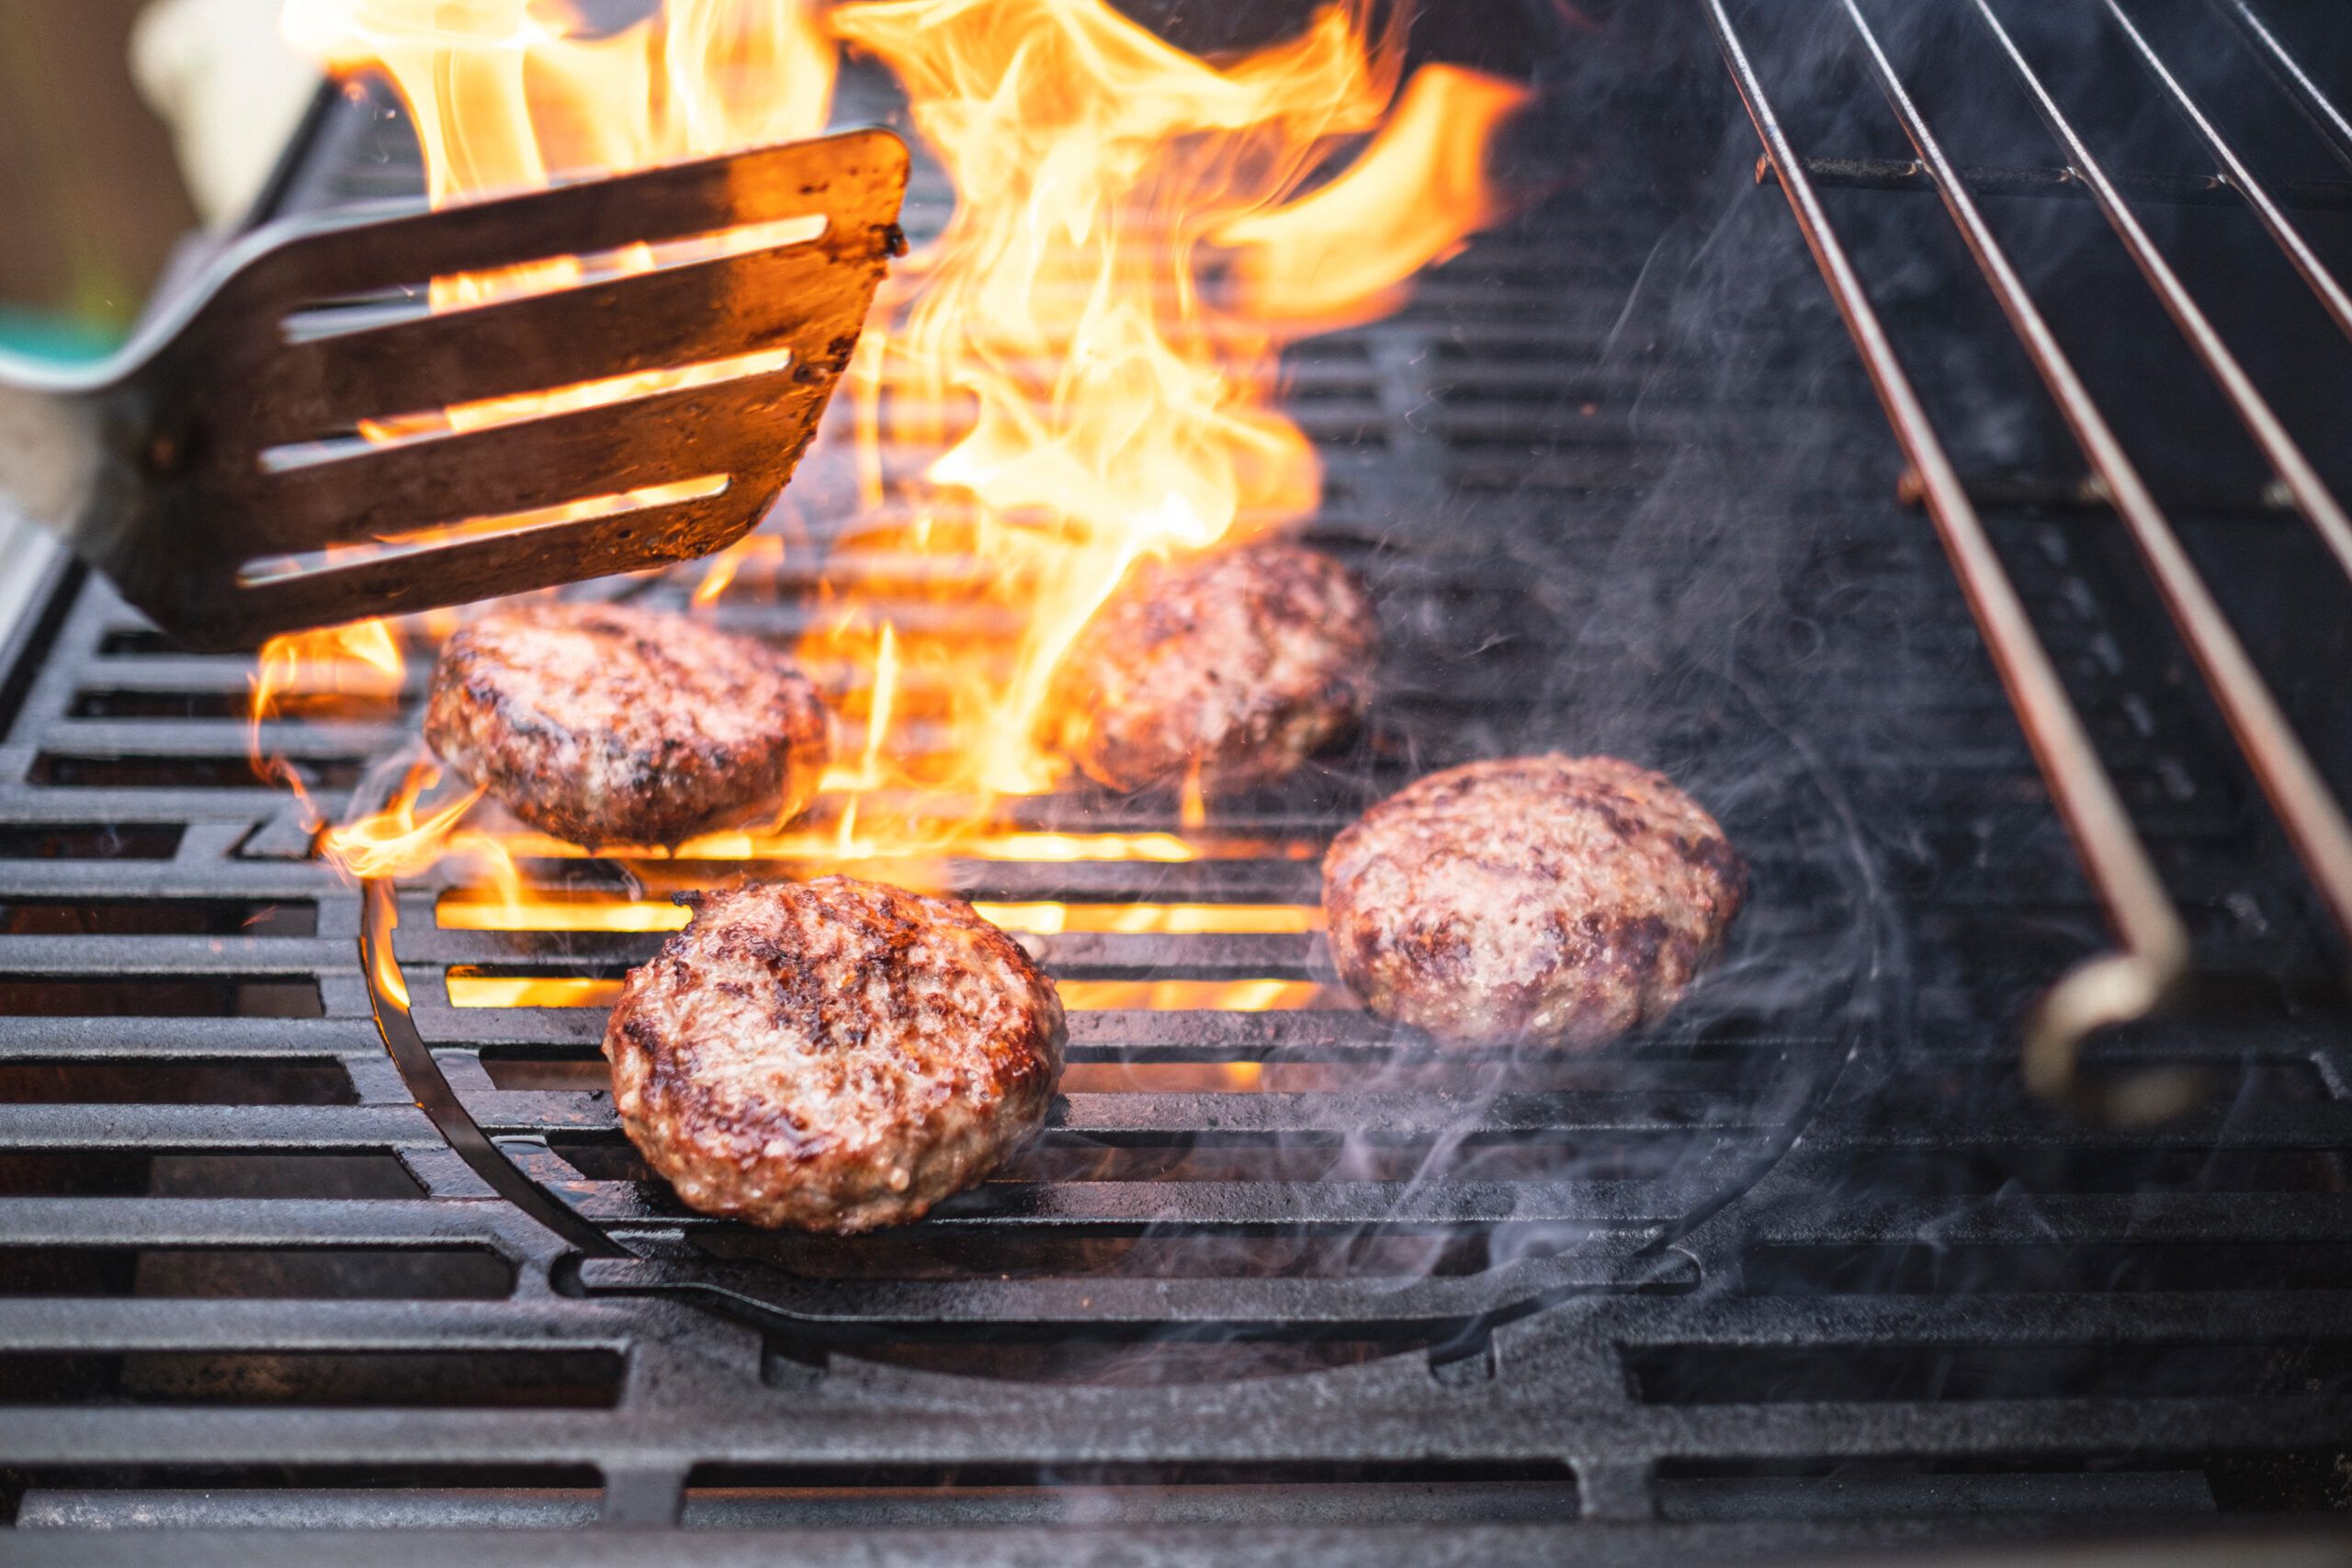
Mastering burger grilling is a cornerstone of barbecue expertise. Follow these tips from Grillmaster Martin for juicy, perfectly charred burgers:
- The best burgers are 3/4 to 1-inch thick. Too plump and they tend to char on the outside and undercook on the inside.
- Create a shallow, inch-wide indent in each patty to prevent them from puffing up during cooking.
- Pat burgers dry with a paper towel and season with salt to enhance browning.
- Preheat your grill to about 450 degrees Fahrenheit, which is the best temperature to cook burgers.
- Use a spatula for flipping, avoiding forks that can pierce the meat and release juices.
- Grilling times vary, so getting a temperature reading is key. Medium-rare burgers are ready at 130 degrees and medium at 140 degrees. For a well-done burger, aim for 160 degrees.
How To Test Burgers by Touch

For steaks, professional chefs often use the touch test to gauge doneness to avoid piercing the meat and releasing juices. Try the touch test yourself:
- Rare: The steak should feel similar to the spot between your thumb and forefinger when your hand is relaxed.
- Medium: Compare the steak’s firmness to the center of your palm when your hand is flat.
- Well-done: The steak should be firm with a slight give, similar to the tip of your nose.
Testing the meat’s firmness is a reliable way to get your preferred level of doneness without losing delicious juices.
Our Conclusion
Preparing your grill for barbecue season is an important task that sets you up for safe, efficient, and enjoyable outdoor cooking. By following this guide—from deep cleaning and propane checks to understanding heat distribution and mastering cooking techniques—you’ll be well-equipped to kick off the grilling season confidently.
Adapted with permission from Weber’s Way To Grill.