Project details
Skill
Cost
Estimated Time
Creating custom kitchen drawer dividers is an excellent way to maximize storage space and keep your utensils organized. This DIY project allows you to tailor the dividers to your specific needs and drawer dimensions.
In this guide, we’ll walk you through the process of building your own kitchen drawer dividers, from measuring and planning to the final assembly. Above, Nathan Gilbert from This Old House demonstrates the step-by-step process, offering valuable insights along the way.
Planning Your Drawer Dividers
Before diving into the construction process, it’s essential to plan your drawer dividers carefully. This step ensures that your final product fits perfectly and meets your organizational needs.
Measuring Your Drawer
Accurate measurements of the inside of your drawer are crucial for custom dividers. Every drawer can vary slightly in size, so precise measurements are necessary for a perfect fit. Use a measuring tape to record the length, width, and depth of your drawer.
Designing the Layout
With your measurements in hand, transfer them to paper and begin planning your divider layout. Think about the items you’ll store and how you’d like them organized. For example, Gilbert focuses on utensil storage, creating dividers that are about 12 inches long and leaving space in the back for items like plastic wrap and aluminum foil.
Choosing Your Materials
Poplar is a great option for this project as it is easy to work with, sands well, and takes paint nicely. However, oak or pine can also be good choices depending on your preferences. Here are the tools and materials you’ll need.
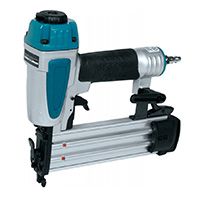
- Brad nails and nailer
- Clamps
- Half-inch poplar boards (or other wood types)
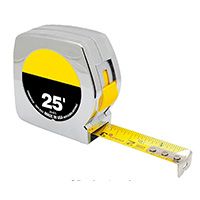
- Measuring tape
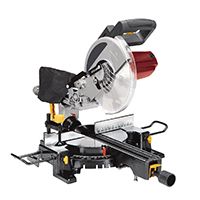
- Miter saw
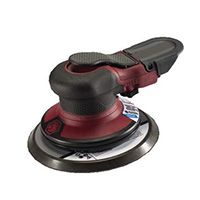
- Orbital sander (optional)
- Paint or finish
- Paper and pencil for planning
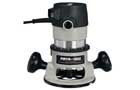
- Router with a 45-degree chamfer bit
- Sandpaper (180-grit)
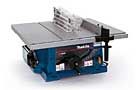
- Table saw
- Wood glue
 Shipping blanket (optional)
Pro tip: Ensure the wood you select is slightly shorter than the depth of the drawer to allow easy placement and removal.
Cutting and Preparing the Wood for Drawer Dividers
With a plan in place, you can start cutting the boards to the right sizes and preparing them for eventual assembly.
Step 1: Cutting the Boards
Using a miter saw, cut your boards to the required lengths based on your layout plan. To ensure accuracy, cut a small piece off the end of each board to create a square edge before making the final cuts.
Step 2: Sanding the Pieces
After cutting, sand all the boards smooth with 180-grit sandpaper. Place a shipping blanket beneath the boards during sanding to protect them and keep them from moving around.
Step 3: Marking for Joinery
Once the boards are cut and sanded, mark them for joinery. You will need to create dados (grooves) and rabbets (notches) to ensure secure connections between pieces. Carefully measure and mark the locations for these joints according to your planned layout.
Step 4: Cutting Dados and Rabbets
Using a table saw, cut the dados and rabbets into the boards. A 1/2-inch stack dado blade simplifies this process, but if you don’t have one, you can make multiple passes with a regular blade to achieve the same result. Precision is key, so take your time to ensure clean and accurate cuts.
Pro tip: To achieve symmetry, work from a center line outward when cutting your joints. For utensil dividers, aim for four equal spaces by starting with a center dado and moving outward.
Kitchen Drawer Divider Assembly and Finishing
With all pieces cut and prepared, it’s time to assemble and add the finishing touches to your drawer dividers.
Step 5: Gluing and Clamping
Apply wood glue to the dados and rabbets, then assemble the divider structure. Use clamps to hold everything in place while the glue dries. Clean up any excess glue with a damp rag to ensure a clean finish.
Step 6: Adding Reinforcement
For extra stability, you can add a single brad nail at each joint once the glue has dried. This step provides additional strength to your dividers without compromising their appearance.
Step 7: Easing the Edges
To make the dividers user-friendly, use a router with a 45-degree chamfer bit to ease the inside edges. This step prevents sharp corners that could catch your hand while reaching for utensils.
Step 8: Fitting the Dividers
Carefully place your custom dividers into the drawer to test the fit. They should fit snugly but not so tightly that they are difficult to remove if necessary.
Step 9: Painting or Finishing
Remove the dividers from the drawer and sand them one final time before applying your chosen finish. Painting the dividers to match the interior of your drawer can create a seamless, built-in look.
More Fun with Drawer Dividers
If you enjoyed completing this project, there are multiple options for customization and applications outside of the kitchen.
- Create similar dividers for office or bathroom drawers.
- Design adjustable dividers that can be repositioned as your storage needs change.
- Add decorative touches like stenciling or using colorful paints to make your dividers aesthetically pleasing.
- Turn the project on its side and create a hanging spice rack with compartments customized to fit your spice and seasoning jars.