We may be compensated if you purchase through links on our website. Our team is committed to delivering honest, objective, and independent reviews on home products and services.
Project details
Skill
Cost
Estimated Time
An entryway wall shelf combines practicality with style, keeping your space organized while adding a decorative element. This woodworking project is ideal for DIY enthusiasts of all skill levels, and you can complete it in a few hours.
In this guide and the video above, This Old House general contractor Tom Silva shows host Kevin O’Connor how to build a custom entryway wall shelf with cubbies and coat hooks.
*Costs in this article represent averages of prices sourced from Home Depot, Lowe’s, and Amazon.
Materials and Tools Needed To Build an Entryway Wall Shelf
Before starting your project, gather the following materials and tools.
Materials
- 1/4-inch plywood
- 1-inch nails
- 1×4 and 1×10 poplar boards
- Coat hooks
- Paint or wood stain
- Primer
- Trim-head screws
- Wood filler
- Wood glue
Tools
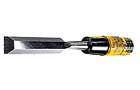
- Chisel
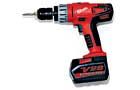
- Drill/driver
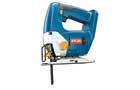
- Jigsaw
- Miter saw
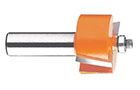
- Rabbeting router bit
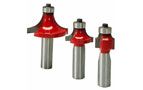
- Roundover router bit
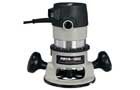
- Router
- Sander
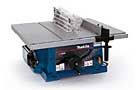
- Table saw
Building the Shelf
Here are the steps for getting the entryway shelf together.
Cutting and Preparing the Wood
Begin by cutting the poplar boards to the length you want using a miter saw. Use a table saw to rip the boards to the appropriate widths. For the back of the shelf, cut the 1/4-inch plywood to size.
Next, use a router with a rabbeting bit to cut rabbets on the sides and top pieces. These rabbets will hold the plywood back in place and hide the rough edge of the plywood. Silva demonstrates this technique, showing how to set the depth of the rabbeting bit to match the thickness of the plywood.
After routing, use a chisel to square off the rounded corners left by the router.
Creating the Curved Bottom
Add a decorative touch to the shelf by creating a curved bottom on the side pieces.
An easy method for this includes tracing the curve using a round object like a plastic bucket or paint can, cutting along the traced line with a jigsaw, and then sanding the cut edge until it’s smooth.
Smoothing the Edges
Use a router with a roundover bit to smooth the leading edges of your shelf pieces.
For the top edge, Silva suggests lowering the router bit slightly to create an attractive shadow line to give the entryway shelf a nice, professional flair.
Assembly
Before assembling the shelf, dry fit the pieces together and pre-drill holes for the dividers in the top and bottom pieces to prevent wood splitting when you insert screws.
Follow these steps to assemble the shelf:
- Apply wood glue to each joint.
- Secure the pieces together using trim-head screws.
- Mark the location of the dividers on the back piece.
- Glue and nail the back piece (plywood) in place using 1-inch nails.
Entryway Shelf Finishing Touches
Now that you’ve assembled the entryway shelf, it’s time to sand and paint it.
Sanding and Priming
Once you have the shelf put together, sand all surfaces to give it a smooth finish. Apply a coat of primer to all surfaces to help the final paint color adhere better and provide a professional look.
Filling and Painting
After the primer dries, fill any screw holes with wood filler and wait for the wood filler to dry completely. Then, sand the filled-in areas until smooth and apply your chosen paint color or wood stain.
Allow the paint to dry completely before adding the hooks.
Adding Coat Hooks
Attach coat hooks to the front of the shelf to add a convenient spot to hang coats, bags, or other items.
Dimension Guidelines for Your Entryway Wall Shelf
To ensure your entryway wall shelf fits perfectly in your space, we recommend following these dimension guidelines:
- Dividers: Equal spacing, around 10–12 inches apart
- Sideboards: Usually 12 inches high and 10 inches wide
- Top and bottom boards: Typically 36 inches long and 10 inches wide
These dimensions offer a balanced look but can be adjusted based on your specific needs and entryway space.
Entryway Shelf Customization Options
Paint and Finish
Choose a paint color that complements your entryway decor. You can also opt for a stain to highlight the natural wood grain. Adding a clear coat finish offers extra durability and a unique appearance.
Additional Features
For added functionality and aesthetic appeal, consider these features:
- Additional shelves: Add more shelves above or below the main unit for extra storage
- Number of cubbies: Depending on your storage needs, you can increase or decrease the number of cubbies
- Personalized hooks: Use different styles of hooks or paint them to match your decor
Our Conclusion
Building an entryway wall shelf is a simple DIY project that adds both style and functionality to your home. With the right tools and materials, you can create a custom piece that perfectly suits your needs and decor. As Silva shows, this is an excellent way to improve your woodworking skills while creating a practical storage area for your entryway.
Tools
 Miter saw
- Table saw
- router
- Rabbeting router bit
- Roundover router bit
- chisel
- Jigsaw
- Drill/driver