
Setting up a ladder correctly is important for your safety and the success of any project. As This Old House general contractor Tom Silva notes, “I know a lot of people—professionals, even—who have been hurt only because they tried to take a shortcut when setting up their ladders.” This guide will walk you through the essential steps to ensure your ladder remains stationary and secure, covering everything from basic safety principles to advanced techniques for various scenarios.
Types of Ladders and Their Uses
Ladders come in various types, each designed for specific tasks. The most common include:
- Stepladders: Ideal for indoor use and low-height tasks
- Extension ladders: Perfect for reaching high exterior areas
- Multi-position ladders: Versatile for various jobs and surfaces
Choosing the right ladder for your task is the first step in ensuring safety. For instance, never use a stepladder as a straight ladder or an extension ladder on stairs.
Ladder Safety Basics
Understanding the fundamentals of ladder safety can help to prevent accidents and injuries.
The Importance of Proper Ladder Setup
Proper setup is critical for ladder safety. A well-positioned ladder provides stability and reduces the risk of falls. Key aspects of proper setup include:
- Ensuring the ladder is on level ground
- Maintaining the correct angle for extension ladders
- Locking all mechanisms securely in place
Remember, a stable ladder is a safe ladder. Taking the time to set up correctly can prevent serious accidents and make your work more efficient.
Pre-Setup Checks
Before you even begin to position your ladder, perform some preliminary checks to verify that your equipment is in good condition and that your work area is safe.
Inspecting Your Ladder for Damage
Always inspect your ladder before use. Look for:
- Cracks or splits in the rails or rungs
- Loose or missing hardware
- Damaged or worn non-slip feet
- Signs of corrosion or rust
If you find any damage, do not use the ladder. It’s better to replace or repair it than risk an accident.
Assessing the Work Area
Take a moment to survey your work area. Consider the following:
- Is the ground level and stable?
- Are there any overhead power lines or obstacles?
- Is there foot or vehicle traffic in the area?
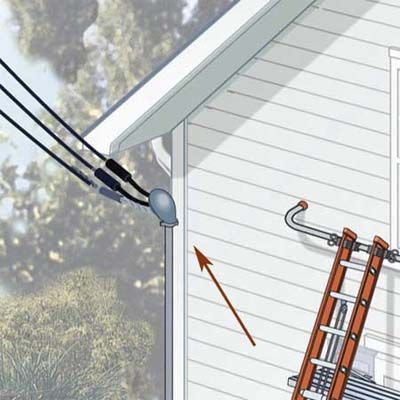
Addressing these factors before setup can prevent many common ladder accidents. For example, always look overhead for wires before carrying or setting up a ladder.
Positioning Your Ladder Correctly
The 4-To-1 Rule for Extension Ladders
The 4-to-1 rule is a simple yet effective guideline for positioning extension ladders. Here’s how it works:
- Measure the distance from the ground to the support point on the wall.
- Divide this height by four.
- The result is how far the base of the ladder should be from the wall.
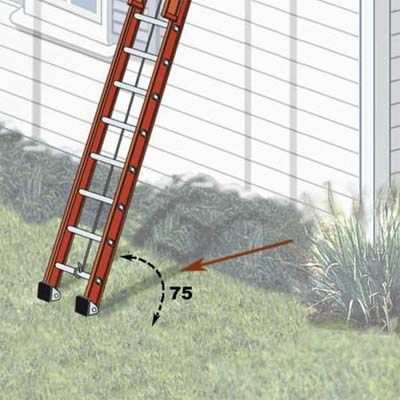
For example, if the ladder reaches a point 20 feet high, the base should be 5 feet from the wall. This creates a safe 75-degree angle for climbing.
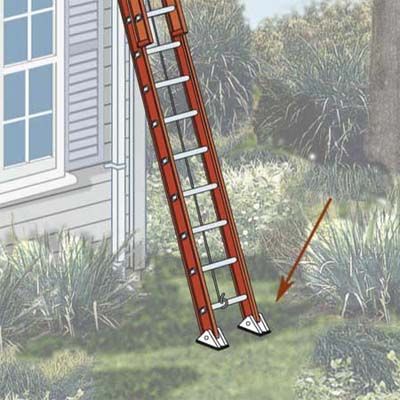
Level feet by digging out the ground or by using ladder levelers.
Proper Angle and Stability Techniques
In addition to the 4-to-1 rule, consider these techniques for ensuring proper angle and stability:
- Use the elbow test: Stand facing the ladder with your toes touching its base. Extend your arms straight out. Your palms should rest on a rung at shoulder height.
- Ensure both rails are evenly supported at the top and bottom.
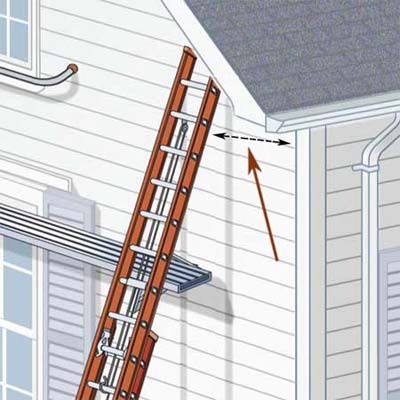
- Use a ladder stabilizer or standoff when working around windows for greater stability and comfort.
Remember, a properly angled ladder reduces strain on the climber and minimizes the risk of the ladder sliding or tipping.
Securing the Ladder’s Footing
A ladder is only as stable as its foundation. Proper footing can help prevent slips and falls.
Setting Up on Different Ground Types
Different surfaces require different setup techniques. Always prioritize creating a level, stable base for your ladder, regardless of the surface type.
Footing: Hard Ground
Rest the ladder feet (with textured rubber pads intact) flat on the surface. Ensure the area is free of slippery materials like plastic tarps or debris.
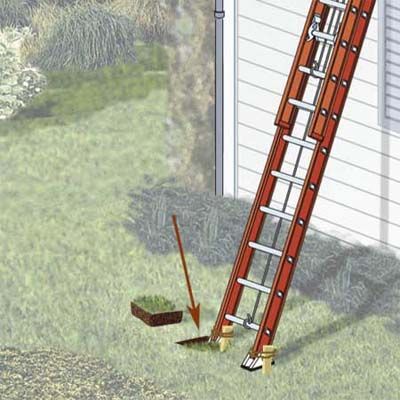
Footing: Soft Ground
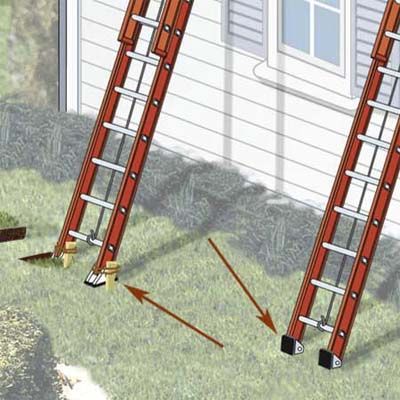
Flip the feet up and drive their spiked ends into the ground. Alternatively, lay the feet flat and secure them with 1 x 2 stakes on the side or in front.
Footing: Uneven Terrain
Use ladder levelers to create a stable base. These adjustable feet can compensate for slopes and irregularities in the ground.
Using Ladder Levelers and Stabilizers
Ladder levelers and stabilizers are valuable tools for enhancing safety.
- Levelers: These adjustable feet attach to the bottom of the ladder, allowing you to compensate for uneven ground. They’re especially useful on slopes or stairs.
- Stabilizers: Also known as standoffs, these attachments widen the ladder’s top contact points. They’re particularly useful when working around windows or on roofs, providing extra stability and a more comfortable working position.
These ladder safety accessories can significantly improve your ladder’s stability and your overall safety.
Extending and Securing Extension Ladders
Extension ladders require special attention during setup to ensure they’re safe and stable. This section covers the key points for properly extending and securing these ladders.
Proper Overlap and Locking Mechanisms
When extending your ladder, follow these guidelines:
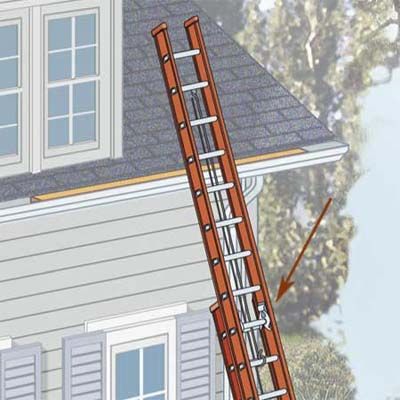
- Position the fly section (the one with the rung locks) in front.
- Ensure the fly section overlaps the base section by at least 3 feet.
- Engage both rung locks securely over the rungs.
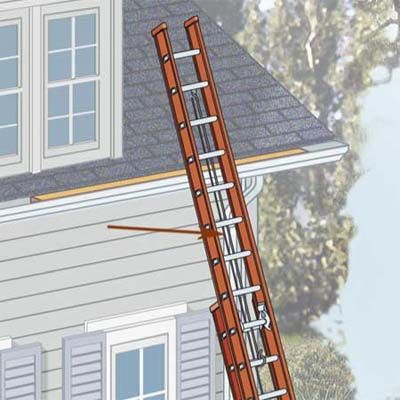
- Tie off the rope on a lower rung to prevent the ladder from retracting unexpectedly.
Always check that the rope and pulley show no signs of wear or damage before use.
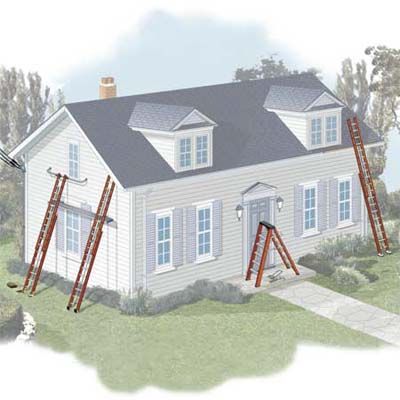
Exterior Wall
When working on an exterior wall, use these illustrations to guide your practices and placement.
Look Up
Avoid Edge
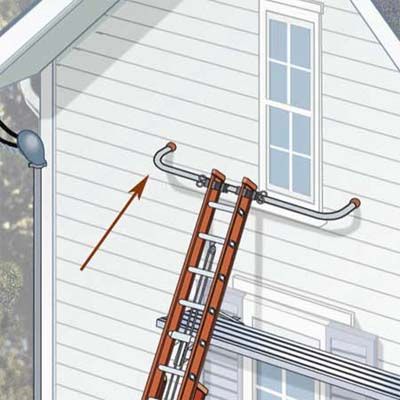
Stabilize
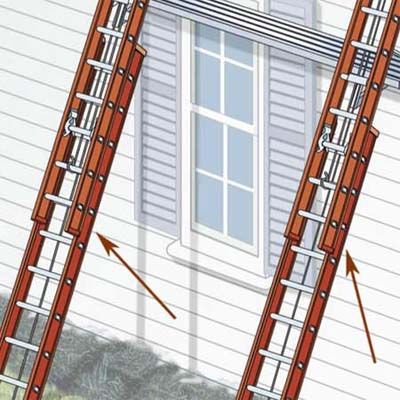
Jacks
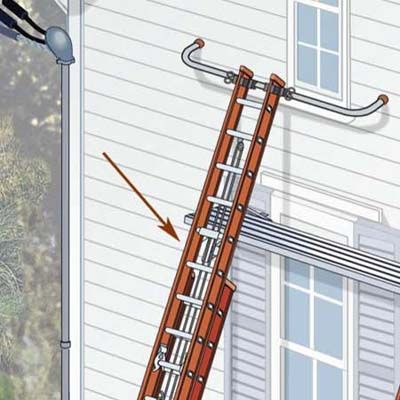
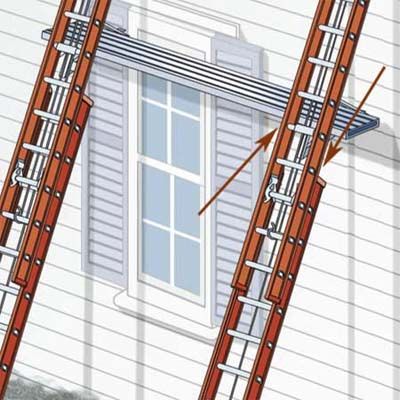
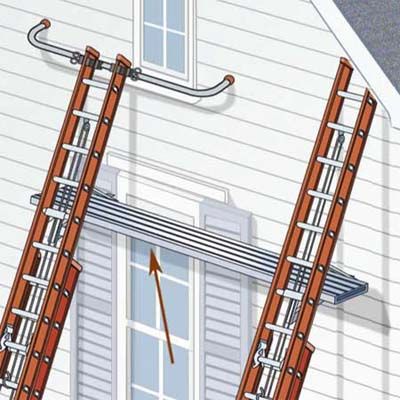
Planks
Fly
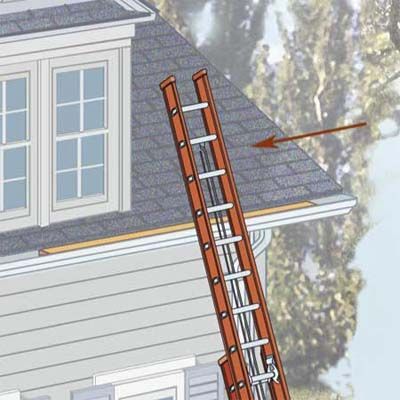
Using a Ladder to Access the Roof
Check out the images below to see how to use a ladder on the roof.
Proper Extension
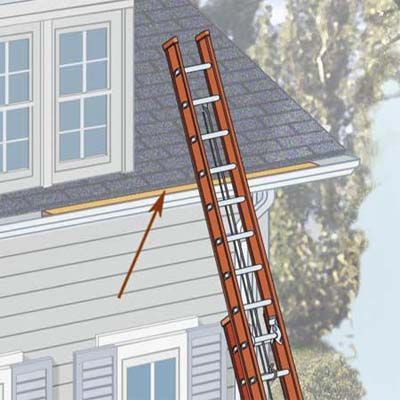
Gutter Support
Rope
Rung Locks
Stabilize
Securing the Ladder at the Top
For added stability, especially when accessing a roof or elevated platform, remember these tips:
- Extend the ladder at least 3 feet above the surface you’re climbing onto.
- If possible, secure the top of the ladder to a stable point on the structure.
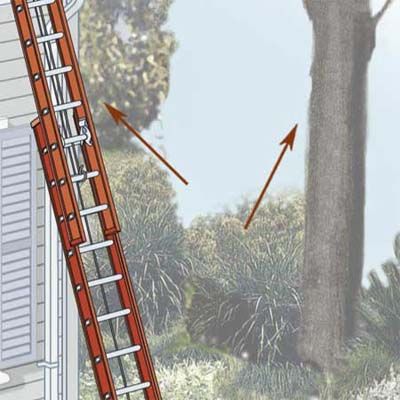
- Avoid resting an extension ladder against a tree or pole, where it can rotate and fall.
- When working near gutters, slip a 2 x 4 into the gutter to prevent it from being crushed by the ladder’s weight.
Special Considerations for Stepladders
Stepladders have their own set of safety considerations. While they may seem simpler than extension ladders, proper setup is still necessary for preventing accidents.
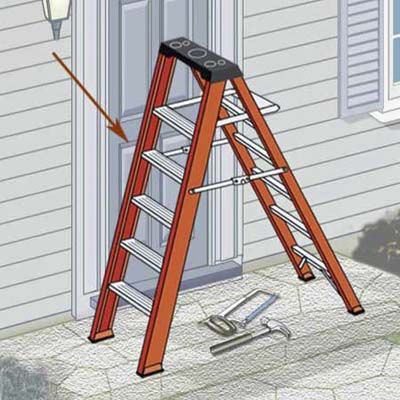
Opening and Locking Spreaders
Before climbing a stepladder:
- Fully open the ladder on a level surface.
- Lock the rail spreaders or braces in the open position.
- Check that any supports or braces beneath the treads are intact.
Never use a stepladder in its folded position or as a straight ladder.
Check out the illustrations below for a visual walkthrough of stepladder safety.
Stepladder: Safety First
Stepladder: Keep Treads Clean
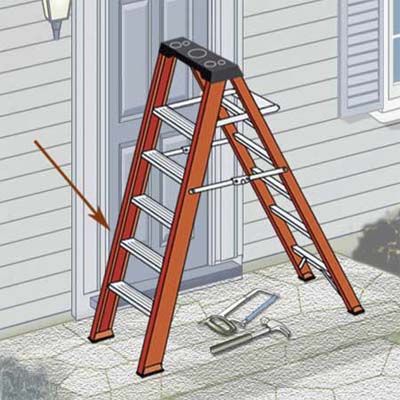
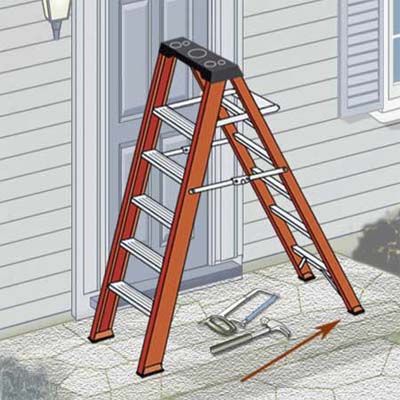
Stepladder: Steady Feet
Stepladder: Brace It
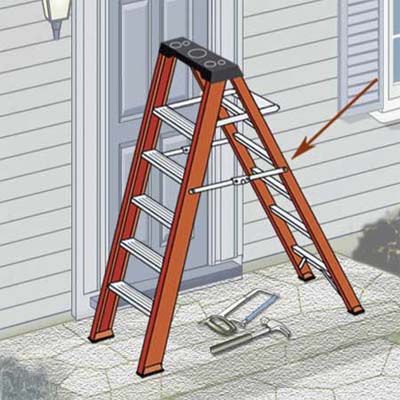
Stepladder: Close Door

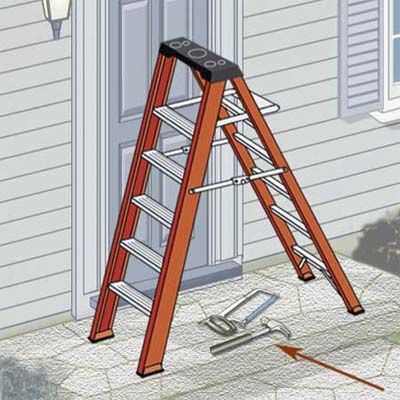
Stepladder: Remove Obstacles
Positioning Near Doors and Walkways
When setting up a stepladder in high-traffic areas:
- Ensure any nearby doors are locked or barricaded to prevent unexpected opening
- Position the ladder away from walkways if possible
- If you must set up in a walkway, use warning signs or barriers to alert others
Always remove all tools and materials from the ladder when it’s not in use to prevent trip hazards.
Advanced Ladder Setup Techniques
For more complex jobs, you may need to employ advanced setup techniques. These methods require extra care and often additional equipment.
Using Ladder Jacks and Planks
Ladder jacks and planks create a platform between two ladders, useful for painting or siding work. When using this setup:
- Use ladder jacks only on Type I or IA ladders.
- Never use ladder jacks higher than 20 feet.
- Above 10 feet, you must use a fall protection harness.
- Use only aluminum scaffolding planks meant for ladder jacks or 2 x 12 wood planks no more than 8 feet long.
- Position jacks on either the front or back of the ladder, but if the planks are in front, have another ladder available for access.
Always follow manufacturer guidelines and safety tips for using an extension ladder when employing these advanced techniques.
When setting up a ladder for roof access:
- Extend the ladder at least 3 feet above the roof edge.
- Secure the ladder at both the top and bottom.
- Consider using a ladder stabilizer to distribute weight and prevent damage to gutters.
- Ensure the ladder is not too close to the roof edge, which could cause it to tip backwards.
Always maintain three points of contact when transitioning from the ladder to the roof and back.
Maintaining Your Ladder for Longevity and Safety
Proper maintenance not only extends the life of your ladder but also ensures it remains safe to use. Regular care and inspection are key to ladder longevity.
Cleaning and Storage Tips
To keep your ladder in top condition:
- Clean the ladder after each use, removing dirt, paint, or other materials.
- Store the ladder in a dry, covered area to prevent weather damage.
- Keep stepladder treads free of paint, which can hide defects on wood ladders.
- Regularly clean treads of grease and dirt to maintain traction.
Proper storage and cleaning prevent premature wear and make it easier to spot potential issues.
When To Replace Your Ladder
Even with good maintenance, ladders don’t last forever. Replace your ladder if you notice:
- Cracks, splits, or excessive wear on rungs or rails
- Loose rivets or faulty locking mechanisms
- Corrosion or rust that affects structural integrity
- Any deformation or bending of the ladder structure
When in doubt, err on the side of caution and replace the ladder. Your safety is worth more than the cost of a new ladder.
Our Conclusion
Setting up a ladder safely is an important skill for any homeowner or professional. By following this comprehensive guide, you can significantly reduce the risk of ladder-related accidents and injuries. Remember, proper setup is just as important as the work you’re doing on the ladder. Always take the time to assess your work area, choose the right ladder for the job, and follow proper setup procedures.