An adjustable wrench is a versatile tool that every homeowner and DIY enthusiast should have in their toolbox. This handy instrument allows you to tackle a wide range of tasks, from basic plumbing repairs to assembling furniture. In this guide, we’ll explore the ins and outs of using an adjustable wrench effectively and safely.
What Is an Adjustable Wrench?
An adjustable wrench, also known as a crescent wrench, is a hand tool designed to grip and turn nuts, bolts, and other fasteners of various sizes. Its key feature is a movable jaw that can be adjusted to fit different-sized objects, making it a versatile alternative to multiple fixed-size wrenches. This tool is a good choice when working with non-standard or metric-sized fasteners.
Types of Adjustable Wrenches
While the term “adjustable wrench” often refers to the classic crescent wrench, there are several types of adjustable wrenches, each designed for specific tasks.
Crescent Wrench
The crescent wrench is the most common type of adjustable wrench. It features a flat, C-shaped head with one fixed jaw and one movable jaw that can be adjusted using a worm gear. This design allows it to fit a wide range of nut and bolt sizes, making it a versatile tool for general use around the home or workshop.
Pipe Wrench
A pipe wrench is a heavy-duty adjustable wrench specifically designed for gripping and turning pipes and round surfaces. It has serrated jaws that provide a strong grip on smooth, cylindrical objects. While effective for plumbing tasks, the pipe wrench’s teeth can damage softer materials, so use it only on appropriate surfaces.
Monkey Wrench
The monkey wrench is an older style of adjustable wrench with a larger, heavier design. It features long, flat jaws and a sliding lower jaw that can be adjusted using a screw mechanism. While less common today, monkey wrenches are still used for heavy-duty tasks and in some specialized industries.
When To Use an Adjustable Wrench
This versatile tool has many applications, but it’s also important to recognize its limitations.
Suitable Applications
An adjustable wrench is ideal for tasks that involve nuts and bolts of various sizes, especially when you don’t have a full set of fixed wrenches on hand. It’s particularly useful for the following tasks:
- Assembling furniture
- Automotive maintenance
- Basic plumbing repairs
- General household repairs
- Quick fixes where precision isn’t critical
Limitations and Alternatives
While adjustable wrenches are versatile, they’re not always the best choice. For high-torque situations or when working with stubborn fasteners, a fixed wrench or socket set may be more appropriate. These tools provide a more secure grip and can handle greater force without the risk of slipping.
Proper Technique for Using an Adjustable Wrench
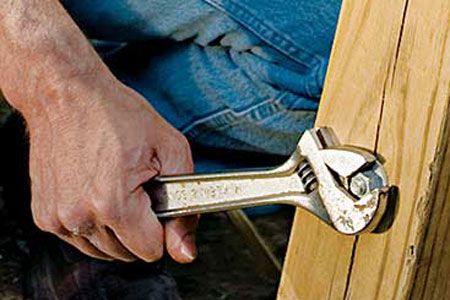
Mastering the proper technique when using an adjustable wrench can make your work more efficient and reduce the risk of injury or damage to the fastener. Always position the wrench so that you can pull it toward your body. This stance gives you better control and reduces the risk of injury if the wrench slips.
Before applying force, make sure the wrench’s jaws are snug against the nut or bolt and touching it on at least three sides. This three-point contact provides a secure grip and prevents slipping, which could damage the fastener or cause injury.
Safety Precautions and Best Practices for Adjustable Wrenches
The adjustable wrench has earned the nickname “knucklebuster” due to the potential for sudden slippage that can result in bruised knuckles. To avoid this, maintain a firm grip on the wrench and be prepared for unexpected movement.
To ensure the best possible grip, retighten the jaws each time you reposition the wrench. Turn the adjusting screw with your thumb while lightly rocking the wrench back and forth on the fastener until it doesn’t rock anymore.
Apply Proper Grip and Leverage
For maximum leverage and control, grab the handle as far from the jaws as possible while still maintaining a solid grip. Avoid the temptation to slip a pipe over the handle for extra leverage, as this can damage the wrench or the fastener. If you need more force, it’s time to switch to a different tool.
Stick to the Correct Side
Use the wrench in the right orientation for optimal performance and minimal wear. Apply force so that most pressure is placed on the fixed jaw. This helps avoid shifting and keeps your fastener secure.
Wear Safety Gear
When performing any tasks that involve tools and machinery, wear proper safety gear. Gloves can protect your hands from the potential “knucklebuster” effect or slipping, and safety glasses keep your eyes safe from any flying debris or accidental hits in tight spaces.
Maintenance and Care for Your Adjustable Wrench
Adjustable wrench maintenance will ensure its longevity and reliable performance. Here are some tips to keep your wrench in top condition:
- Clean the wrench after each use to remove dirt and debris.
- Apply a light coat of oil to prevent rust, especially on the moving parts.
- Store the wrench in a dry place to avoid corrosion.
- Periodically check and tighten the adjusting mechanism.
- Replace the wrench if it shows signs of wear or damage.
Regularly inspect the wrench for any signs of damage. Check the handle for cracks and make sure the jaws haven’t lost their alignment. If you notice any significant wear or structural damage, it’s time to replace it to avoid injuries or tool failure during use.
Advanced Tips and Tricks for Adjustable Wrenches
Once you’ve mastered the basics, these advanced techniques can help you tackle more challenging situations with your adjustable wrench.
Using the Flip Trick for Limited Spaces
When working in tight spaces where you can only give the wrench a partial turn, try the flip trick. Wrench jaws are offset 15 degrees from the centerline of the handle. Reversing the head allows you to get the most out of each pull.
Adapting to Different Nut Sizes
When switching between nut sizes, don’t assume the previous setting will work. Always readjust the jaws to achieve a snug fit on each new fastener. This habit will prevent slippage and potential damage to the nut or bolt.
Using It with Other Tools
An adjustable wrench can be used effectively alongside other tools for increased versatility. For instance, you can pair it with pliers for added grip or use it in combination with a multi-tool for more complex fixes. Combining your tools can enhance your DIY skills and project outcomes.
Adding Extensions
Consider using an extension bar for bolts and nuts in tough-to-reach areas. This can give you the necessary leverage or reach you need to complete the task without straining. Use an extension suitable for your wrench size and task requirements.
Maintaining Grip in Slick Conditions
When working with greasy or wet fasteners, it can be challenging to keep the wrench steady. Wrap the fastener with a cloth or a piece of sandpaper to create more friction. This makes it easier for the wrench to grip and turn the fastener without slipping.
Common Mistakes To Avoid When Using an Adjustable Wrench
Even experienced users can fall into bad habits. Here are some common mistakes to watch out for:
- Applying force at an angle instead of perpendicular to the fastener
- Failing to fully close the jaws on the fastener
- Neglecting to clean and maintain the wrench regularly
- Over-tightening the fastener
- Using the wrench as a hammer or pry bar
- Using the wrench on a fastener that’s too large or small for its capacity
Our Conclusion
The adjustable wrench is a versatile tool for any homeowner or DIY enthusiast. By understanding its use, maintenance, and limitations, you can tackle a wide range of projects with confidence and safety.