A rustic stone walkway can transform your outdoor space into something exceptional, and bring a natural charm to your property. If you choose the right stones, lay them correctly, and maintain your completed work well, you can enjoy a beautiful pathway for years to come. Learn how to install your own rustic stone walkway in the guide below.
Planning Your Stone Walkway
You must plan your walkway carefully before you begin installation. Consider the factors below.
Choosing the Right Stone
Choose stones that complement your home’s exterior and existing landscaping. Natural stone options include the following:
- Bluestone
- Flagstone
- Granite
- Limestone
- Slate
Determining the Path
Decide what you want the shape of your path to be, and in which direction it should go. A curved path can add visual interest, while a straight path provides a more formal look. Use spray paint or markers to outline the walkway’s edges. This will make it easier to visualize the final result and guide your digging process.
Calculating Materials
Measure the length and width of your planned walkway to determine how much stone and base material you’ll need. Factor in extra material for cuts and waste. For a typical walkway, you’ll need the following materials:
- Crushed stone or gravel
- Landscape fabric
- Plastic edging
- Stone dust
- Stone pavers
Preparing the Walkway Site
You need to prepare the site properly to achieve a stable and long-lasting walkway. Follow the steps below.
Contacting Utility Services
Before you start digging, contact your local utility locating services so that you can mark underground lines. This prevents damage to utilities and keeps you safe while the project is in motion.
Excavating the Path
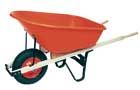
Use a pickaxe and shovel to dig out a path that’s 6–8 inches deep, depending on the thickness of your chosen stones. Remove the soil with a wheelbarrow and repurpose it elsewhere in your yard.
Compacting the Soil
Use a plate compactor to firmly pack down any exposed soil, which will create a stable base for your walkway. If you don’t own a compactor, you can rent one from most home improvement centers. Wear hearing protection while operating this equipment.
Creating a Solid Base for Your Stone Walkway
A solid base won’t settle or shift over time. Follow the steps below to create one:
Adding and Compacting Gravel
- Spread a 2-inch layer of crushed stone or gravel over the area you excavated.
- Use the plate compactor to firmly pack this layer.
- Add another 2-inch layer of stone and compact the gravel again.
Applying Stone Dust
- Mix stone dust with water in a wheelbarrow to create a consistency you can spread.
- Spread a 1-inch layer of the moistened stone dust over the gravel you compacted.
- Smooth the surface with a trowel, which will create a level bed for the stones.
Laying the Walkway Stones
Once you’ve created a solid base, you can start laying your stones. Take your time on this step, and be precise.
Placing the First Stone
- Start at one end of the walkway.
- Place the first stone on the bed of stone dust that you’ve prepared.
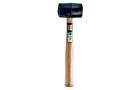
- Use a rubber mallet to tap the stone into place, and make sure it’s level and stable.
Continuing the Pattern
- Select stones that fit well together, and create a puzzle-like pattern.
- Leave small gaps between stones for a natural look.
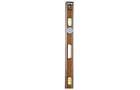
- Use a level to make sure stones are even with each other.
Cutting Stones
Follow the steps below to fit stones into tight spaces or create specific shapes:
- Mark the cut line on the stone.
- Use the back of a masonry hammer or a stone chisel to score along the line.
- Strike the stone firmly to break it along the scored line.
Wear safety glasses when cutting stone to protect your eyes from flying debris.
Stone Walkway Finishing Touches
Complete your walkway with the final steps below.
Filling Gaps
- Sweep stone dust into the gaps between stones.
- Use a broom to work the dust into the crevices and create a solid fill.
- Mist the walkway with water to settle the dust.
Installing Edging
- Place plastic edging along both sides of the walkway.
- Secure the edging by hammering stakes into the ground. This edging will contain the stones and prevent shifting.
Planting Around the Walkway
Plant low-growing ground covers, ornamental grasses, small shrubs, or perennials along the edges of your walkway for a beautiful, natural look. These plants can soften the edges of the walkway and better integrate it into your landscape design.
Stone Walkway Maintenance Tips
Remove any weeds that sprout between stones to keep your walkway looking great. Rinse the area with a garden hose to clear away dirt and prevent weed growth. Sweep the area regularly to remove debris, and refill gaps with stone dust.
Incorporating Unique Design Elements for Your Walkway
A rustic stone walkway gives you the opportunity to flex your creative muscles with the projects below.
Integrating Lighting
Add soft lighting along your walkway to make it safer and more beautiful. Consider the following types of outdoor lighting:
- Path lights: Install these along the edges of the walkway to illuminate the path.
- Solar lights: These lights charge during the day and illuminate at night.
- Spotlights: Use these to highlight specific features, such as plants or decorative elements.
Creating Patterns
Arrange stones in unexpected patterns for an especially intriguing look. Consider the options below.
- Basket weave: Lay stones in pairs, which creates a woven appearance.
- Herringbone: Arrange stones in a zigzag pattern, which adds a dynamic visual effect.
- Running bond: Place stones in a staggered, linear arrangement, as if they’re bricks in a brick wall.
Adding Decorative Elements
Incorporate decorative elements into your walkway to enhance its charm. Consider the following ornaments:
- Decorative borders: Use different stones or materials to frame the walkway.
- Mosaic inlays: Create artistic designs using smaller stones or tiles within the walkway.
- Stepping stones: Place larger stones at intermittent spots for a whimsical touch.
Choosing the Right Plants
Complete your project by adding plants that thrive in your climate and complement the rustic aesthetic of your pathway. Below are some popular options:
- Creeping thyme: A fragrant, low-maintenance ground cover that tolerates foot traffic
- Heuchera: Features vibrant foliage that adds visual interest
- Sedum: Succulents that provide interesting textures and colors
Walkway Seasonal Maintenance
Perform some of the following maintenance tasks each season to keep your walkway in good condition:
Spring
- Clean the stones with a garden hose to remove dirt and debris.
- Inspect the walkway for any damage caused by winter weather.
- Refill gaps with stone dust or gravel.
Summer
- Remove any weeds you see immediately.
- Make sure you have adequate irrigation for plants along the walkway.
- Trim any overhanging plants or branches that may obstruct the walkway.
Fall
- Clear fallen leaves and organic debris from the walkway.
- Cover delicate plants with mulch or frost cloth to protect them from early frost.
- Reapply stone dust to any areas that have settled or shifted.
Winter
- Avoid using harsh chemicals or salt to melt ice, as they can damage stones.
- Clear snow immediately to prevent ice buildup.
- Use sand or gravel for traction on icy surfaces.
Tools
 Hearing and eye protection
- Shovel
- Pickaxe
- Wheelbarrow
- Plate compactor
- masonry trowel
- Masonry hammer
- rubber mallet
- Level