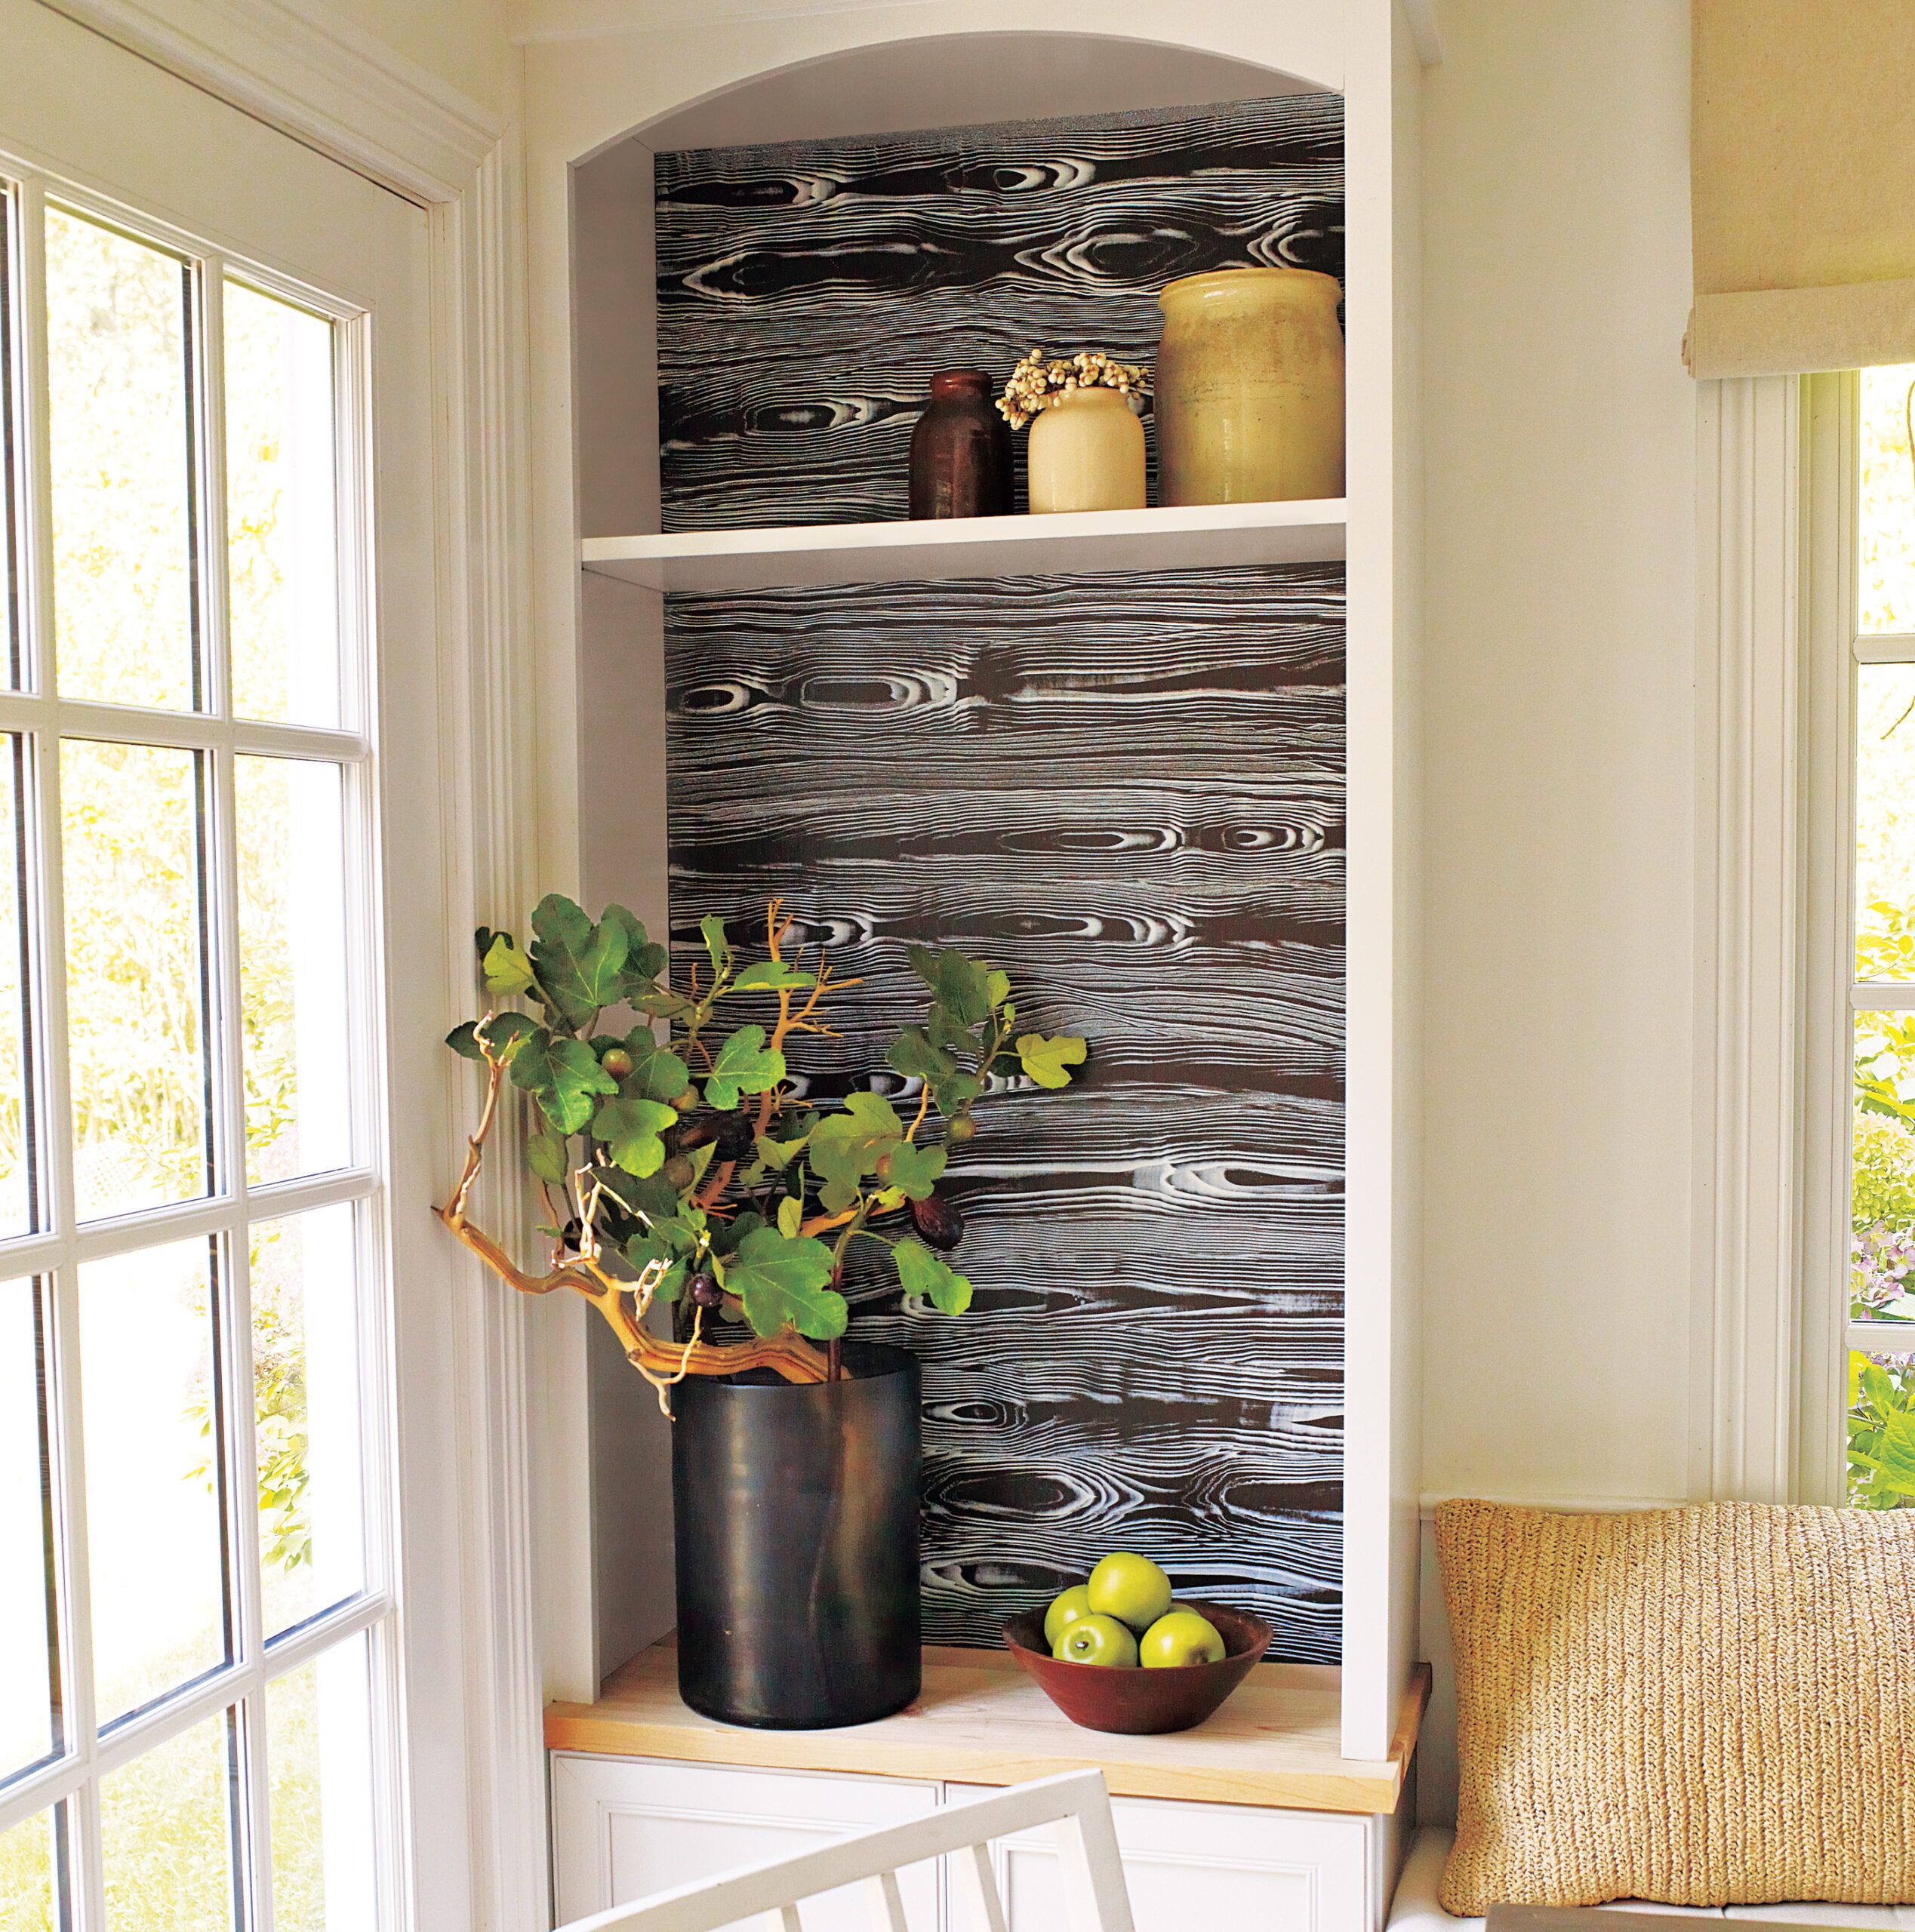
Faux wood grain can add more surface warmth and character without the expense of real wood. “It’s great for painted pieces that could be made out of wood, like doors and hutches, but also on a wall,” says interior designer Ingrid Leess. In this guide, we’ll explain how to paint easy faux wood grain, from the supplies you’ll need to painting tips.
Essential Tools and Materials for Faux Wood Grain Painting
For a basic faux wood grain effect, you’ll need satin-finish latex paint for the base coat, clear acrylic glaze, and latex paint to mix with the glaze. Choose a base coat color that resembles the wood tone you want to achieve. The glaze mixture will create the wood grain effect over this base color.
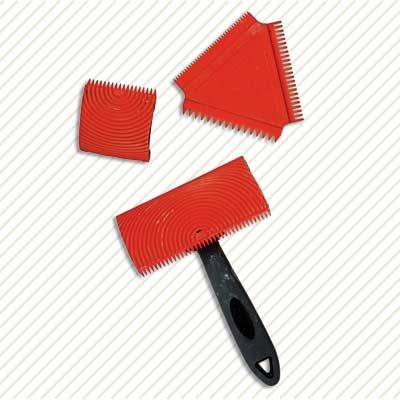
You’ll also need a wood-graining kit to create realistic patterns. These kits typically include a wood-graining rocker, a paint comb, and a check tool to create knots and imperfections.
Preparing Your Surface for Faux Wood Grain
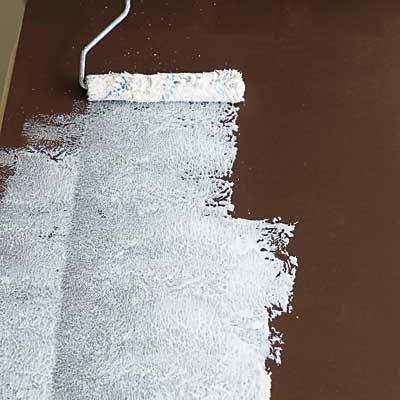
Clean and prime the surface by patching holes and cracks, removing loose paint and wallpaper, clearing away any dust and debris, and sanding the wall. Then, apply two coats of your chosen satin-finish paint with a mini roller. This paint will show through the glaze to add depth to the finish. Allow each coat to dry evenly (this can take up to six hours) before adding the next one.
Creating the Faux Wood Grain Effect
After preparing the surface and applying the base coat, you can create the faux wood grain effect. Experiment with how you use the paint comb and graining rocker to make a natural pattern.
Mixing and Applying the Glaze
Mix equal parts clear acrylic glaze and white latex paint to create your glaze mixture. Apply it to a small section of your surface to start. You don’t want to cover large swaths of the surface right away because the glaze will start to dry while you work.
Using a Paint Comb
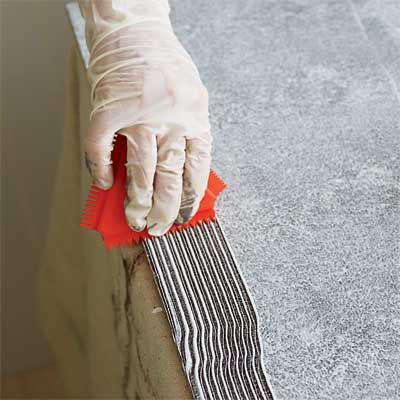
Hold the paint comb at a 45-degree angle to the surface, and cut in along the top of the panel. Pull the tool through the glaze in a smooth, uninterrupted motion to create veins that run the panel’s width. This will save you from lining up the graining rocker with the edge on your first pass.
Using a Wood Graining Rocker
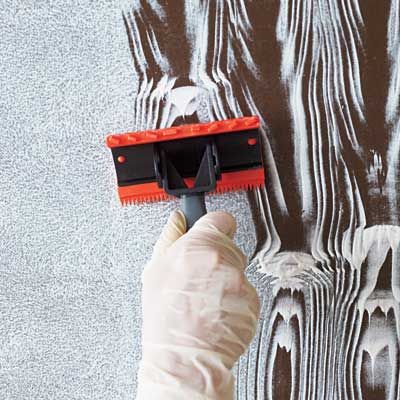
Overlapping the grain, set the heel of the rocker on the far edge of your glazed section. Then, in one smooth motion, pull the tool toward you and drag the pattern through the glaze. If it doesn’t look how you want it to, reglaze that area and try again. You can also flip the handle to run the grain in the opposite direction.
Adding Faux Wood Imperfections

Real wood has knots and imperfections that add to its character. You can mimic them with a check tool or the corner of your paint comb. Soften the edges of the faux knots with a dry brush to blend them into the surrounding grain. Then, add small, irregular lines radiating from the knots to further the realism.
Grain Painting Techniques for Different Wood Species
You can also recreate the appearance of various wood species. Understanding different faux wood grain techniques that replicate specific wood species can elevate your project.
Oak Wood Grain
Oak is known for its prominent, straight grain with occasional wavy patterns. The grain is usually bold, with a medium to coarse texture.
Faux technique:
- Base coat: Start with a warm, medium-brown base coat, which mimics the natural color of oak.
- Graining tools: Use a wood graining tool or a comb to create the distinctive straight lines of oak. Drag the tool slowly to create a coarse texture.
- Layering: After the initial graining, apply a darker glaze in vertical strokes. This glaze should be partially wiped off to reveal the base coat, enhancing the depth of the grain.
- Finishing touches: Add subtle knots and variations in color using a fine brush.
Mahogany Wood Grain
Mahogany is revered for its rich, reddish-brown color and its straight, fine grain with a slight shimmer.
Faux technique:
- Base coat: Begin with a reddish-brown base coat to mirror the natural hue of mahogany.
- Graining tools: A soft brush works best for mahogany’s fine grain. Use long, sweeping motions to mimic the straight lines of the grain.
- Glazing: Apply a slightly darker glaze, wiping it off in places to let the base color shine through. This technique highlights the depth and richness of the wood.
- Highlighting: To replicate the subtle shimmer, mix a small amount of metallic paint with your glaze and lightly brush it over the grain.
Walnut Wood Grain
Walnut is characterized by its rich, dark brown color with a mixture of straight and wavy grain patterns. It often has a slightly coarse texture.
Faux technique:
- Base coat: Choose a dark, warm brown base coat to capture the deep tones of walnut.
- Graining tools: A graining comb or a brush can be used to create the mixed straight and wavy grain patterns. Vary the pressure to replicate the natural variation found in walnut.
- Layering: Apply a dark glaze over the base coat and use a comb or brush to create the grain patterns. Wipe away some of the glaze to reveal the lighter base, simulating the natural variation in walnut.
- Details: Add small, darker streaks using a fine brush to mimic the natural variations and knots.
Cherry Wood Grain
Cherry wood is known for its smooth texture and distinctive reddish-brown color. The grain is usually straight but can occasionally show a wavy pattern.
Faux technique:
- Base coat: A deep, reddish-brown base coat sets the stage for a cherry wood effect.
- Graining tools: Use a soft brush to create the straight or slightly wavy lines of cherry wood.
- Glazing: A slightly darker glaze should be applied and then gently wiped off to expose the base color.
- Final details: Use a small brush to paint in faint lines that mimic the natural changes in grain direction.
Pine Wood Grain
Pine has a light color with a straight grain and visible knots. It’s often associated with a more rustic or country style.
Faux technique:
- Base coat: Start with a pale yellow or light beige base coat to mimic pine’s natural lightness.
- Graining tools: A graining comb is ideal for creating pine’s straight grain. Press harder to create the appearance of knots or whorls.
- Layering: Apply a light brown glaze, allowing it to settle in the grain lines while wiping it off the smoother areas. This will give a natural-looking depth.
- Knots and details: Use a small brush or even your fingers to add the characteristic knots, blending them into the surrounding grain for a realistic effect.
Maple Wood Grain
Maple is known for its fine, even grain and light, creamy color. It has a smooth texture and often features subtle waves or curls in the grain.
Faux technique:
- Base coat: A soft, light beige or creamy white base coat reflects maple’s natural hue.
- Graining tools: A soft brush is best for maple’s subtle grain. Use sweeping motions to create faint, wavy lines.
- Glazing: A light glaze slightly darker than the base coat can be applied to add depth. Wipe it off gently to avoid overpowering the delicate grain pattern.
- Finishing touches: For the most realistic effect, use a very fine brush to add barely-there curls or waves in the grain.
Our Conclusion
Faux wood grain painting offers many possibilities for creativity and customization. By understanding the unique characteristics of different wood species, you can tailor your techniques to achieve a realistic and visually appealing finish.