Crown molding adds a touch of elegance to any room, transforming plain walls and ceilings into sophisticated spaces. This decorative trim also creates a smooth transition between walls and ceilings, enhancing the overall appearance of your home. While installing crown molding may seem daunting, with the right tools and techniques, it’s a project many homeowners can tackle by following the steps below. In the video above, This Old House general contractor, Tom Silva, demonstrates the decorative crown molding installation process. Learn more in our guide below.
What Is Crown Molding?
Crown molding is a decorative trim found in homes at the top of walls where it meets the ceiling. It comes in various styles and materials to fit different interior designs.
These are the common types of crown molding:
- Medium-density fiberboard (MDF): A more affordable option that’s easy to work with, MDF is an excellent choice for those who plan to paint their molding. However, it can’t be placed in areas with high moisture.
- Plaster: This type of molding has intricate designs, but it requires professional installation due to its weight and complexity. Plaster is best suited for historic homes or for those who desire highly detailed molding.
- Polyurethane: Lightweight and resistant to moisture and insects, polyurethane molding is ideal for bathrooms and kitchens. It’s easy to install and can mimic the appearance of wood.
- Wood: Traditional and versatile, wood crown molding can be painted or stained to match any decor. It offers a natural warmth and richness but varies in cost depending on the type of wood.
Your crown molding should be proportional to the room’s dimensions and ceiling height. For rooms with 8-foot ceilings, the molding should be 2–4 inches wide. For 9-foot ceilings, opt for 3–3.5-inch molding. For 10-foot ceilings or higher, go with 5–7-inch molding or larger.
In larger or more stately rooms, don’t be afraid to use wider molding to make a grand impression.
How To Install Crown Molding
You’ll need a few tools and materials before you start installing the crown molding.
- Caulk and caulk gun
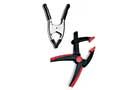
- Clamps
- Coping saw
- Dust mask
- Drop cloths
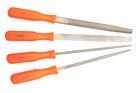
- Hand files
- Measuring tape
- Miter saw
- Paint or stain (if needed)
- Pencil
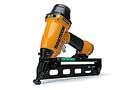
- Pneumatic finish nailer
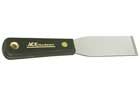
- Putty knife
- Safety glasses
- Sandpaper
- Wood glue
Installing crown molding on your own can be challenging, especially in longer spaces. Enlisting a friend or family member to hold the opposite end of longer pieces can help you avoid costly mistakes and make the job easier.
Once you have your desired molding, tools, materials, and a helper, follow these steps:
1. Set Up Your Workspace
Clear the room of furniture and cover the floor with drop cloths to protect surfaces. Set up your miter saw in a well-ventilated area, such as outside or in a garage.
2. Measure the Room
Measure each wall where you’ll install crown molding down to the nearest 1/8 of an inch. Add 10%–15% to your total measurement to account for waste and mistakes. Mark the locations of the wall studs that will support your molding.
3. Cut the Crown Molding
To create the first piece of crown molding:
- Use a self-locking C-clamp to secure a short one-by-four to the saw table, positioning it at the correct distance from the saw’s fence to hold the crown at the proper angle.
- Set the crown molding upside down against the saw fence and the one-by-four stop block.
- Cut a return into the end of a length of molding with the saw blade set at 45 degrees.
- Rotate the saw to the opposite angle and make a second 45-degree miter cut on the other end of the molding.
- Glue the small return piece onto the mitered end of the crown.
4. Nail the First Piece
With your first piece of crown molding, use a pneumatic finishing nailer to attach the crown to the wall studs and ceiling joists. Place nails about 16 inches apart, alternating between the top and bottom of the molding for balanced support.
The nails should be driven in at an angle to avoid visible holes and to provide better strength.
5. Cope Inside Corners
Coping inside corners provides a snug fit and eliminates gaps.
- Cut a 45-degree miter onto each end of a length of crown.
- On the end that fits into a wall corner, use a coping saw to cut a coped joint. Carefully saw along the profile on the face of the molding.
- Fine-tune the coped cut with a file and sandpaper.
6. Nail the Coped Molding
The coped end should be pressed tightly against the piece of crown installed previously. Repeat step four with the coped molding to secure it.
7. Create Scarf Joints
Seamless scarf joints can prevent visible seams along longer walls.
- Cut a 45-degree miter on the end of each piece to be joined.
- Apply a small amount of wood glue to the joint.
- Slide the pieces together tightly, align them, and nail them in place.
8. Add the Finishing Touches
To create a polished, professional look, you can use wood filler to cover nail holes and any small gaps in joints. Sand the filled areas smooth. Apply caulk to the top and bottom edges of the molding where it meets the ceiling and wall to cover any inconsistencies.
You might also want to paint or stain the crown molding. For pre-primed molding, add your chosen paint color. For wood molding, you can opt to paint or stain. If you decide to paint, use at least two coats for a durable finish.
Troubleshooting Common Issues with Crown Molding
Even experienced do-it-yourselfers (DIYers) can encounter challenges when installing crown molding, such as:
- Mismatched corners: Adjust your miter saw angles slightly to account for out-of-square corners, creating a custom fit.
- Uneven walls or ceilings: Use a flexible caulk to fill gaps between the molding and the wall or ceiling. Paintable caulk can be color-matched.
- Warped molding: Choose the straightest pieces for longer walls and use shorter pieces on problem areas to limit noticeable warps.
Our Conclusion
Installing crown molding is a rewarding DIY project that can significantly enhance your home’s interior. With careful planning, precise cutting, and attention to detail, you can achieve professional-looking results. While it may take some practice to master the techniques, the elegant finish is well worth the effort.
Tools
 Miter saw
- Clamps
- Pneumatic finish nailer
- Coping saw
- Hand files
- Putty knife