Project details
Skill
Cost
Estimated Time
We may be compensated if you purchase through links on our website. Our team is committed to delivering honest, objective, and independent reviews on home products and services.
Crown molding adds charm and value to any home, transforming plain walls into elegant spaces. While traditional wood molding can be challenging to install, foam crown molding offers a simpler alternative. This lightweight, flexible material is perfect for DIY enthusiasts looking to upgrade their home’s interior. Our guide outlines the benefits of foam crown molding compared to traditional materials. In the video above, This Old House senior technical editor Mark Powers demonstrates how to install foam crown molding with ease and precision.
*Cost data sourced from Angi
Benefits of Foam Crown Molding
Foam crown molding is a modern alternative to traditional wood or plaster moldings. Made from lightweight polystyrene foam coated in hard plaster, this material offers several advantages for homeowners and DIY enthusiasts:
- Affordable: Costs around $1–$4 per linear foot, making it budget-friendly
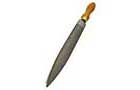
- Easy to cut: Can be trimmed with a simple handsaw
- Flexible: Adapts well to uneven walls and ceilings
- Forgiving installation: Imperfections can be easily corrected with joint compound
- Lightweight: Easy to handle and install without specialized tools
Comparing Foam to Traditional Molding
When compared to wood or plaster molding, foam crown molding offers distinct advantages:
- Less susceptible to moisture or pest damage, which can be a concern with wood moldings
- More adaptable to various conditions without sacrificing the aesthetic appeal
- No complex miter cuts or coping
- Requires minimal carpentry skills, broadening its accessibility.
- Significantly lighter, reducing strain during installation
Tools and Materials Needed for Foam Crown Molding
Make sure to gather the tools and materials listed below before starting your foam crown molding project.
- 8d nails
- 150-grit sandpaper
- Angled sash paintbrush
- Foam crown molding
- Hammer
- Joint compound
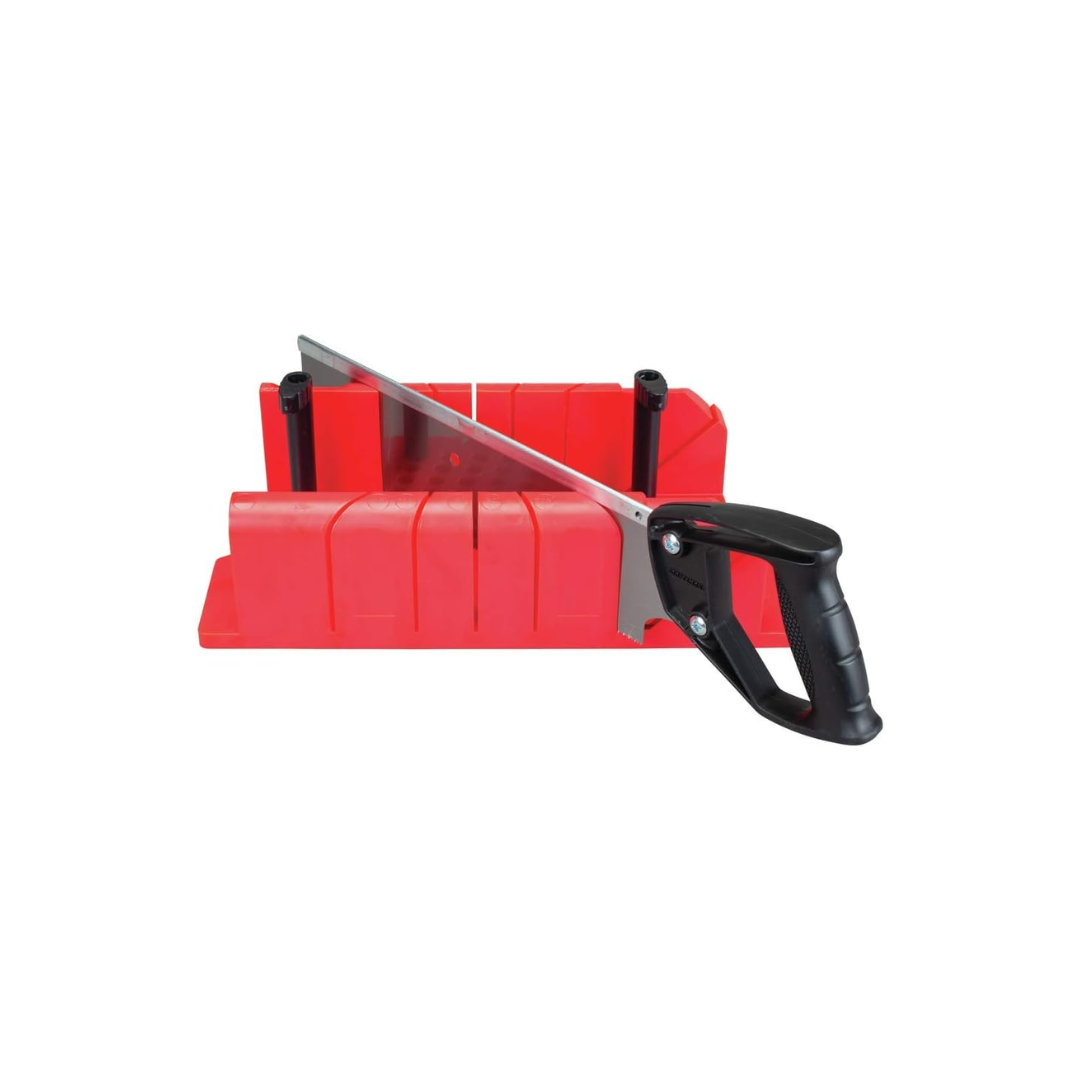
- Miter box and handsaw
- Measuring tape
- Painter’s tape
- Pencil for marking
- Primer and paint
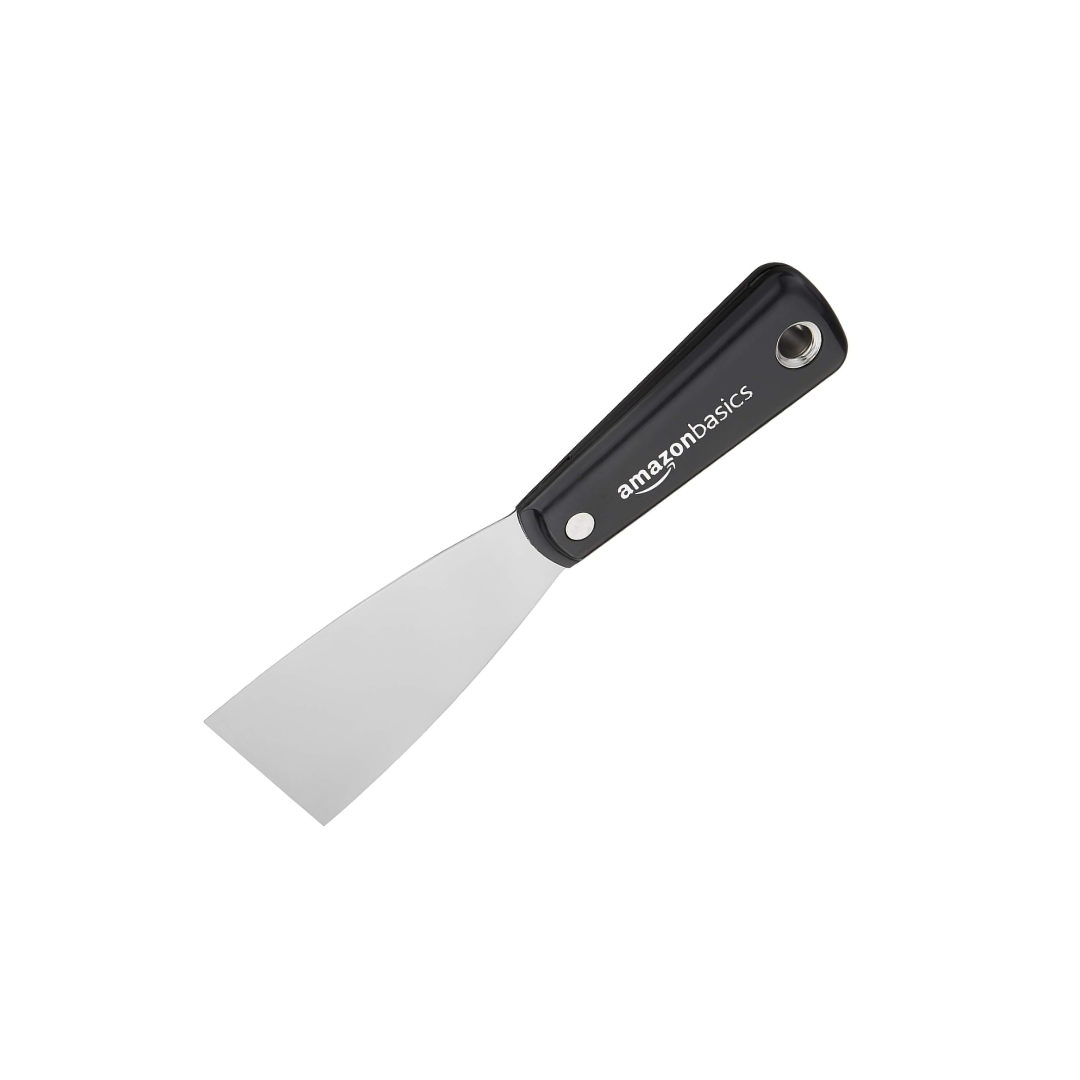
- Putty knives (1.5-inch and 6-inch)
- Rasp or sanding block
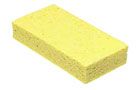
- Wet sponge
Measuring and Planning
Purchase the correct amount of materials to minimize mistakes during installation. Start by measuring the room’s perimeter to determine how much molding you need. Add 10% to your total to accommodate waste and errors. Plan your cuts carefully, particularly focusing on corners and transitions. Remember to take note of the corner angles and any irregularities in the walls.
In the video below, general contractor Tom Silva
Steps on Installing Foam Crown Molding
Use our step-by-step guide below to complete your crown molding installation.
Step 1: Lay Out and Cut the Molding
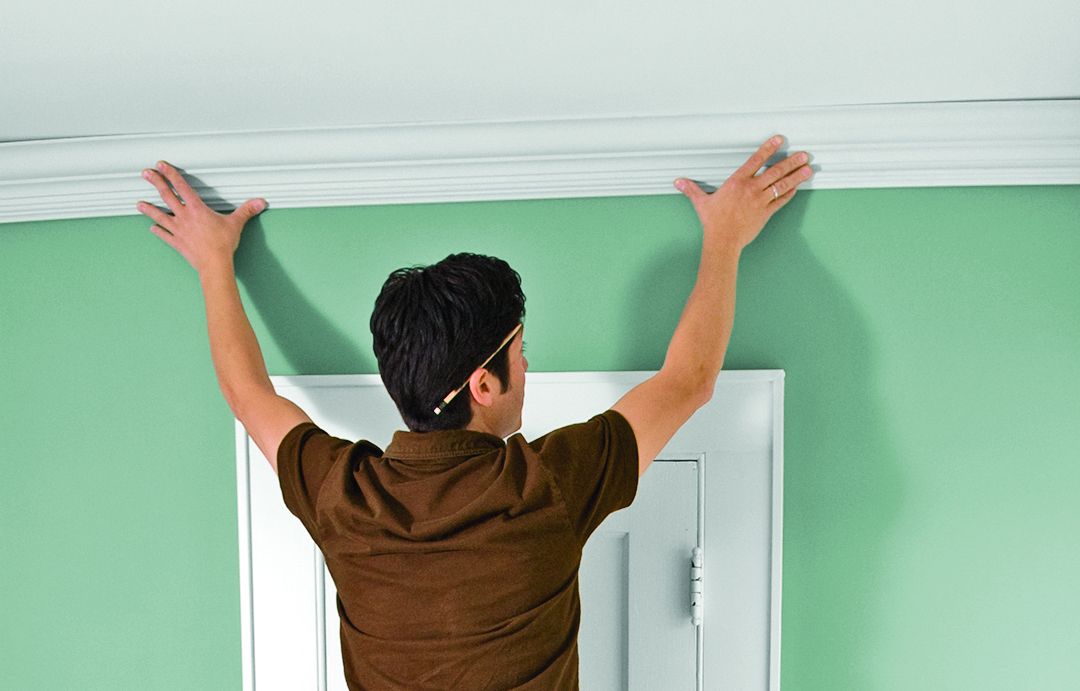
If you’re working with walls that are out of level and plumb, allow your eye, rather than a level, to guide the position of the molding. For best results, focus on getting the crown to look parallel with any neighboring trim. Install it starting at an inside corner and work toward any outside corners. Hold a strip of molding in place above a door or window casing. Adjust the molding until it looks even with the casing (ask a helper to stand back and look for you). Draw a pencil line to mark this positioning so you can install the crown at this alignment.
Step 2: Cut an Inside or Outside Corner
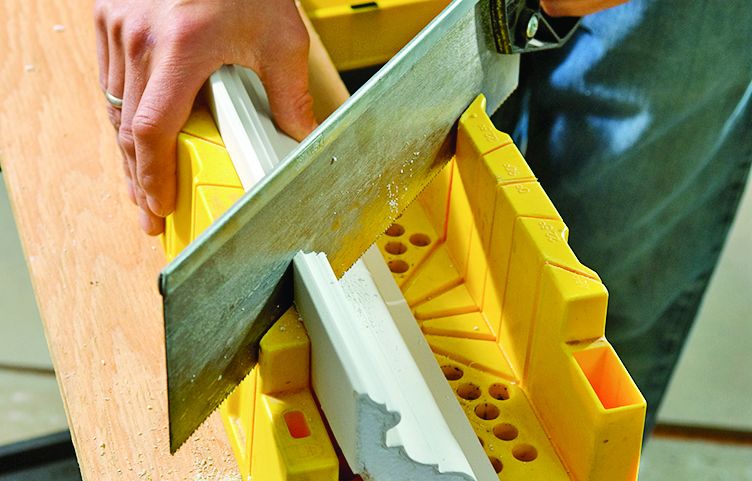
To cut the molding at an angle for an inside or outside corner, place it in a miter box upside down and brace it against the bottom and side of the box as if it were angled against a ceiling and wall. Using a handsaw, cut the molding at a 45-degree angle. On an inside corner, the top part of the molding will be shorter. On an outside corner, the bottom part will be shorter.
Step 3: Make a Tight Fit
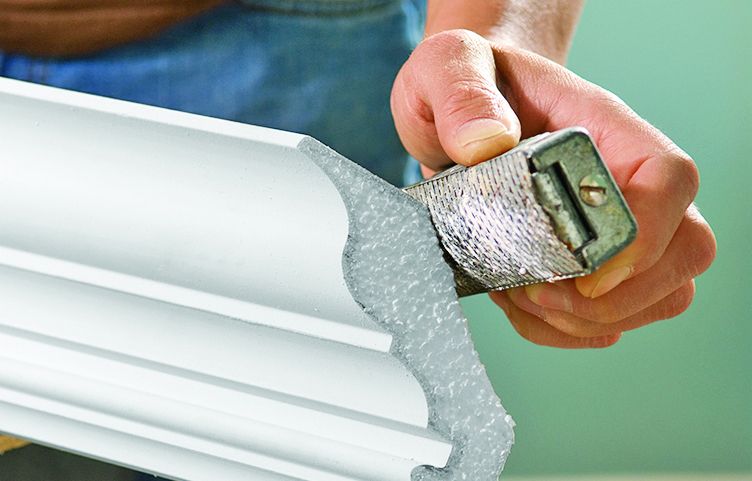
Using a rasp or sanding block, shave the back of the angled cut to create room for the two corners to come together tightly at the face.
Tip: Because straight butt joints are so easy to hide with this molding, you can cut the pieces shorter to make it easier to work.
Step 4: Install the Molding
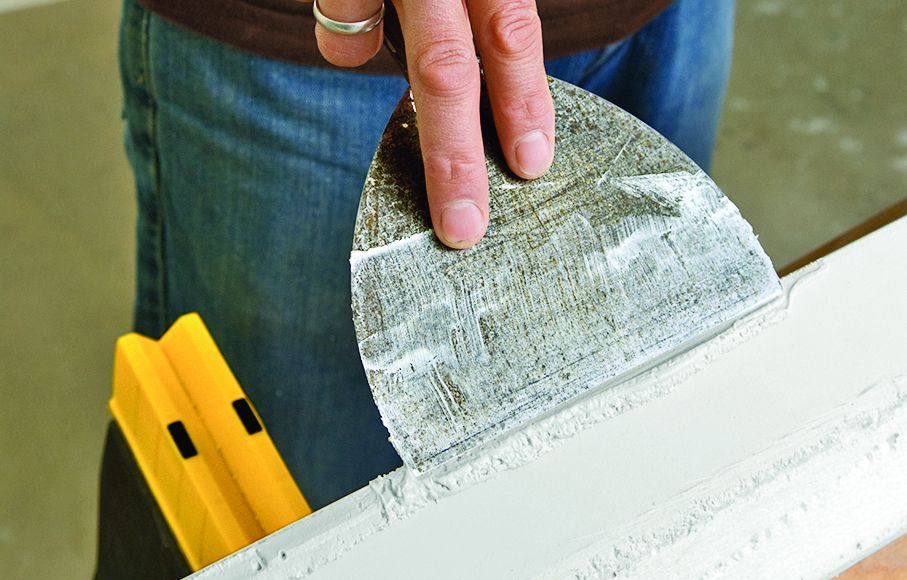
The crown adheres to the wall with joint compound, but using too much will allow it to slide down the wall. As the compound sets, support long runs of molding with 8d nails. Using a 6-inch putty knife, spread a 1/2-inch bead of joint compound along the molding’s top and bottom edges. Spread mud liberally on each cut end.
Step 5: Match the Profiles First
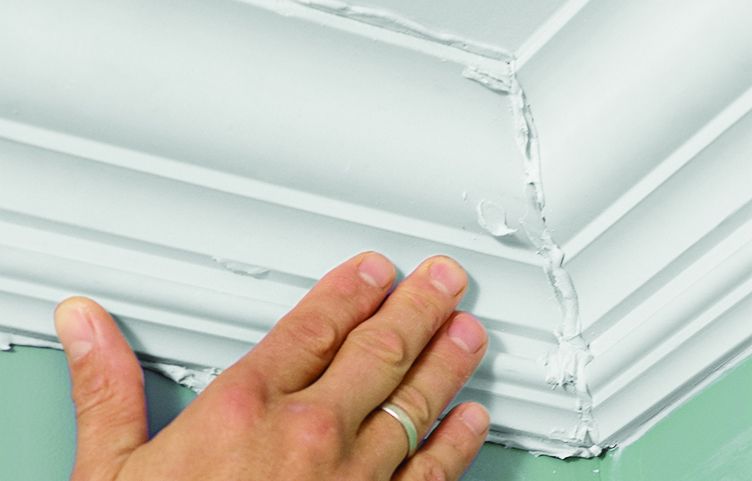
Push the two mitered ends together to create the inside corners, making sure their faces align in the corner. Match up the profile details first, then use mud to fill any small gaps between the molding and the ceiling on either side.
Step 6: Fit Together an Outside Corner
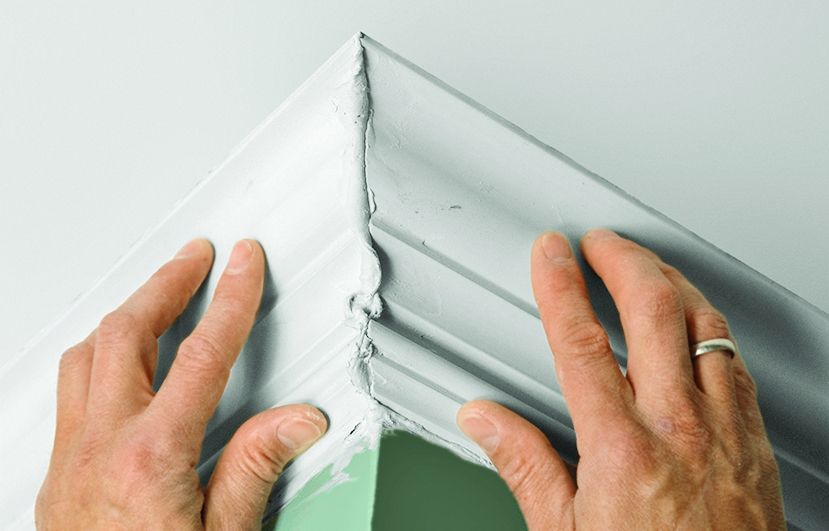
Press the mitered ends together on an outside corner until mud squeezes out of the joint. Use your finger or a putty knife to backfill gaps.
Step 7: Use Nails to Brace Long Runs
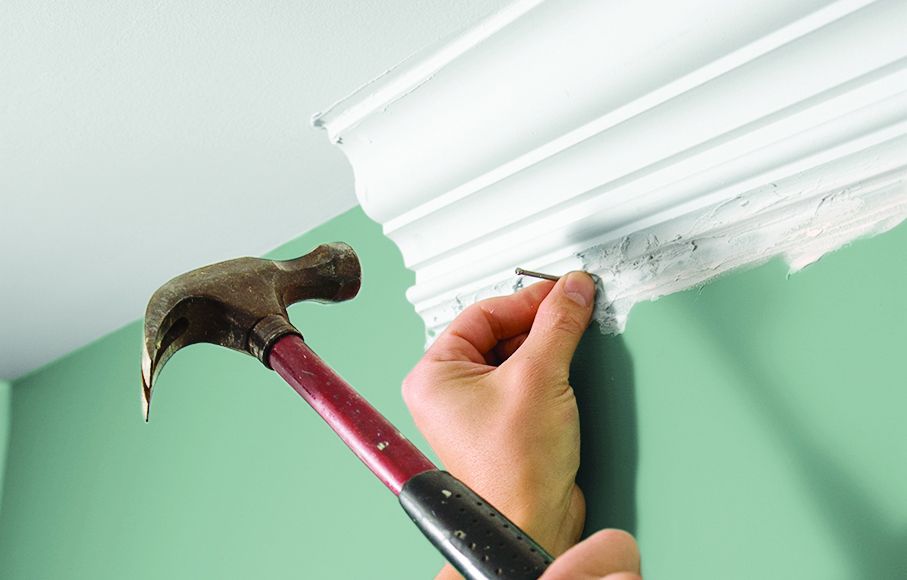
Along straight runs, push the straight-cut ends to create a butt joint. On long runs, place an 8d nail under the molding every few feet and at joints to hold it in place. Angle the nails up slightly to hide the holes and sink them enough to keep them in place.
Step 8: Smooth the Joints
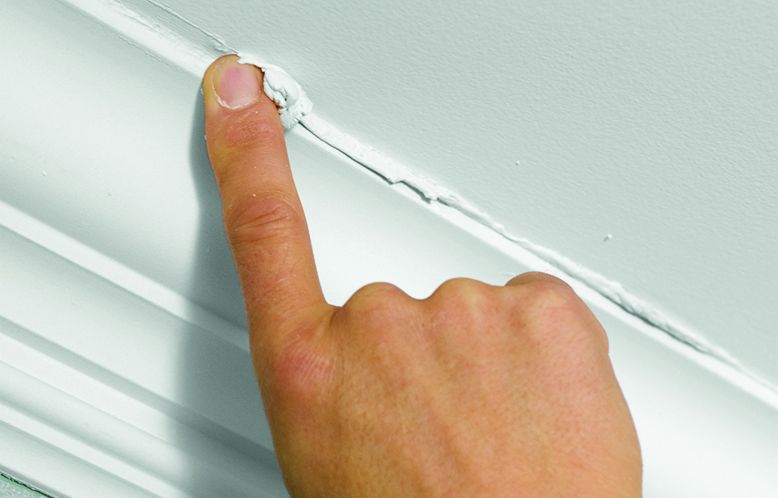
For easier cleanup, remove excess joint compound while it’s still wet. Use your finger to smooth out the seams where the molding meets the wall and the ceiling. Use a wet sponge to help wipe away the compound and clean up the face of the molding. Don’t remove too much compound—if you do, the seams will “hollow” as it dries.
Step 9: Fill to Excess
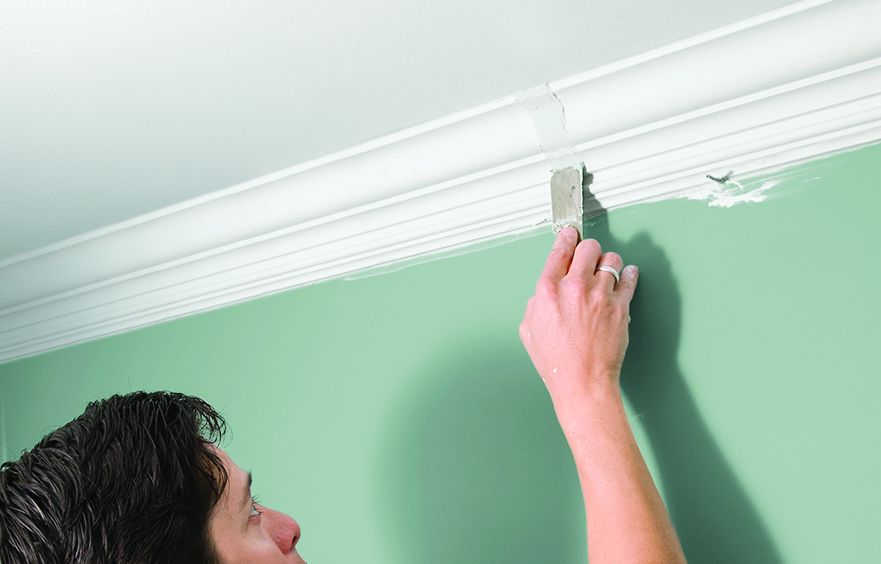
Using a small putty knife, push more compound into and over butt joints. Pull the knife over each profile detail, leaving the compound a little proud of the joint. Once dry, the excess can be sanded smooth.
Step 10: Prep to Paint
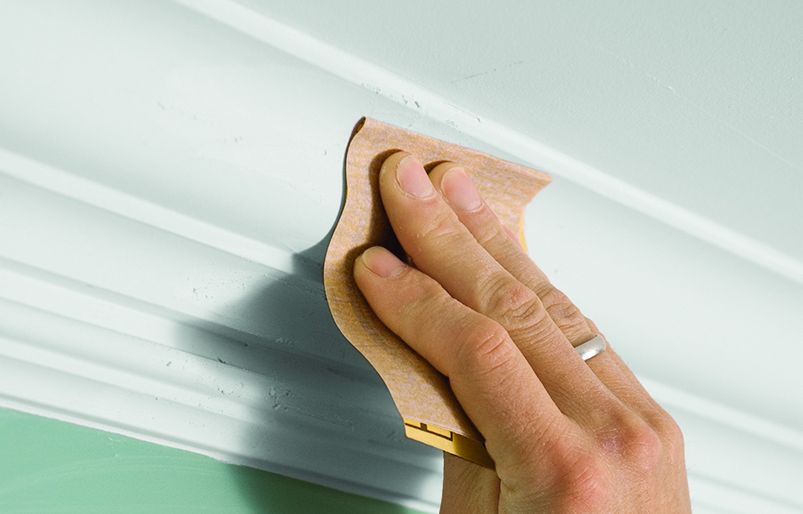
Joint compound is easy to sand, and once you go over the seams where molding meets molding, the joints will almost disappear. After the joint compound dries completely, sand down the excess using 150-grit sandpaper.
Step 11: Mask and Paint
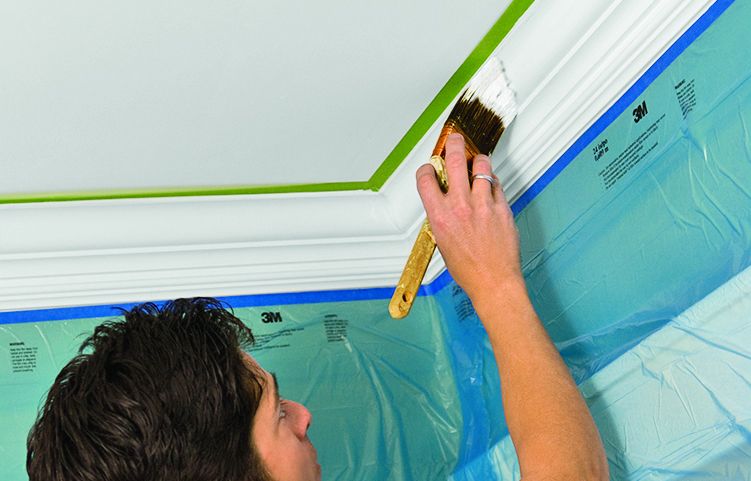
Mask the walls along the edges of the molding with painter’s tape. Using an angled sash brush, prime and paint the molding to match the door and window casings in the room.
Foam Crown Molding Maintenance and Care
Follow the tips below to maintain your new foam crown molding.
Cleaning Tips
Regular cleaning helps maintain the molding’s appearance:
- Avoid harsh chemicals that could damage the plaster coating.
- Check for dust accumulation in corners and clean as needed.
- Dust regularly with a soft, dry cloth or duster.
- For deeper cleaning, use a slightly damp cloth with mild soap.
Repairs and Touch-Ups
Address any damage promptly:
- Fill small nicks or cracks with spackling compound.
- For larger damages, consider replacing the affected section of molding.
- Regularly inspect the molding for any signs of wear or damage.
- Sand smooth once dry and touch up with matching paint.