A wood hamper is a sturdy, attractive solution for storing all your dirty clothes. While you can go out and buy one, it’s also a practical DIY project just about any homeowner can manage. In this guide, we’ll walk you through how to build a wood hamper, including necessary materials and finishing touches.
Essential Tools for Your Project
Before you begin, gather the following tools and materials:
Tools
- Circular saw
- Miter saw
- Jigsaw
- Brad nailer
- Drill/driver
- Measuring tape
- Pencil
- Safety glasses
- Hearing protection
Materials
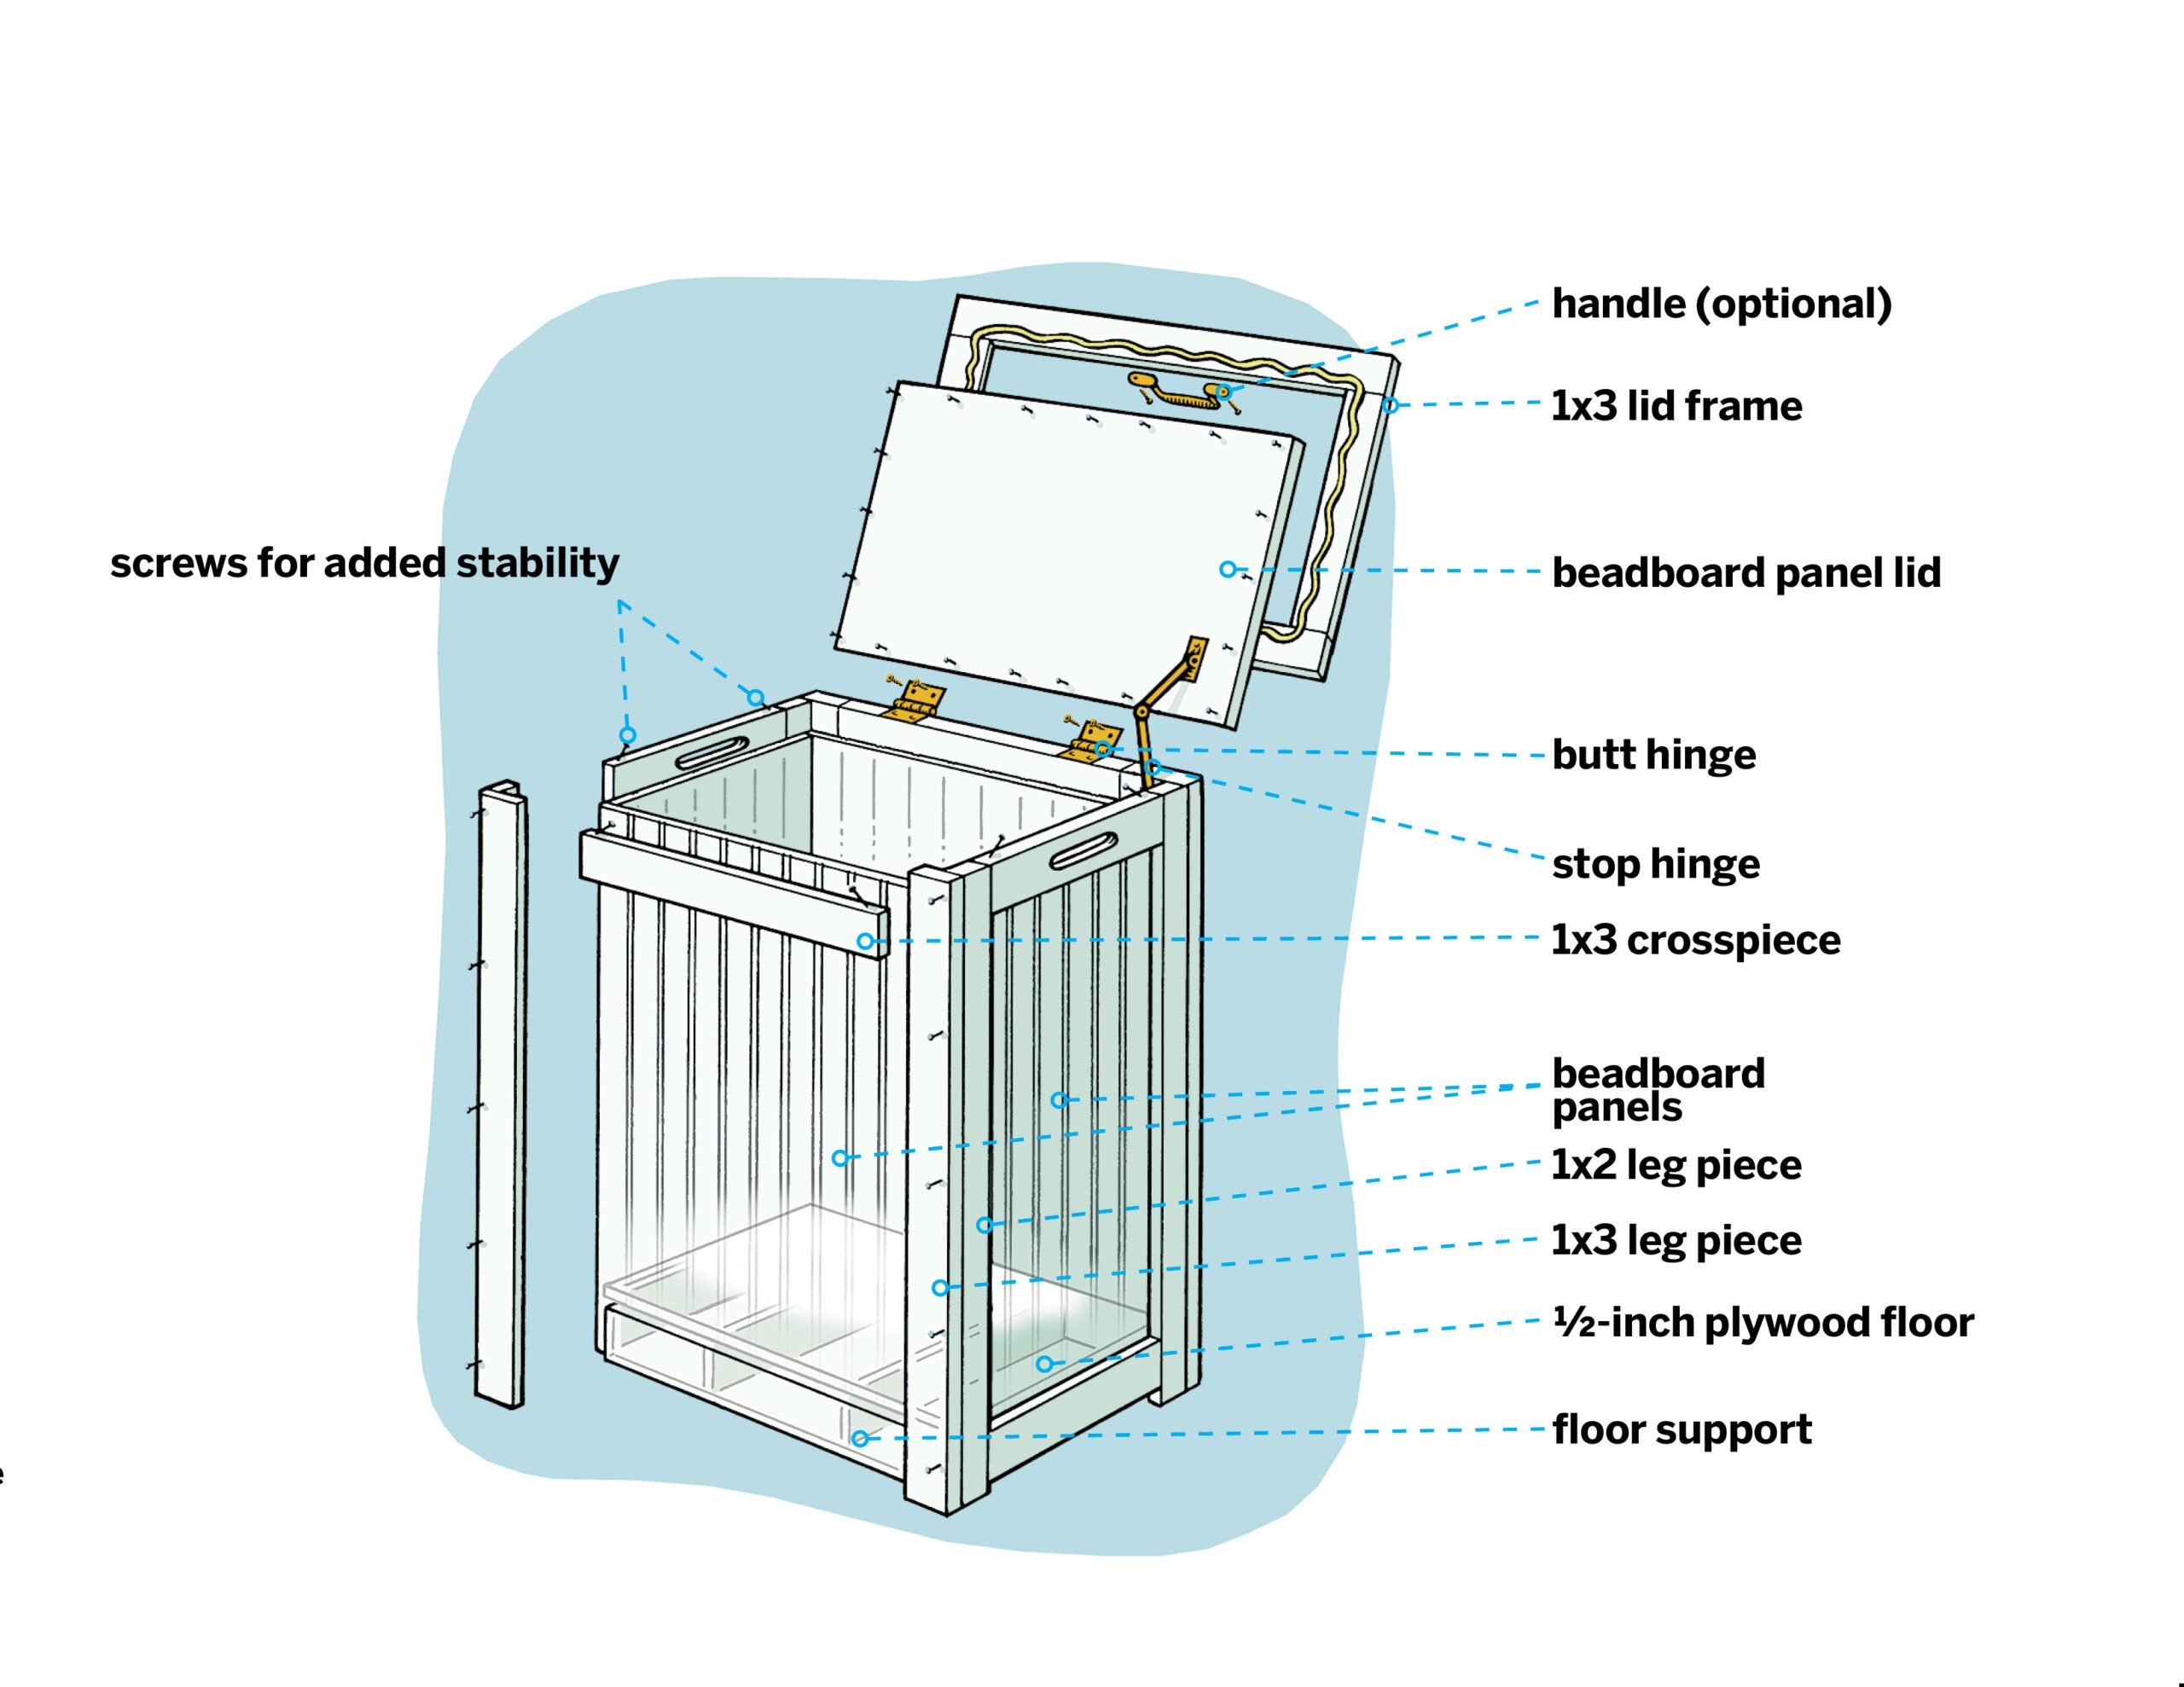
- 1-by-2 leg pieces (four at 23 inches)
- 1-by-3 leg pieces (four at 23 inches)
- Beadboard panel, front and back (two at 21-by-18 inches)
- Beadboard panel, sides (two at 21-by-11 inches)
- 1-by-3 crosspieces (four at 15 inches)
- 1-by-3 crosspieces (four at 8 inches—from two of these, cut a centered 4 1/2-by-1-inch handle hole with rounded ends)
- 1-by-3 floor supports (two at 10 1/4 inches)
- Floor beadboard or plywood (one at 17 5/8-by-10 1/8 inches)
- 1-by-3 lid frame (two at 20 1/2 inches)
- 1-by-3 lid frame (two at 7 3/4 inches)
- Beadboard panel, lid (one at 18 1/2-by-11 inches)
Preparing Your Workspace to Build a Hamper
Before you start building, set up a clean, well-lit workspace with enough room to maneuver around your project. We recommend you have a stable work surface, such as a workbench or sawhorse with a plywood top.
Always wear safety glasses when cutting wood or using power tools. Use hearing protection when operating loud machinery. Keep your work area clean to prevent tripping hazards, and ensure proper ventilation if you’re painting or staining your hamper.
Steps To Build Your Wood Hamper
The following design is flexible. You can follow the steps below for the general building process but customize as you prefer.
Step 1: Build the Legs
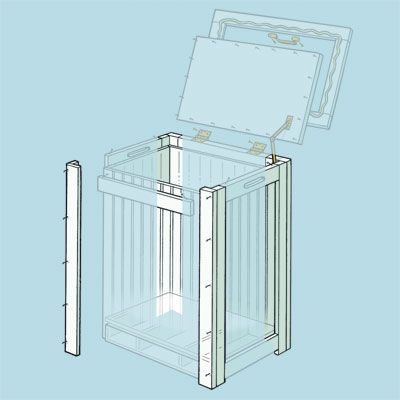
Secure the edge of a 1-by-2 leg piece to the face of a 1-by-3 leg piece, flush with its edge, to form an L. Repeat to make four legs.
Step 2: Attach the Panels and Floor Support
Secure the front and back panels to the back sides of the 1-by-3 leg pieces, 2 inches from the ends. Secure the side panels to the back sides of the 1-by-2 leg pieces. Attach the floor supports between the front and back panels.
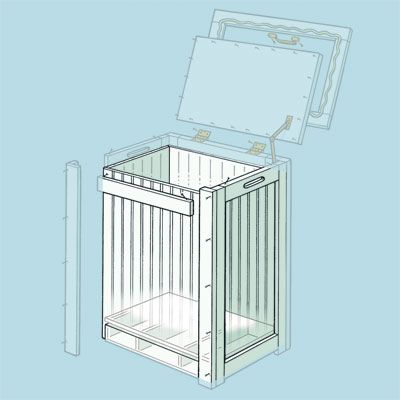
Step 3: Trim the Hamper and Insert the Floor

Secure crosspieces so that the lower ones sit flush with the bottoms of the panels and the upper ones with the handle cutouts sit flush with the tops of the legs. Drive screws at an angle through the top edges of the upper crosspieces and into the legs. Secure the plywood floor to the floor supports.
Step 4: Assemble and Attach the Lid
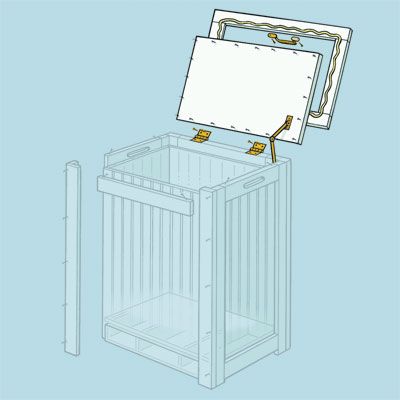
Secure the lid’s short frame pieces between the long frame pieces. Secure the panel to the frame. Attach the lid to the hamper with two butt hinges. Add a stop hinge on one side.
Adding Finishing Touches and Customizations to the Hamper
Now that the basic structure of your wood hamper is complete, you can add personal touches to make it truly your own. Decide whether you want to paint or stain your hamper. A painted finish can match your laundry room decor, while a stained finish highlights the natural wood grain. Be sure to sand all surfaces smooth before applying your chosen finish.
Additional Features To Consider
Customize your hamper with these optional features:
- Add a handle to the lid for easier opening.
- Install cup hooks inside to hang a removable laundry bag.
- Apply weatherstripping to the lid edges to create a better seal and contain odors.
- Attach casters to the bottom for mobility.
Troubleshooting Common Wood Hamper Issues
Even with careful planning, you may encounter some challenges during the building process. Here are some common issues and solutions:
- Uneven legs: Double-check all measurements, and use a level to keep your hamper legs straight.
- Gaps between panels: Fill small gaps with wood filler before finishing. For larger gaps, you may need to recut and replace the affected pieces.
- Lid alignment issues: Adjust the hinge positions or sand down areas where the lid catches to ensure smooth operation.
Maintaining Your Wood Hamper
To keep your wood hamper in top condition, regularly dust and clean the exterior with a soft, damp cloth. Periodically check and tighten any loose screws or hardware. Refinish or touch up the paint or stain as needed to protect the wood.
See our guide on how to maintain a washer and dryer to complement your new hamper and keep your laundry area in top shape.
DIY Enhancements for Your Wooden Hamper
Once you’re done with the basic construction of your wood hamper, you might want to add some additional enhancements. Here are a few ideas.
Adding Dividers
If you prefer sorting your laundry as you go, consider adding dividers to your wood hamper. These can be made from the same material as the hamper and attached to the inside with screws or wood glue. You can create separate compartments for whites, colors, and delicates, making laundry day even more efficient.
Installing a Removable Liner
A removable liner can make it easier to transport dirty clothes from the hamper to the washing machine. You can buy a ready-made liner or sew one to fit your hamper’s dimensions. Attach the liner with Velcro strips to make it easy to remove and wash. Choose a durable, washable fabric that complements your hamper’s design.
Incorporating Storage
Incorporate additional storage options into your hamper design for more functionality. For example, you might add a small shelf or hooks on the side for storing laundry essentials, such as detergent, fabric softener, and clothespins.
Personalizing With Decorative Elements
Personalize your wood hamper with decorative elements that reflect your style. Paint designs, stencil patterns, or add a decoupage to the exterior to give it a unique look. Decorative knobs or handles can also add a touch of personality and make your hamper one of a kind.
Tools:
 Circular saw
- Miter saw
- Jigsaw
- Brad nailer
- Drill/driver