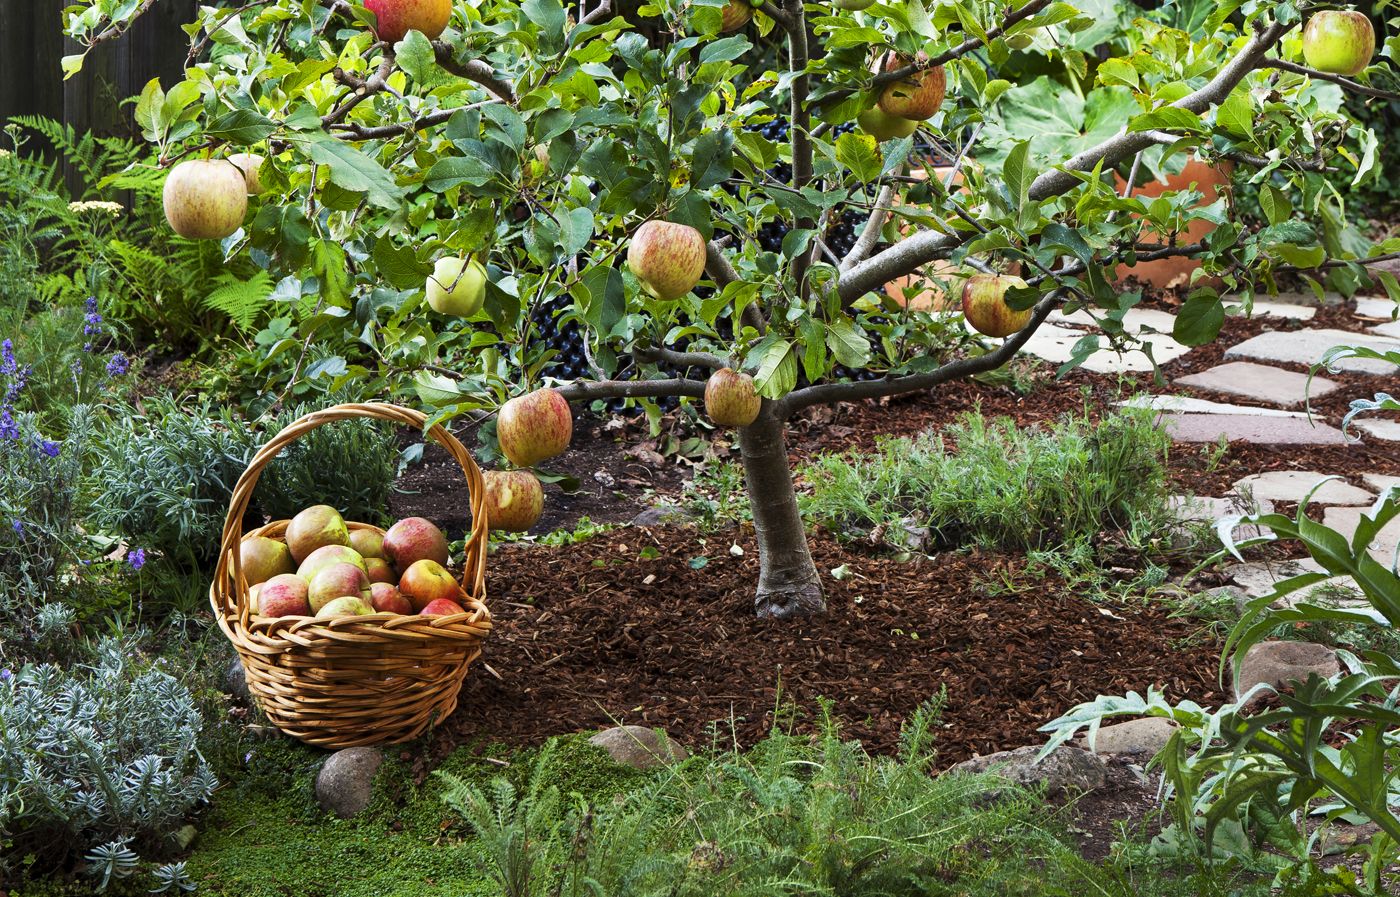
Growing fruit trees in your backyard provides you with fresh, homegrown fruit and adds beauty to your landscape. Whether you have a spacious yard or a small patio, there’s a fruit tree option for every gardener. This guide will walk you through the essentials of selecting, planting, and caring for fruit trees, helping you cultivate a thriving orchard that yields delicious harvests for years to come.
Choosing the Right Fruit Trees for Your Climate
Different fruit trees have varying cold hardiness and heat tolerance levels, so it’s important to choose varieties that can thrive in your specific USDA hardiness zone. For example, apple trees generally grow well in zones 3–8, while peach trees prefer zones 5–9. Consult with a local garden nursery to find proven varieties for your area.
Soil Requirements for Fruit Trees
Most fruit trees prefer well-draining, fertile soil with a slightly acidic to neutral pH of 6–7. Before planting, test your soil and add compost or an acidic fertilizer if you need to increase its pH. If your soil is rocky, lacks nutrients, or has a high clay content, we recommend planting in a raised bed or a 20-inch-wide container to ensure proper drainage and soil quality.
Sunlight and Water Needs for Healthy Growth
Fruit trees generally require at least six to eight hours of direct sunlight daily. Select a planting site that receives ample sunlight throughout the day. Water needs vary depending on the tree species and local climate, but most fruit trees benefit from consistent, deep watering, especially during their first growing season and during fruit development.
Selecting and Planting Your Fruit Trees
Choosing high-quality trees and planting them correctly sets the foundation for a healthy, productive orchard. Follow these guidelines to give your fruit trees the best start possible.
Best Time to Plant Fruit Trees
The best time to plant fruit trees depends on your climate and the type of tree you’re planting. In general, early spring or late fall are the best seasons for planting. Spring planting allows trees to establish roots before the hot summer months, while fall planting gives trees time to settle in before winter dormancy.
How To Choose High-Quality Nursery Stock

When selecting fruit trees, look for bare-root saplings or container-grown trees with healthy, well-developed root systems. Avoid trees with damaged bark, signs of disease, or pest infestations. We recommend choosing trees that are one or two years old, as they tend to establish more quickly than older specimens.
Proper Planting Techniques for Optimal Growth
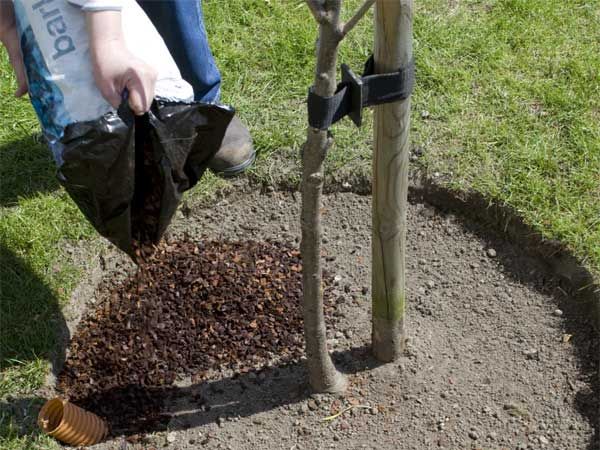
To plant your fruit tree, dig a hole twice as wide as the root ball and just deep enough to accommodate the roots. Place the tree at the same depth it was growing in the nursery, spreading the roots outward. Backfill with native soil, tamping gently to remove air pockets. Water thoroughly and apply a two- or three-inch layer of organic mulch around the base. Keep mulch away from the trunk to prevent rot.
Properly Spacing Fruit Trees

A typical summer-pruned fruit tree can grow to about five feet wide. In an 8-by-8-foot area, you can plant two trees on the diagonal, three feet apart in the center (A). Another option (B) is a hedgerow made of any type of trees spaced three feet apart in the center.
Get even more variety with “high-density planting” (C). Here, several of the same type of fruit tree with a similar rootstock—such as a grouping of early, midseason, and late peaches—are in a single hole, spaced 18 inches apart on center. In all cases, pruning and competition for water and food limit size.
Popular Types of Fruit Trees
Below are several types of fruit trees we recommend, sorted by the type of fruit and harvesting season.
Apple
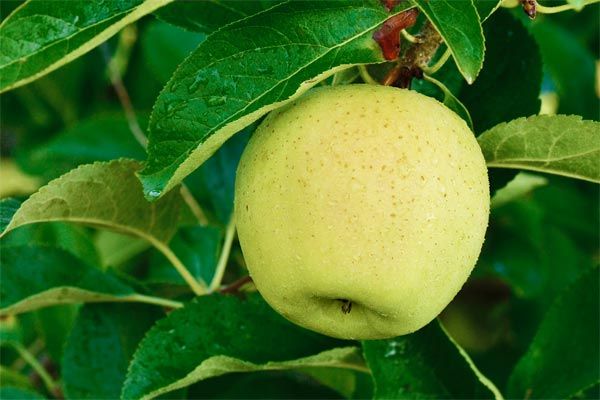
Most apple trees produce a better yield when pollinated by a second variety. They can grow in a range of hardiness zones:
| Season | Hardiness Zone | Variety | Description |
|---|---|---|---|
| Early (late July through late August) | 4–10 | Gala | Large size, red-striped skin, crisp and sweet-tart |
| Early (late July through late August) | 5–9 | Akane | Medium size, pale-red skin, sweet and spicy flesh |
| Early (late July through late August) | 6–9 | Anna | Medium size, golden-red skin, very juicy |
| Early (late July through late August) | 6–9 | Ein Shemer | Large size, golden-yellow skin, crisp and tart |
| Midseason (late August through late September) | 6–9 | Granny Smith | Large size, yellow-green skin, firm, tart flesh |
| Midseason (late August through late September) | 5–8 | Jonagold | Large size, red-striped fruit, firm and juicy |
| Midseason (late August through late September) | 4–9 | Empire | Medium size, reddish skin, sweet and tangy, notably cold-tolerant |
| Midseason (late August through late September) | 3–8 | Honeycrisp | Large size, red skin, mild, sweet, and aromatic, notably cold-tolerant |
| Late (late September through late October) | 5–8 | Stayman Winesap | Large size, deep-red skin, firm and spicy |
| Late (late September through late October) | 5–8 | Fuji | Medium size, reddish-orange skin, very crisp and sweet |
| Late (late September through late October) | 4–8 | Northern Spy | Large size, blush skin, firm and crisp, notably cold-tolerant |
| Late (late September through late October) | 4–7 | Golden Delicious | Large size, yellow skin, tangy, notably cold-tolerant |
Peach
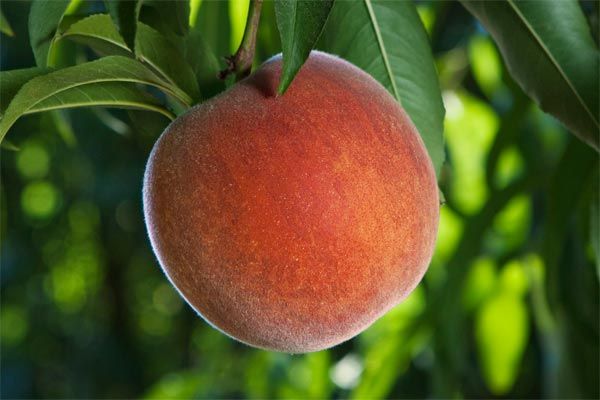
These will grow in zones 4–9 but do especially well in zones 6 and 7. Most are able to set fruit with their own pollen:
| Season | Hardiness Zone | Variety | Description |
|---|---|---|---|
| Early (June through mid-July) | 5–8 | Fourth of July | Medium size, reddish skin, firm, juicy, and sweet, very early fruiting |
| Early (June through mid-July) | 9–10 | Eva’s Pride | Medium size, reddish skin, fine flavor and aroma, notably heat-tolerant |
| Midseason (late July through mid-August) | 5–9 | Fay Elberta | Medium size, yellow skin, classic rich, peach flavor |
| Midseason (late July through mid-August) | 4–8 | Reliance | Large size, yellow skin, sweet, juicy, peachy flavor, notably cold-tolerant |
| Late (late August through late September) | 5–8 | Hale Haven | Medium size, yellow blushed-red skin, firm, sweet, and juicy |
| Late (late August through late September) | 4–8 | Contender | Medium size, yellow blushed-red skin, sweet, creamy flesh, notably cold-tolerant |
Pear
Pears generally prefer to grow between zones 4 and 9. Most need the pollen of a second variety on the same fruiting schedule for fertilization:
| Season | Hardiness Zone | Variety | Description |
|---|---|---|---|
| Early (late July through mid-August) | 5–7 | Warren | Medium size, pale green, juicy and buttery flesh |
| Early (late July through mid-August) | 4–9 | Conference | Medium size, pale-green skin, very juicy and sweet, notably early fruiting |
| Early (late July through mid-August) | 4–9 | Red Clapp’s Favorite | Medium size, bright-red skin, very juicy |
| Early (late July through mid-August) | 4–9 | Comice | Large size, light-green skin, sweet with a firm texture |
| Midseason (late August through early September) | 5–8 | Seckel | Small size, reddish-brown skin, very firm, creamy white flesh |
| Midseason (late August through early September) | 5–8 | Potomac | Medium size, pale-green glossy skin, creamy white flesh |
| Midseason (late August through early September) | 4–8 | Max Red Bartlett | Medium size, sweet, crisp fruit, notably cold-hardy |
| Midseason (late August through early September) | 4–8 | Harrow Delight | Medium size, yellow skin, very sweet and juicy, notably cold-tolerant |
| Late (mid-September through early October) | 5–8 | Anjou | Large size, bright-green skin, sweet, fine-textured flesh |
| Late (mid-September through early October) | 5–9 | Bosc | Medium size, brownish skin, tender and spicy-sweet |
| Late (mid-September through early October) | 4–8 | Luscious | Small size, bright yellow, fine-textured flesh, notably cold-tolerant |
| Late (mid-September through early October) | 3–7 | Parker | Medium size, yellow-bronze skin, tender and sweet, notably cold-tolerant |
Pruning and Training Fruit Trees for Maximum Yield
Proper pruning and training help maintain fruit tree health, control size, and maximize fruit production. These techniques help shape your trees and encourage strong, fruitful growth.
The Importance of Pruning Young Trees
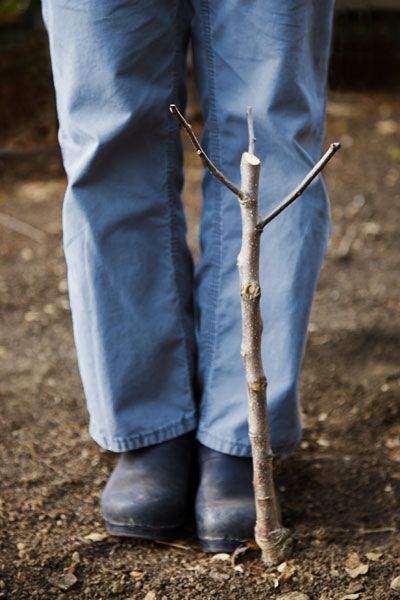
Pruning young fruit trees is crucial for establishing a strong framework and promoting future fruit production. After planting, make a heading cut at an angle just above a leaf node, reducing the tree to about 18 inches tall. This initial cut may seem drastic, but it creates a sturdy, low-branching scaffold that will support future fruit loads.
Two Types of Pruning Cuts
Know the difference between a heading cut and a thinning cut.
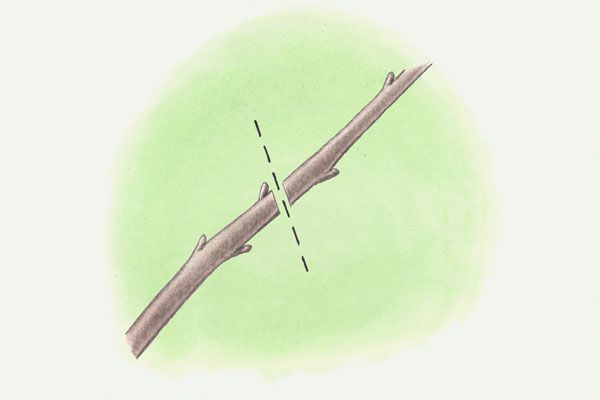
A heading cut shortens branches and limbs. Make a clean cut just above a leaf node or where a leaf attaches to a stem. This type of cut forces the buds below to grow into new branches, increasing bushiness.
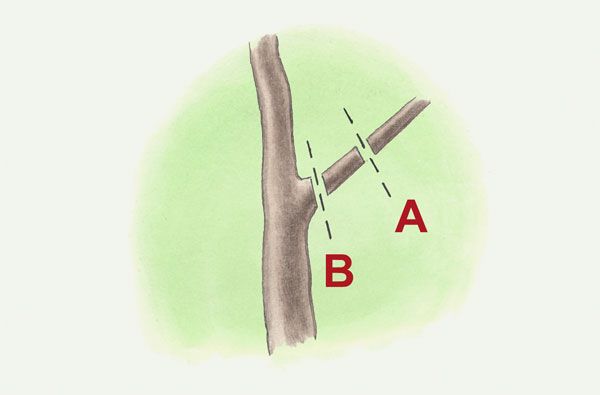
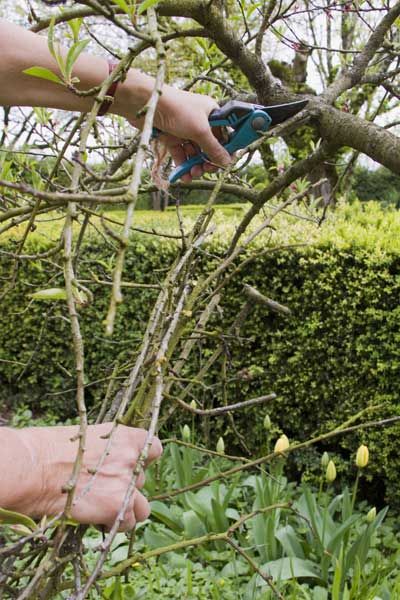
Thinning cuts remove entire branches or shoots. The first cut (A) shortens the branch to a stub and avoids ripping the bark. The second cut (B) removes the rest of the limb. Cut back to just above the branch collar, the thickened area of bark from which a limb emerges. Thinning cuts decrease the number of branches and open the interior of the tree to light and air.
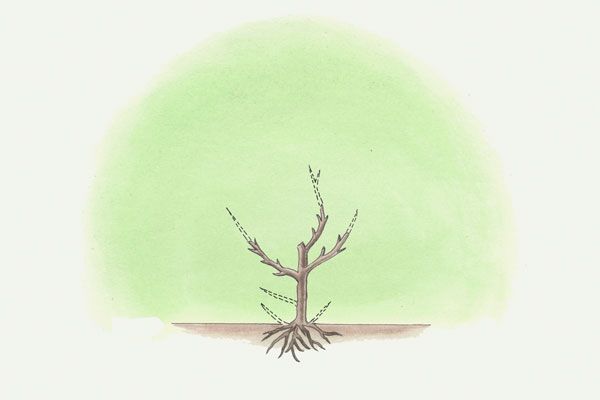
First Spring Pruning

If your tree doesn’t already have branches below the initial heading cut, use your fingers to remove all but three evenly-spaced buds. These will become the tree’s scaffold branches.
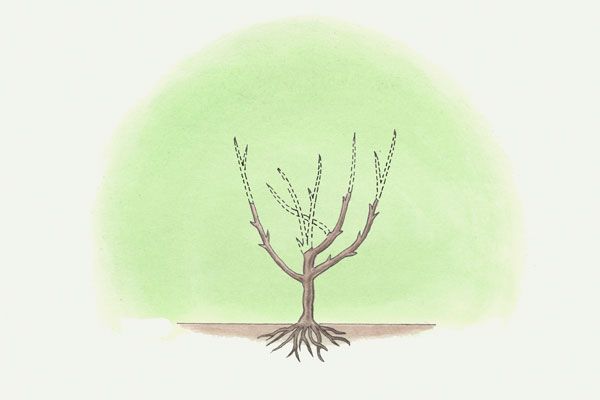
First Summer Pruning
Remove suckers—growth that emerges from the rootstock—and prune away all but the three branches evenly spaced around the trunk. Head back these branches by one-half to two-thirds, to an outward-facing bud.
First Winter Pruning
Prune to open up the center of the tree and remove crossing or crowded limbs. These cuts encourage a vase-like shape. To spur the growth of thinner limbs, head back by two-thirds. To slow the growth of thicker limbs, head back by one-half.
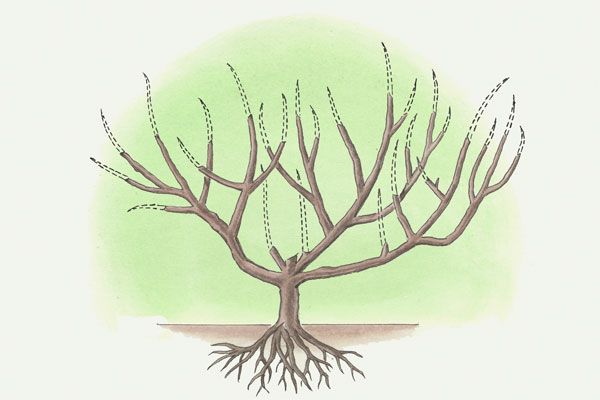
Second Summer Pruning
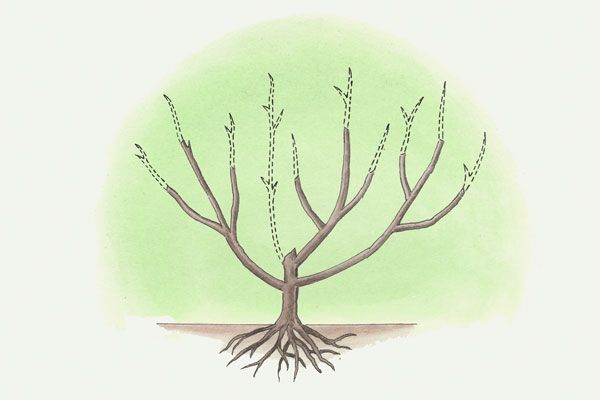
You’ll have a small, shapely tree that still has room to grow. Head back vertical branches by one-half to two-thirds. These cuts reduce height and encourage branches to grow at a 45-degree angle, horizontal enough to create fruit.
Pruning Mature Trees
For mature trees, prune in late winter to maintain structure and aesthetics. To control height and maintain a manageable size, prune again in June around the summer solstice. This summer pruning reduces the tree’s food production, helping keep it small.
Training Techniques for Different Tree Shapes
Different fruit tree species benefit from various training techniques. For example, you can train apple and pear trees on a central leader system, while you can train peach trees to an open center. We recommend researching the best training method for your specific fruit tree variety.
Managing Pests and Diseases in Fruit Trees
Protecting your fruit trees from pests and diseases is crucial for maintaining their health and ensuring a good harvest.
Common Fruit Tree Pests and How To Control Them
Fruit trees are susceptible to various pests, including aphids, codling moths, and mites. Regularly inspect your trees for signs of infestation, such as distorted leaves, holes in fruit, or visible insects. Use integrated pest management techniques, including pruning affected areas, introducing beneficial insects, and applying organic pesticides when necessary. Call a pest control professional for help if the problem gets out of hand or you’re unsure about how to eliminate pests safely.
Identifying and Treating Fruit Tree Diseases
Common fruit tree diseases include fireblight, powdery mildew, and various fungal infections. Look for symptoms such as discolored leaves, cankers on branches, or fruit rot. Proper sanitation, including removing fallen leaves and pruning infected branches, can help prevent disease spread. In severe cases, consult with a local cooperative extension office for appropriate treatment options.
Organic Methods for Pest and Disease Management
There are many organic methods for managing pests and diseases in fruit trees. These include companion planting with pest-repelling herbs, applying compost tea to boost tree immunity, and using physical barriers, such as tree wraps, to prevent insect damage. Encourage natural predators, such as birds and beneficial insects, to help control pest populations in your orchard.
Fertilizing and Feeding Your Fruit Trees
Proper nutrition is essential for healthy growth and abundant fruit production. Understanding your trees’ nutrient requirements and implementing an appropriate fertilizing schedule will help ensure their success.
Understanding Nutrient Requirements
Fruit trees require a balance of essential nutrients, including nitrogen, phosphorus, and potassium, as well as various micronutrients. Specific needs vary depending on the tree species and soil conditions. Conduct regular soil tests to determine which nutrients your trees may be lacking.
Types of Fertilizers for Fruit Trees
There are various fertilizer options for fruit trees, including organic and synthetic formulations. Organic options, such as compost, well-rotted manure, and fish emulsion, provide slow-release nutrients and improve soil structure. Synthetic fertilizers offer precise nutrient ratios but may require more frequent application.
When and How to Apply Fertilizers
We recommend fertilizing fruit trees in early spring before new growth begins. For young trees, apply fertilizer in a ring around the drip line, gradually expanding the area as the tree grows. Mature trees benefit from fertilizer applied over the entire root zone. Always follow package instructions for application rates and avoid over-fertilizing, which can lead to excessive leaf growth at the expense of fruit production.
Harvesting and Storing Your Homegrown Fruit
The culmination of your efforts comes with harvesting your homegrown fruit. Knowing when and how to pick your fruit, as well as proper storage techniques, will help you enjoy the best flavor and longest shelf life.
Signs Your Fruit Is Ready for Harvest
Different fruits have varying indicators of ripeness. For example, apples are typically ready when they easily detach from the tree with a gentle twist. Peaches are ripe when they have a strong aroma and yield slightly to gentle pressure. We recommend researching the specific signs of ripeness for your fruit varieties to determine the optimal harvest time.
Proper Harvesting Techniques
Handle fruit gently during harvest to avoid bruising or damaging the skin. For most tree fruits, cup the fruit in your hand and gently twist or lift to separate it from the branch. Use clean, sharp pruning shears for fruits with tough stems, such as pears.
Best Practices for Fruit Storage
You can extend the life of your harvested fruit with proper storage. Most tree fruits store best in cool, humid conditions. You can store apples and pears for several months in a refrigerator or cool basement. Stone fruits, such as peaches and plums, have a shorter storage life and are best enjoyed fresh or preserved through canning or freezing.
Dwarf Fruit Trees: Big Rewards in Small Spaces
Dwarf fruit trees offer an excellent solution for gardeners with limited space, providing full-sized fruit on compact trees that are easy to maintain and harvest.
Benefits of Growing Dwarf Fruit Trees
Dwarf fruit trees typically reach heights of eight to 10 feet, making them ideal for small yards, patios, or containers. Their compact size allows for easier pruning, spraying, and harvesting without the need for ladders. Dwarf trees also begin bearing fruit earlier than their full-sized counterparts, sometimes producing within two to three years of planting.
Top Dwarf Varieties for Home Gardens
Popular dwarf fruit tree varieties include ‘Gala’ and ‘Fuji’ apples, ‘Bartlett’ and ‘Anjou’ pears, and ‘Elberta’ peaches. When selecting dwarf varieties, consider your climate, available space, and fruit preferences.
Special Care Tips for Dwarf Fruit Trees
Dwarf fruit trees require similar care to standard-sized trees but may need more frequent watering and fertilization due to their smaller root systems. They also benefit from support, such as stakes or trellises, to help bear the weight of fruit. Prune them regularly to maintain their compact size and shape.
Companion Planting for Fruit Trees
Companion planting can enhance the health and productivity of your fruit trees by attracting beneficial insects, repelling pests, and improving soil conditions.
Best Companion Plants for Fruit Trees
Basil, mint, and thyme can repel pests and attract pollinators, while flowering plants, such as marigolds and nasturtiums, help deter harmful insects. Nitrogen-fixing plants, such as clover and beans, can improve soil fertility around fruit trees.
Plants To Avoid Near Fruit Trees
Avoid planting grass or other competitive plants directly under fruit trees, as they can compete for water and nutrients. Some plants, such as black walnut trees, produce chemicals that can inhibit fruit tree growth and should remain at a distance.
Creating a Diverse Fruit Tree Guild
A fruit tree guild is a permaculture concept that involves planting complementary species around fruit trees to create a self-sustaining ecosystem. This might include a mix of nitrogen fixers, nutrient accumulators, pest-repelling plants, and groundcovers that work together to support the fruit tree’s health and productivity.