We may be compensated if you purchase through links on our website. Our team is committed to delivering honest, objective, and independent reviews on home products and services.
As winter fades and spring approaches, it’s time to prepare your home for the new season. This checklist will guide you through essential tasks to ensure your house is ready for warmer weather. By tackling the following projects early, you’ll set yourself up for a comfortable and enjoyable spring season.
Make a List of Needed Repairs
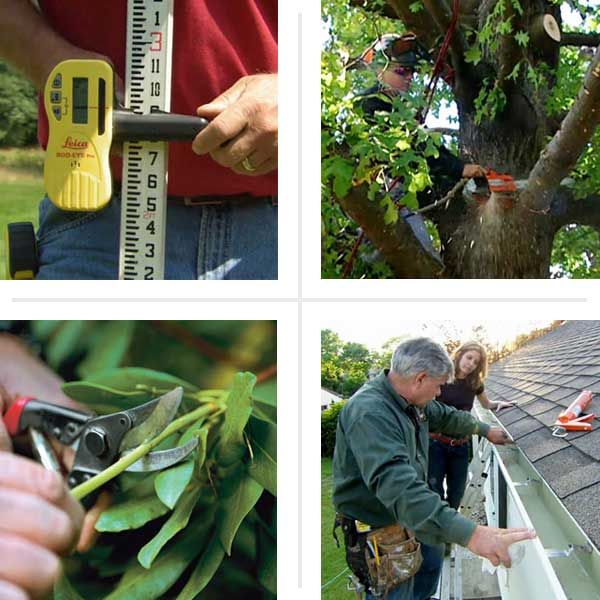
Winter can be harsh on your home, often leaving behind a trail of necessary repairs. As the snow melts and temperatures rise, we encourage you to assess any damage and create a prioritized list of tasks. This proactive approach will help you address issues before they worsen and become more costly.
Start by conducting a thorough inspection of your home’s exterior and interior. Look for signs of wear and tear, such as:
- Cracks in the foundation or walls
- Damaged gutters or downspouts
- Drafty windows or doors
- Peeling paint or siding issues
- Roof damage (missing shingles, leaks)
Once you’ve identified the problems, prioritize them based on urgency and potential for further damage. Remember to include both do-it-yourself (DIY) projects and those requiring professional assistance.
For post-storm cleanup, refer to our Smart, Safe Storm Cleanup Tips. If you’re unsure how to tackle a project, consult our 56 Survival Skills for Homeowners guide. Additionally, check out our Slash Your Utility Bill With a DIY Energy Audit article to identify areas where you can improve your home’s efficiency and reduce utility costs.
Trim Broken Tree Limbs
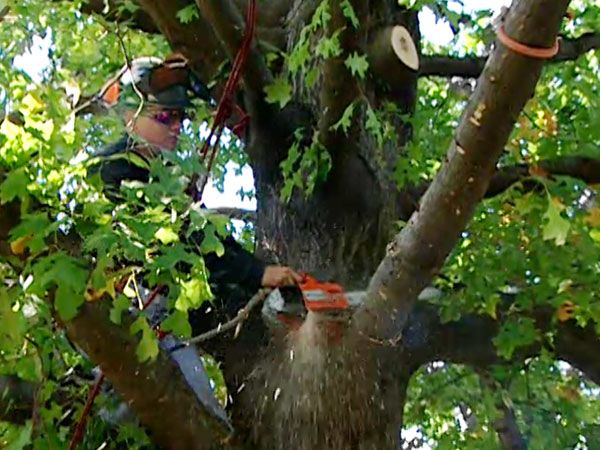
Winter storms and heavy snow can wreak havoc on trees, leaving behind broken branches and potential hazards. As spring approaches, addressing these issues promotes healthy growth and safety around your property.
Begin by surveying your yard for visible damage to trees and large shrubs. Look for the following:
- Broken or hanging branches
- Damaged bark
- Leaning trees
- Split tree trunks
Using proper tools and techniques, you can handle the pruning yourself for smaller branches. However, it’s best to hire a professional arborist for larger limbs or trees with significant damage. They have the expertise and equipment to safely remove hazardous branches and assess the overall health of your trees.
When trimming trees yourself, follow these guidelines:
- Use clean, sharp tools to make clean cuts.
- Cut at the branch collar (the swollen area where the branch meets the trunk).
- Avoid leaving stubs or cutting too close to the trunk.
- Remove no more than 25% of a tree’s live branches in a single season.
Consult our guide on pruning larger trees for detailed instructions on How To Prune a Large Tree. At the same time, make sure that you have the right tools for the job—check out TOH Tested: Pruning Tools.
Trim Shrubs
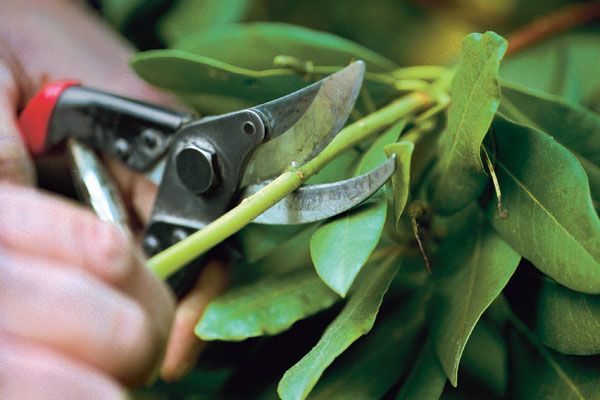
Proper shrub maintenance is important for maintaining a healthy and attractive landscape. Spring pruning is important for new growth and maintaining shape, even if your shrubs survived winter without visible damage.
When trimming shrubs, keep these tips in mind:
- Avoid over-pruning, which can stress the plant.
- Identify the type of shrub to determine the best pruning time and technique.
- Remove dead, damaged, or diseased branches first.
- Shape the shrub to maintain its natural form or desired shape.
- Thin out dense growth to improve air circulation and sunlight penetration.
Timing is incredibly important for flowering shrubs. Prune spring-flowering shrubs immediately after they bloom, while you should prune summer-flowering shrubs in late winter or early spring before new growth begins.
Follow our Shrub Pruning Dos and Don’ts guide to address common shrub problems with the proper techniques. For young flowering shrubs, learn about appropriate care in Everything You Need to Know About Pruning and Dividing Plants. If you’re dealing with tight spaces, consider using specialized Pruners for Tight Spots to make the job easier.
Spiff Up Damaged Gutters
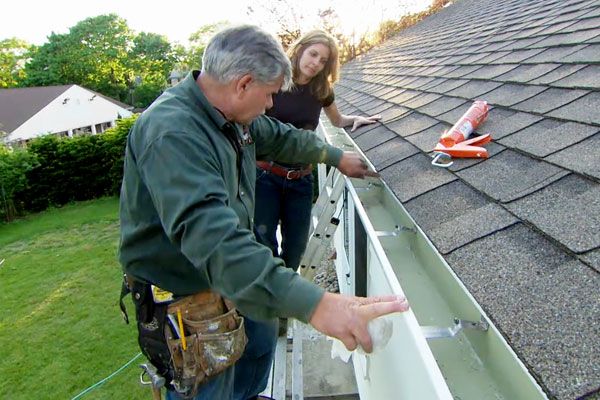
Gutters are important in protecting your home from water damage, but they often bear the brunt of winter weather. Addressing gutter issues promptly can prevent more significant problems down the line, especially as spring rains approach.
Before climbing a ladder to inspect your gutters, review How To Use a Ladder Safely to verify you’re taking proper precautions. Once you’re ready to assess the damage, look for:
- Clogged downspouts
- Cracks or holes in the gutters
- Damaged or missing gutter guards
- Loose or detached gutter sections
- Sagging gutters
You may be able to handle the job for minor repairs, such as reattaching loose sections or sealing small leaks. Follow our step-by-step guide on How To Install Rain Gutters for tips on installation and repair techniques.
Consider hiring a professional gutter service for more significant issues or if you’re not comfortable working at heights. They can provide a thorough inspection and address any problems efficiently and safely.
We recommend installing gutter guards and a regular cleaning schedule to prevent future gutter issues. This proactive approach can save you time and money in the long run by reducing the need for repairs and protecting your home from water damage.
Check out TOH general contractor Tom Silva’s quick solution for stopping leaks in How To Repair a Leaky Gutter. Or start fresh with Tom as he walks you through setting up a system ready to tackle the harshest downpours in How To Install Aluminum Gutters. Got more questions? You’ll find all the info you need in All About Gutters.
Seal Water Out of Your Basement

As snow melts and spring rains arrive, basements become particularly vulnerable to water infiltration. Taking steps to waterproof your basement can prevent costly damage and protect your home’s foundation.
Start by inspecting your basement walls for signs of moisture or existing leaks. Look for:
- Cracks in the walls or floor
- Efflorescence (white, powdery deposits on walls)
- Mold or mildew growth
- Water stains or discoloration
Applying waterproof masonry paint can help seal out moisture for minor issues. Products like BEHR PREMIUM Basement & Masonry Waterproofer or ZINSSER WATERTITE-LV Waterproofing Concrete Masonry Paint can be effective for do-it-yourself applications.
However, for more severe water issues or if you’re unsure about the source of the problem, it’s best to consult a professional waterproofing contractor. They can assess the situation and recommend appropriate solutions, such as:
- Applying exterior waterproofing membranes
- Improving grading around your home’s foundation
- Installing an interior drainage system
- Repairing or replacing damaged gutters and downspouts
Keep a wet/dry vac on hand for quick cleanup of any water that does make its way into your basement. For smaller spaces, consider compact utility vacs that offer powerful suction in a more manageable size.
For step-by-step guidance on addressing basement leaks, check out Tom’s pro advice on How To Fix a Leaky Basement Wall.
Tackle Basement Puddles With a Portable Pump

While a permanent sump pump is ideal for homes prone to basement flooding, a portable utility pump can quickly and effectively solve occasional water issues. When using a portable pump, keep these tips in mind:
- Choose a pump with an adequate flow rate and head lift for your needs.
- Clean and dry the pump thoroughly after each use.
- Direct the discharge hose away from your home’s foundation.
- Monitor the pump while in use to prevent burnout.
- Place the pump in the lowest part of the basement.
Remember that standing water can lead to mold growth and structural damage if left for more than 48 hours. Act quickly to remove water and thoroughly dry affected areas to prevent long-term issues.
Consider installing a sump pump for a more permanent solution to basement flooding. Follow Tom’s tutorial on How To Install a Sump Pump for guidance. A water-powered sump pump can provide added peace of mind in areas prone to power outages. Watch This Old House plumbing and heating expert Richard Trethewey demonstrate How To Install a Water-Powered Sump Pump.
Implement the strategies outlined in 3 Steps to Prevent Basement Leaks to further protect your basement from water damage.
Level Grade To Avoid a Swampy Yard
An uneven yard can lead to water pooling, creating muddy areas and potential mosquito breeding grounds. Discover how to keep mosquitoes at bay in The Mosquito, Up Close.
Proper grading helps direct water away from your home’s foundation and maintain a healthy lawn. To address grading issues, follow these steps:
- Observe water flow during rainfall to identify problem areas.
- Use a long level or string level to determine low spots.
- Add soil to low areas, gradually sloping away from your home’s foundation.
- Compact the added soil to prevent settling.
- Reseed or sod the newly graded areas.
A well-graded yard protects your home and improves the visuals and usability of your outdoor spaces. For guidance on establishing a level grade line, check out Roger Cook’s demonstration in How To Establish a Level Grade Line for Landscaping.
In addition to proper grading, consider these strategies to manage excess water in your yard:
- Create rain gardens to absorb and filter runoff.
- Extend downspouts to discharge water further from your home.
- Install French drains to redirect water away from problem areas.
- Use permeable paving materials for patios and walkways.
Explore the Best Ways To Deal With Storm Water for more information. Additionally, learn How To Extend a Downspout to further protect your home’s foundation from excess moisture.
Repair and Clean Screens

As warmer weather approaches, it’s time to prepare your screens for use. Clean, well-maintained screens allow you to enjoy fresh air while keeping insects out of your home.
Follow these steps to repair and clean your screens:
- Remove screens from windows and doors.
- Inspect for tears, holes, or loose mesh.
- Clean screens using mild soap and water, gently scrubbing with a soft brush.
- Rinse thoroughly and allow to air dry.
- Repair or replace damaged screens as needed.
You can often patch small holes using screen repair tape or patches for minor repairs. For more extensive damages or worn-out screens, consider replacing the mesh entirely.
Here’s how to replace screen mesh:
- Remove the old spline and screen using a narrow screwdriver.
- Cut the new mesh to size, leaving a slight overhang.
- Place the new mesh over the frame.
- Use a spline roller tool to press the new spline into the channel, securing the mesh.
- Trim excess screen material with a utility knife.
Shown: Professional Screening Roller Knife; The Home Depot
Prime-Line Products P 7523 Spline, 25-Feet, Black; Amazon
Repurpose old screens around the house with 10 Uses for Window Screens.
Make room for spring breezes by following our step-by-step guide, How To Build a Screen Door.