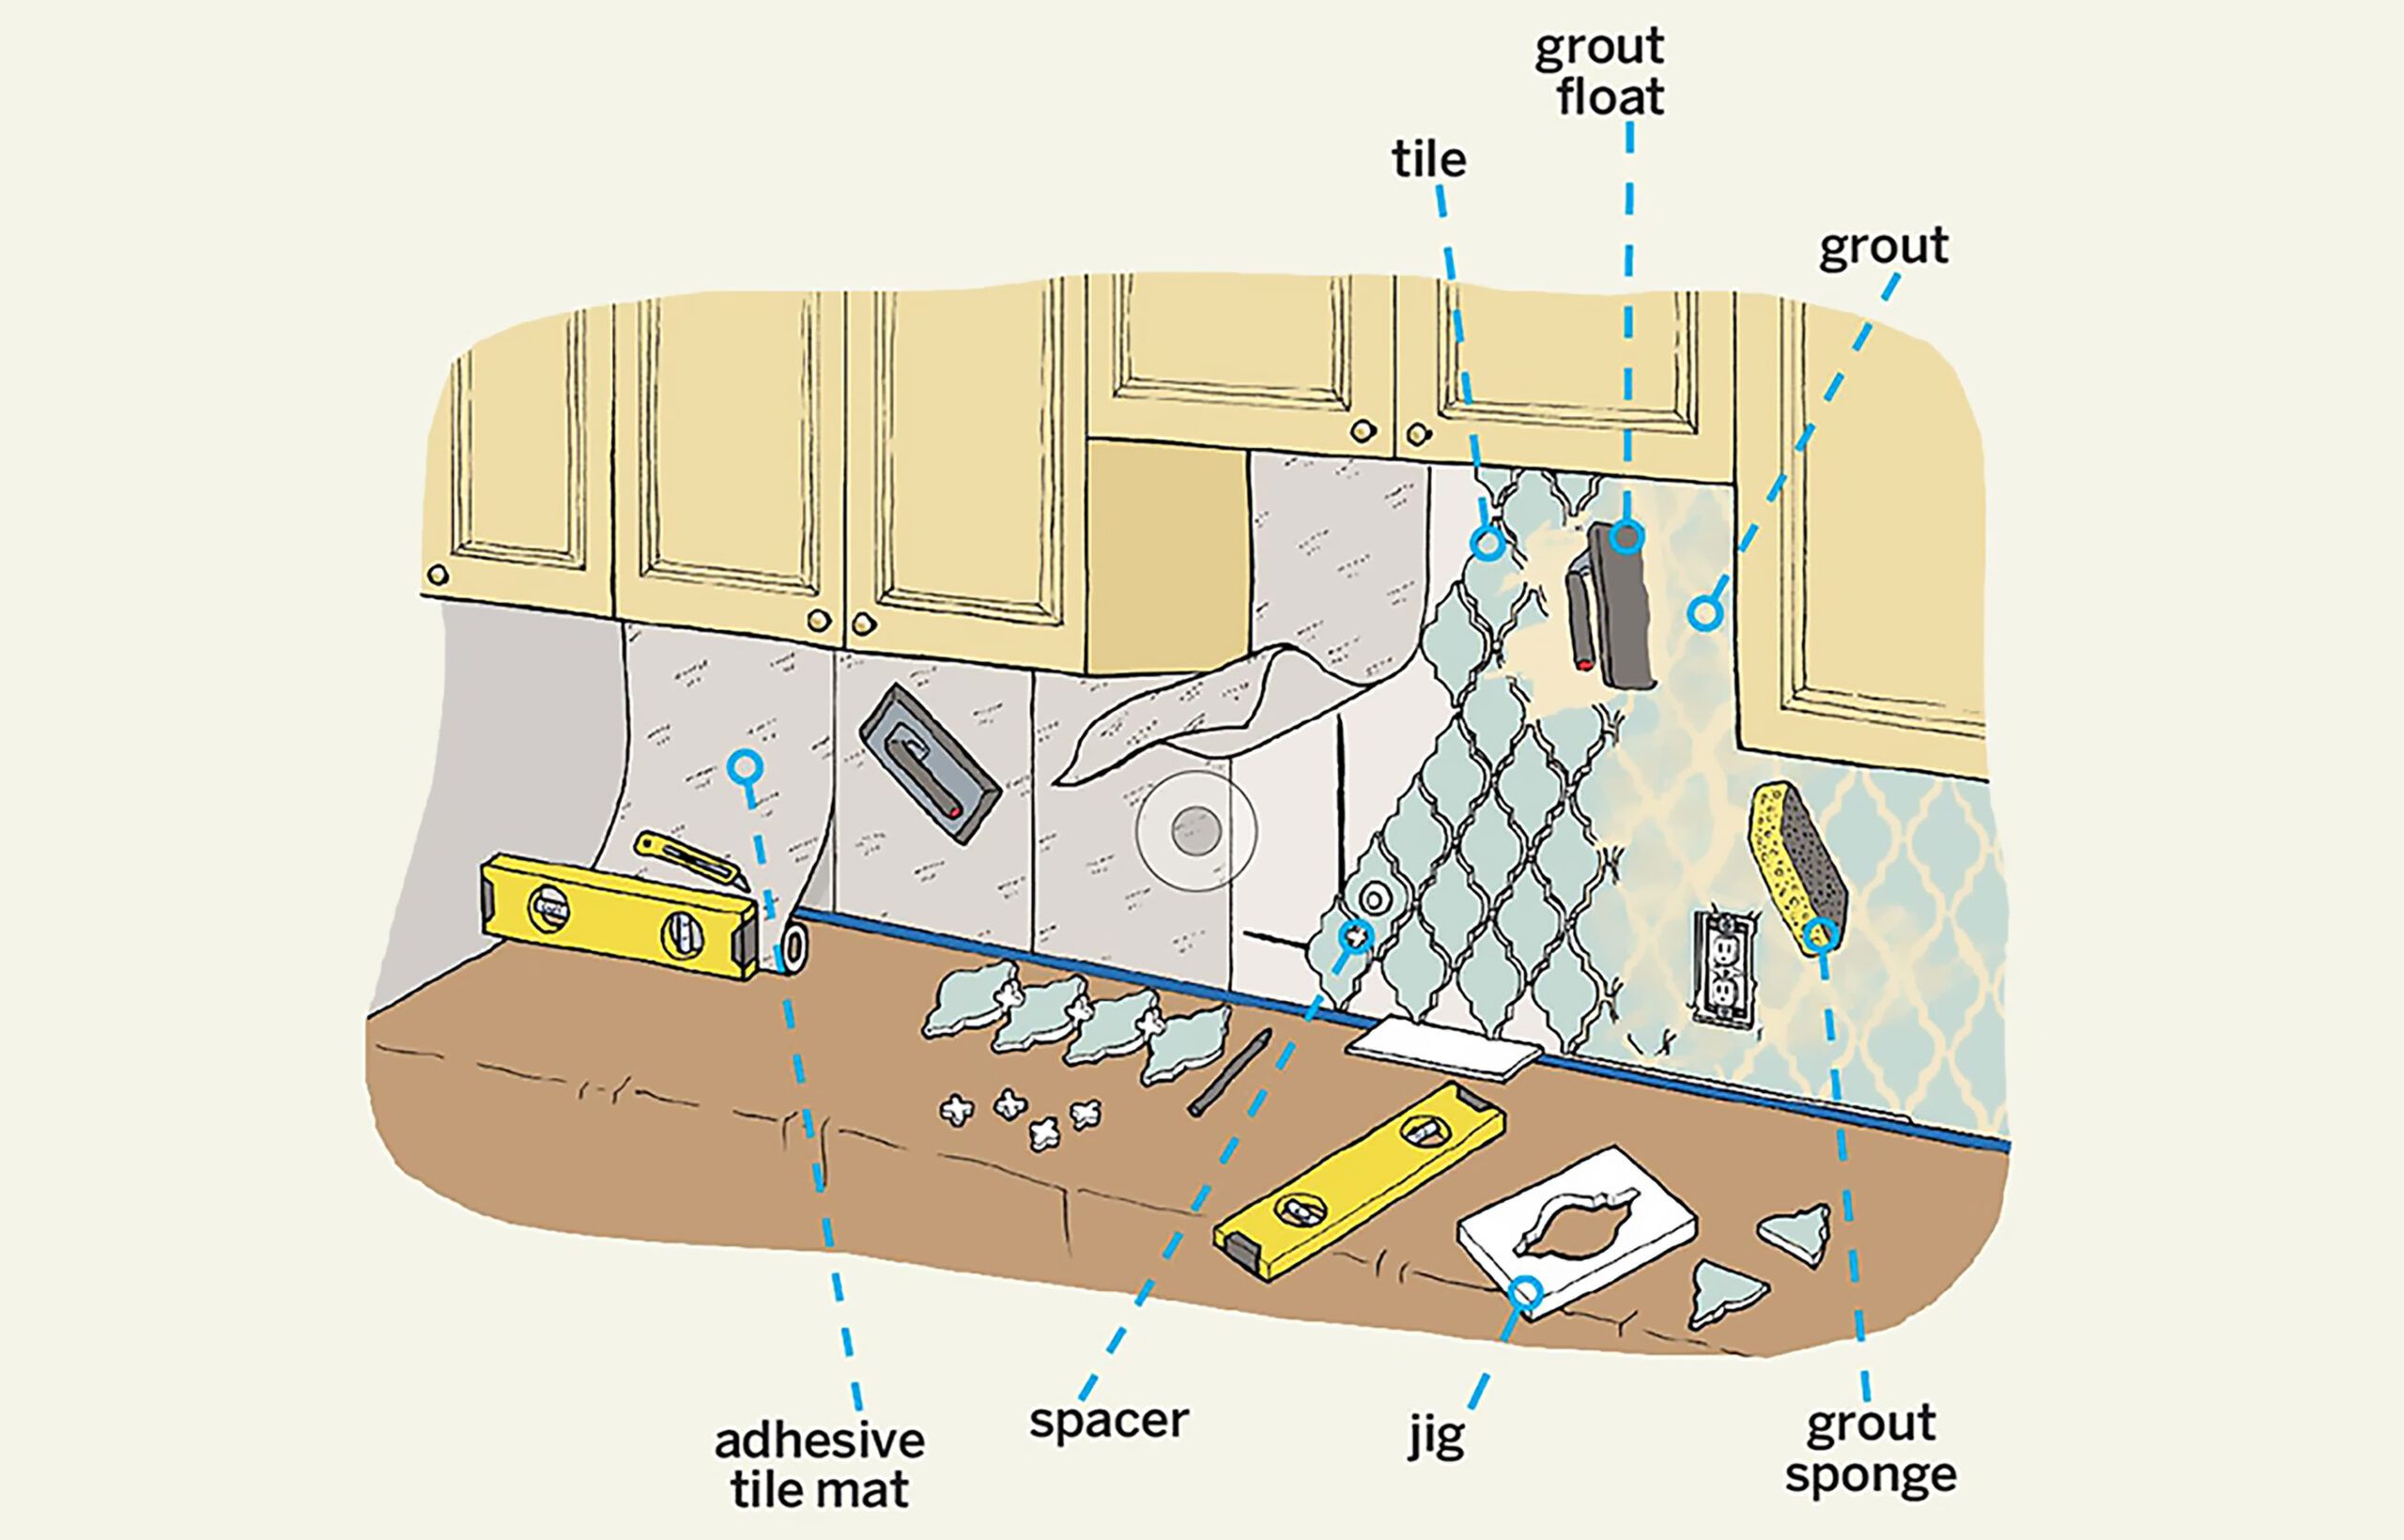
Project details
Skill
Cost
Estimated Time
Adding a new tile backsplash can completely refresh a kitchen’s look without busting the budget, and you don’t have to master troweling thinset to do it. We skipped that step altogether and used a sticky tile mat—think industrial-strength double-sided tape—that tenaciously grabs both tile and drywall, as well as existing tile or laminate. It makes for particularly quick work with square or rectangular tiles or those bound to mesh backing, though our choice of a curvaceous individual field tile ratcheted up the degree of difficulty. But the point remains, as This Old House senior technical editor Mark Powers demonstrates on the following pages. That is, the peel-and-stick mat goes up in minutes, so you can focus on the important part—setting the tile.
Recommended Tools:
Products & Resources:
Tile: Capriccio Arabesco, $17.40 per square foot; Ann Sacks
Adhesive: MusselBound Adhesive Tile Mat, $28 for 15 square feet; MusselBound
Grout: Fusion Pro, $55 per gallon; The Home Depot
Cabinet hardware: Bristol Smoked 1⅜-inch-diameter knobs, $19 apiece; Rejuvenation
Cabinet pull: Canfield 5-inch drawer pulls, all in oil-rubbed bronze Rejuvenation
Faucet: Brantford pull-down kitchen faucet with MotionSense, $705; Moen
Step 1
Project Overview
Project timeline:
Day 1: Install the mat and set the full tiles (Steps 2-10).
Day 2: Fill in the partial tiles and grout (Steps 11-18).
Step 2
Adhere the First Section
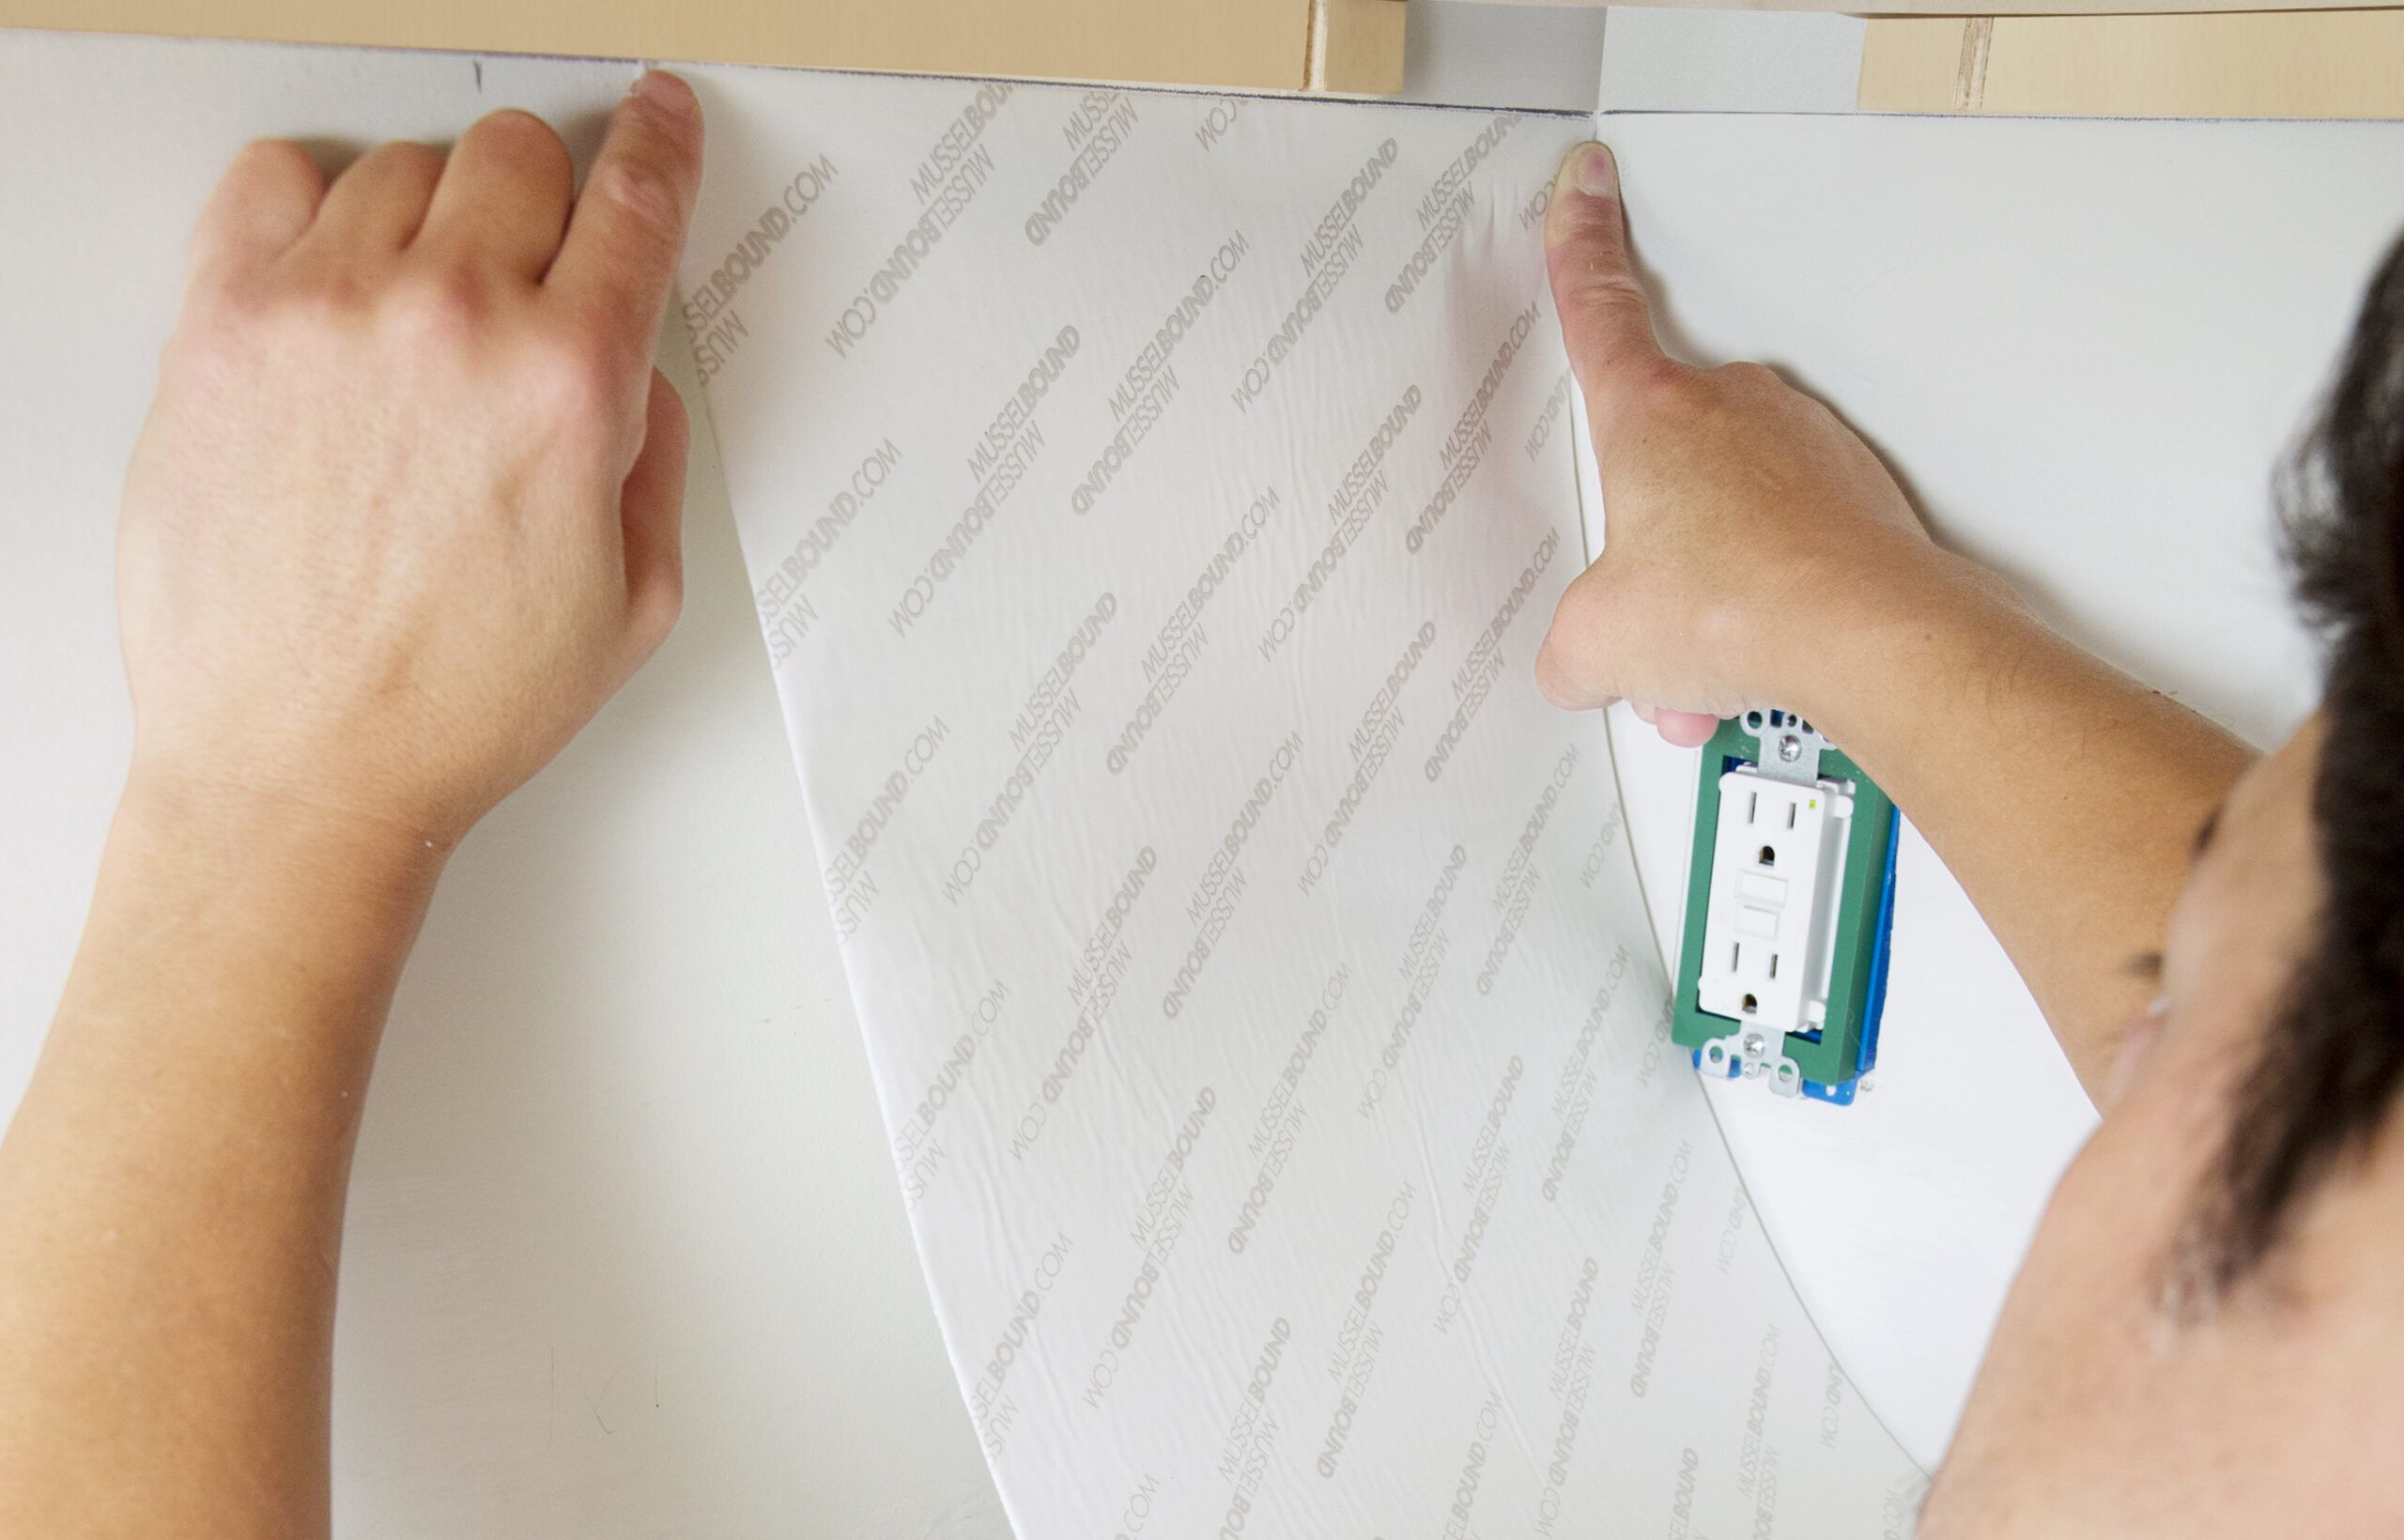
To prep, cut the power to the backsplash outlets, clean the wall with degreaser, and protect the countertop with builder’s paper or cardboard. Now, starting at a corner, stick the mat to the top of the wall under the cabinet, pressing the corners in place lightly so they can be repositioned if necessary.
Square up the mat along the corner, then touch it to the wall, working from the top down to avoid creating air bubbles. Use a level or straightedge and a breakaway knife to trim the bottom at the countertop.
Step 3
Place the Other Sections
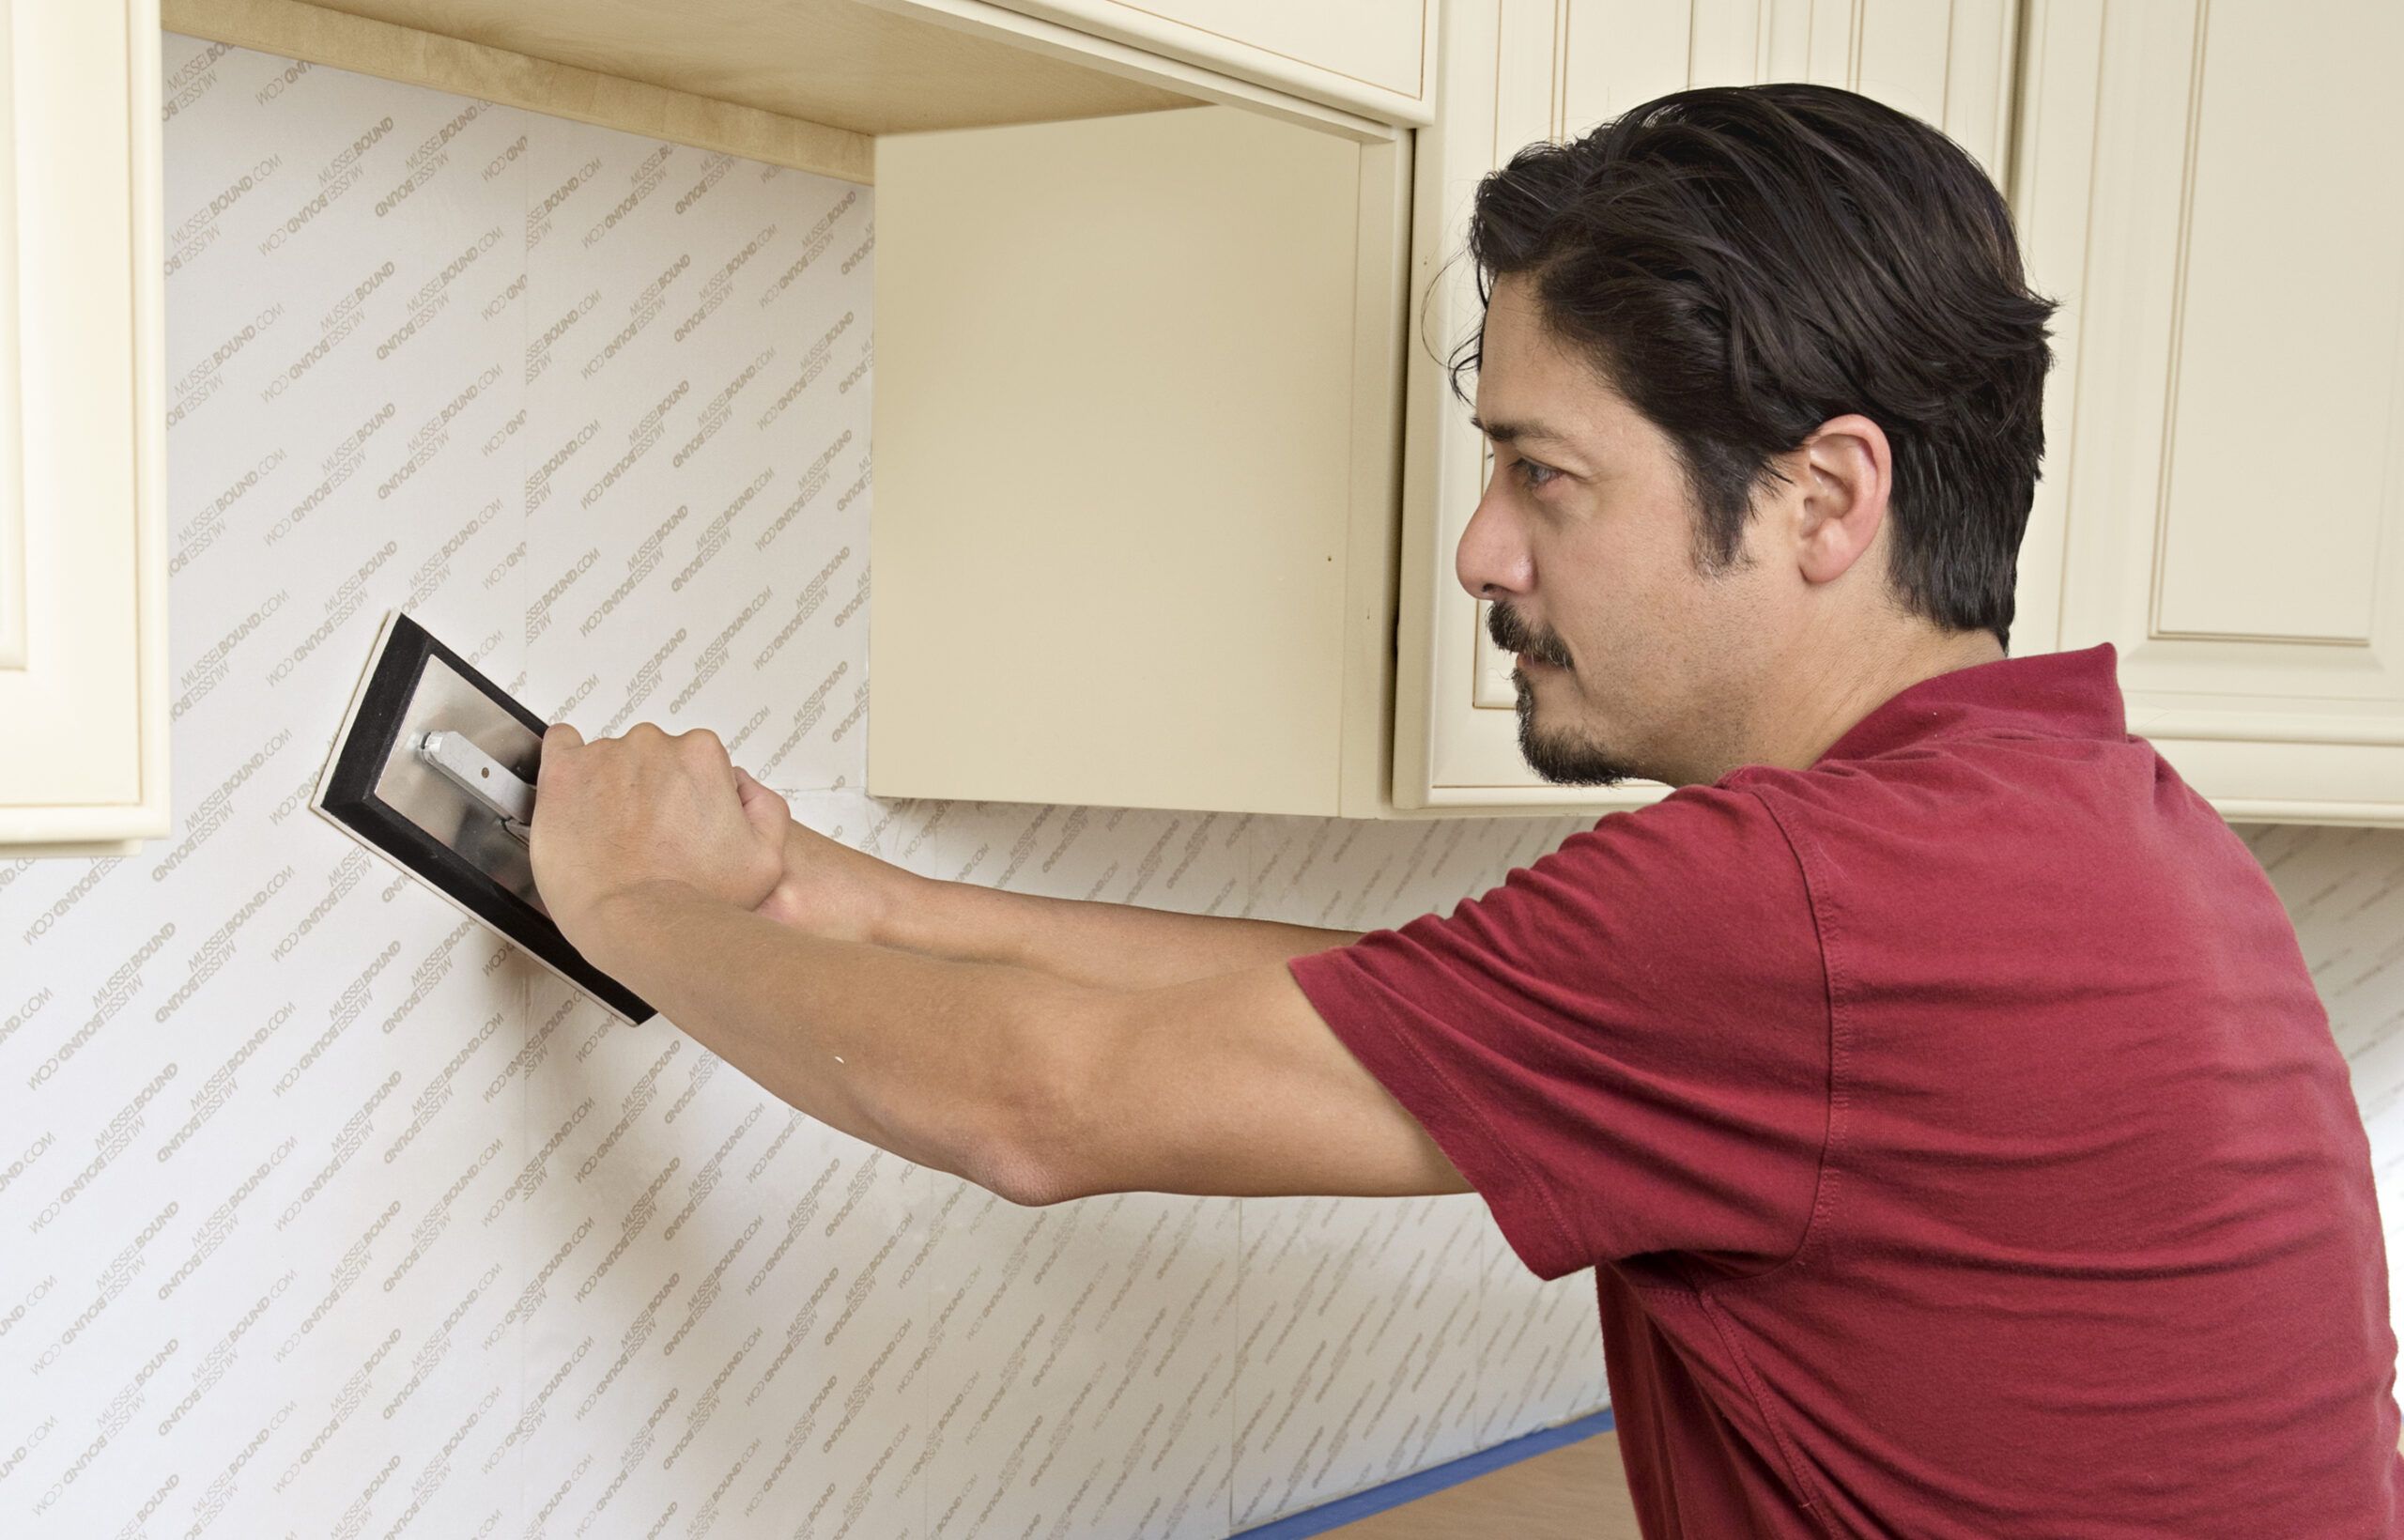
Position and trim the next section of mat the same way. To reposition a section, gently lift it off the wall by hand—it’ll stick to any tool. Continue, covering the entire backsplash. Use a grout float to squeegee out any air bubbles, then press on each section of mat for 5 seconds, bonding it to the wall.
Step 4
Dry-Fit the Pattern
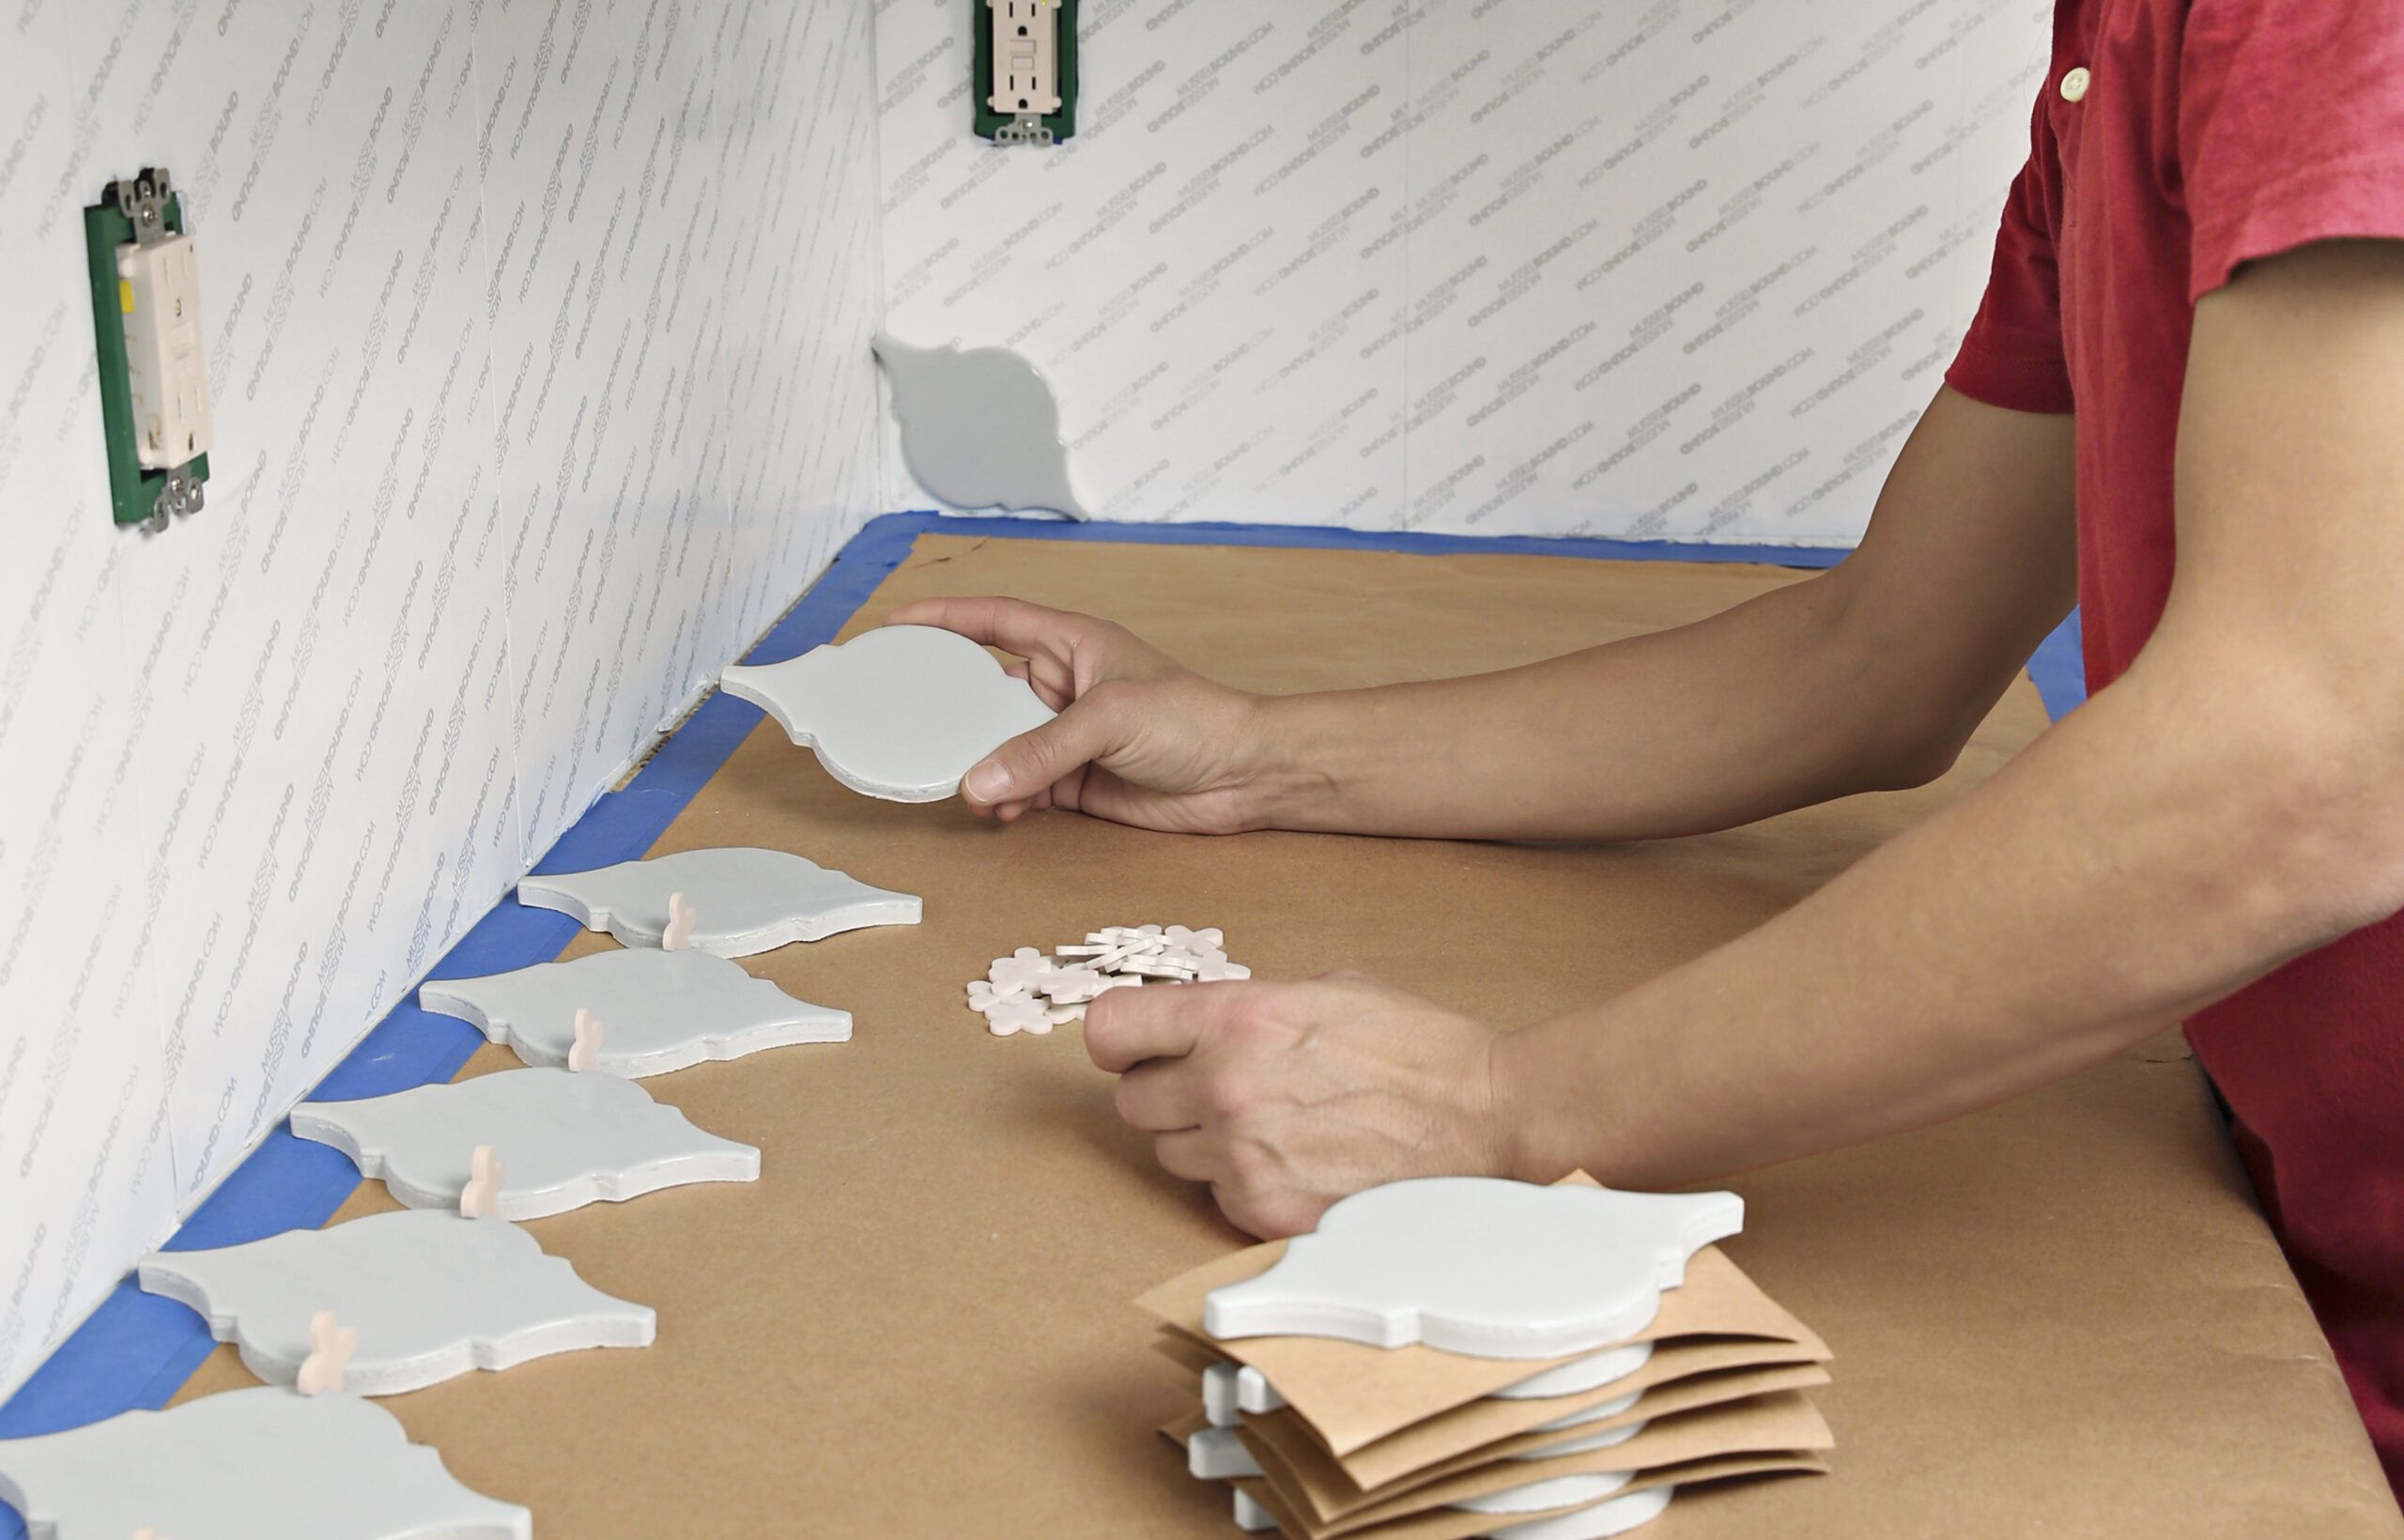
Measure and mark the center of the backsplash’s feature wall—in this case, the sink wall—on the painter’s tape. (We removed the faucet to allow more working room.) Center a tile at the mark. Start laying out tiles to one side, using spacers between them, to see where the last tile in the row lands. The feature wall tile will butt into the tile of the adjacent wall, so place a tile on edge to account for that.
Step 5
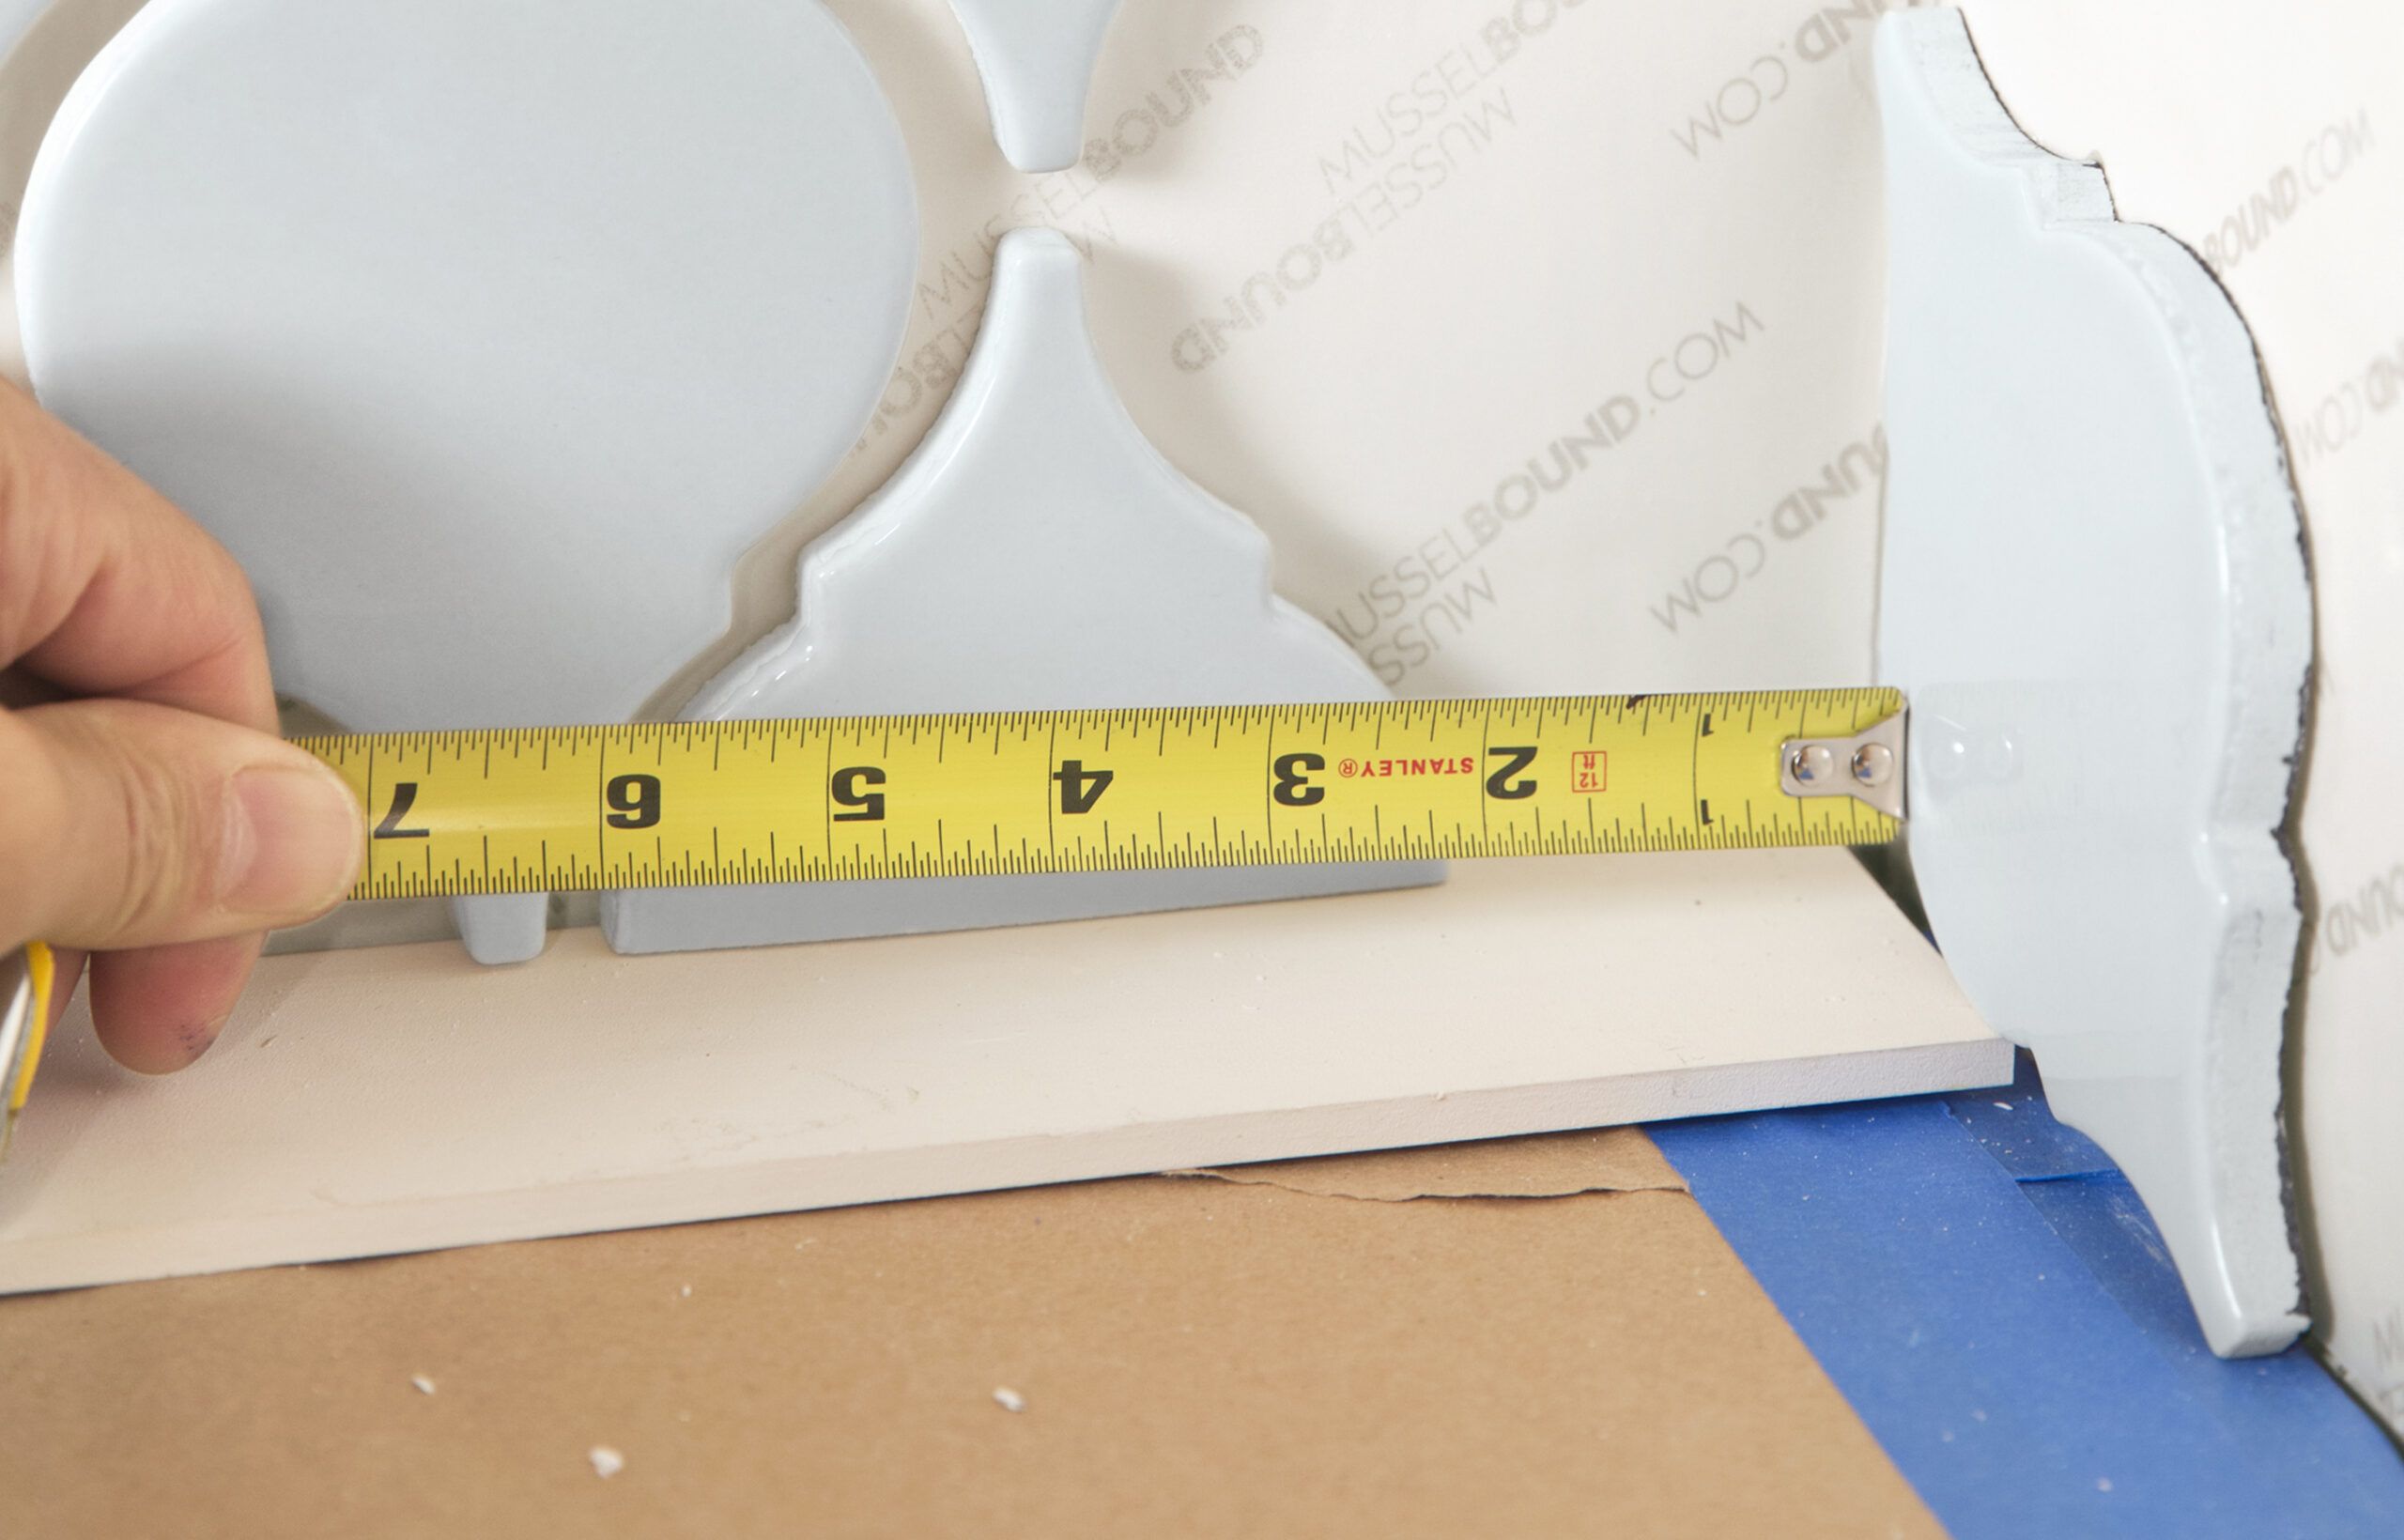
Measure the Gap
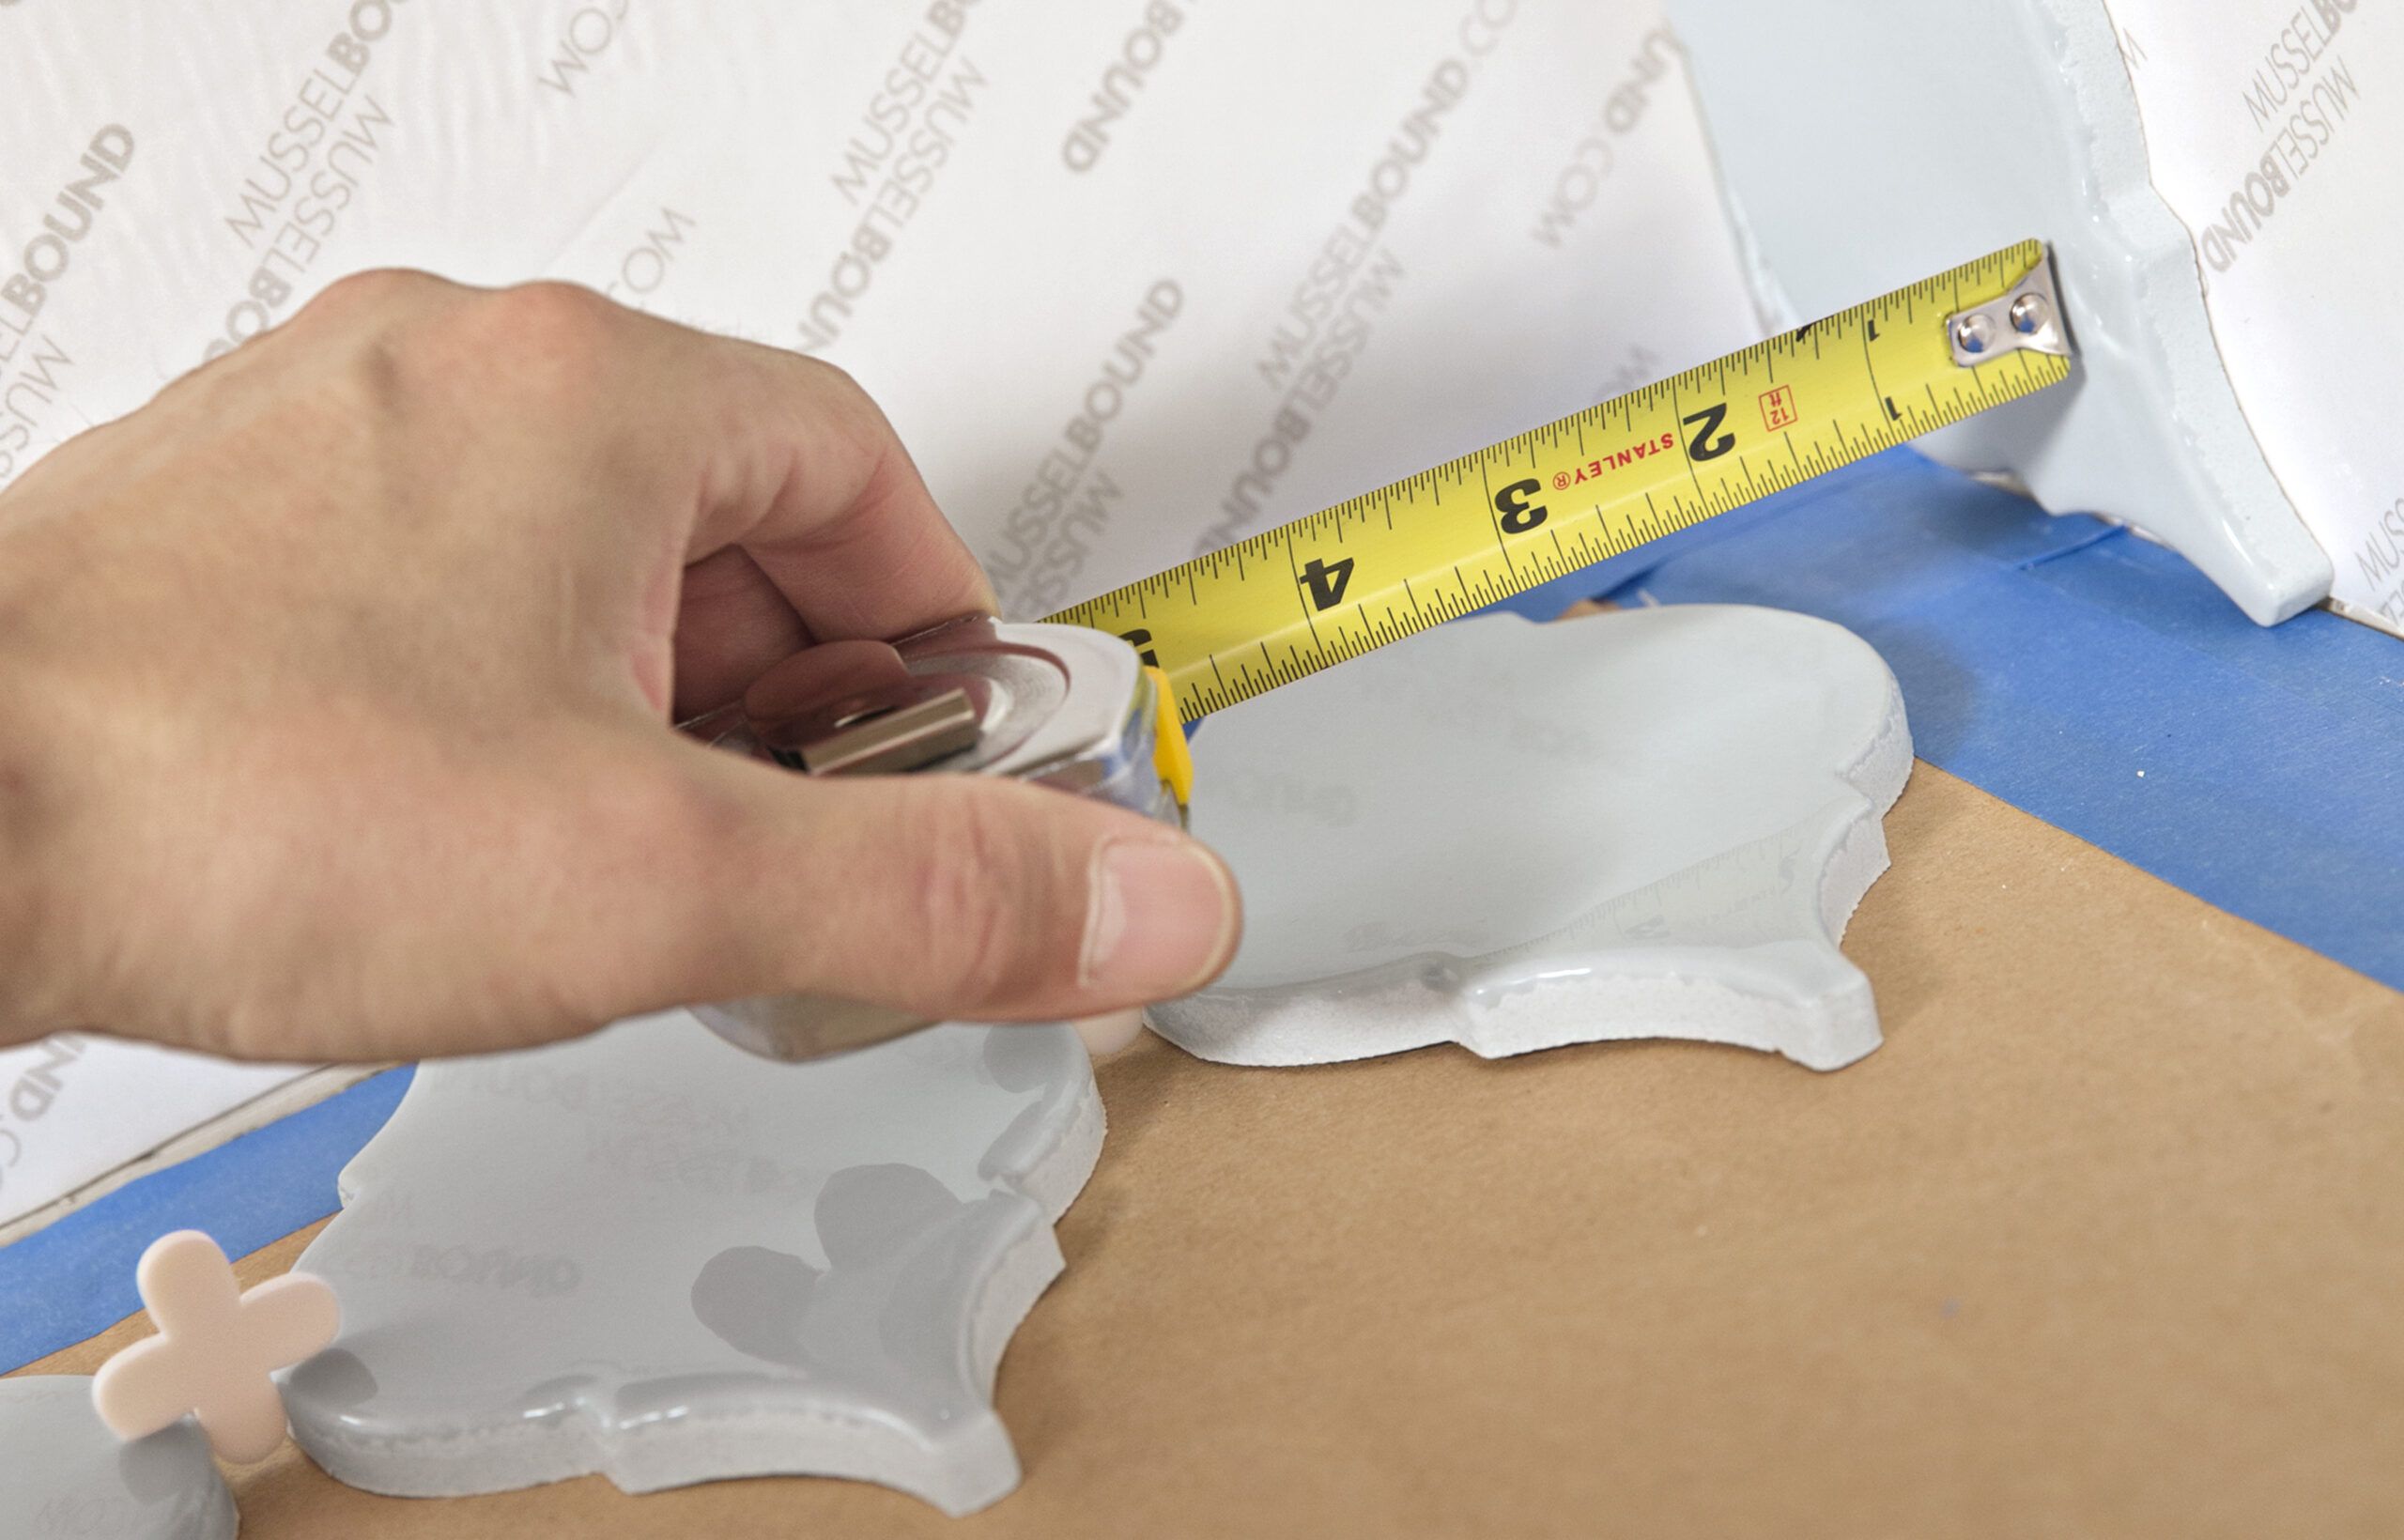
When you reach the corner and can’t place another full tile, measure the gap to the tile on the adjacent wall. Subtract the width of the spacer (⅜-inch in this case).
Step 6
Adjust and Test
Use the measurement to shift the centerline, if necessary, to finish the course with tiles of at least a half width. Make a new mark for the adjusted centerline, as shown, and lay out the tiles again to make sure the last tile lands the way you like.
Finish dry-fitting the other half of the row and check that the last tile will be more than a sliver. Rather than centering the pattern top to bottom, we wanted to start with a full tile at the countertop (allowing for a caulk line). This minimizes the number of tiles that need to be cut.
Step 7
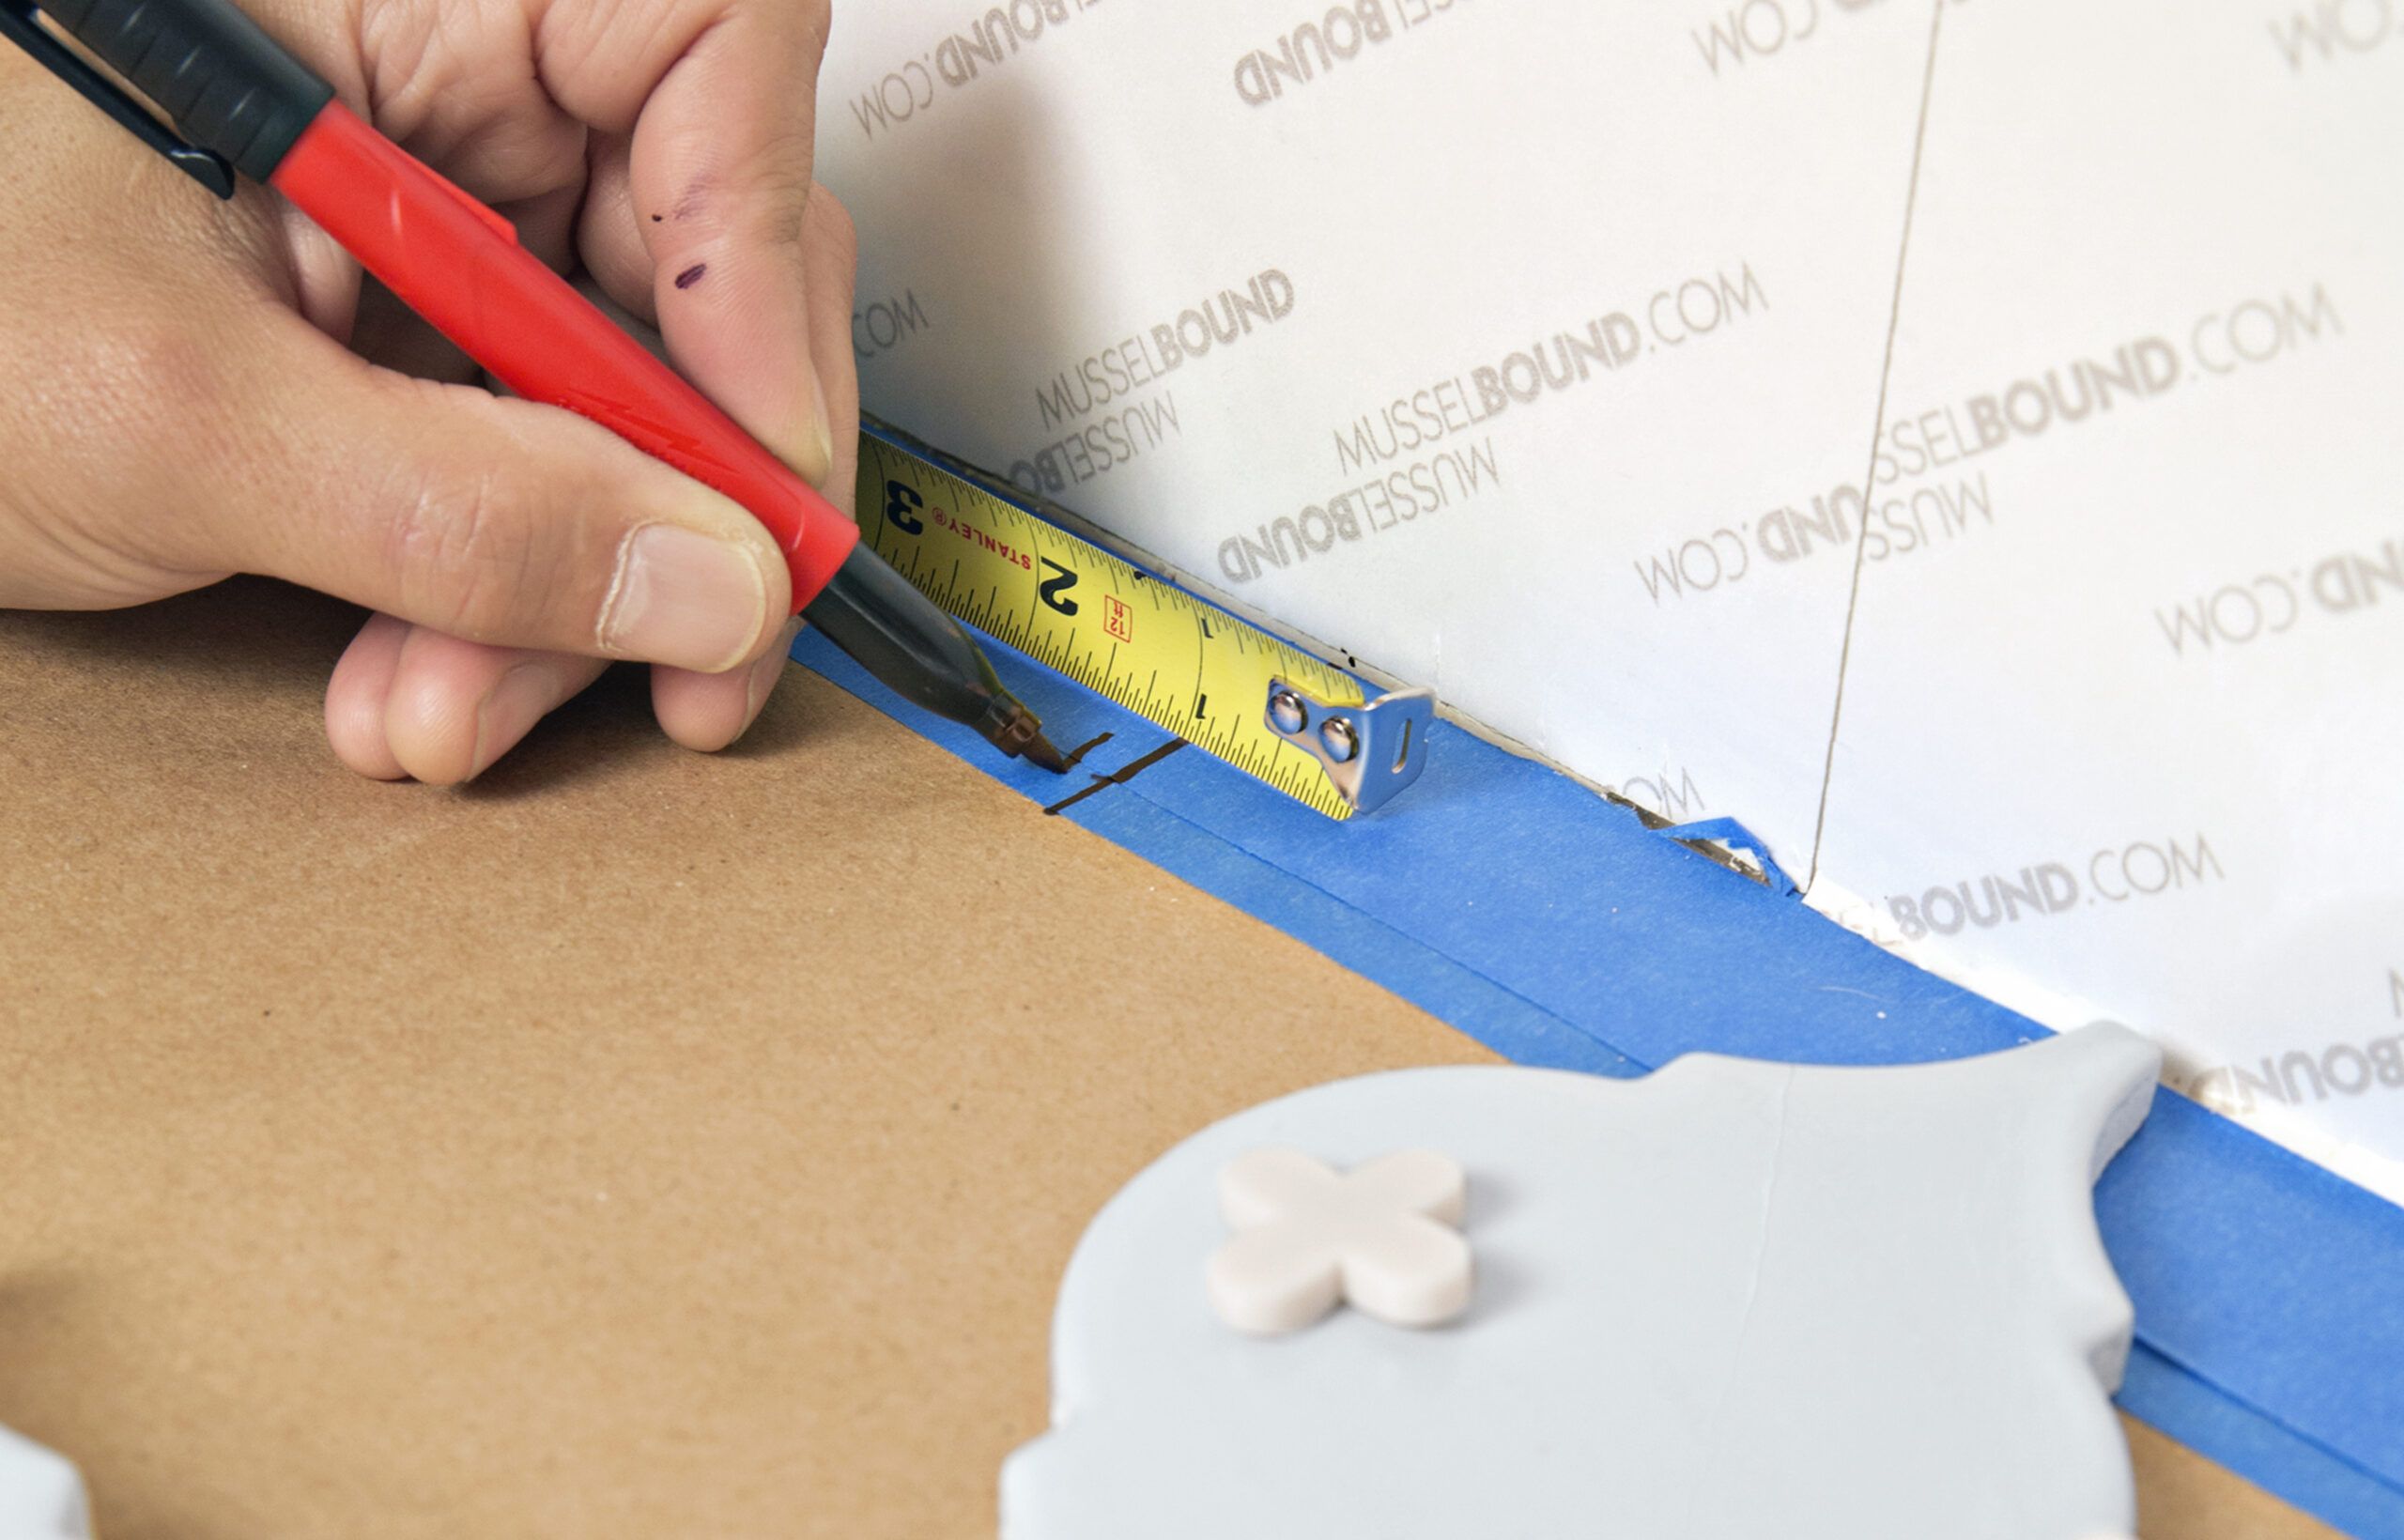
Transfer the New Layout Line
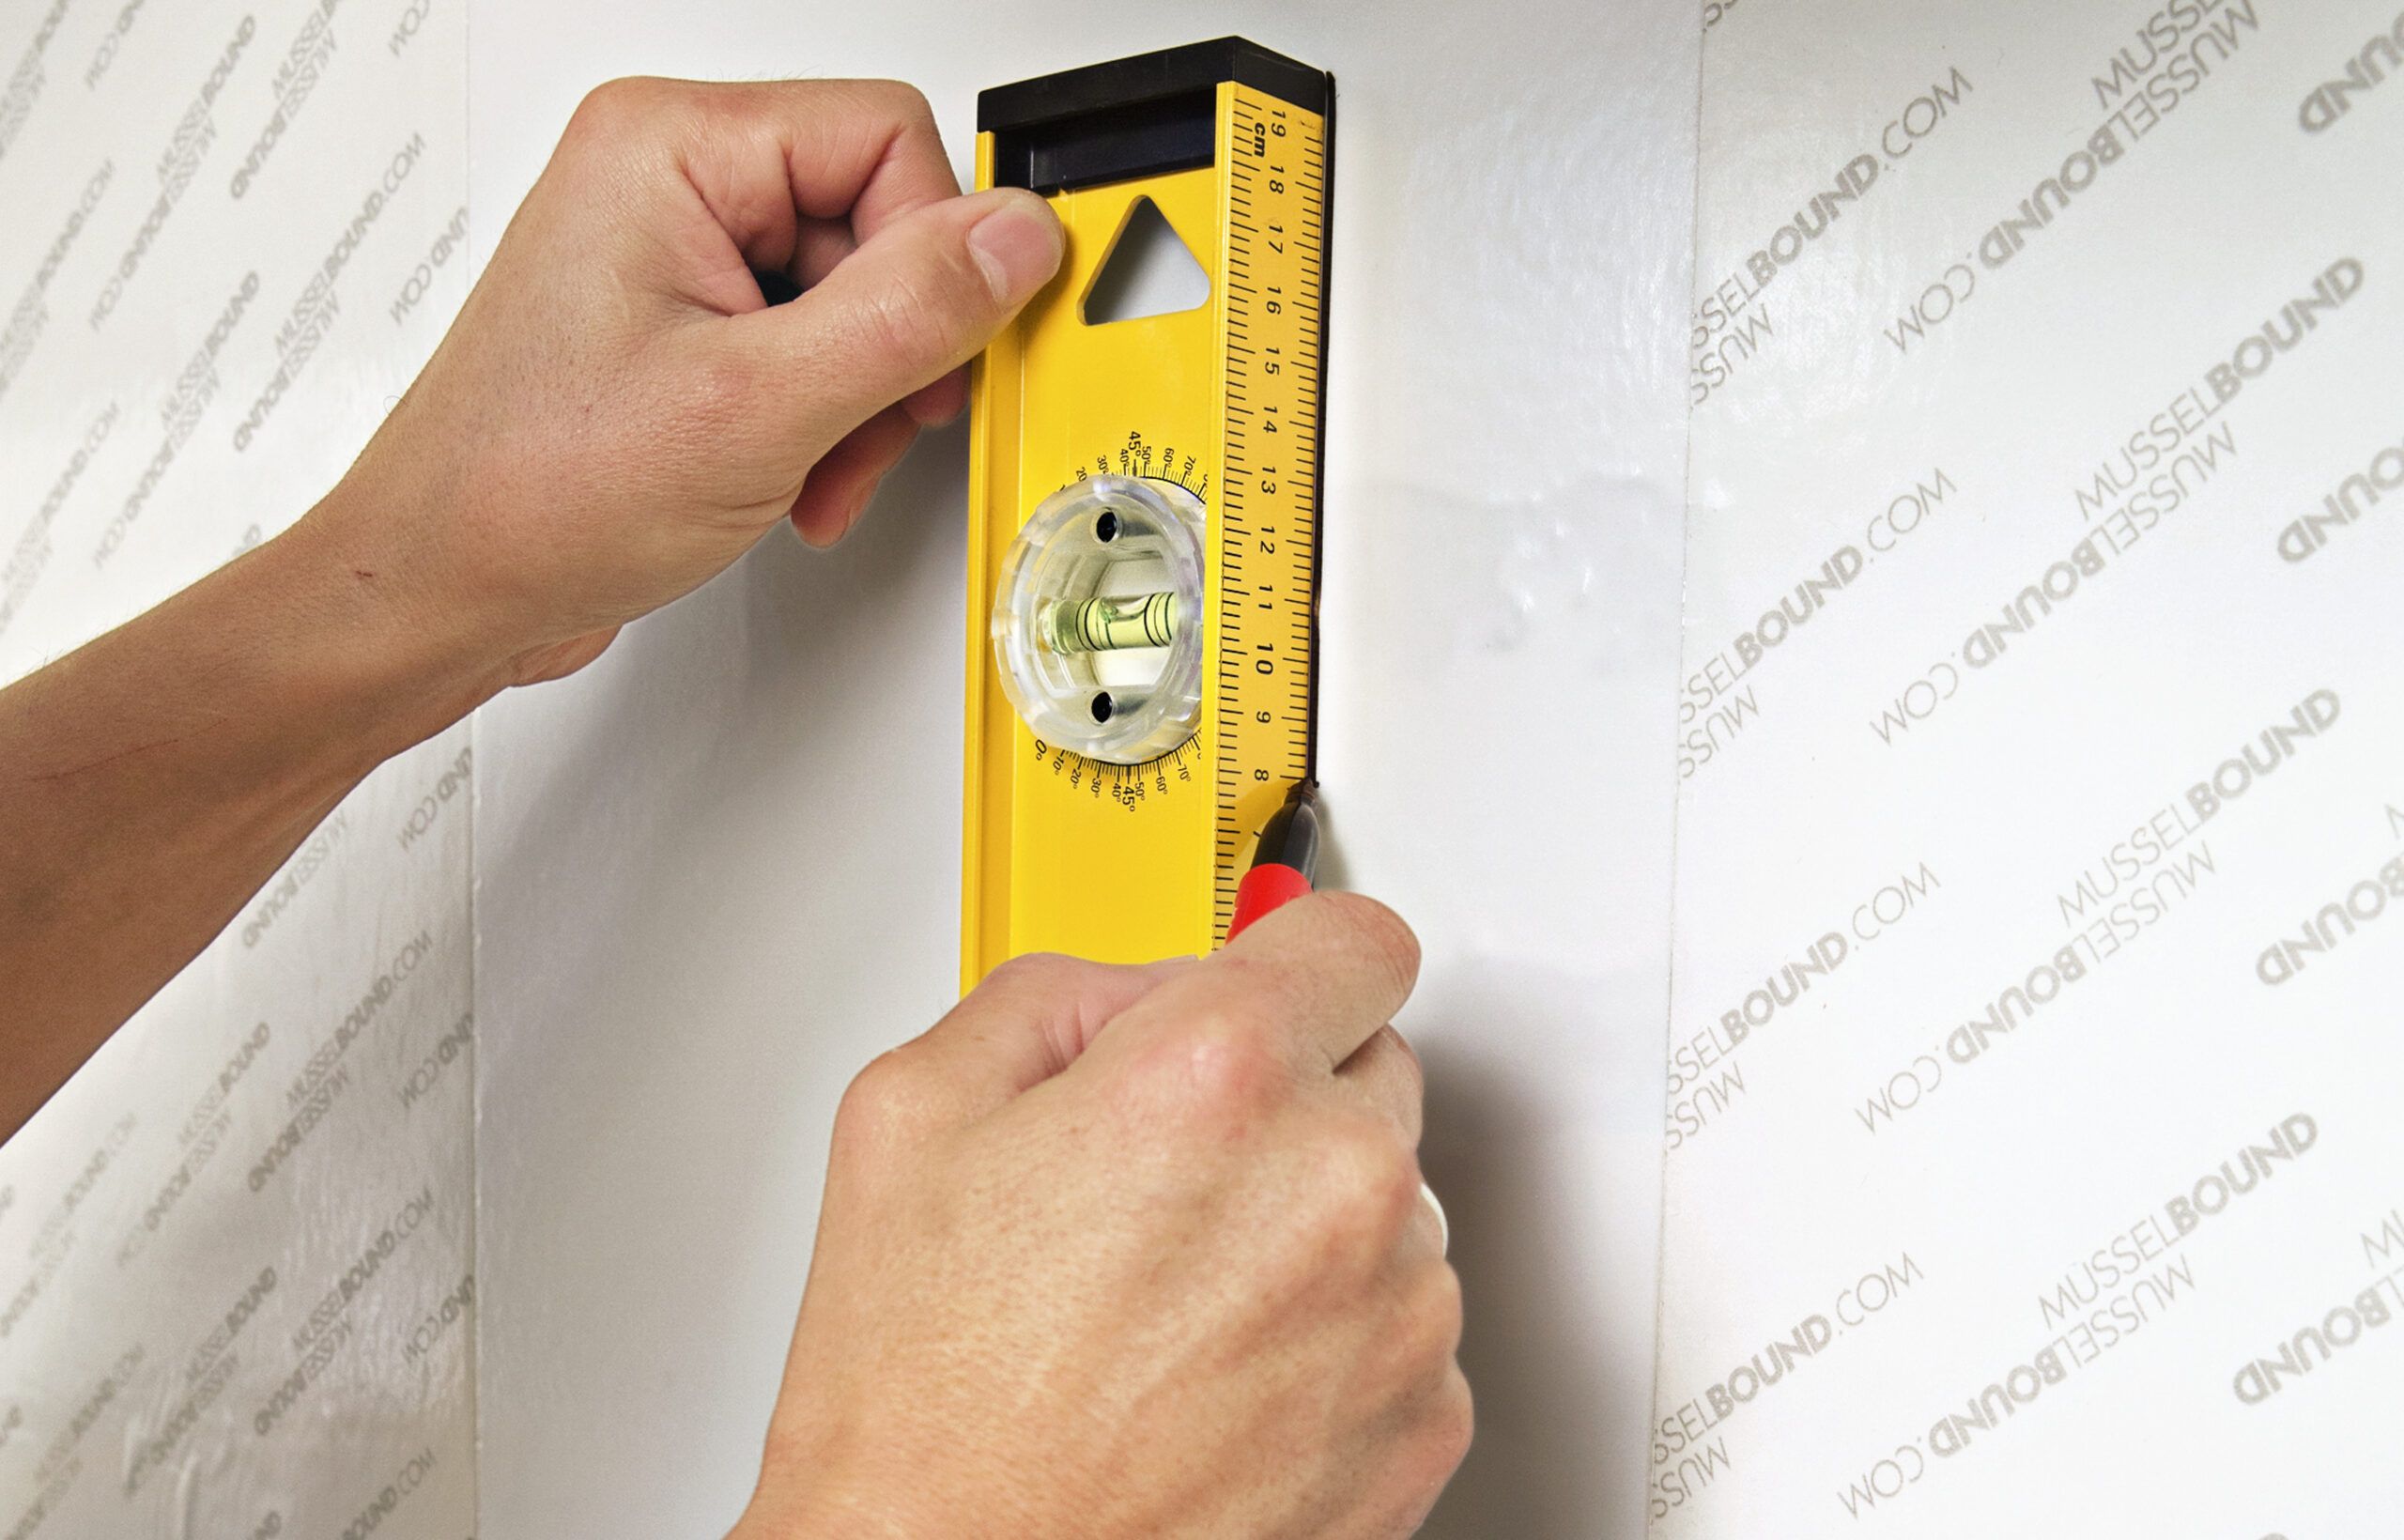
Peel the lining from the mat just above the new centerline. Lightly place a level plumb with the mark and carry the line up the backsplash. Use a piece of thin scrap or cardboard on the countertop as a spacer for the caulk line.
Then measure the height of a tile, divide it in half, and measure up from the spacer that distance along the plumb line. Use the level to make a perpendicular line, creating a crosshair for the first tile.
Step 8
Establish the Pattern
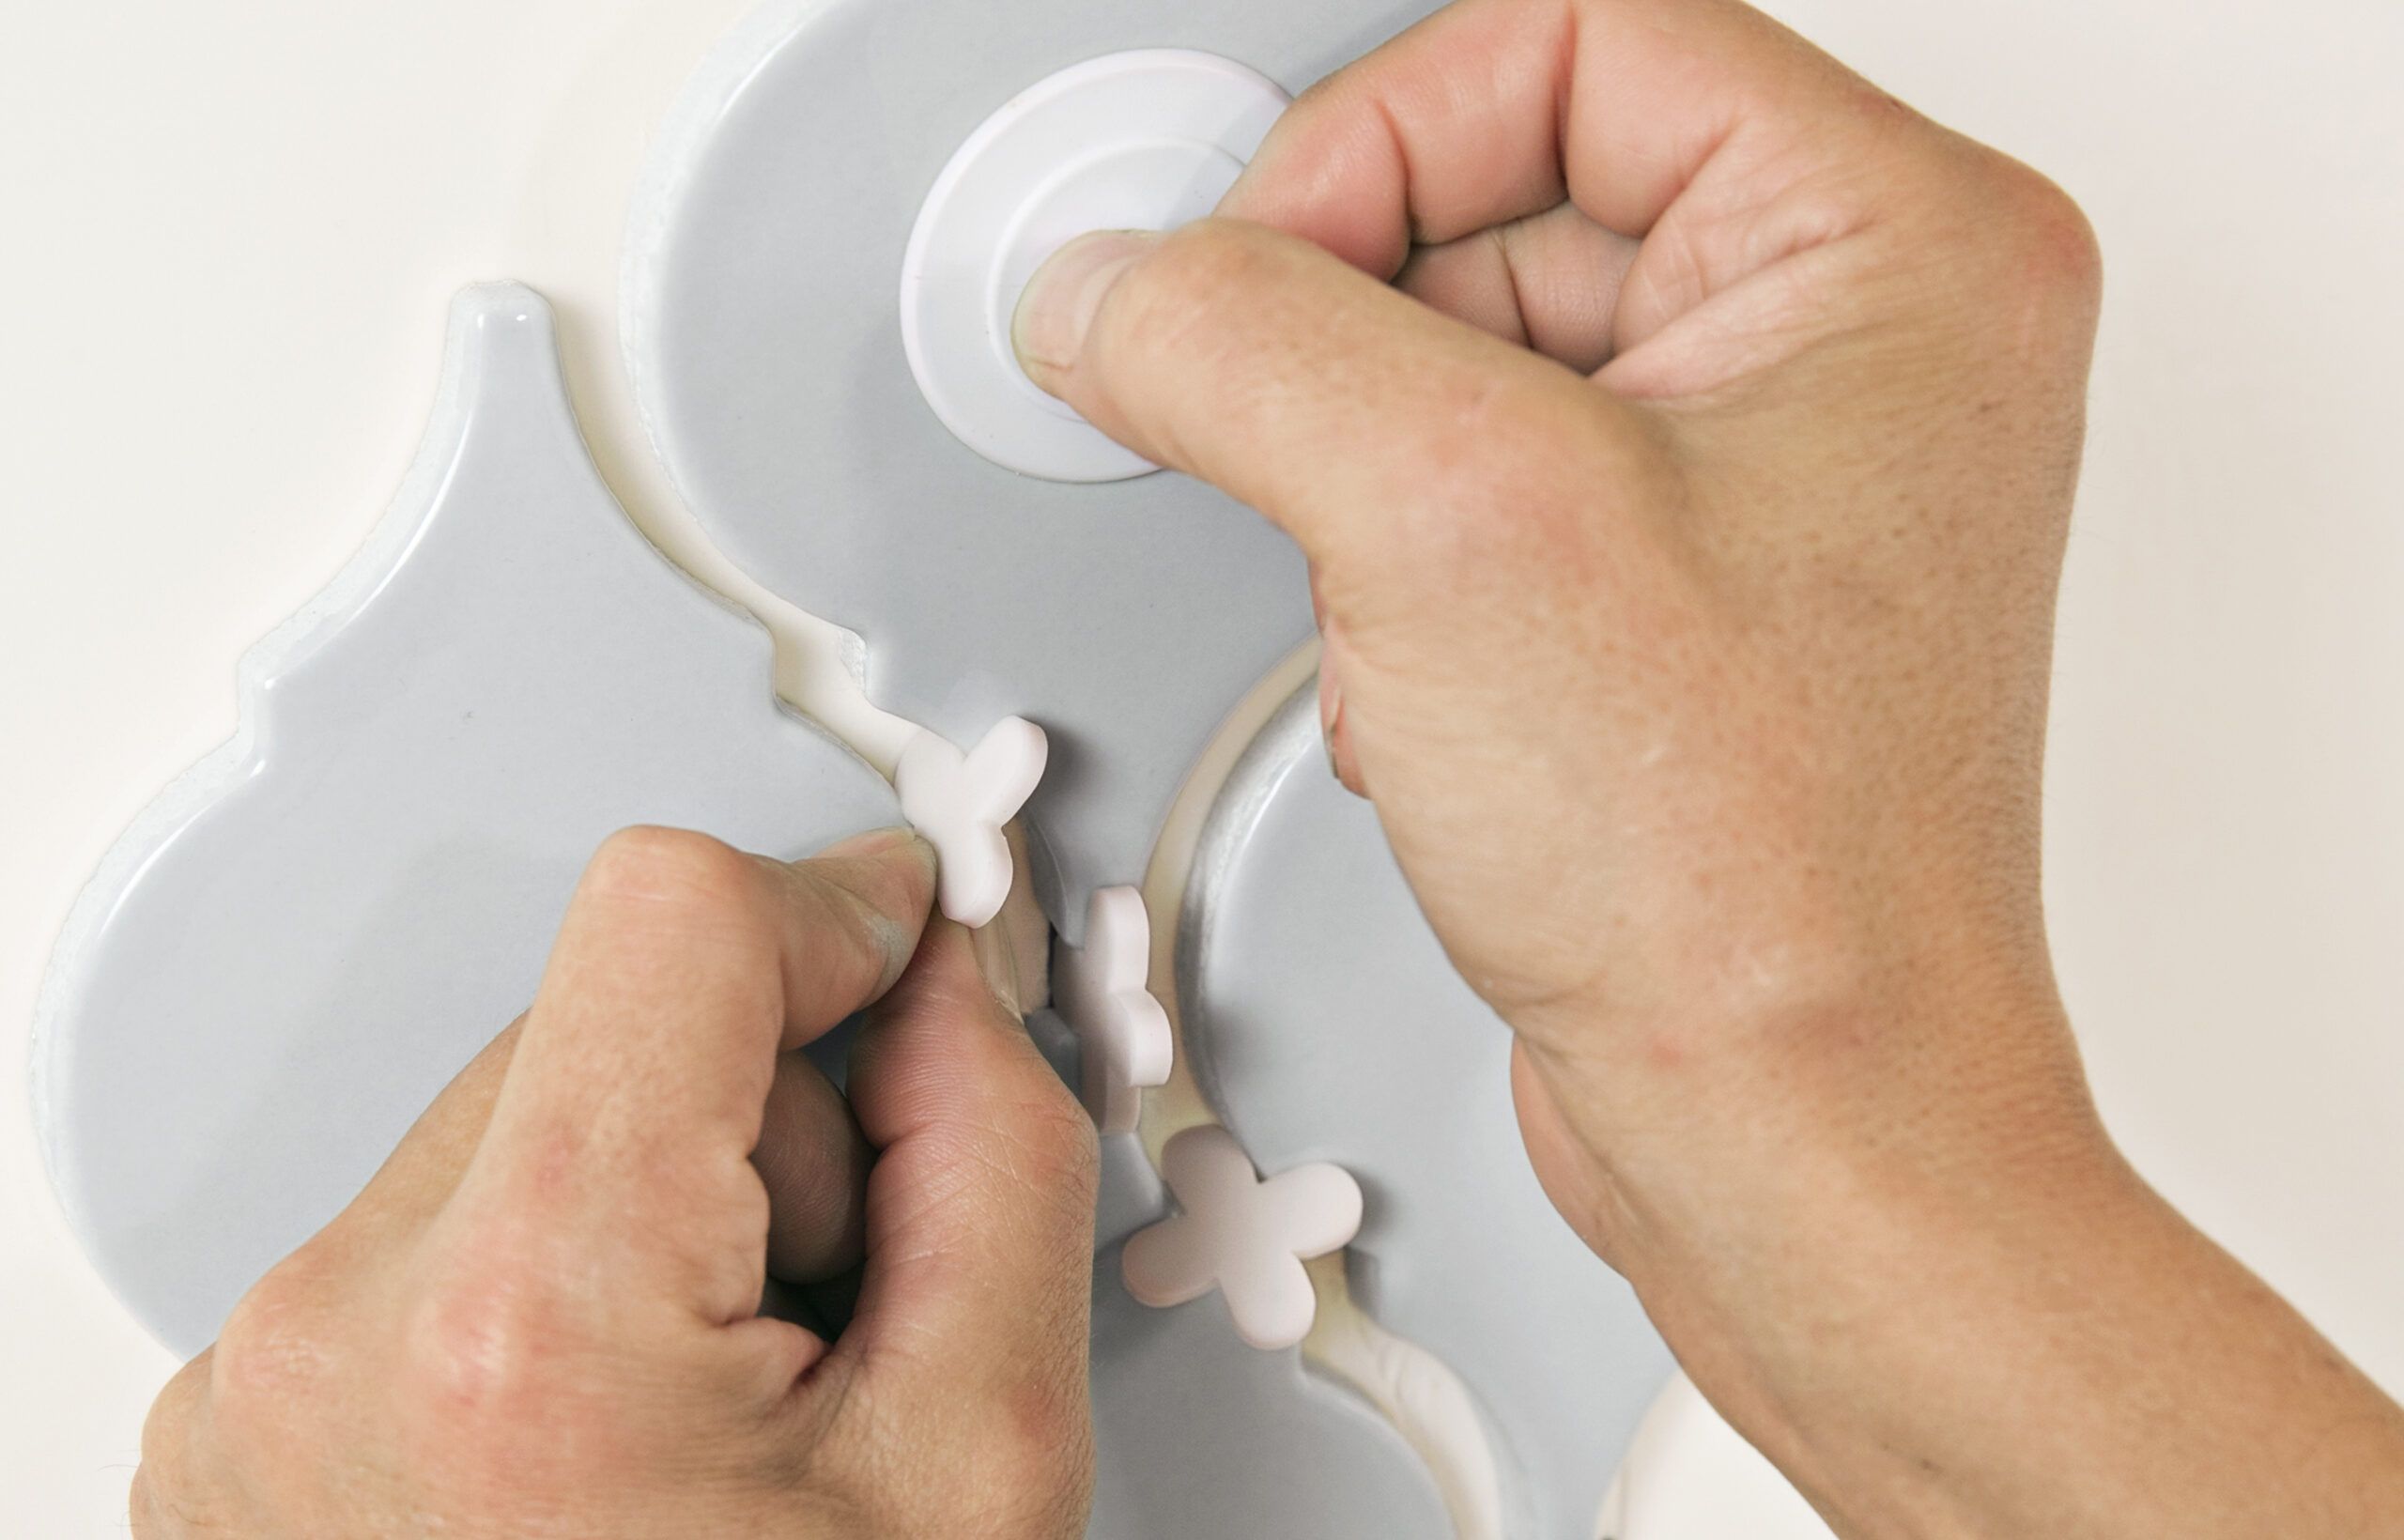
Center the first tile on the crosshair, then tap the top and bottom to tack it in place on the mat. Reposition tiles by prying them off with a 5-in-1 tool. Use spacers to line up and place adjacent tiles, building the pattern up and out from the first tile.
Step 9
Mark the Tile

When you reach an outlet, hold the tile in position by tacking one edge to the mat against spacers. Use a wax pencil to mark where the tile overlaps the receptacle box.
Step 10
Trim Tile to Fit
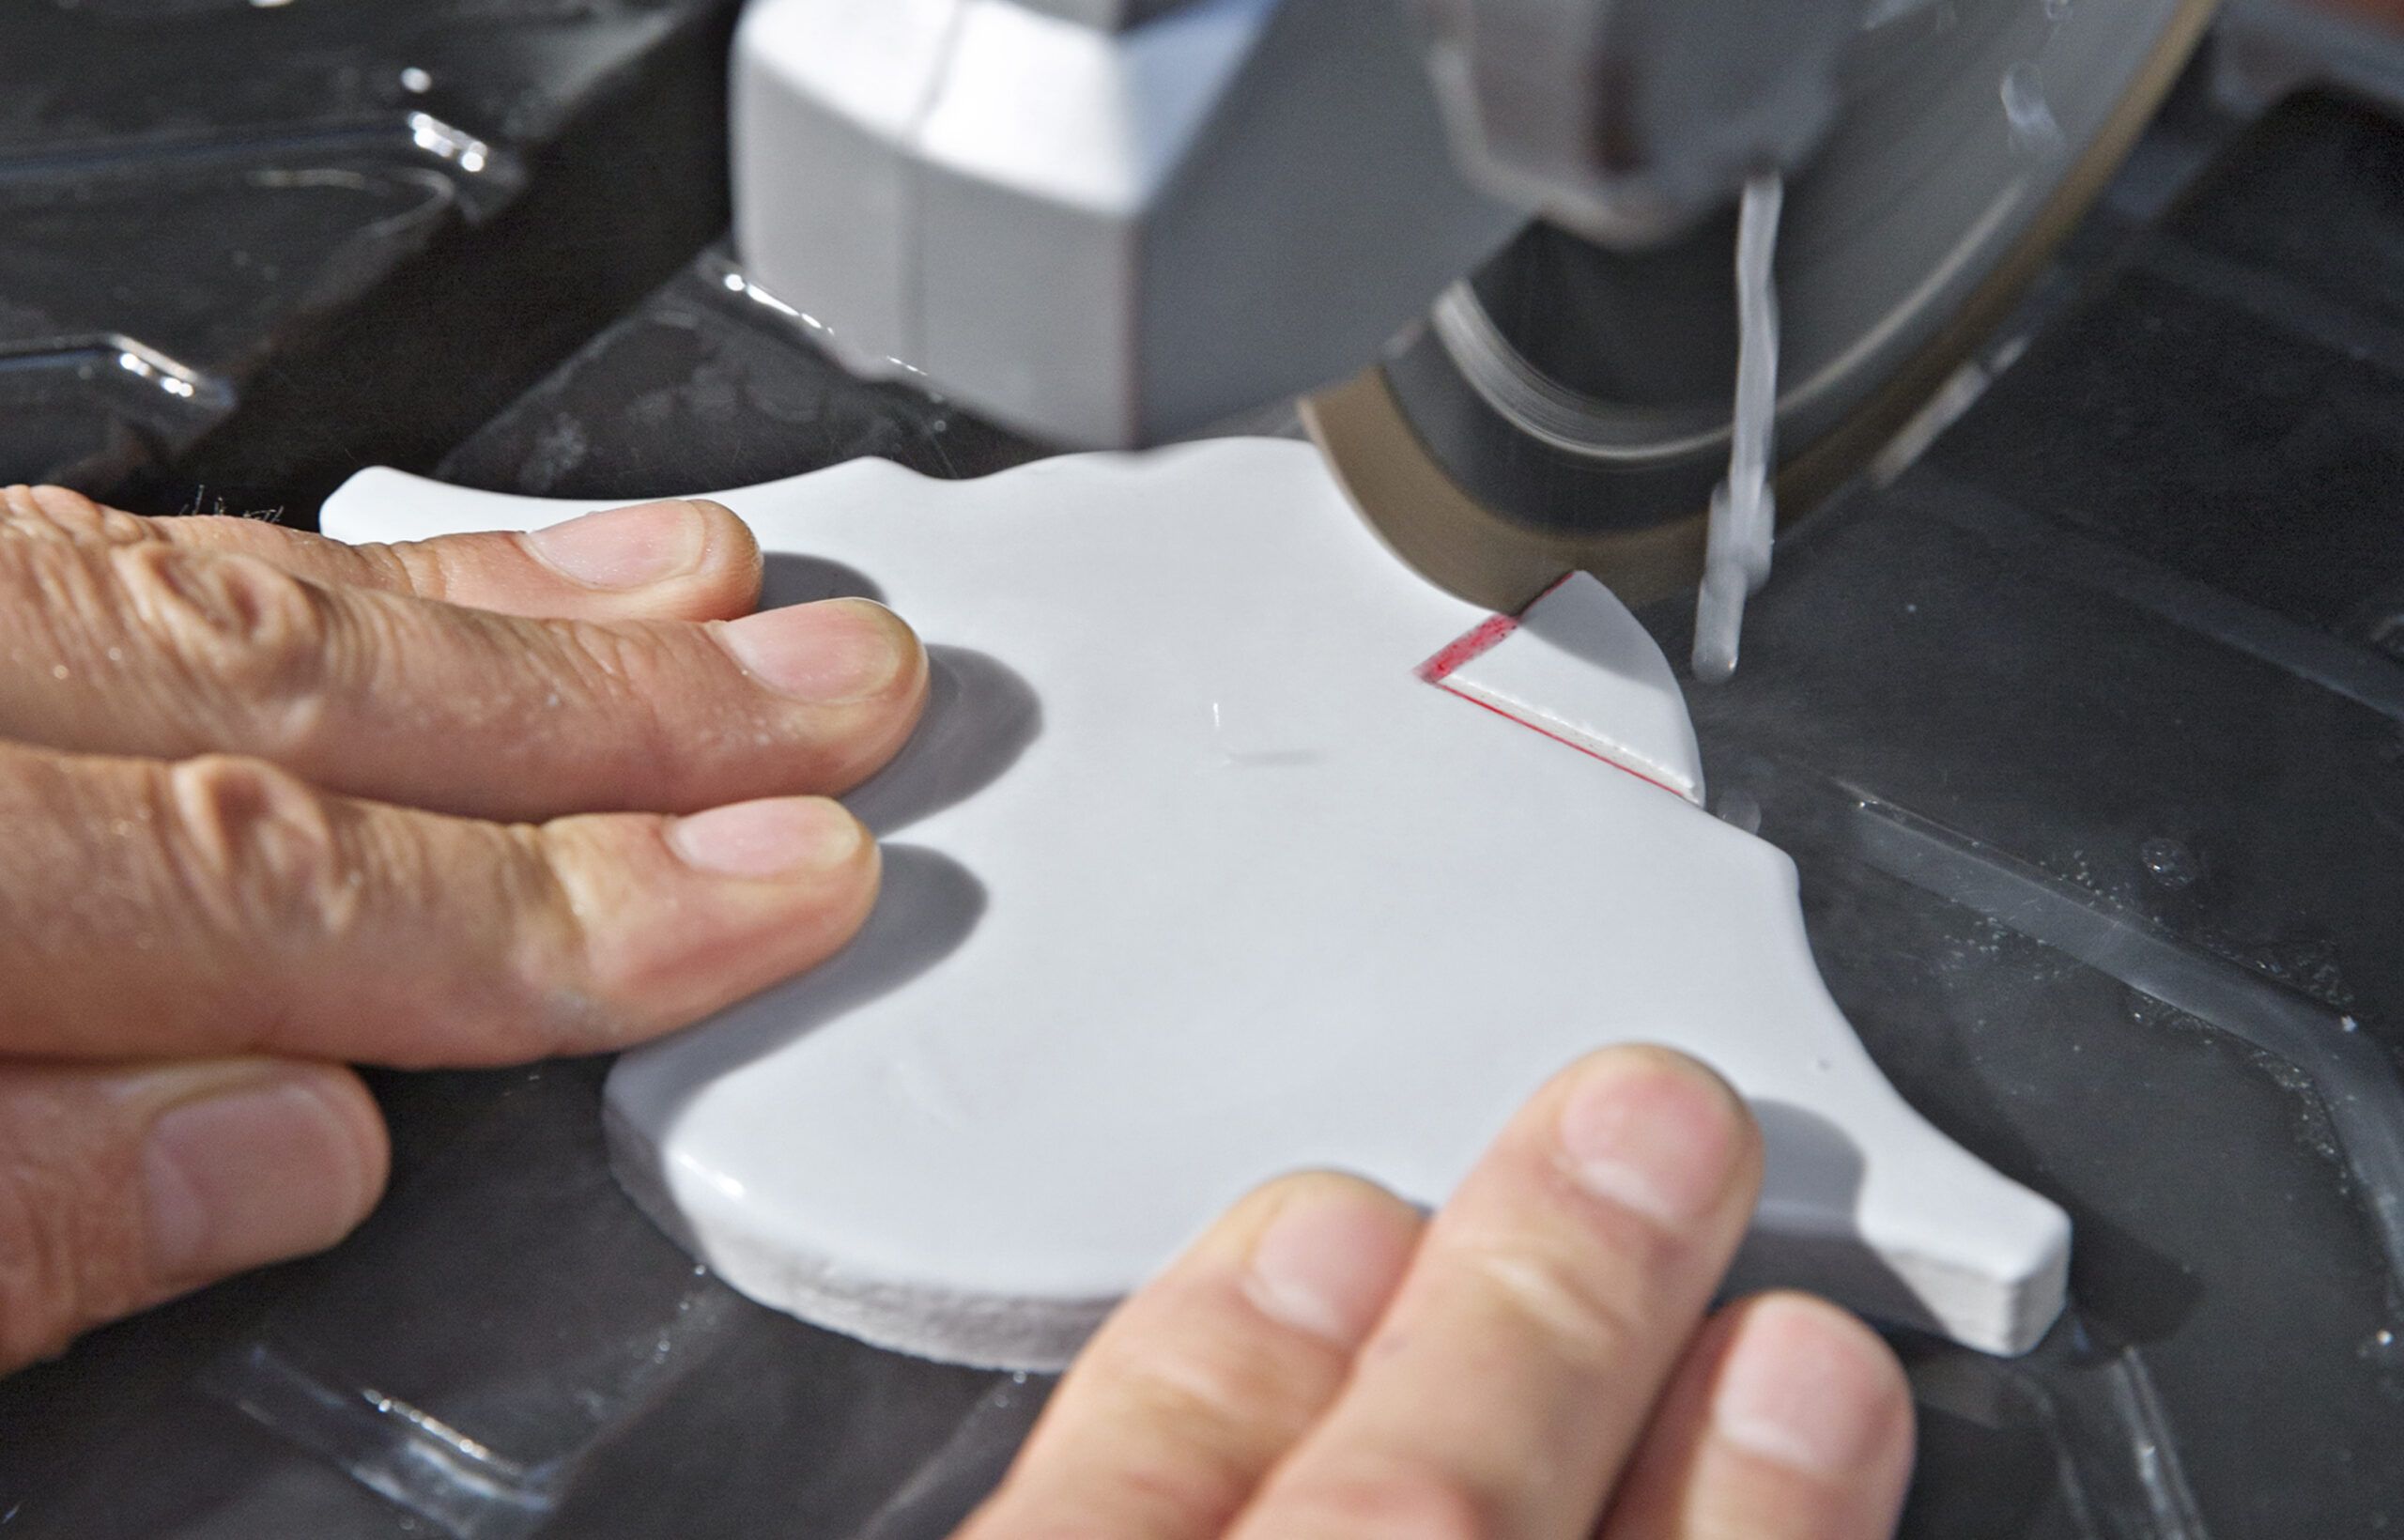
To cut the notch, use the tile saw to make two straight cuts, one along each wax pencil line, until they meet. Flip the tile facedown and complete the cuts. If the connection isn’t perfect, don’t worry: That corner will be covered by the receptacle plate.
Tip: Use a suction cup to get a good grip on non-rectangular tiles, so you can set each one where it belongs the first time (unlike thinset, the adhesive mat doesn’t allow for adjustments in-place).
Step 11
Make a Jig
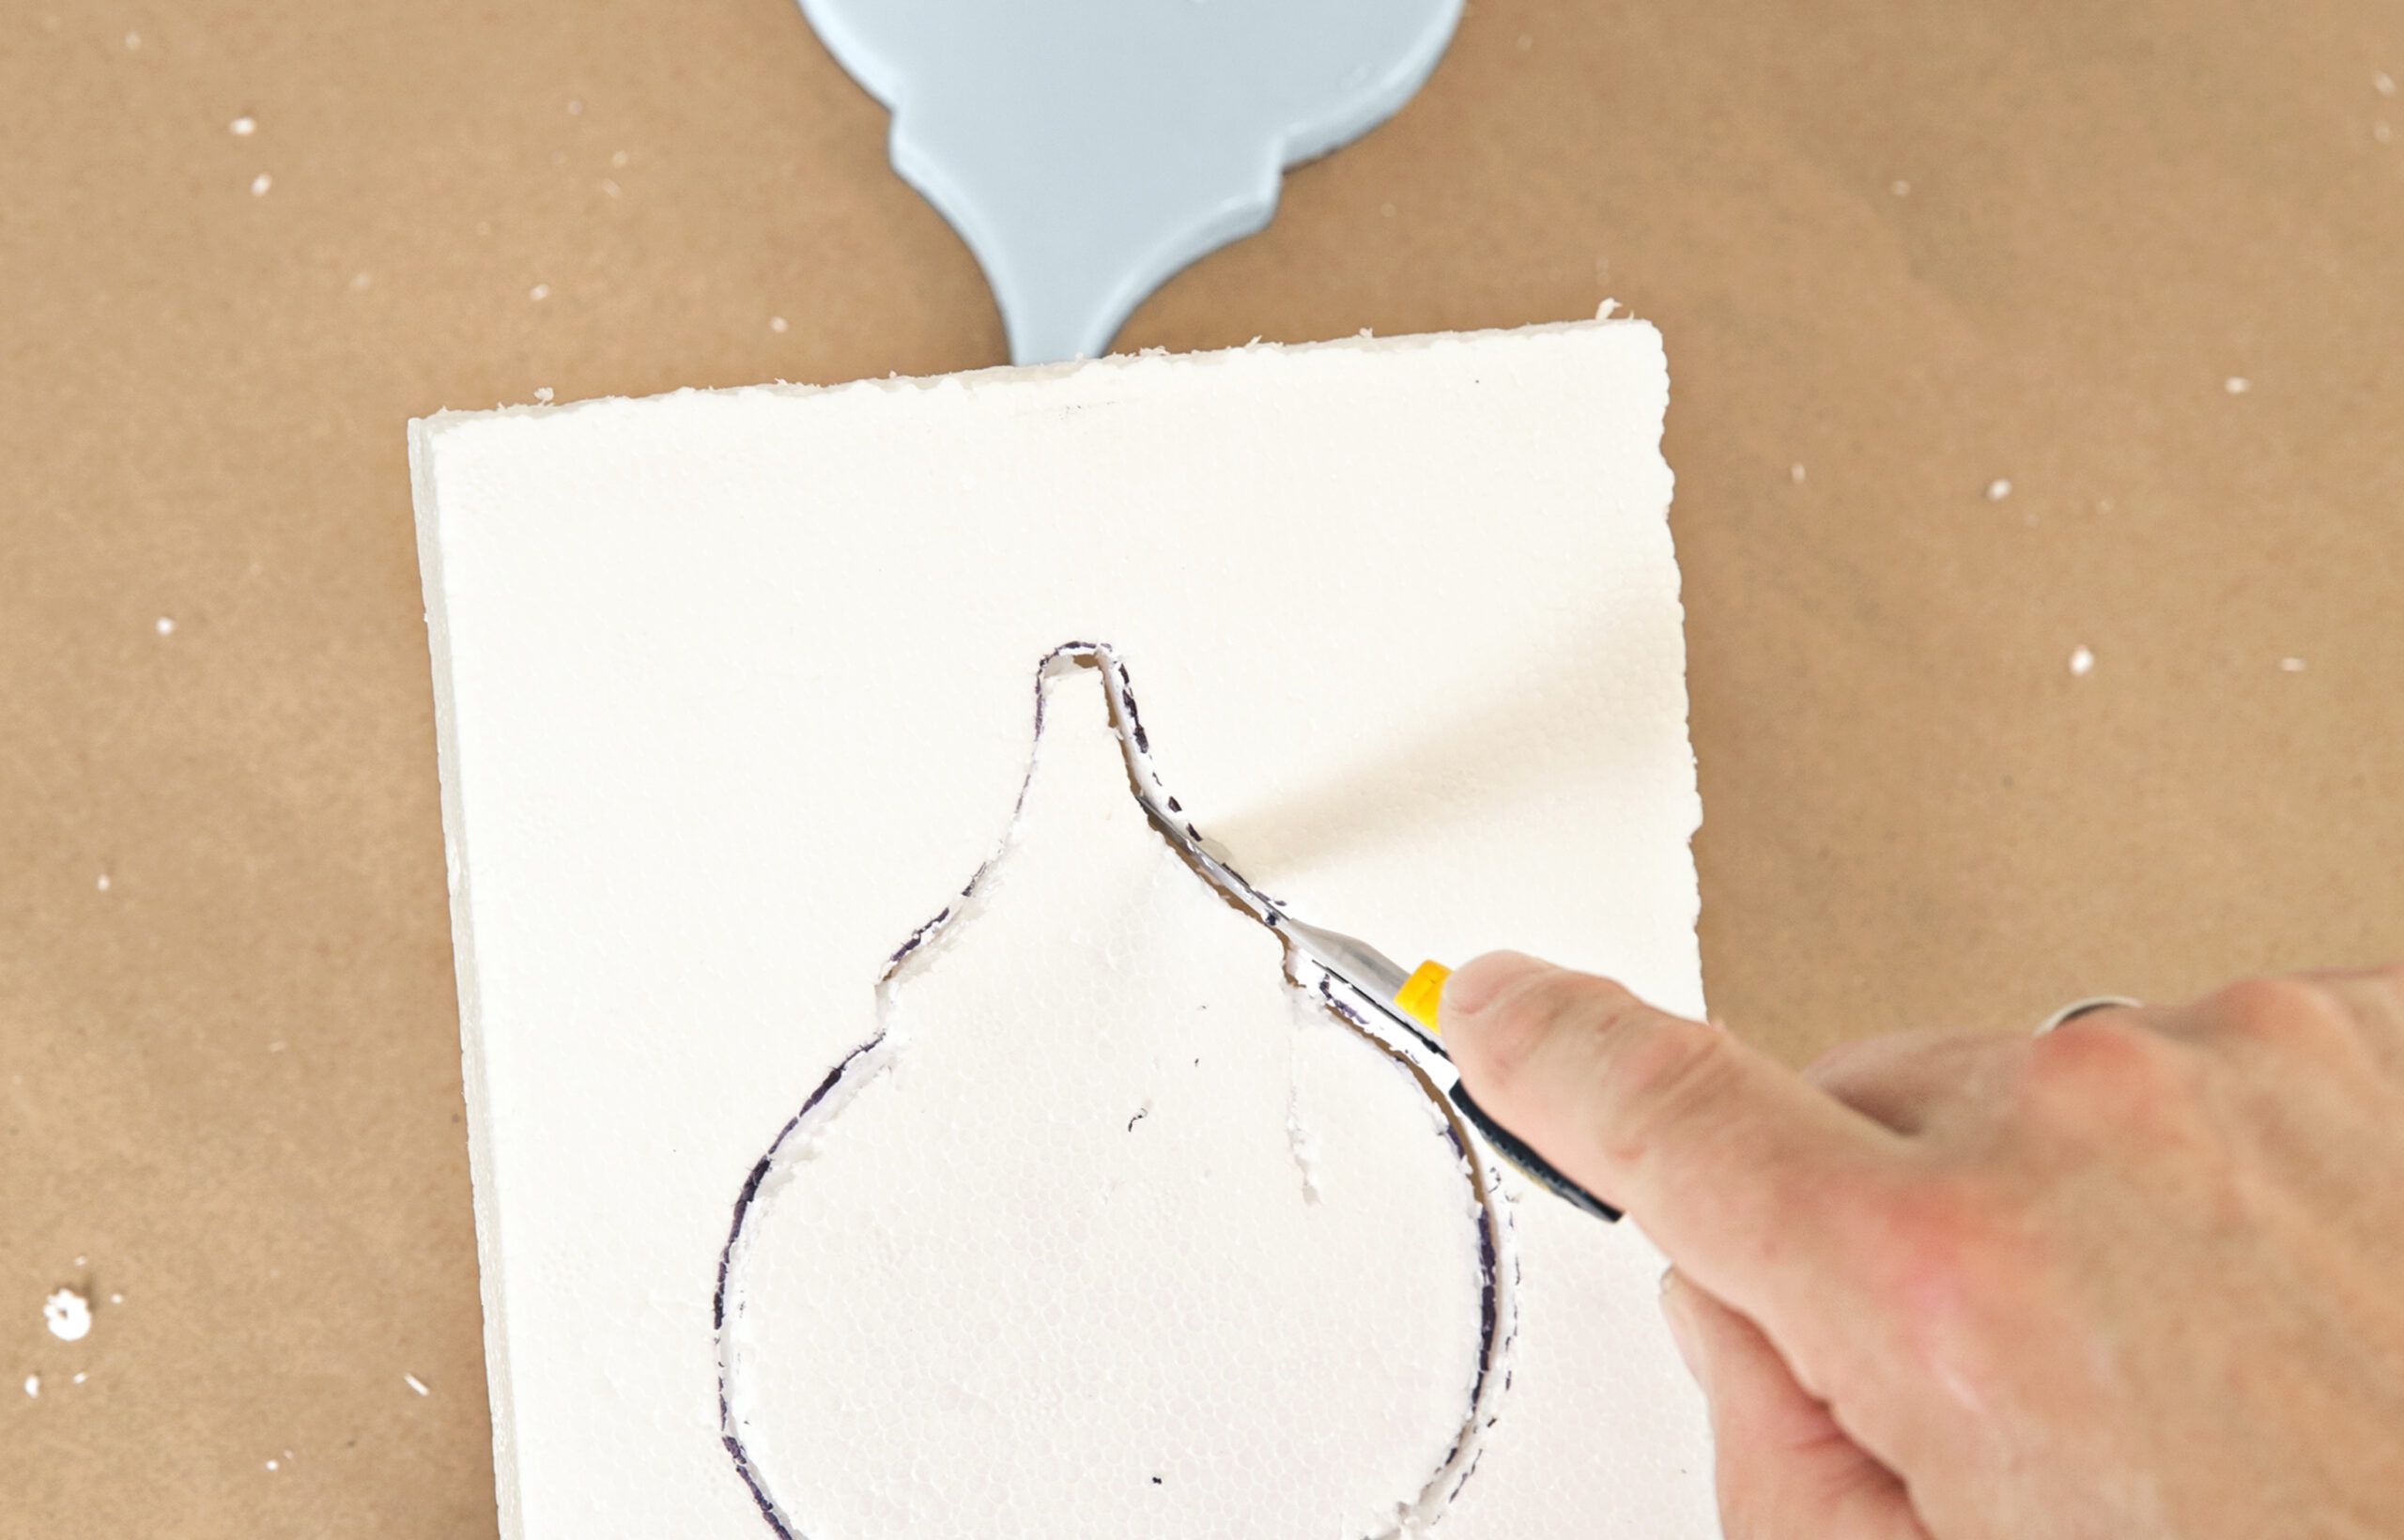
Once you’ve filled in all the full tiles along one wall, you can cut and install the partial tiles. First cut a rectangle from a piece of foam to use as a jig, preserving at least one corner from the factory edges. Place a tile on the foam and center it using the combination square, by making sure the border of the jig is equal on opposite sides of the tile. Outline the tile with the felt-tip marker. Use a breakaway knife to cut out the shape.
Step 12
Cut Tiles
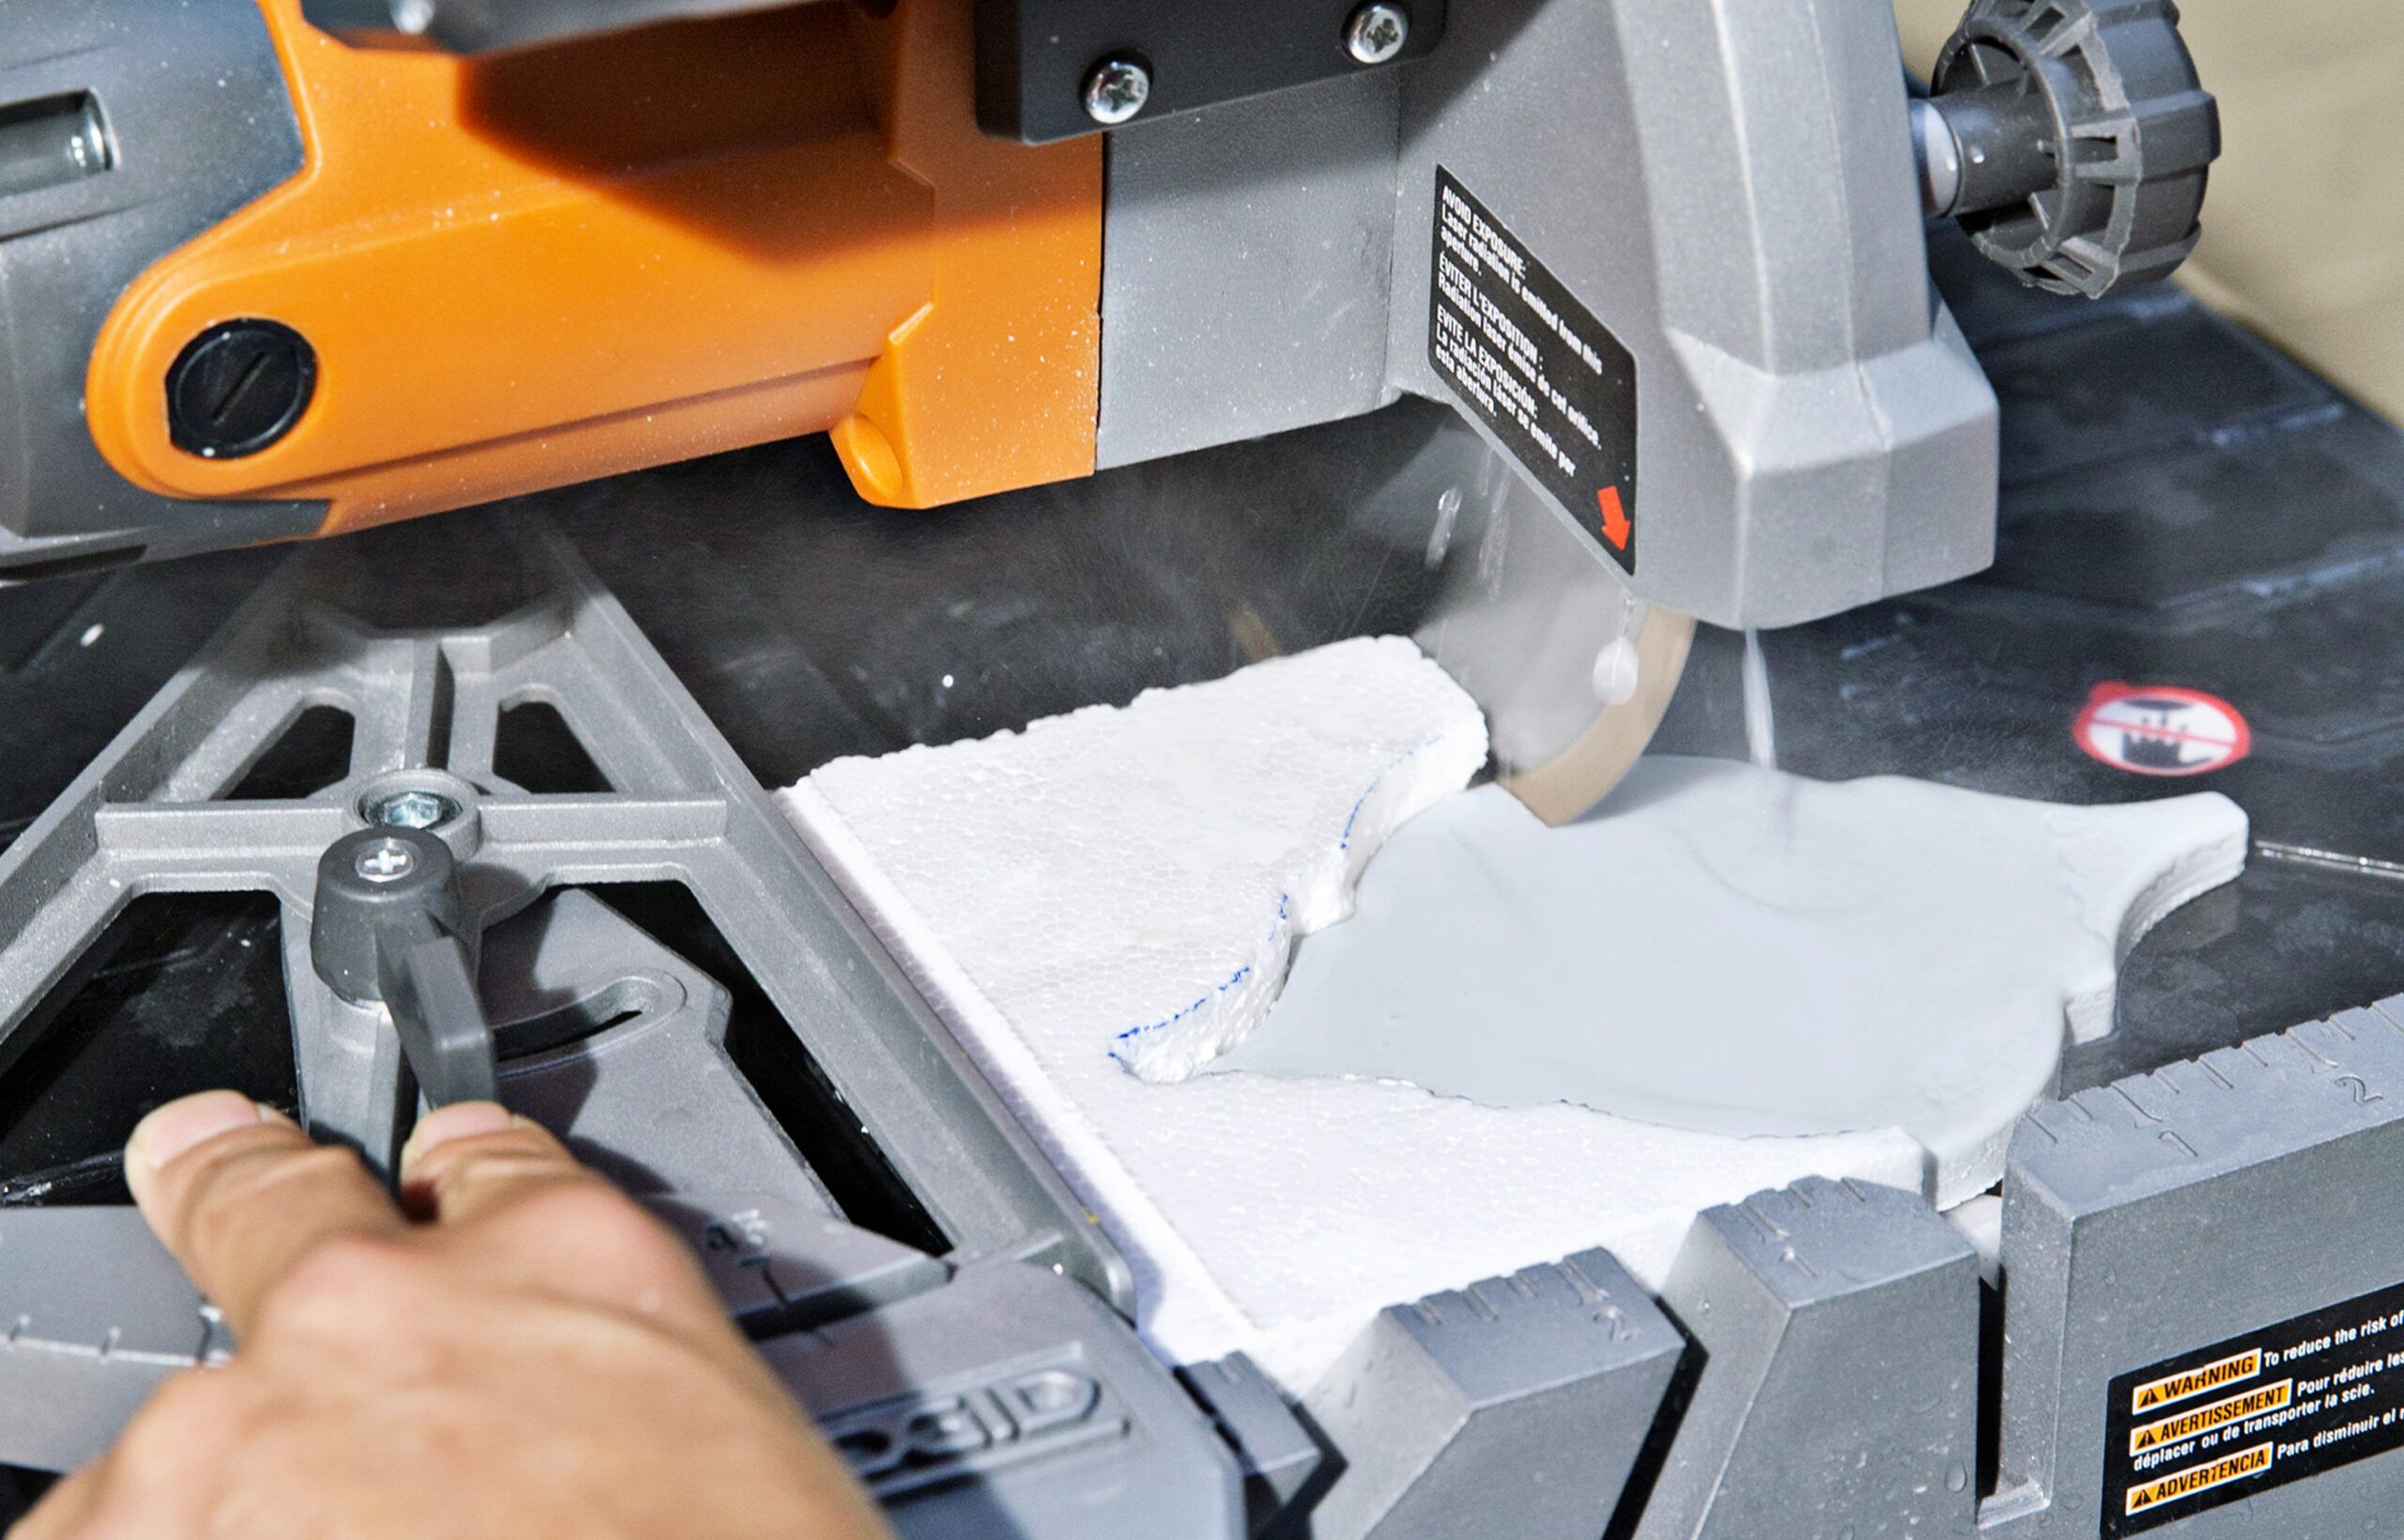
Measure the spaces for the bottom row of half tiles from the caulk-line spacer to the tile above. Subtract the width of your tile spacers, and mark the tile. Place it in the jig, with the factory corner nestled where the saw’s fence meets the edge of the table. Push the tile through the blade, holding the foam jig in place if necessary.
Tip: To prevent chip-out, adjust the depth of the saw blade so that the abrasive band just slices through the bottom of the tile.
Step 13
Place Half Tiles
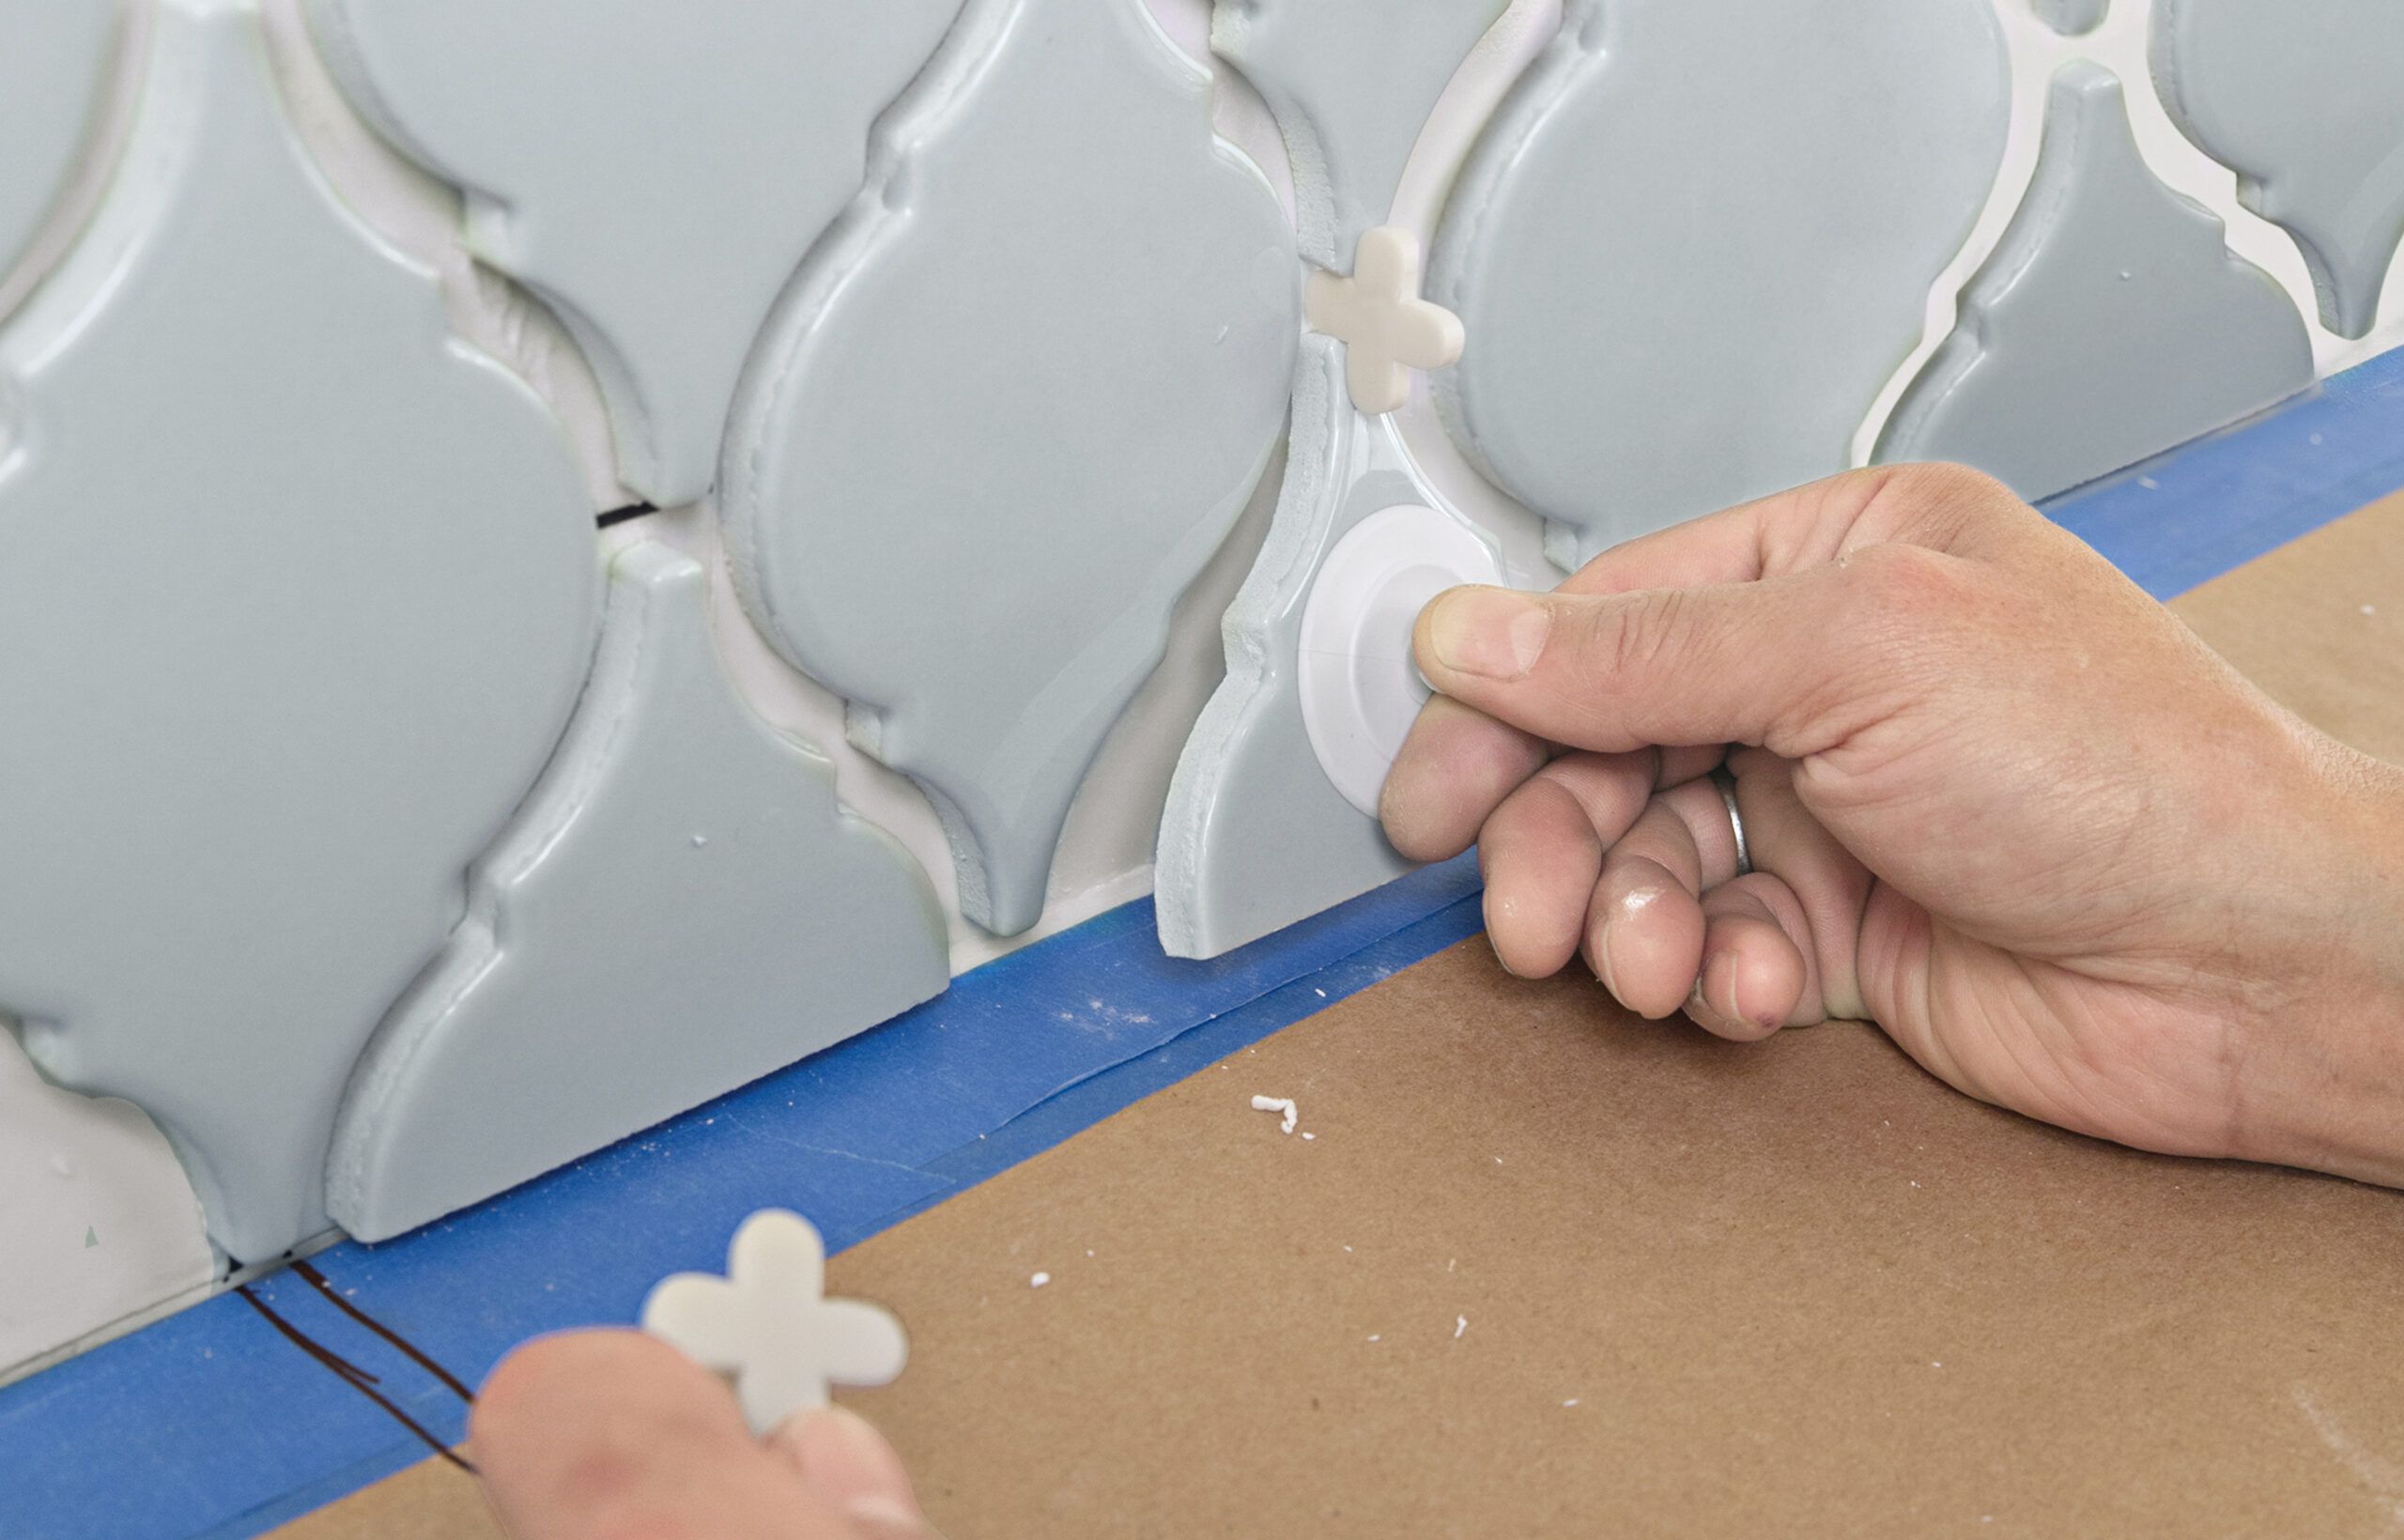
Stick a spacer to the mat beneath the tile above, as shown, and touch the tip of the half tile to the mat. Then place a second spacer between the half tile and its neighbor. Press the bottom of the half tile against the mat.
Step 14
Measure for the Last Tile
Measure between the lsst tile in the course and a tile standing in for those that will cover the adjacent wall, as shown. Subtract the width of the grout-line spacer.
Step 15
Transfer the Mark
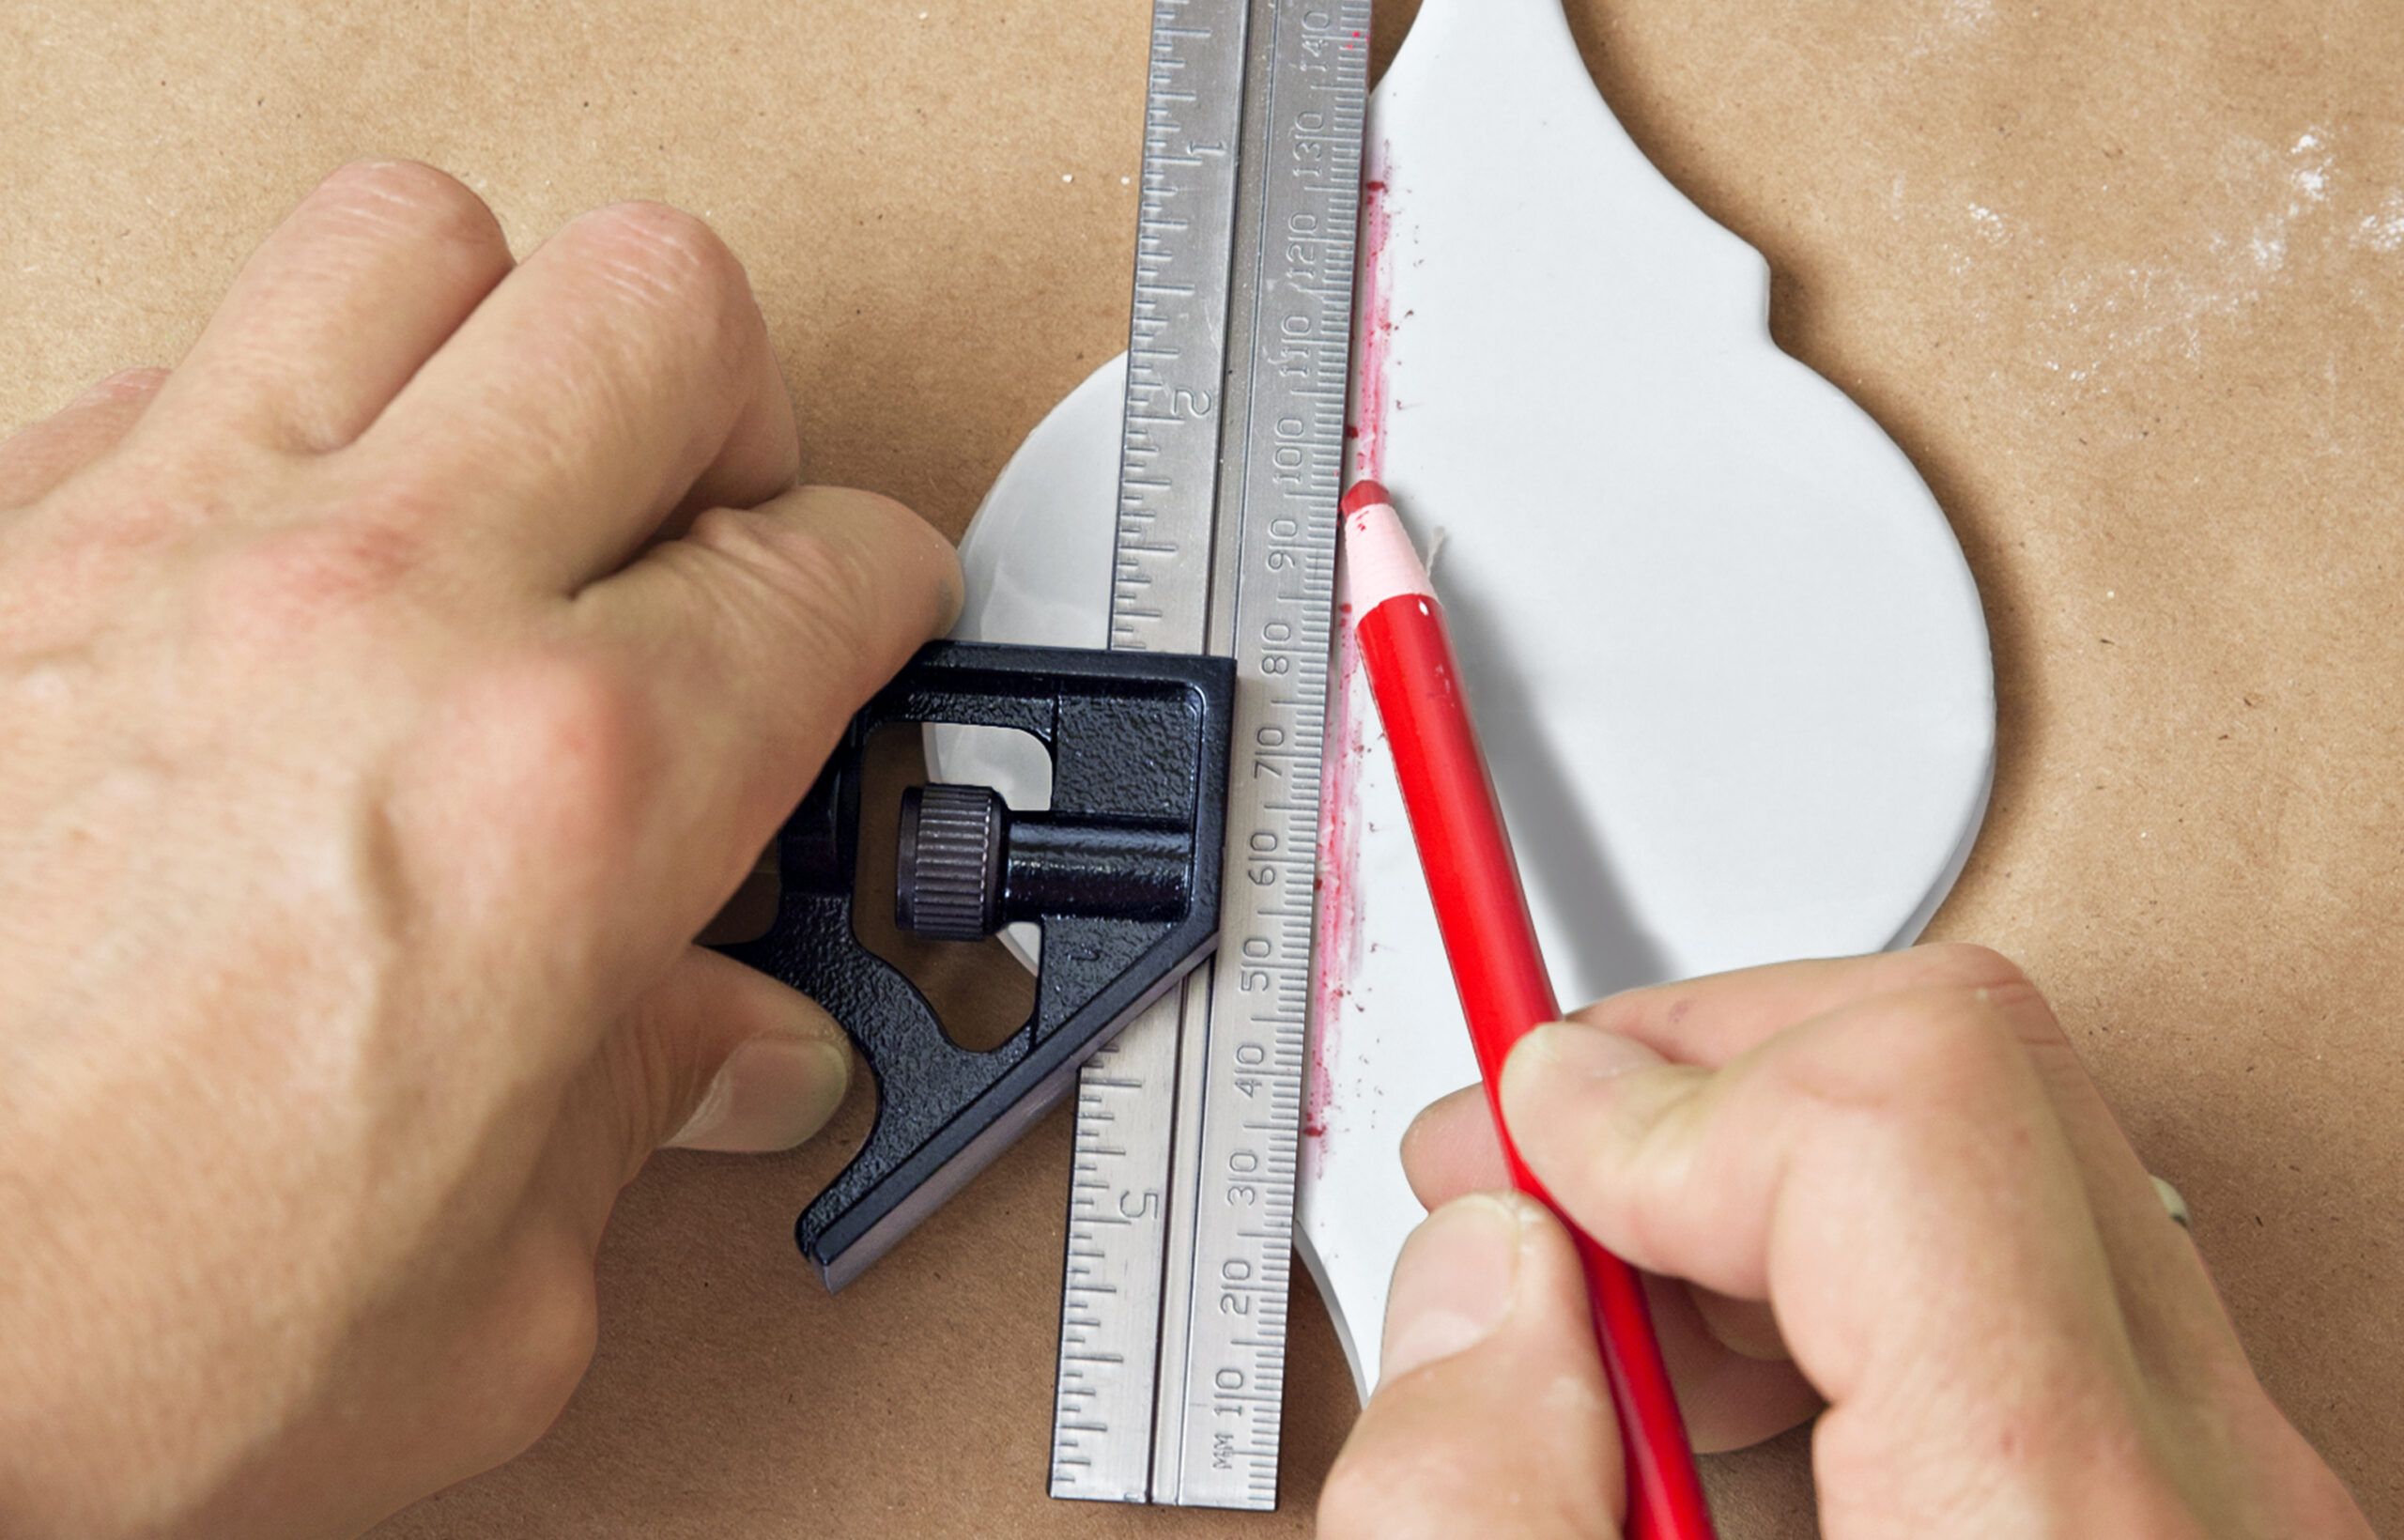
Set a combination square to that measurement, strike a line on a full tile, then use a vertically oriented jig to cut it—but don’t set the partial tile. You’ll cut and set its mating piece first, which keeps the corner joint less conspicuous.
Step 16
Start the Return Wall
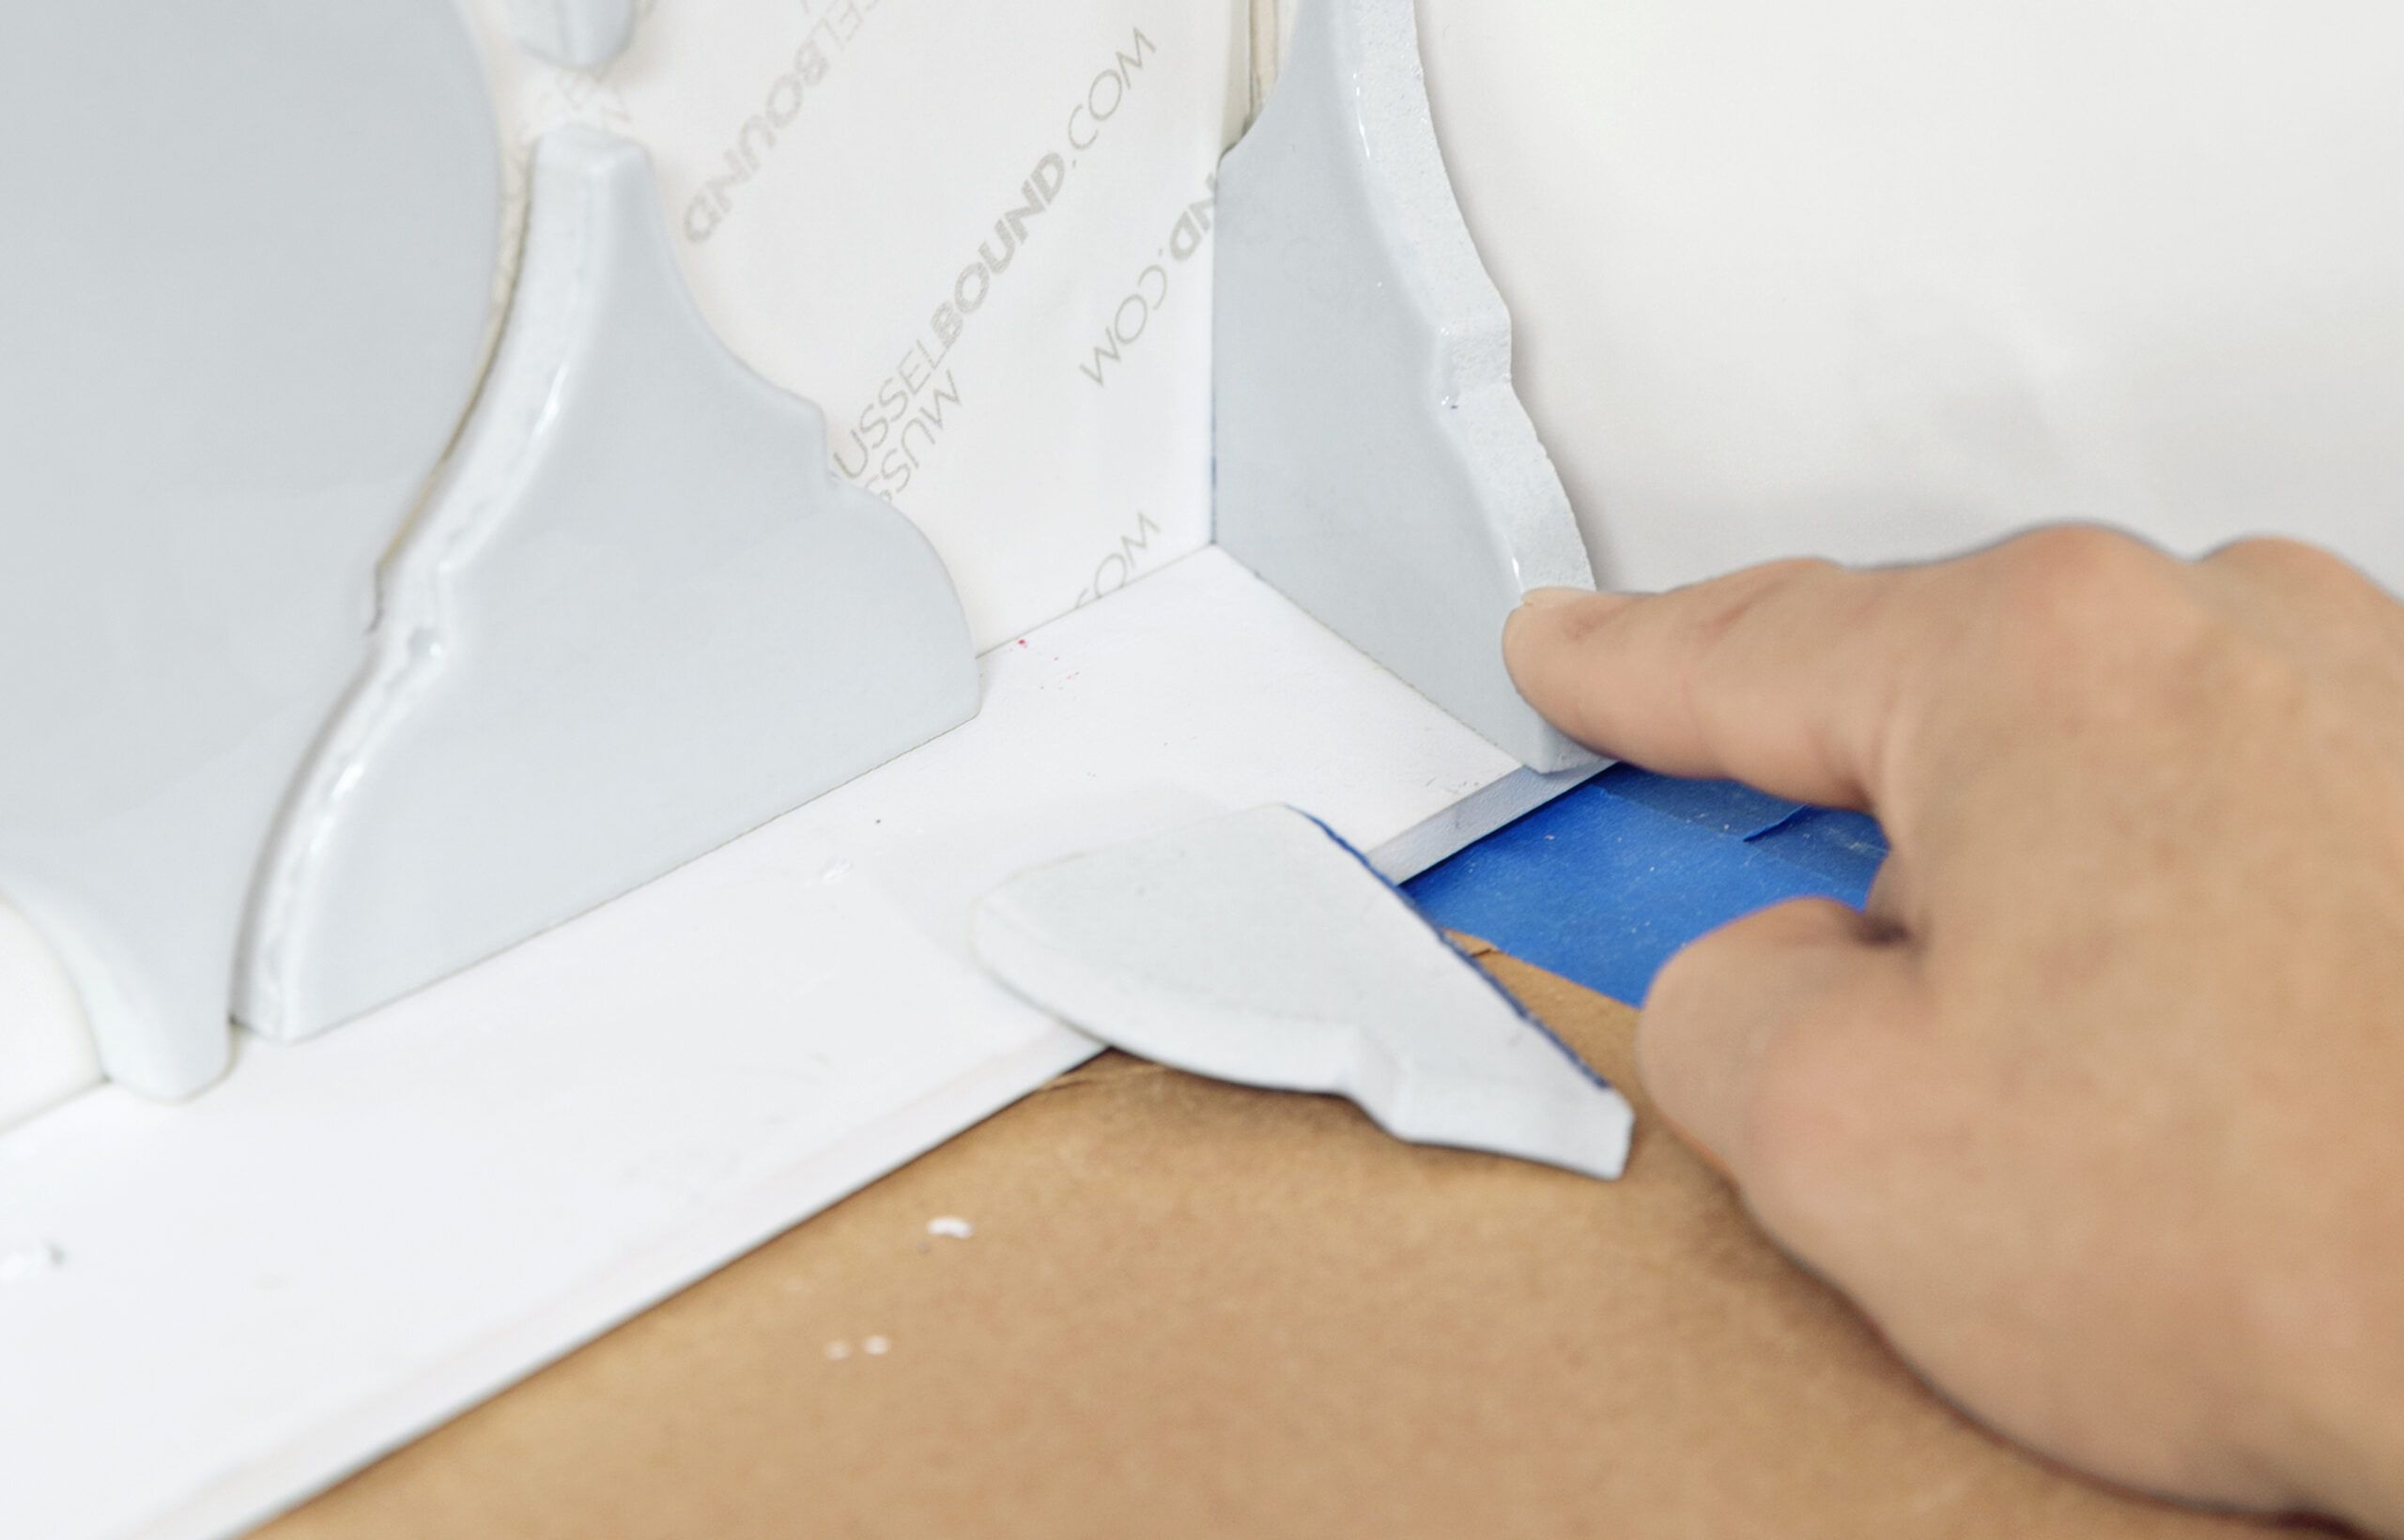
The exposed faces of the two pieces that form the corner should add up to the width of one full tile. To mark the return piece without measuring, stack the partial tile on it and mark along the cut edge. Then adjust the cutline to make the return tile wider by the thickness of the tile, to create a butt joint.
Cut the tile and set it into the corner. Then add the last piece of the feature wall to complete the corner. Finish the feature wall by cutting the rest of the corner tiles the same way. To start the return wall, add a spacer to the first return tile, then measure off that to make new layout lines.
Step 17
Trowel on Grout
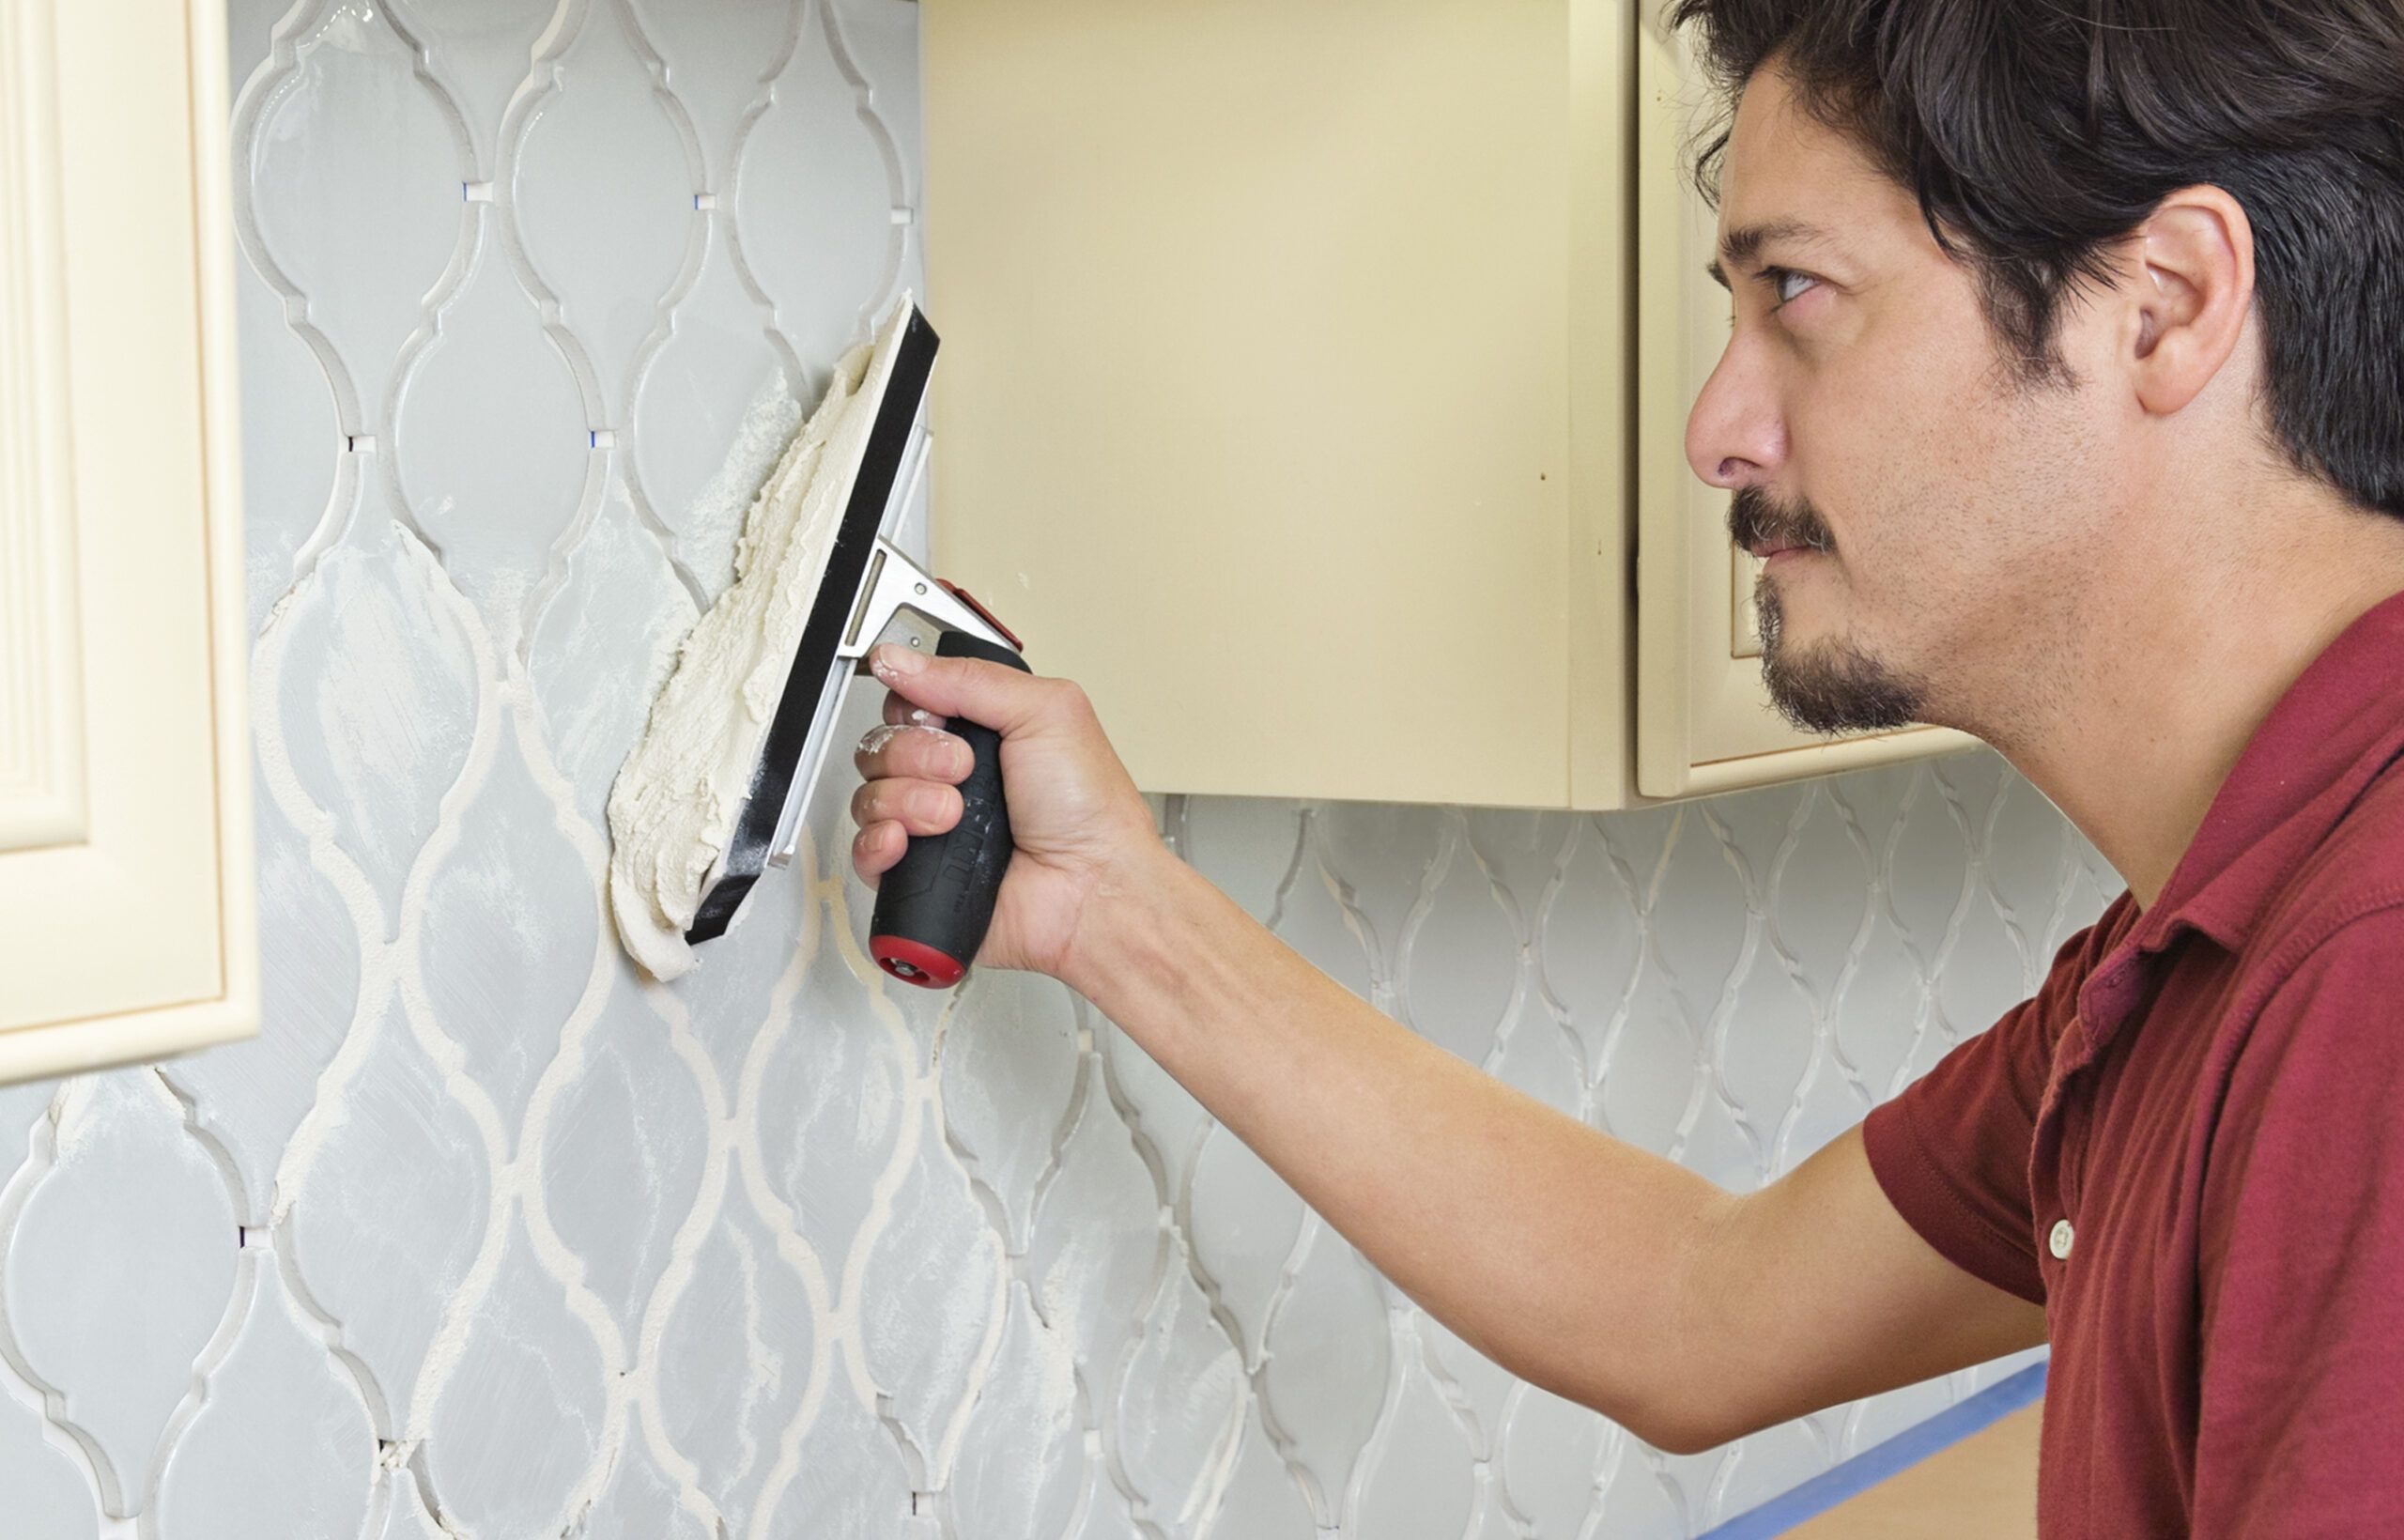
Once you finish placing all your tiles, use the rubber grout float to set them—pressing each one for 5 seconds. Use a grout sponge and water to moisten the surface of as much tile as you can grout in 5 minutes.
Spread the grout, approaching the joints at a diagonal while holding the float at about 45-degrees to the backsplash. Work the grout into the joints, then pull diagonally across the tiles to remove the excess.
Step 18
Sponge Tiles Clean
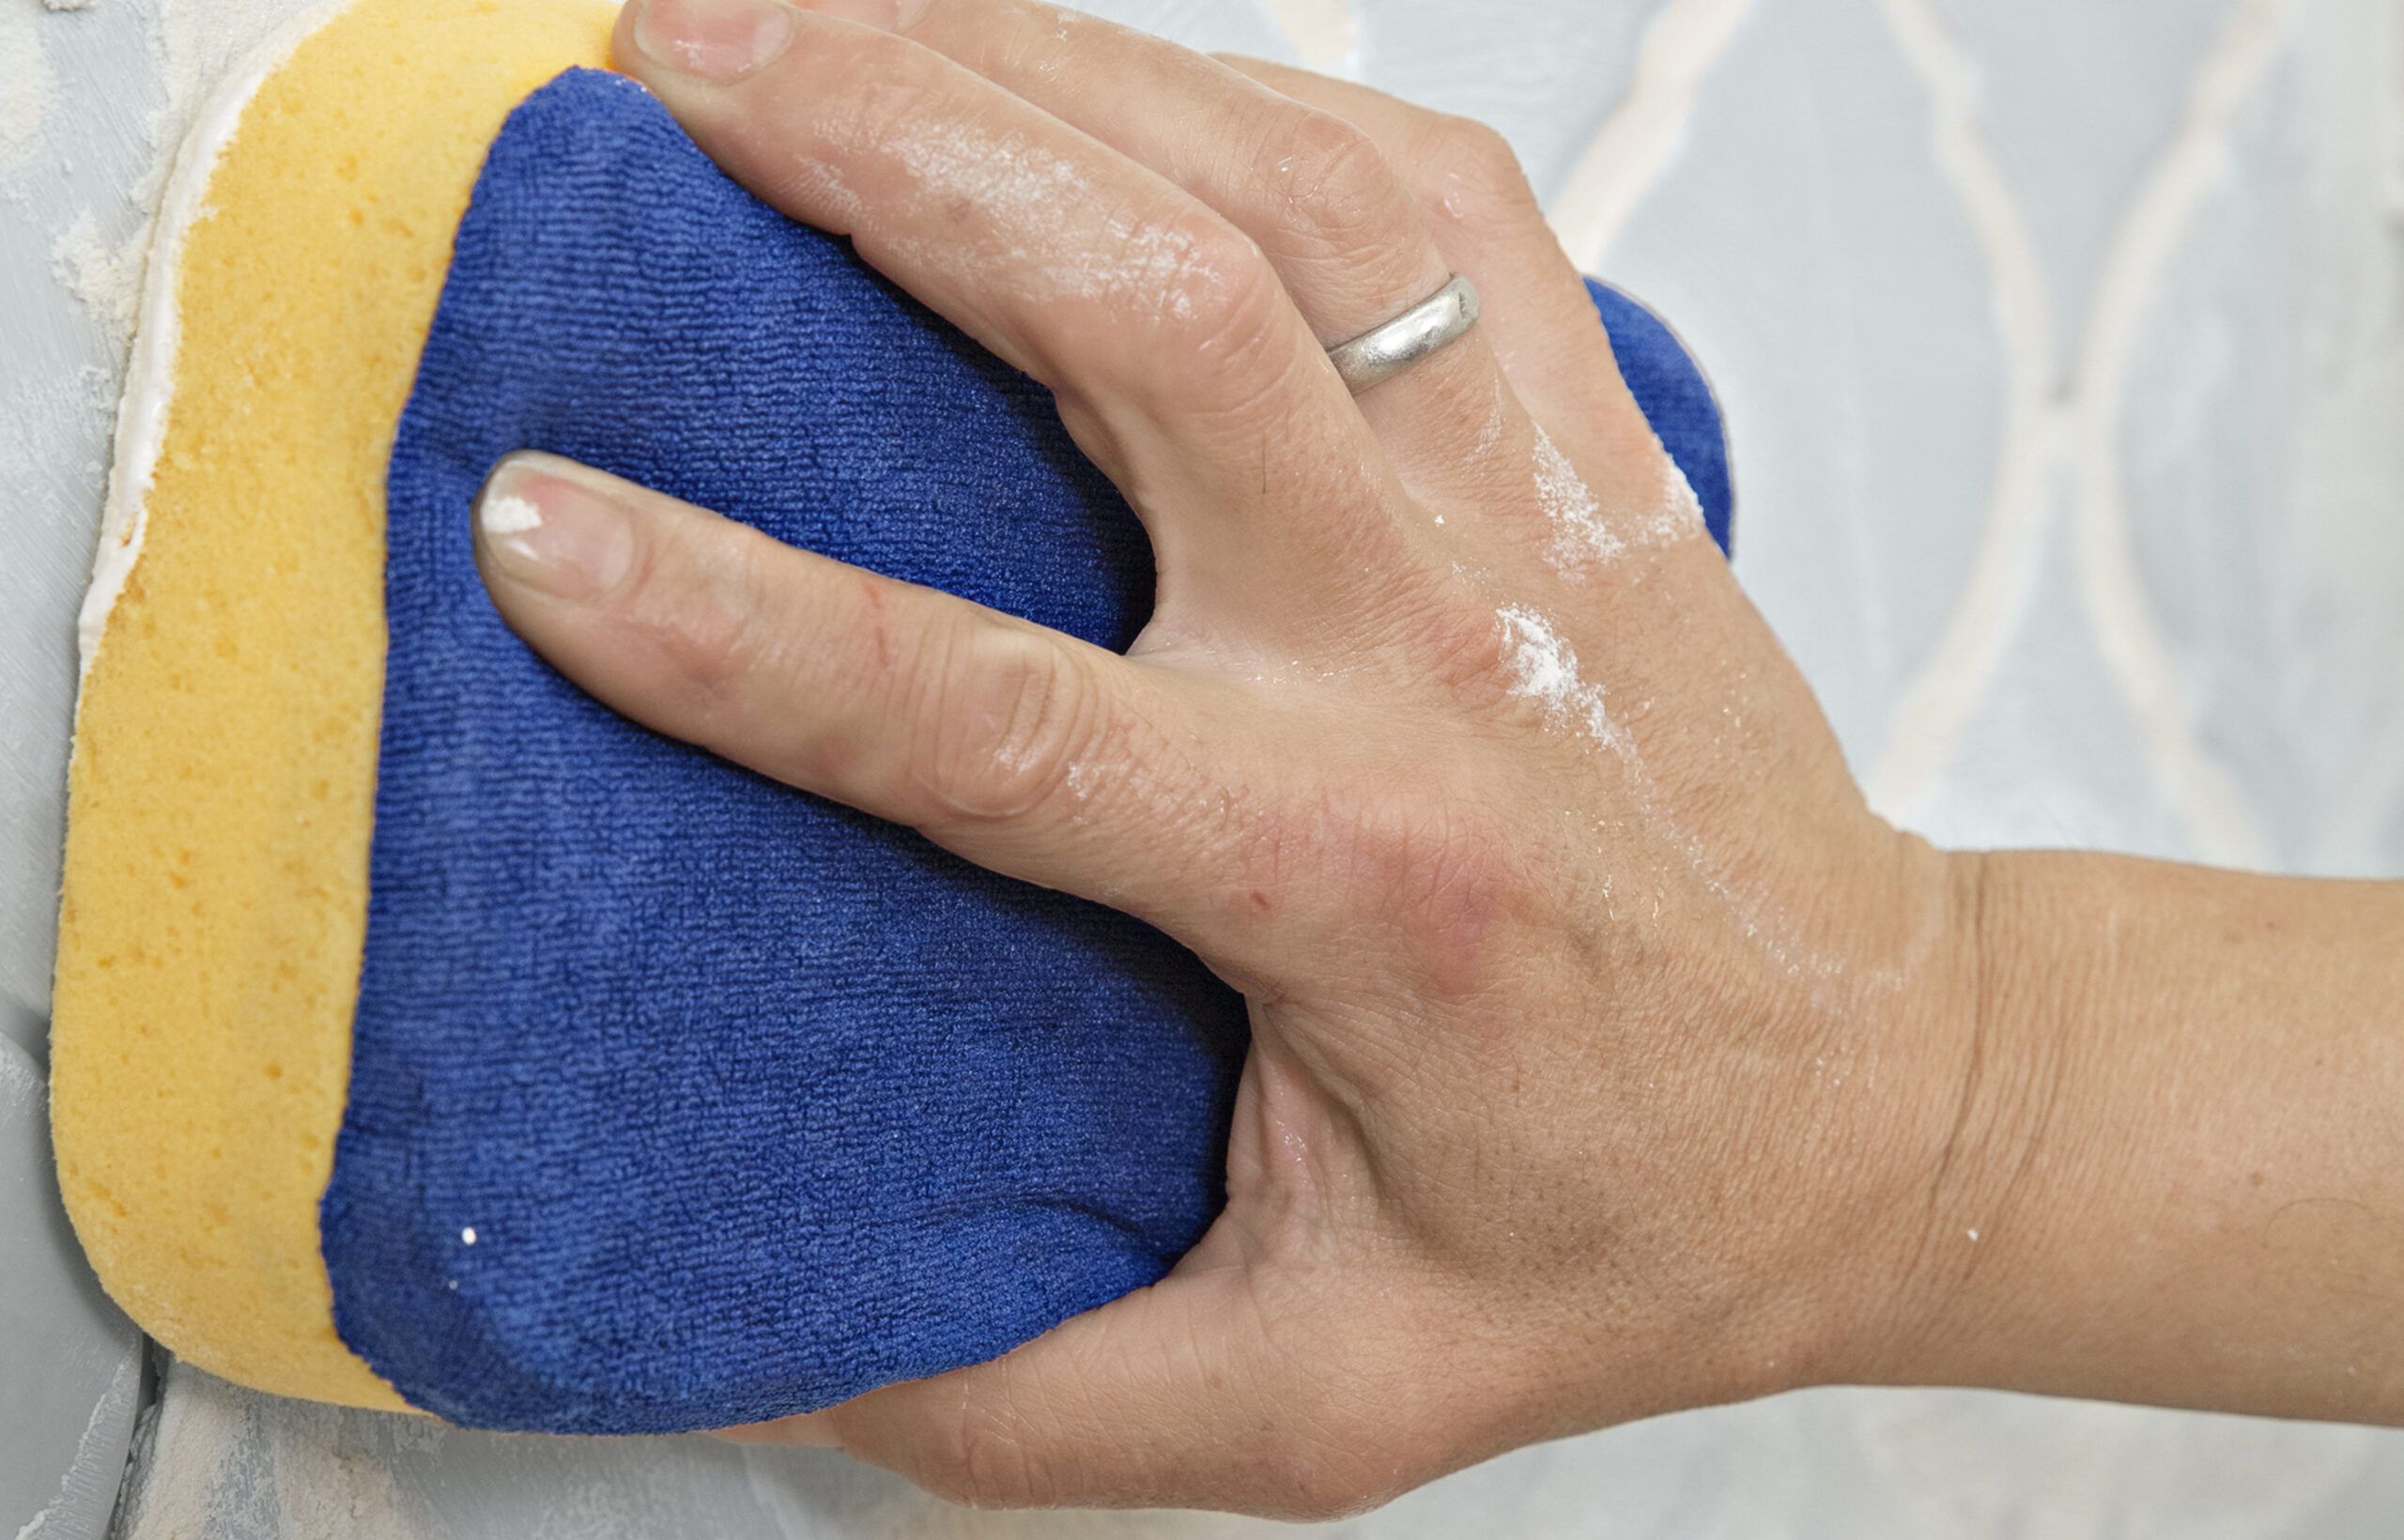
Wet a sponge in a bucket of clean water and clean grout and residue off the tiles with a circular motion, then rinse the sponge in a second bucket.
Take care not to wipe so aggressively that you pull grout out of the joints. Rinse and repeat with fresh water until any haze is gone and the moisture left on the tiles is clear. Then wrap a clean sponge in a microfiber cloth and blot the backsplash dry. Continue grouting in sections. Use textured acrylic caulk the color of the grout to fill the seam between the tile and countertop.