Propagating fall perennials is a great way to save money on new plants. By taking cuttings from perennials before winter comes, you can create new plants for your spring garden. In this guide, we’ll walk you through how to successfully propagate fall perennials and keep the cuttings healthy.
Understanding Perennial Propagation
Perennials are plants that can live for more than two years, often returning each spring from their rootstock. These plants are reliable and usually don’t need to be replanted annually. Many perennials can be grown as annuals in colder climates, as they may not survive harsher winters.
Propagation is a way to multiply plants by taking cuttings from your plant before they go out of season. It’s a great way to increase your plant stock without buying new plants each year.
Best Plants for Fall Propagation
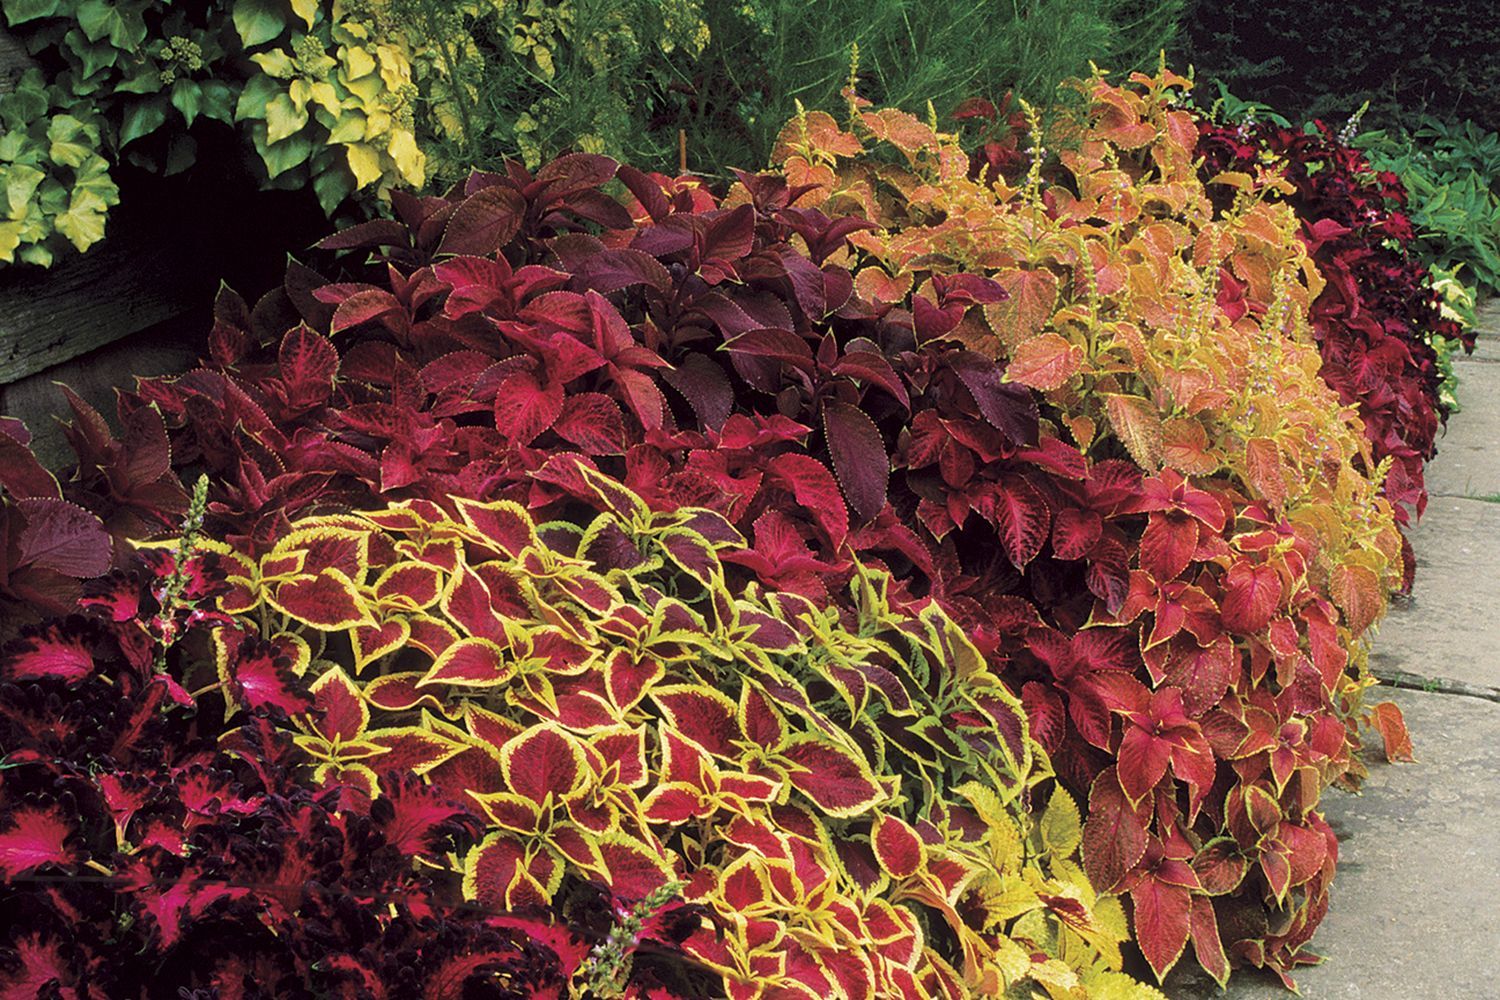
Not all perennials are suited for propagation. Select plants that can readily produce new growth from cuttings, like coleus, geraniums, and impatiens. These plants are often grown as annuals in colder regions but can be overwintered indoors through propagation. Other plants you can choose for propagation include lavender, sage, and some types of succulents.
For successful propagation, you need to choose healthy parent plants. Look for plants with strong, disease-free stems and vibrant foliage. Avoid taking cuttings from plants showing signs of wilting, pest infestation, or disease, as these can be passed on to the new plants.
Essential Tools and Materials for Perennial Propagation
Having the right tools and materials on hand will give you clean cuts and promote healthy root development.
Pruning Equipment
Clean, sharp pruning tools are ideal for taking cuttings, but hand pruners or garden scissors can work well for most plants. You should sterilize your tools with rubbing alcohol between cuts to prevent the spread of disease between plants.
Rooting Hormones and Potting Supplies
Rooting hormone, available in powder or liquid form, can improve your chances of successful propagation. You’ll also need small pots or flats, a sterile soilless potting mix, and plastic sheeting to create a mini greenhouse environment for your cuttings.
Step-by-Step Propagation Process
Follow these steps to propagate your fall perennials.
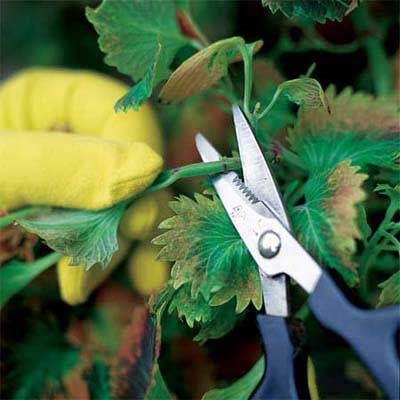
Taking Cuttings from Parent Plants
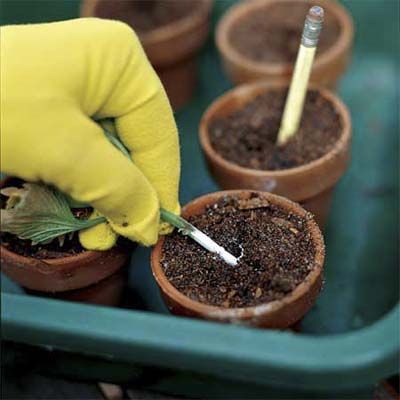
Select a healthy stem with three to six nodes (the points where leaves meet the stem). Using clean pruning shears, make a clean cut just below a node. Remove any flowers and the leaves from the bottom third of the stem. To prevent cuttings from drying out, wrap them in a moist paper towel and place them in a plastic bag away from direct sunlight until you’re ready to plant.
Preparing Cuttings for Rooting
Trim the cutting to about four to six inches long, making sure to cut just below a node. Remove any remaining lower leaves, leaving only two to three sets of leaves at the top of the cutting. This reduces water loss so the plant can focus on root development.
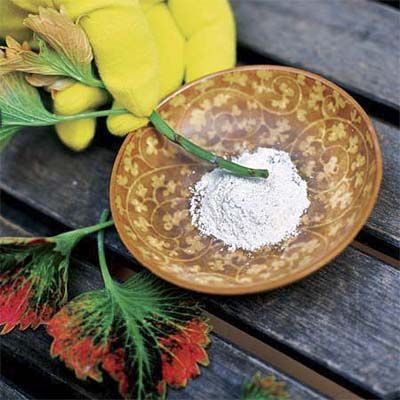
Applying Rooting Hormone
Dip the cut end of your stem in the rooting hormone. If you’re using a powder, tap off any excess to avoid over-application. For liquid hormone, soak the cut end for about 5 seconds. This step encourages faster and stronger root development in your cuttings.
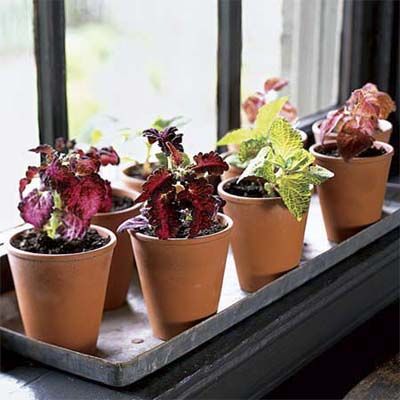
Planting Your Cuttings
Fill small pots or flats with a moistened, sterile, soilless potting mix. Use a pencil or chopstick to make holes in the pot or flat, spacing them at least one inch apart. Gently insert each cutting into a hole with at least one node below the surface. Firmly press the pot or flat around the stem for support and to eliminate air pockets.
Creating the Ideal Environment for Perennial Rooting
Providing the right conditions for your cuttings will help your plants root successfully. A warm, humid environment mimics outdoor conditions that encourage root growth.
Temperature and Humidity Control
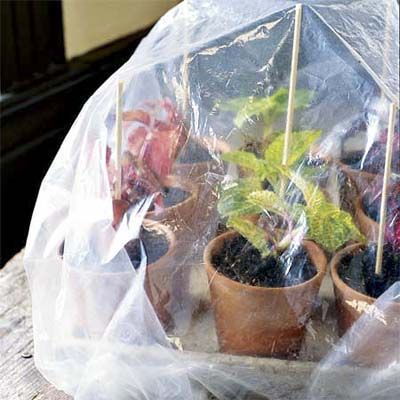
Maintain a consistent temperature between 65°-75°F (18-24°C) for rooting. Cover your pots or flats with clear plastic to create a humid environment. Use chopsticks or small dowels to support the plastic and prevent it from touching the cuttings. This makeshift greenhouse helps retain moisture and warmth.
Lighting Requirements
Place your cuttings in a location that receives bright, indirect light. Direct sunlight can be too intense and may cause the cuttings to wilt or burn. A north or east-facing window often provides the best light conditions for rooting cuttings.
Caring for Your Propagated Plants
Proper care during the rooting process is important for the health and success of your new plants. Consistent attention to watering and monitoring will encourage strong root development.
Watering and Fertilizing
Water gently to keep the growing plant consistently moist, and do not waterlog the cuttings. Once roots have developed and new growth appears, you can begin fertilizing the plant with a balanced, water-soluble fertilizer at half-strength.
Monitoring for Root Development
Check your cuttings weekly for signs of root development. Gently tug on the stem; if you feel resistance, roots are likely forming. You can also look for new leaf growth, which indicates successful rooting. This process typically takes three to four weeks, depending on the plant species and environmental conditions.
Transplanting and Hardening Off
Once your cuttings have developed strong root systems, they’re ready for the next phase: transplanting and acclimating them to the outdoors.
To transplant your cuttings, gently remove them from their pot or flat using a butter knife or small trowel. Plant them in individual pots filled with a high-quality potting mix.
Before moving your new plants outdoors in spring, they must be hardened off. Start by placing them in a sheltered outdoor location for a few hours each day, gradually increasing their exposure to outdoor conditions over a week or two. This process helps the plants adjust to the temperature, wind, and direct sunlight.
Common Challenges Propagating Perennials and Troubleshooting
Propagation can be tricky and present challenges. Be aware of common problems such as pests, diseases, and rooting issues so you can address them quickly.
Pests and Diseases
Keep a close eye on your cuttings for signs of pests or diseases. You can prevent common issues, such as fungal growth, with good air circulation and by avoiding overwatering. If you notice any problems, isolate the affected plants and treat them with organic or chemical solutions.
These are some common pests and diseases you may encounter when propagating perennials:
- Botrytis: A gray mold that can kill leaves or even the entire cutting
- Damping off: A fungal disease that causes stems to rot at or just below the soil line
- Fungus gnats: Small flies that are attracted to moist soil and can damage roots
- Mealybugs: White, cottony pests that suck sap from cuttings
- Root rot: A fungal disease caused by overwatering or poor drainage
- Whiteflies: Tiny white insects that can weaken new growth
Rooting Issues
If your cuttings aren’t rooting, temperature, humidity, or the age of the parent plant may be the cause. Sometimes, taking cuttings from younger plants can yield better results. Experimenting with different rooting methods or hormones may also help your plant propagation to be more successful.
Caring for Different Types of Perennials
Each type of perennial needs different care. Here are some guidelines.
Herbaceous Perennials
Herbaceous perennials, such as echinacea and hosta, die back to the ground each winter but return in the spring from their root systems. These plants typically benefit from division every few years. When propagating herbaceous perennials, divisions or root cuttings are often more successful than taking stem cuttings.
Woody Perennials
Woody perennials, such as lavender and rosemary, have stems that last year-round. These plants are often propagated through semi-hardwood cuttings taken in late summer or early fall. Good drainage and avoiding excessive moisture is important for the growth of woody perennial cuttings.
Bulbous Perennials
Bulbous perennials, such as lilies and tulips, reproduce through bulbs or corms. Propagation typically involves separating offsets or bulblets from the parent bulb. This process is usually done in the fall after the foliage has died back. Plant the separated bulbs directly in the garden or pots for overwintering.