Growing a plant and vegetable garden is a rewarding project that brings you closer to nature and provides fresh produce for cooking. Whether you dream of juicy heirloom tomatoes or vibrant marigolds, this guide will walk you through every step of growing your garden from seeds and keeping it thriving.
Recommended Tools:
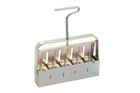
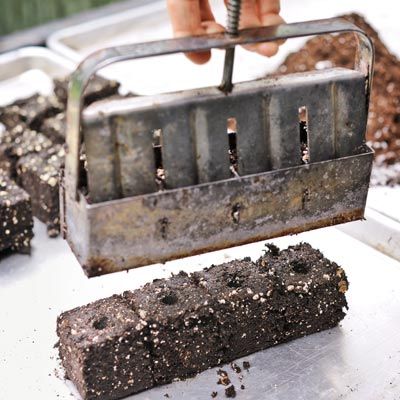
 Handheld soil blocker
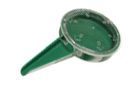
- Hand seed sower
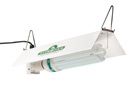
- Grow light
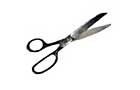
- Scissors
Decide Whether To Start the Garden Inside or Outside
The first step in seed starting is deciding whether to begin indoors or outdoors. This depends on the type of plants you’re growing and your local climate. Heat-loving plants such as tomatoes, peppers, and eggplants benefit from an indoor head start, while you can sow many flowers and hardy vegetables directly in the garden once your nighttime temperatures consistently stay above 50 degrees Fahrenheit.
For outdoor sowing, check the seed packet for specific instructions on spacing and planting depth. Sow seeds sparsely in rows to make thinning easier later on. To handle tiny seeds more efficiently, we like using a seed dispenser or a folded postcard as a makeshift tool.
Tip: To encourage faster germination, try soaking seeds in warm water for a few hours before planting. This works especially well for larger seeds or those with hard coats.
Prep Indoor Garden Pots
If you’re starting seeds indoors, you need to create a clean and sterile environment to prevent disease. Start by thoroughly cleaning any used containers with hot, soapy water. Use a sterile, soilless mix specifically designed for seed starting. These have the ideal texture and nutrients for young seedlings.
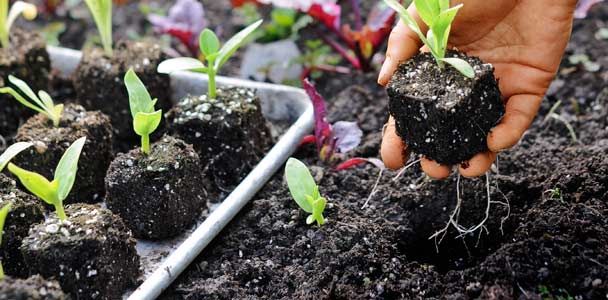
You have lots of container options for indoor seed starting, including peat pots, plastic cell packs, repurposed containers (such as yogurt cups with drainage holes), and soil blocks. Choose the one that best suits your needs and available space.
If you’re using repurposed containers, make sure you punch adequate drainage holes in the bottom to prevent waterlogging. We recommend labeling the containers with the seed type and the planting date to keep track of your seedlings’ progress. The organization will help you maintain a healthy and efficient indoor garden.
Sow Garden Seeds With Care
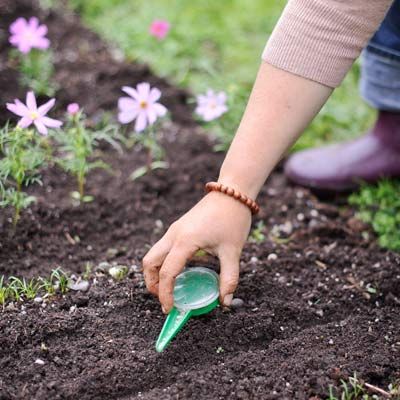
Proper sowing results in more successful seed germination. Start by moistening your starter mix or garden bed before planting. This step helps create the ideal environment for seeds to sprout and reduces the risk of seeds shifting during watering.
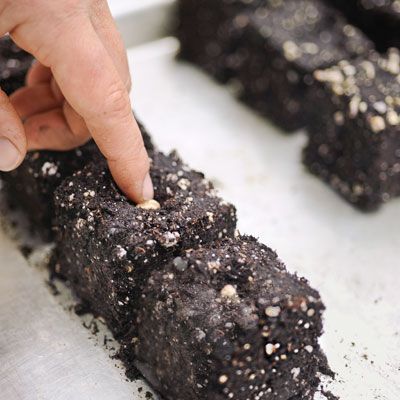
Take your time to place each seed individually, following the depth and spacing recommendations on the seed packet. In starter cups, one or two seeds per container is a good starting point. Overcrowding can lead to competition and stunted growth.
For extremely small seeds, try these tips:
- Mix the seeds with fine sand for a more even distribution.
- Sprinkle the seeds lightly over the damp soil surface.
- Use a mister or spray bottle to water gently after sowing.
Different seeds have individual light requirements for germination. Some need complete darkness, while others call for light to sprout. Always check the seed packet for specific instructions. Maintaining consistent soil moisture is important, and letting the soil dry out can interrupt germination.
Mimic a Greenhouse Garden
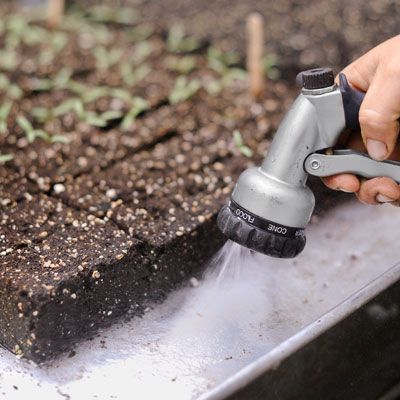
Creating a greenhouse-like environment will help your seeds germinate faster and more consistently. For indoor seeds, cover your containers with plastic wrap or a clear plastic dome to increase the humidity. Water from below whenever the soil feels dry to avoid disturbing the seeds.
For outdoor sowing, use a lightweight row cover or cloche to create a similar effect. These covers increase humidity and protect seeds from birds and harsh weather conditions.
You need to monitor your seeds closely during this stage. The moment you notice sprouts emerging, remove all covers to prevent fungal diseases. This transition marks the beginning of the seedling stage, where your plants will require different care.
Lighting for Strong Seedlings
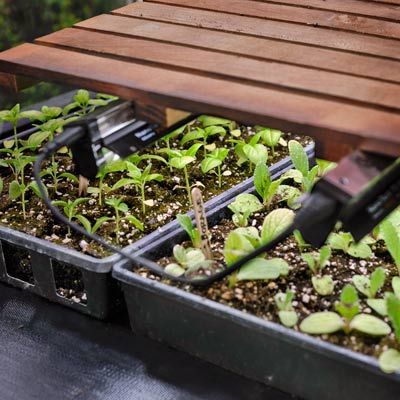
Proper lighting leads to strong, healthy seedlings. Most plants need about 15 hours of bright light daily for growth, which can be tough to get naturally during late winter and early spring.
While a sunny window may suffice for a bit, it might not be enough to develop robust seedlings. “Indoors, a sunny window works in a pinch, but consider investing in a grow light if you start seeds every year,” advises experienced gardener and author Niki Jabbour.
When using grow lights, follow these best practices:
- Position the light 2 inches above the seedlings
- Raise the light as the plants grow to maintain the distance
- Use a timer to guarantee consistent light exposure
You’ll also need to water regularly and feed weekly with a diluted fish emulsion or another organic fertilizer suitable for seedlings.
Air circulation, such as keeping a fan on, helps prevent diseases and strengthens the seedlings. Regular ventilation also helps in simulating outdoor breezes, so the transition is smoother for the plants when they eventually move outside.
Limit Garden Competition
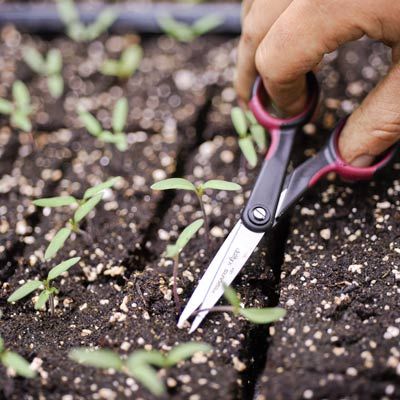
As your seedlings develop, it’s important to thin them out to reduce competition and promote healthy growth. Once the seedlings grow their second pair of true leaves, it’s time to select the strongest plants and remove the weaker ones.
When thinning, avoid pulling out the unwanted seedlings. This can damage the roots of nearby plants. For indoor starts, aim for one plant per container or cell. Use clean, sharp scissors to snip off the weaker seedlings at the soil level.
Thinning may seem counterintuitive, but it leads to the development of strong and productive plants. The remaining seedlings will have more space, nutrients, and light to grow.
Prepare To Plant a Garden
Before transplanting your indoor seedlings to the garden, gradually acclimate them to your outdoor conditions. This process is called hardening off. It helps prevent transplant shock and gives your plants a smooth transition to the garden.
To harden off your seedlings:
- Wait until plants have 3–4 sets of leaves and a well-developed root system.
- Begin by placing seedlings in a shaded outdoor area for a few hours on a mild day.
- Gradually increase exposure to sunlight and outdoor conditions over 7–10 days
- Bring plants indoors at night, especially if temperatures drop below 50 degrees Fahrenheit (10 degrees Celsius).
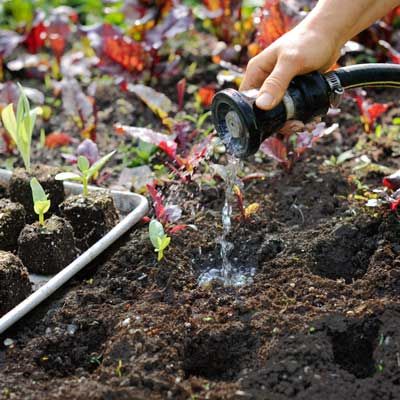
When you’re ready to plant, choose an overcast or drizzly day if possible. Gently remove seedlings from their containers, keeping the root ball intact. Plant them in pre-moistened holes at the same depth they were growing in their containers.
With peat pots or soil blocks, you can plant the entire unit directly in the ground. Just be sure to tear off any portion of the peat pot that sits above the soil to prevent wicking moisture away from the roots. We recommend setting a routine for regular inspection and maintenance to make sure your young plants are adapting well.
Protect Tender Plants With a Row Cover
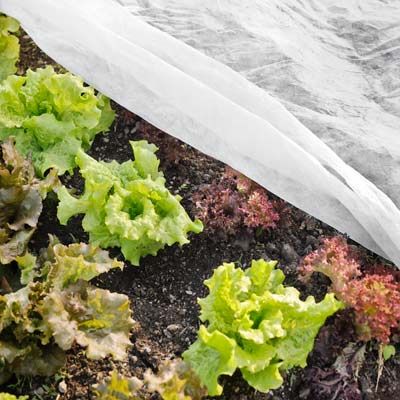
After planting your seedlings, using a lightweight row cover can provide protection during the early stages of growth. Row covers offer several benefits, including:
- Creating a microclimate that can boost early growth
- Further hardening off of new transplants
- Protection from late spring frosts
- Shielding against insect pests like cabbage worms and cucumber beetles
To use a row cover effectively, choose a material that allows light and water to penetrate. Secure the edges of the cover to prevent it from blowing away.
Remove the cover on warm and sunny days to prevent overheating. You can gradually reduce cover use as your plants establish and the weather stabilizes.