Project details
Skill
Cost
Estimated Time
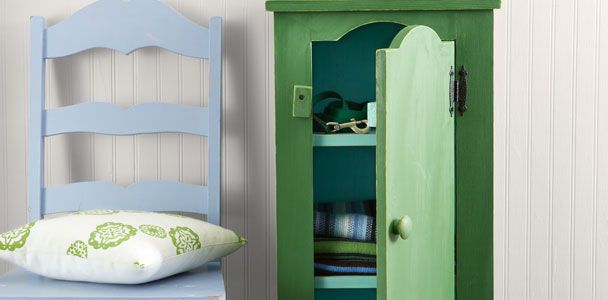
A jelly cupboard is a classic piece of furniture for storing preserves and other small items. While antique versions can be found in oak or cherry, most traditional jelly cupboards are made of painted pine. We’ll take you through each step of creating your own jelly cupboard, whether you’re an experienced woodworker or a DIY novice.
Planning Your Jelly Cupboard Project
Before you start building, consider the project’s requirements and make sure you’re prepared for the task ahead.
Skill Level Required
Building a jelly cupboard is generally an easy to moderate project. While the assembly is straightforward, some steps, such as cutting curves with a jigsaw, require a steady hand. Even if you’re new to woodworking, you should be able to complete this project with patience and attention to detail.
Cost Breakdown
This project is relatively affordable. Expect to spend around under $100 for the necessary wood, hardware, and finishing supplies. This estimate may vary depending on the quality of materials you choose and local prices.
Time Estimation
You should set aside approximately six hours to complete this project. This timeframe includes cutting the wood, assembling the cabinet, and applying finishing touches. If you’re new to woodworking, you might want to bake in additional time to make sure you’re comfortable with each step.
Tools and Materials For Jelly Cupboards
Having the right tools and materials on hand will make your jelly cupboard project go smoothly. Let’s break down what you’ll need.
Required Tools
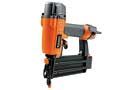
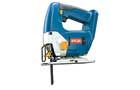
- Circular saw
- Clamps
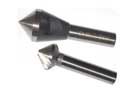
- Combination countersink drill bit (1/8-inch)
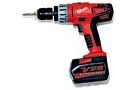
- Drill/driver
- Jigsaw
- Paint brush (2 1/2-inch sash brush)
- Pencil
- Pneumatic brad nailer
- Regular drill bit (1/8-inch)
- Sanding materials (220-grit sandpaper)
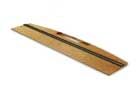
- Straight edge
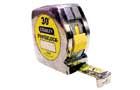
- Tape measure
 Tape measure
- Pencil
- Clamps
- Straight edge
- Circular saw
- Pneumatic brad nailer
- Jigsaw
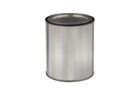
- paint can – 1-quart
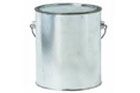
- paint can – 1-gallon
- Shims
- Drill/driver
- combination countersink drill bit – 1/8-inch
- drill bit – 1/8-inch
- sandpaper – 220-grit


Necessary Materials
- Brad nails (1 1/4-inch)
- Cabinet hardware (hinges, knob, and latch)
- Edge-glued pine panels (3/4-inch thick)
- Paint or stain of your choice
- Plywood for the back panel (1/4-inch thick)
- Wood filler
- Wood glue
- Wood screws (1 1/4-inch)
Preparing the Wood Pieces
The first step in building your jelly cupboard is cutting and preparing the wood components. This stage sets the foundation for your entire project.
Cutting the Panels
Using your circular saw, cut the edge-glued pine panels according to the following measurements:
For a cabinet: 14 3/4″ W x 36″ H x 9 1/2″ deep with a cap 15 3/4″ W x 10″ deep
- 3/4-inch by 18-inch edge-glued-pine front panel, to make the face frame and door: one at 36 inches ripped to 14 3/4inches wide
- 3/4-inch by 18-inch edge-glued-pine sides: two at 36 inches, ripped to 8 1/2 inches wide
- 1/4-inch pine plywood back: one at 32 inches, ripped to 14 1/2 inches wide
- 3/4-inch by 18-inch edge-glued-pine cap: one at 15 3/4 inches, ripped to 10 inches wide
- 3/4-inch by 18-inch edge-glued-pine shelves and top: four at 8 1/2 inches, ripped to 13 1/4 inches wide
- 3/4-inch by 18-inch edge-glued-pine latch: one at 2 1/2 inches, ripped to 1 1/2 inches wide
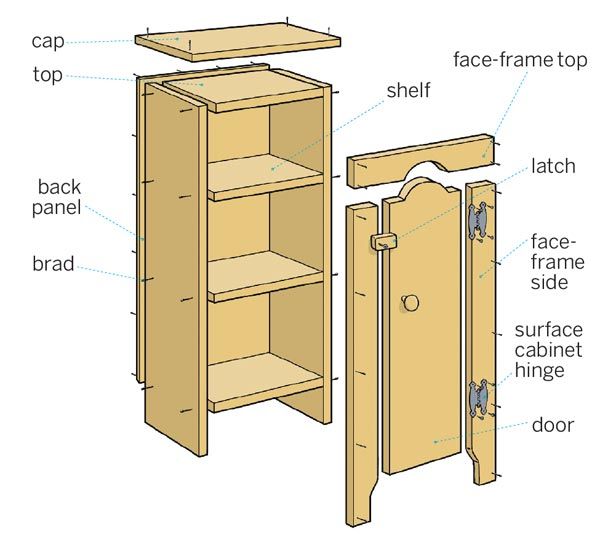
Build the Box
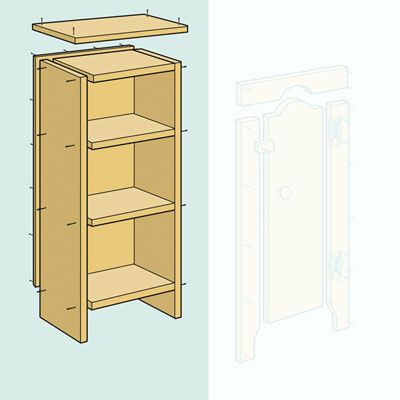
- Use a circular saw to cut the pieces according to the cut list.
- Sandwich the top and shelves between the sides, with the shelves installed 10 1/2, 21, and 32 1/2 inches below the top.
- Apply glue to the edges of the sandwiched pieces and nail into them through the outside of the cabinet, using a pneumatic nailer and 1 1/4-inch brads.
- Glue and nail the back panel in place, flush at the top and inset 1/8-inch at each side.
- Nail the cap onto the cabinet, flush at the back but overhanging the front and sides equally.
Make the Face Frame
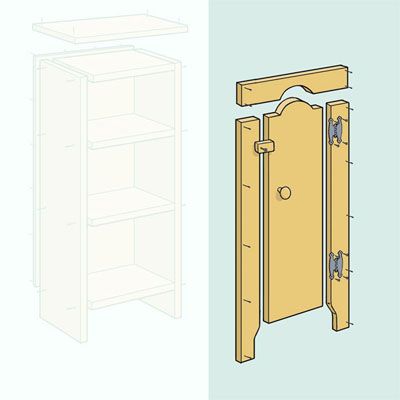
- To create the feet on the front panel, measure and mark a rectangle, 3 1/4 by 11 inches, centered at one end.
- Trace the curve of a 1-quart paint can to round off the corners, then cut the line with a jigsaw.
- At the opposite end, draw a straight line across the panel 2 inches down from the top.
- Mark spots 4 3/8 inches in from each side on that line and 1 1/2 inches above the line’s midpoint.
- Use the curved edge of a 1-gallon paint can to connect the marks and trace the curve above the line.
- Follow the curved line with a jigsaw to cut out the top piece of the face frame.
- Use a straightedge and a circular saw to rip 2 5/8-inch strips off both sides of the remaining piece, creating the sides of the face frame and the cabinet door.
Install the Front
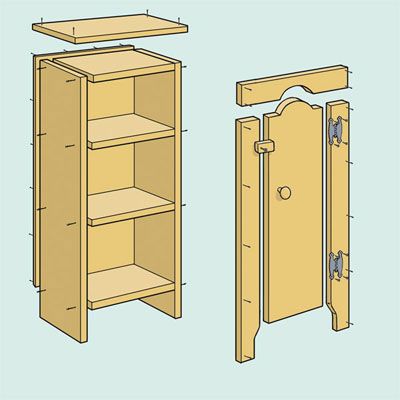
- Lay the box on its back, and glue and nail the top and sides of the face frame to the front.
- Use cardboard or shims to center the door. Install the hinges and knob.
- To install the latch, use a 1/8-inch combination countersink bit to drill through the latch and into the face frame, then loosely screw the piece in place with a 1 1/4-inch wood screw.
- Fill any nail holes with wood filler and smooth rough spots with 220-grit sandpaper before painting the cupboard.
Adding Finishing Touches to Your Jelly Cupboard
The final steps in creating your jelly cupboard involve smoothing out any rough spots and applying your chosen finish.
Sanding and Smoothing
- Fill any visible nail holes with wood filler.
- Once the filler is dry, sand the entire cabinet with 220-grit sandpaper.
- Pay special attention to the edges and any areas where different pieces meet.
- Wipe away all dust with a tack cloth.
Painting Techniques
- Choose a paint color that complements your home decor. Traditional jelly cupboards were often painted in muted, earthy tones.
- Apply a primer if needed, especially if you’re using a light color over bare wood.
- Use a 2 1/2-inch sash brush to apply thin, even coats of paint.
- Allow each coat to dry completely before applying the next.
- For a distressed look, lightly sand some edges and corners after the paint has fully dried.
Customizing Your Jelly Cupboard
While we’ve provided instructions for a classic pine jelly cupboard, there are many ways to personalize your project.
Alternative Wood Choices
If you prefer a different look or have access to other materials, these are other popular wood options:
- Cherry: To achieve a rich, warm tone
- Oak: For a more formal, traditional appearance
- Reclaimed wood: For an authentic, rustic feel
Decorative Elements to Consider
Embellish your jelly cupboard further with these decorative touches:
- Beadboard backing to add texture to the interior
- Decorative hinges or knobs to personalize with unique hardware
- Glass door inserts to showcase contents while maintaining a clean look
- Stencils to paint simple patterns for added design
Maximizing Storage in Your Jelly Cupboard
Make the most of your new jelly cupboard’s capacity and organization with these ideas.
Shelf Placement Strategies
Consider these tips when positioning your shelves:
- Adjust shelf heights to accommodate different jar sizes
- Choose a specific shelf for frequently used items
- Leave ample space between shelves for easy access
Organizing Tips for Small Spaces
Maximize your jelly cupboard’s storage potential with these ideas:
- Add a lazy Susan on a shelf for easy access to items at the back
- Install hooks on the inside of the door for utensils or measuring spoons
- Use small baskets or bins to group similar items
Maintaining Your Jelly Cupboard
Proper care will help keep your jelly cupboard lovely and functional for years.
Cleaning Methods
Keep your cupboard looking its best with these cleaning tips:
- Avoid harsh chemicals that may damage the finish
- Dust regularly with a soft, dry cloth
- For painted surfaces, wipe with a damp cloth and mild soap as needed
Periodic Maintenance Tasks
Perform these tasks annually to keep your cupboard in top condition:
- Apply a fresh coat of paint every few years if desired
- Check and tighten any loose hardware
- Touch up paint chips or scratches
Alternative Uses for Your Jelly Cupboard
While traditionally used for storing preserves, jelly cupboards are versatile pieces that can serve many purposes in modern homes.
In the Kitchen
Beyond storing jams and jellies, consider using your cupboard for:
- Housing a collection of specialty oils and vinegars
- Organizing spices and dried herbs
- Storing small appliances or cookbooks
Beyond the Kitchen
Your jelly cupboard can find a home in other areas of your house:
- As a stylish bar cabinet in the dining room
- As a unique nightstand in a bedroom
- Housing linens in a bathroom
- Storing crafting supplies in a hobby room
Remember, while a jelly cupboard’s original use was for storing preserves, you can always get creative with its purpose in your home. From a charming kitchen accent to a small bookcase alternative, your handcrafted jelly cupboard can adapt to your unique needs and style preferences.