A bad flooring joint often forms where flooring meets a step or transition, causing unsightly gaps and potential tripping hazards. Below, we walk through how to effectively repair a bad flooring joint, restoring both the appearance and function of your floor. This Old House general contractor Tom Silva demonstrates in the video above.
Common Causes of Bad Flooring Joints
Wood, the primary material in many flooring systems, naturally expands and contracts with changes in temperature and humidity. This movement can cause gaps to form, especially where different pieces of flooring meet. Common causes of bad floor joints include poor initial installation, natural wood movement, moisture damage, and wear and tear over time.
Signs of a Bad Flooring Joint
Don’t ignore these common signs a joint needs repair.
Visible Gaps or Separation
Description: A common sign of a bad floor joint is gaps forming between floorboards or tiles. This could happen due to wood expanding or contracting, improper installation, or the natural settling of the home.
Causes: Humidity fluctuations, moisture damage, or uneven subflooring
What to look for: Gaps between planks or seams in tile flooring that weren’t there before. Over time, these gaps can widen.
Squeaky or Noisy Floors
Description: If your flooring makes noise when walked on, such as squeaking, creaking, or popping sounds, it’s a sign that the joints are loose or not properly fastened.
Causes: Loose nails or screws, separation between the subfloor and joists, or loose boards rubbing against one another
What to look for: Walk over the floor and listen for specific areas where the noise originates, often near seams or joints.
Uneven or Raised Flooring
Description: If one part of the flooring feels higher than another or there’s noticeable unevenness at a joint, it can indicate a problem with the joint itself.
Causes: Moisture swelling, improper installation, or a failing subfloor
What to look for: Look for ridges or bumps where flooring sections meet, or areas where one plank or tile is noticeably higher than another.
Cracks in Flooring
Description: Cracks at the joints in wood or tile flooring indicate that the floor is not expanding and contracting properly or that the joint has weakened.
Causes: Expansion and contraction due to moisture or temperature changes, impact damage, or shifting of the subfloor
What to look for: Visible cracks along seams in tile, wood, or laminate flooring. In severe cases, you may see cracks along the entire joint line.
Water Damage or Staining
Description: Water damage around floor joints can cause discoloration, warping, or even mold growth, especially in wood or laminate flooring.
Causes: Leaks, high humidity, or spills that aren’t properly cleaned up
What to look for: Dark staining, warping, soft spots, or swelling of floorboards near joints. Mold or mildew may also develop in these areas.
Loose or Moving Floorboards
Description: If you notice that individual floorboards or tiles move when stepped on, the joints may be loose or failing.
Causes: Nails or screws that have come loose, worn adhesive, or subfloor problems
What to look for: Watch for movement when you step on a particular area of the floor, or if tiles or boards shift under pressure.
Buckling or Cupping
Description: Buckling is when the floor rises in one or more areas, while cupping happens when the edges of wood planks rise higher than the center.
Causes: Excess moisture trapped beneath the floor or improper wood acclimation before installation
What to look for: Examine the joints for raised areas or floorboards that have warped, particularly where two boards meet.
Soft or Spongy Feeling
Description: A soft or spongy feeling underfoot, especially at joints, can indicate that the subfloor or joint is compromised.
Causes: Rotting wood, moisture damage, or a weakened subfloor
What to look for: Press down on the floor, especially near seams, and feel for any areas that give more than they should.
Dislodged or Broken Grout in Tile Floors
Description: In tiled floors, damaged grout between tiles at joints can be a sign that the flooring has shifted or settled.
Causes: Movement in the subfloor, moisture seeping into grout lines, or poor-quality grout installation
What to look for: Cracked, missing, or loose grout between tiles at joints. In severe cases, the tiles themselves may shift or come loose.
Drafts or Temperature Changes
Description: Gaps or cracks in flooring joints can let in drafts, leading to cold spots or temperature variations across the room.
Causes: Gaps forming due to separation or improper sealing of joints
What to look for: Feel for drafts coming through the floor or uneven temperature in rooms, especially near joints.
Mold or Mildew
Description: Mold or mildew near floor joints can be a sign of water intrusion or a moisture issue affecting the joint.
Causes: Leaking pipes, water spills, or high humidity levels not properly managed
What to look for: Visible signs of mold or a musty smell, especially in areas such as bathrooms, kitchens, or basements where moisture is common.
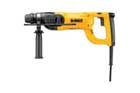
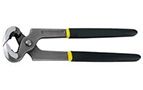
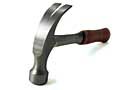
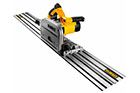
Tools and Materials Needed To Fix Joints
- Chisel
- Construction adhesive
- Floating tenons
- Hammer
- Mortising machine
- Nail pulling pliers
- Reciprocating saw
- Safety gear (eye protection and ear protection)
- Track saw or circular saw
- Wood glue
 Reciprocating saw
- chisel
- Nail pulling pliers
- Hammer
- Track saw
- Mortising machine

Always prioritize safety when working with power tools. Wear appropriate protective gear, including safety glasses and ear protection. Ensure your work area is well-ventilated and free from obstacles.
Step-by-Step Floor Joint Repair Process
Follow these steps to repair your bad flooring joint effectively. Work carefully and methodically for the best results.
1. Remove the Nosing
Begin by creating space for the reciprocating saw blade. Use a dull chisel to gently lift the nosing, then cut the nails holding it in place with the reciprocating saw. Carefully remove the nosing, watching out for any protruding nails.
2. Clean the Area
Once the nosing is removed, pull out any remaining nails. Use a scraper to remove old adhesive or filler from both the nosing and the subfloor. This step ensures a clean surface for the new installation.
3. Straighten the Flooring Edge
To create a straight edge for the new joint, place a straight edge along the widest gap in the flooring. Use a track saw or circular saw to cut all the flooring evenly along this line. For areas the saw can’t reach, use a chisel to carefully remove excess material, ensuring the edge is flush with the cut boards.
4. Prepare the Nosing
Check the fit of the nosing against the newly straightened flooring edge. If necessary, trim the back of the nosing’s horn (the part that extends past the baseboard) to ensure a proper fit.
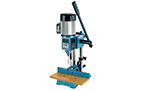
5. Create Mortises
To ensure a tight, lasting joint, mark lines on both the nosing and floorboards for mortise locations. Use a mortising machine to cut matching mortises in both surfaces. These mortises will house floating tenons, which help keep the joint tight and aligned.
6. Install the Nosing
With all preparations complete, apply construction adhesive to the subfloor under where the nosing will sit. Spread wood glue along the edge of the flooring. Insert floating tenons into the mortises on the nosing. Carefully align the nosing with the floorboards, ensuring the tenons match up with the floor mortises. Gently tap the nosing into place with a hammer.
Once the joint is tight, secure the nosing with 16d nails. In the video above, Silva demonstrates this process, showing how to achieve a professional-quality repair.
Finishing Touches when Repairing Flooring Joints
After installing the nosing, a few final steps will ensure a polished look and long-lasting repair.
Filling Nail Holes
Use wood filler that matches the color of your flooring to fill any visible nail holes. Once dry, sand the filled areas smooth for a seamless finish.
Applying Finish
If necessary, apply a matching finish to the repaired area to blend it with the surrounding flooring. This step is particularly important if you had to cut into existing floorboards during the repair process.
Preventing Floor Joint Issues
While repairing a bad flooring joint can dramatically improve your floor’s appearance and function, taking steps to prevent future problems is equally important.
Controlling Humidity
Wood flooring expands and contracts with changes in humidity. Use a dehumidifier in damp areas and maintain consistent indoor humidity levels to minimize wood movement.
Regular Maintenance
Inspect your flooring regularly for signs of wear or damage. Address any issues promptly to prevent them from worsening over time.
Professional Installation
For new flooring installations, we recommend hiring a professional. Proper installation from the start can prevent many common flooring issues.