Project details
Skill
Cost
Estimated Time
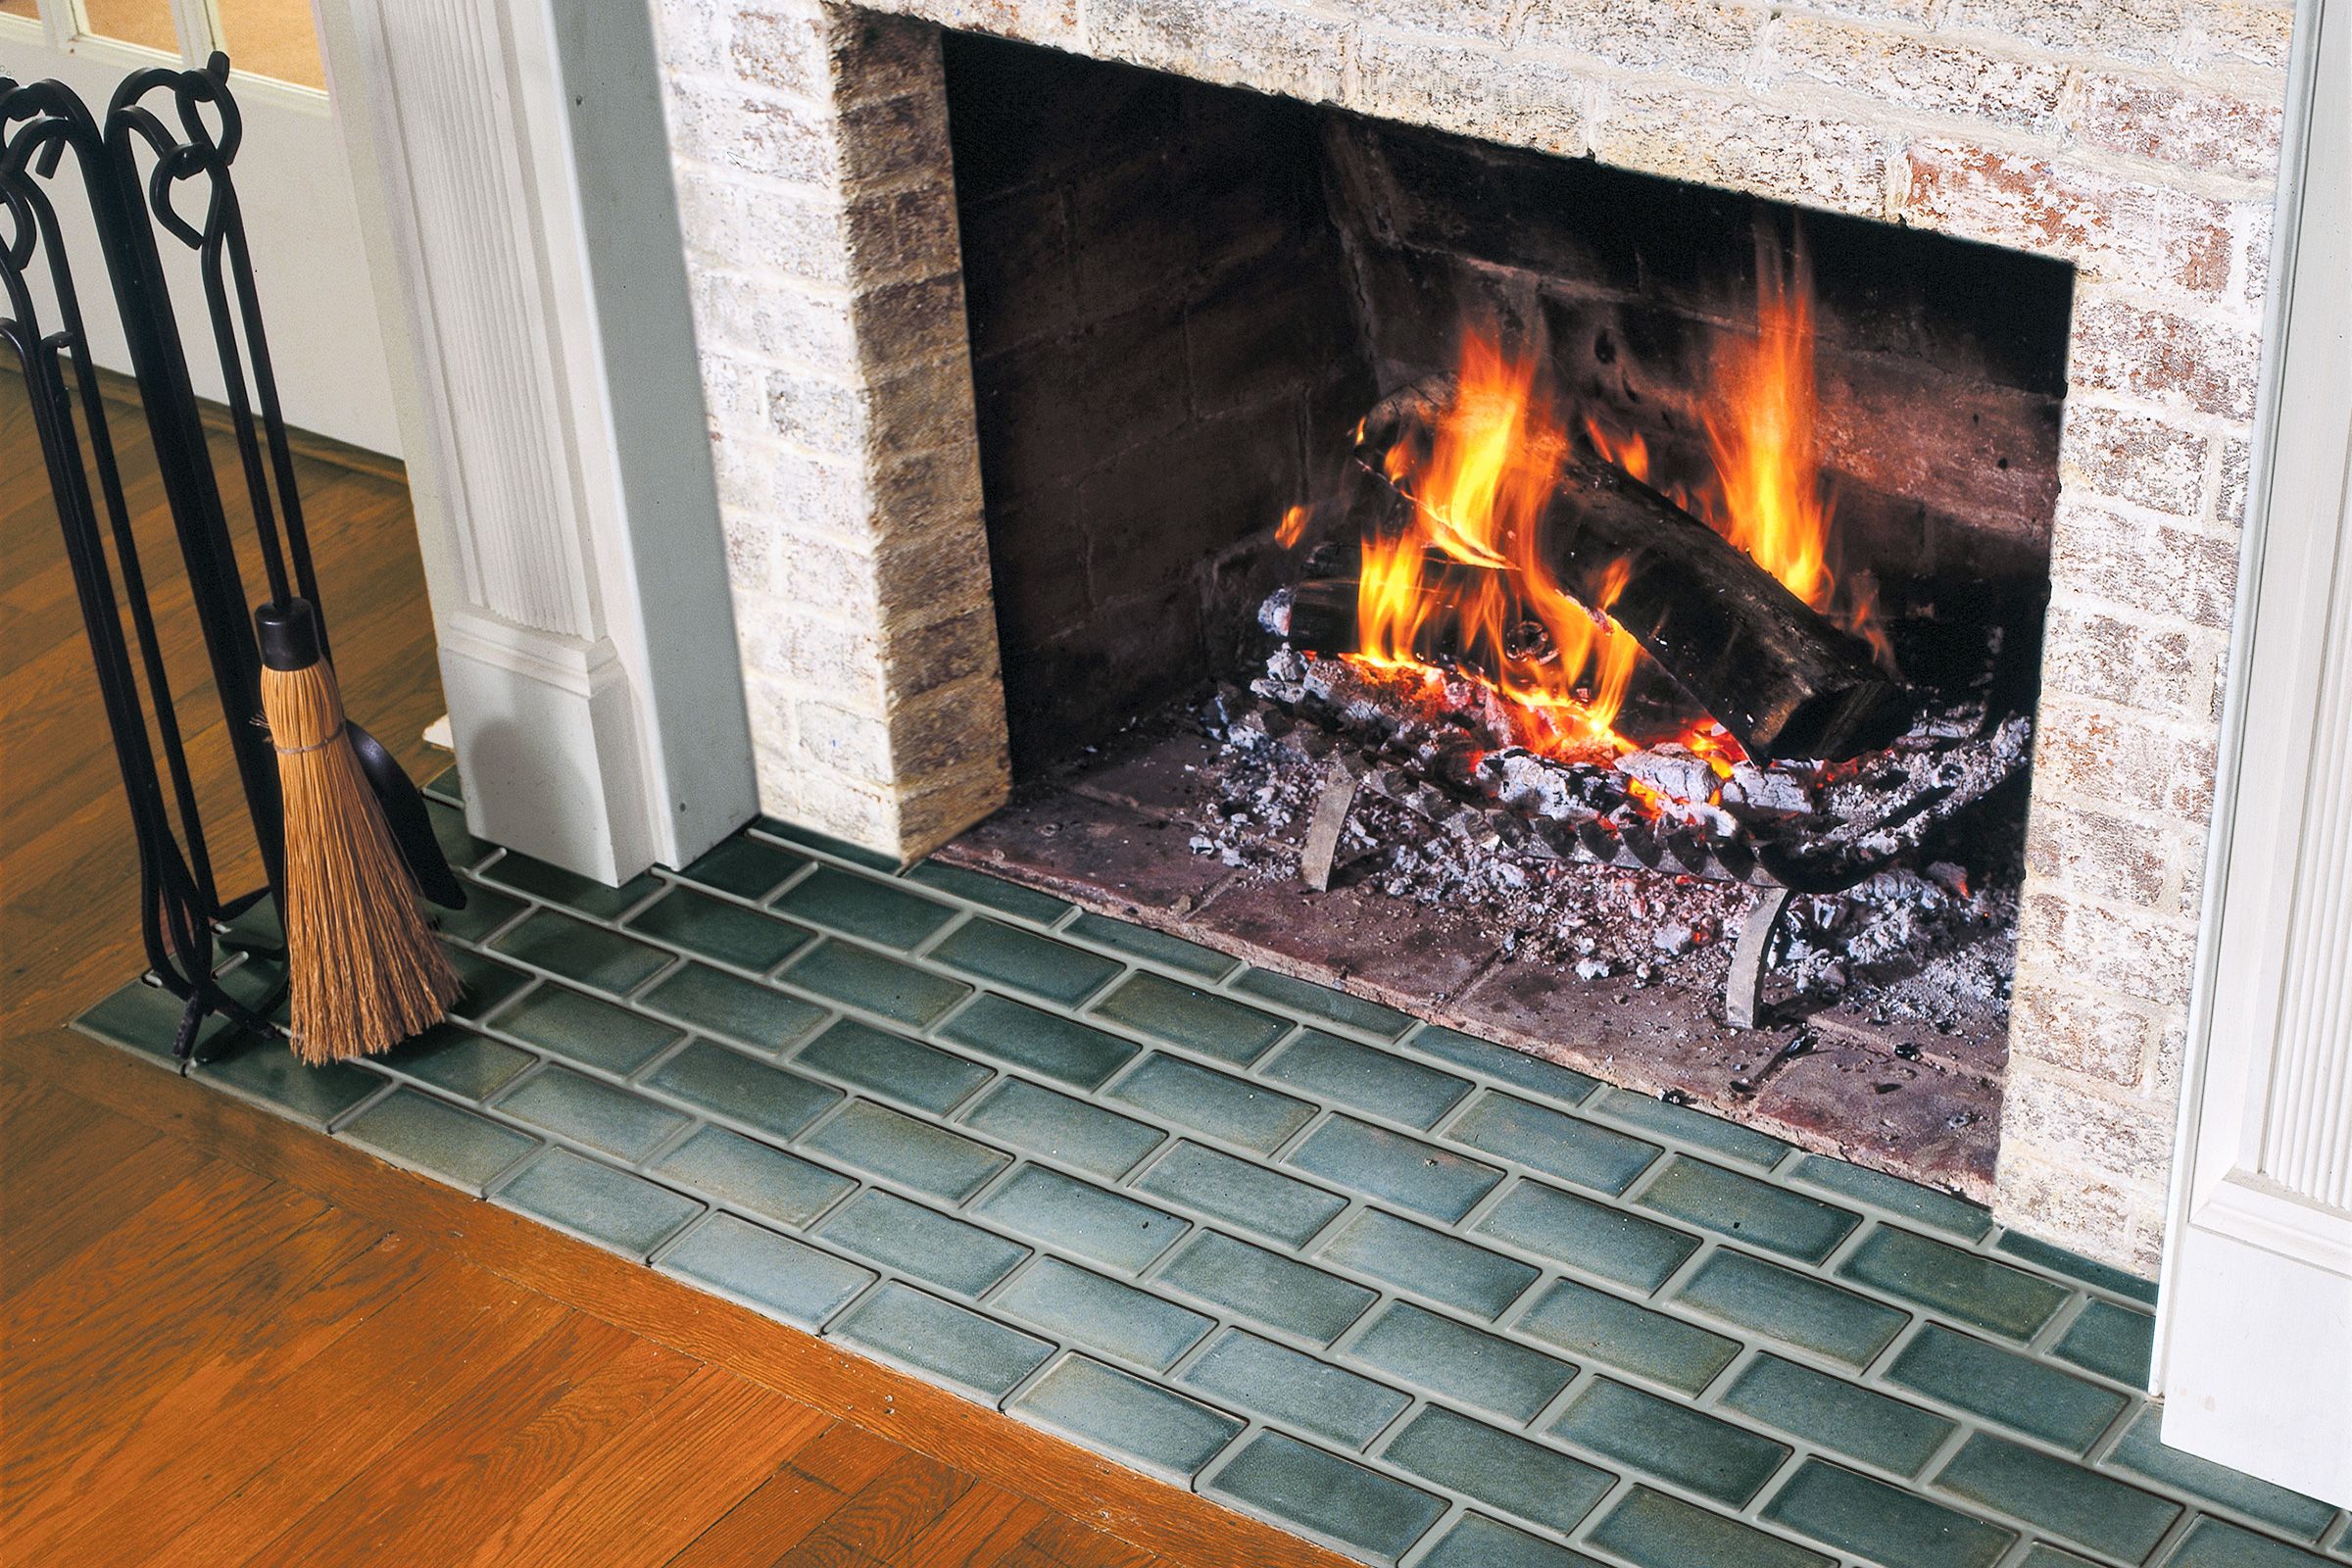
A tiled hearth can be both stylish and functional. It acts as a protective buffer between the fireplace and your flooring, preventing heat damage and catching any stray embers. A hearth can also be a striking focal point in your living space, improving the overall appearance of your fireplace and room. While it may seem daunting at first, with the right approach and tools, you can create an attractive and long-lasting hearth.
We’ll walk you through the process of tiling a hearth, from preparation to finishing touches, to help you tackle this home improvement project with confidence.
Essential Tools and Materials for Tiling a Hearth
Before you begin tiling your hearth, gather all the necessary tools and materials. You must also consider local building codes. Typically, the hearth must extend at least 16 inches in front of the firebox and 8 inches on either side. This keeps your floor protected and helps prevent fire hazards.
Necessary Tools
- Grout sponge
- Level
- Notched trowel
- Pencil or marker
- Rubber grout float
- Safety gear (eye protection, ear protection, gloves)
- Tape measure
- Wet tile saw
Required Materials
- Caulk (matching grout color) and caulk gun
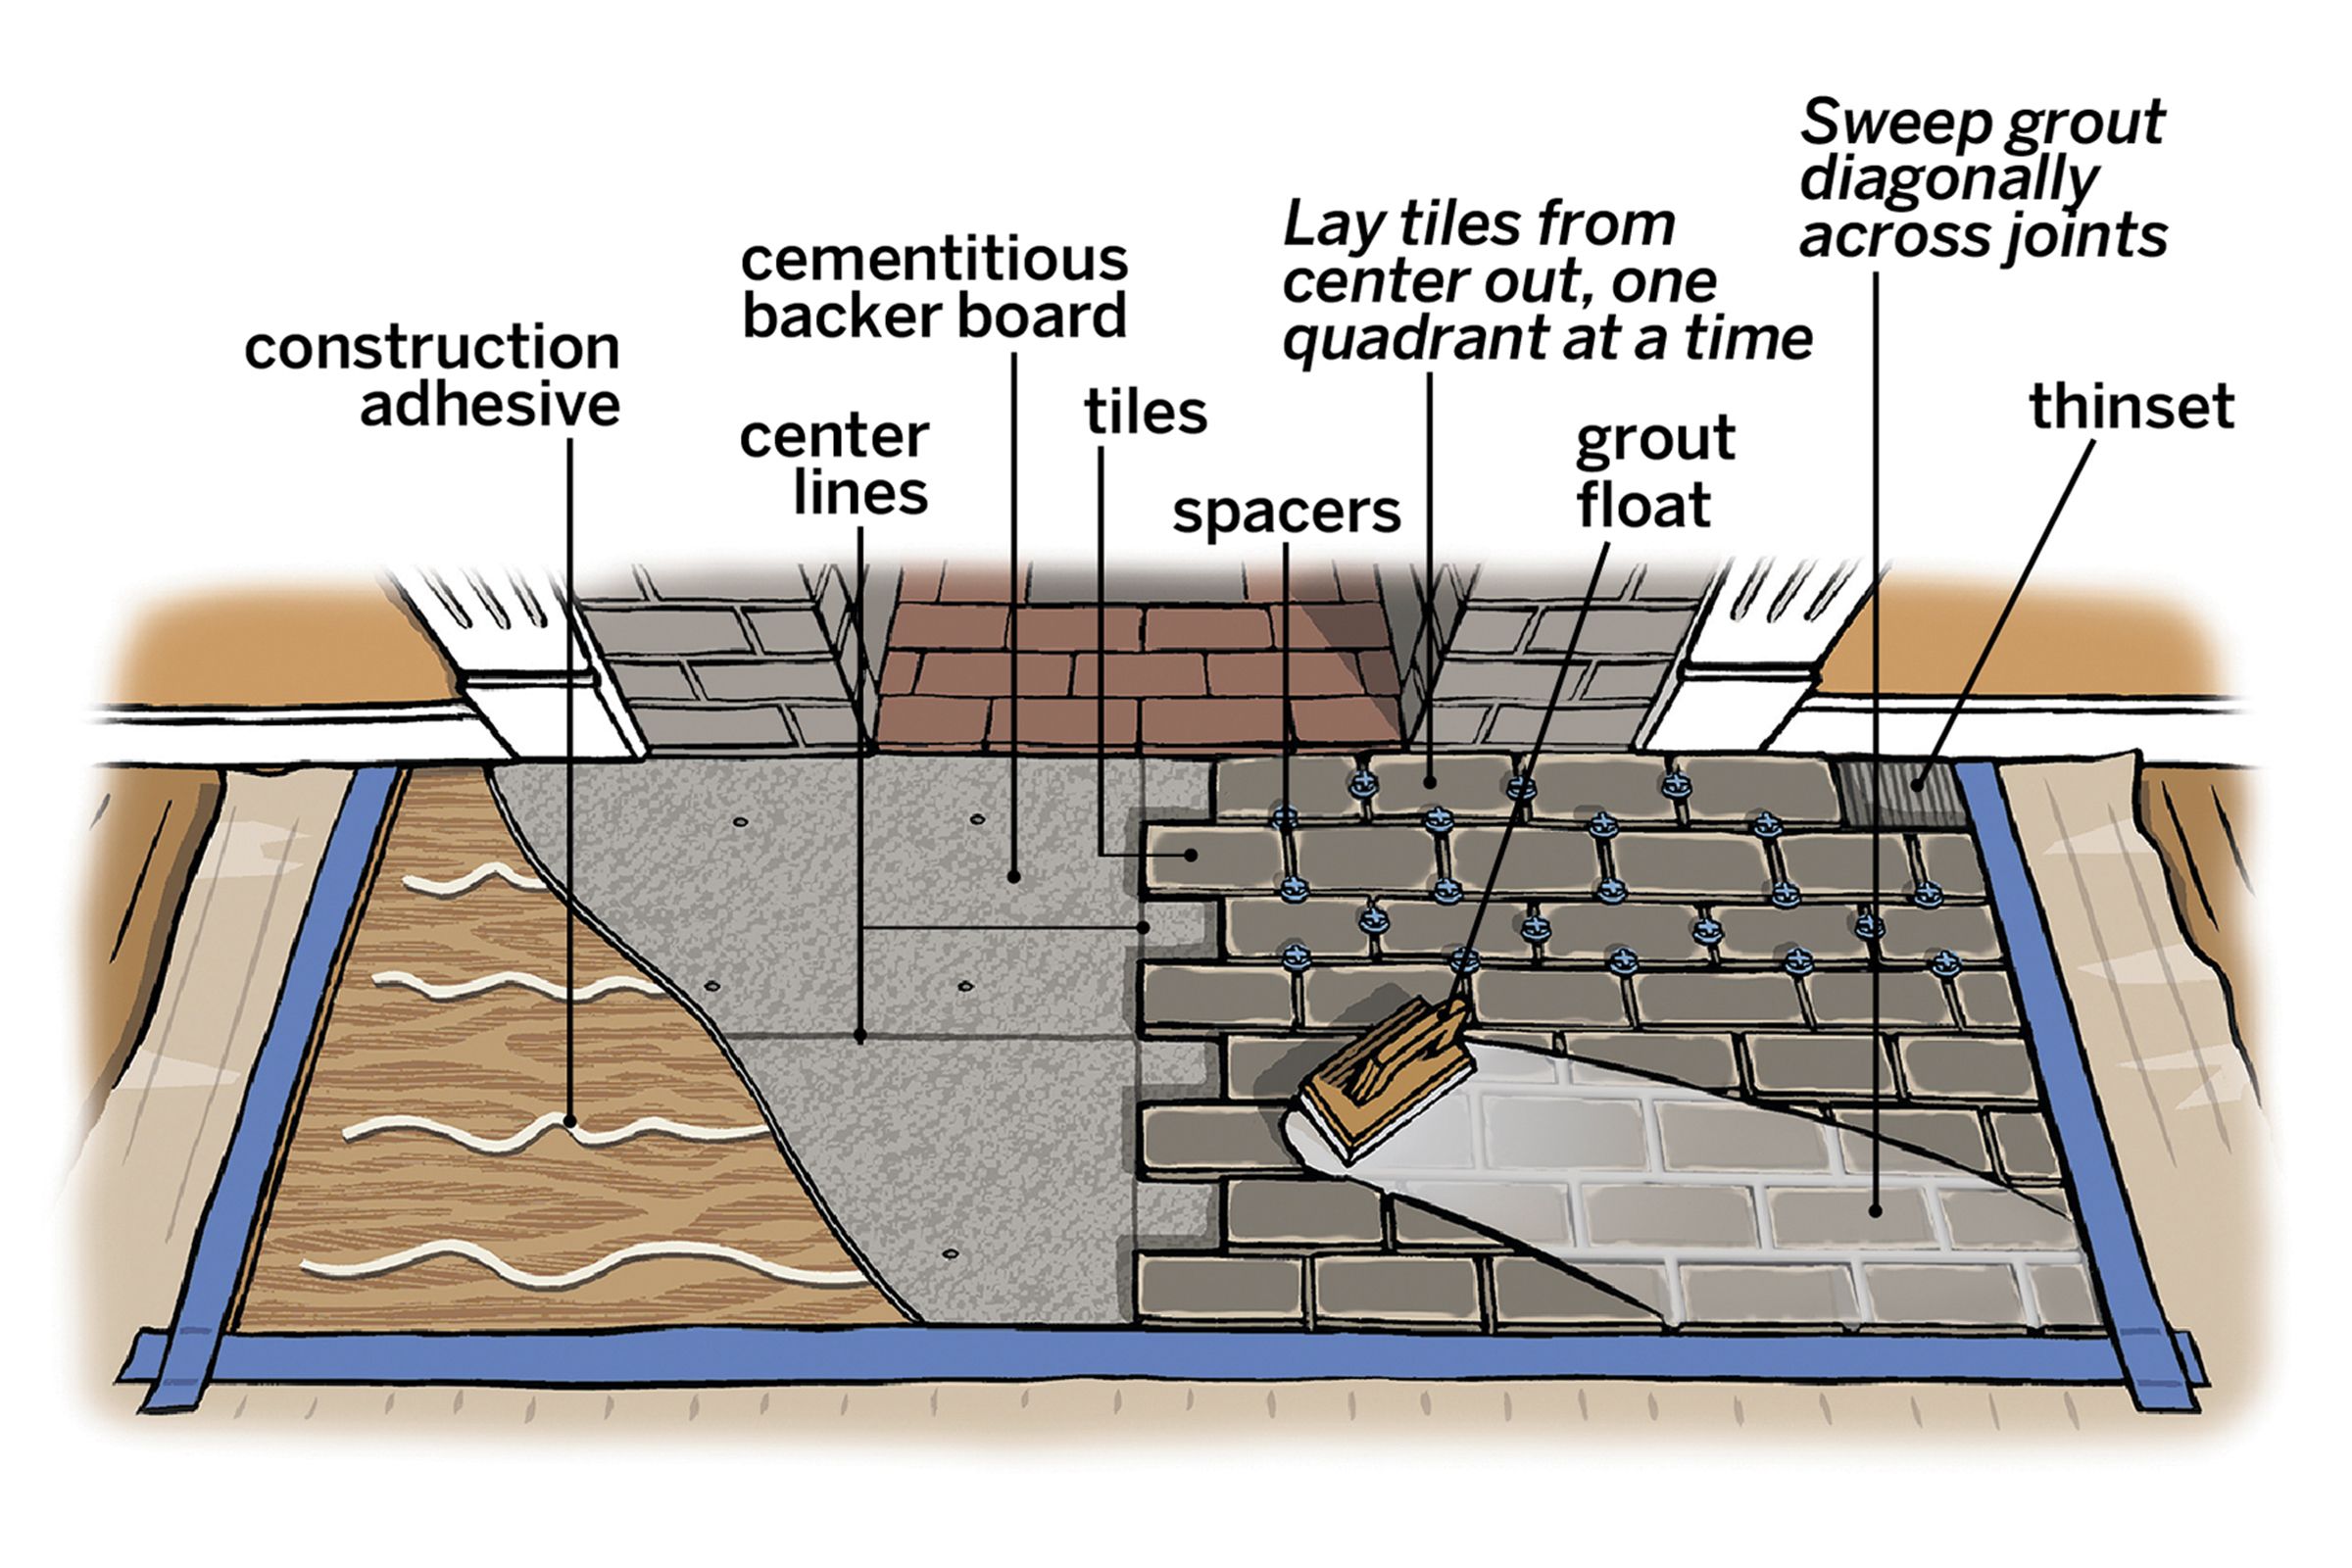
- Cementitious backer board (if needed)
- Construction adhesive
- Grout
- Latex additive (for thinset)
- Plastic sheeting and painter’s tape (for floor protection)
- Screws (for backer board)
- Thinset mortar
- Tile spacers
- Tiles (heat-resistant and suitable for hearths)
Preparing the Hearth for Tiling
Remove Old Tiles or Surfaces
If your hearth already has tiles or another surface covering, you’ll need to remove it completely. Use a chisel and hammer to carefully pry off old tiles, being cautious not to damage the underlying layer. For other materials, such as brick or concrete, you may need to use a grinder or sandblaster to create a smooth surface.
Create a Level Substrate
A level substrate is crucial for a professional-looking tile job. If you’re working with a concrete slab, check for any unevenness. For concrete slabs that need leveling, mix a small batch of thinset mortar with latex additive. Use the straight edge of a trowel to skim coat the surface, filling in any voids and creating a smooth, level base. Allow this to dry completely before proceeding.
If your substrate is plywood, you’ll need to install a layer of cementitious backer board to create a non-combustible surface. Measure the hearth area and cut the backer board to fit. Attach it to the plywood using construction adhesive and screws placed every 12–16 inches. Fill any screw holes with thinset.
Choosing the Right Tiles for Your Hearth
Your selected tiles must withstand the fireplace heat while ideally complementing your home decor.
Types of Heat-Resistant Tiles
Some suitable options for tiling a fireplace surround, including the hearth, include the following:
- Ceramic tiles: Durable and available in various colors and patterns
- Natural stone tiles: Options such as slate, granite, or marble offer unique looks
- Porcelain tiles: Dense, less porous, and highly heat-resistant
- Quarry tiles: Unglazed ceramic tiles known for their durability and slip resistance
Considerations for Tile Patterns and Designs
The pattern and design of your hearth tiles affect the overall look of your fireplace. Consider the following when choosing your tile layout:
- Border tiles: Consider using a contrasting border to frame the hearth and add definition.
- Color and texture: Choose tiles that complement your fireplace surround and room decor.
- Pattern complexity: Simple grid patterns are easier to install, while more complex designs like herringbone or basketweave can be visually appealing.
- Size and shape: Larger tiles can make a small hearth appear more spacious, while smaller tiles allow for intricate patterns.
Planning Your Tile Layout
Careful planning is essential for achieving a symmetrical hearth. Take the time to measure, mark, and dry-fit your tiles before applying any adhesive.
Measuring and Marking the Hearth
Start by measuring the firebox opening and determining its center point. Extend this point to the hearth and draw a line bisecting it. If the center is close to a mortar line or another focal point on the firebox, adjust your line accordingly. Then, find the center of the hearth from front to back and draw another perpendicular line, dividing the hearth into quadrants.

Dry-Fitting Tiles
Begin at the front edge of the hearth, laying out tiles in one quadrant. Start at the center line and work outward, using spacers to account for grout lines. Mark any tiles that need cutting. If cuts would result in tiles less than 1-inch wide, adjust your layout slightly to avoid using small slivers.
Continue filling in the quadrant until you reach the center line from front to back. If tiles extend beyond this line, mark a new reference line along their edge. Repeat this process for the entire hearth area, marking tiles at the back edge for cuts if necessary.
Cutting Tiles for Edges and Corners
Before you begin the tiling process itself, follow the below steps to make sure each tile is the shape it needs to be:
- Mark tiles that need cutting and use a wet tile saw for precise cuts.
- Align the cut mark with the saw blade and adjust the fence for a secure fit.
- Wearing safety gear, turn on the saw and water supply.
- Slowly feed the tile into the blade, applying light pressure.
Step-by-Step Process of Tiling the Hearth
With your preparation complete and layout planned, you’re ready to begin tiling your hearth. Follow these steps for the best results.
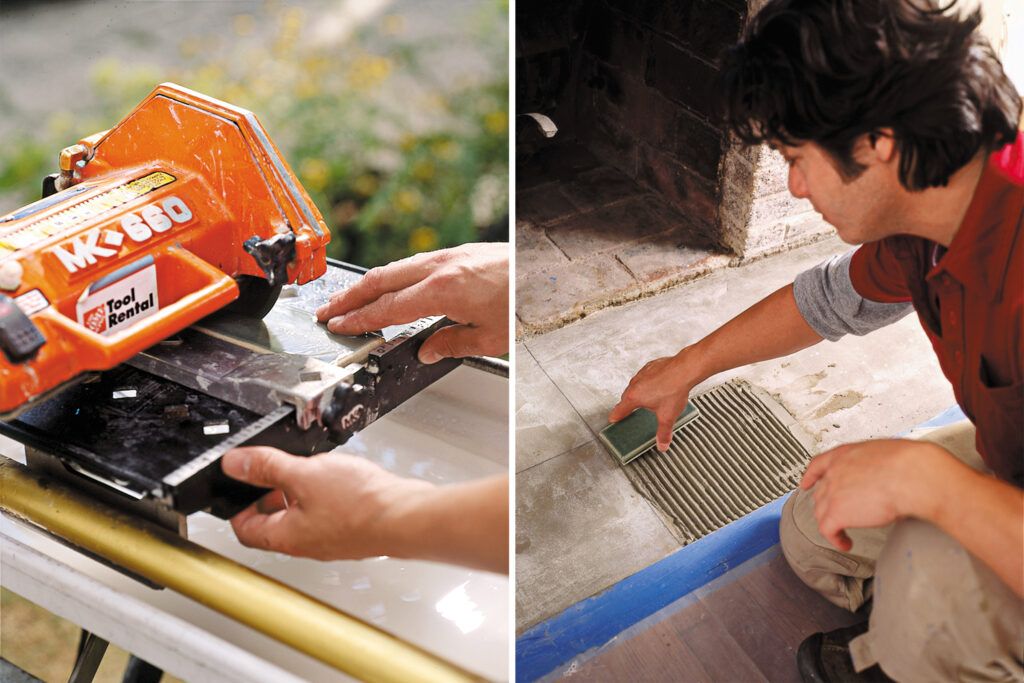
Applying Thinset Mortar
- Mix thinset mortar with latex additive according to the package instructions. The mixture should be thick enough to stick to an upside-down trowel.
- Using the straight edge of the trowel, spread a layer of thinset into one quadrant of the substrate.
- Turn the trowel to the notched side and, holding it at an angle, scrape ridges into the thinset.
Remember, thinset has a working time of about 30 minutes once spread, so only cover small areas at a time.
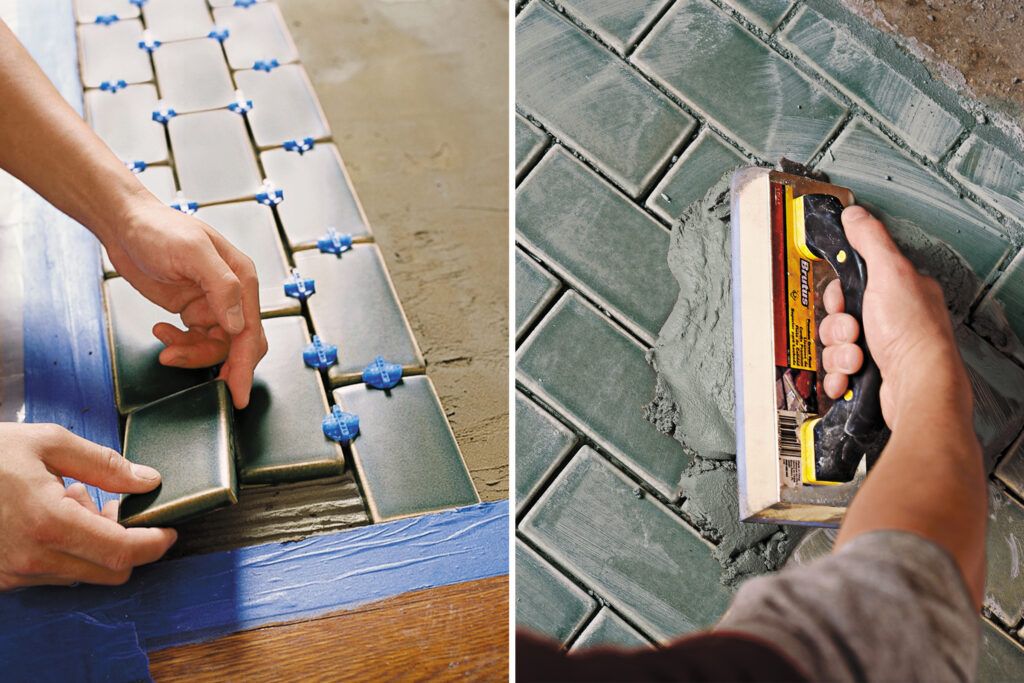
Setting the Tiles
- Begin at the intersection of your layout lines, setting a tile and giving it a slight twist to embed it in the thinset.
- Continue working outward from the center, following your planned layout.
- Use spacers between tiles to maintain even gaps for grout.
- Check tiles with a level or straightedge to ensure they’re on an even plane.
- If a tile is too low, remove it and add more thinset. If it’s too high, gently press it down or remove excess mortar.
- Fill in edge tiles last, ensuring all grout spaces look even and straight.
Grouting and Finishing Touches
After allowing the thinset to dry for 24 hours, you can proceed with grouting and finishing your newly tiled hearth.
Mixing and Applying Grout
- Clean any joints where thinset has squeezed out using a grout sponge or putty knife.
- Mix grout according to package instructions until it resembles peanut butter consistency.
- Holding a grout float at an angle, spread the grout diagonally across the joints.
- Work the float in all directions to ensure full joints. Never sweep parallel to the joints, or it will catch in the gaps and pull up the mix.
- Let grout dry for 30–60 minutes, or until it’s firm to the touch
- Clean excess grout with a damp sponge.
- Allow the grout to dry overnight, then buff off any haze with a clean, dry cloth.
Cleaning and Sealing the Tiled Hearth
- Once the grout has fully cured (usually 48–72 hours), clean the entire hearth surface with a pH-neutral cleaner.
- Rinse thoroughly and allow to dry completely.
- Apply a penetrating sealer to protect both the tiles and grout from stains and moisture.
- Fill the joint around the perimeter of the hearth with caulk matching the grout color.
- Smooth the caulk with a wet finger for a clean finish.
Allow the hearth to set for another two to three days before using your fireplace.
Maintaining Your Newly Tiled Hearth
To keep your tiled hearth looking its best, regular maintenance is key. Here are some tips:
- Clean spills immediately to prevent staining.
- Inspect the hearth periodically for any loose or damaged tiles, addressing issues quickly.
- Reseal the tiles and grout annually, or as recommended by the sealer manufacturer.
- Sweep or vacuum the hearth regularly to remove dust and debris.
- Use a pH-neutral cleaner for routine cleaning, avoiding harsh chemicals that could damage the tiles.
Troubleshooting Common Tiling Issues
Even with careful planning and execution, you may encounter some challenges when tiling your hearth. Here are some solutions to common issues tiling issues.
Dealing With Uneven Surfaces
If you discover unevenness after laying some tiles, don’t panic. You can often adjust individual tiles by adding or removing thinset beneath them. For more significant unevenness, you may need to remove tiles and apply a self-leveling compound before retiling.
Addressing Heat-Related Tile Problems
If you notice tiles cracking or popping off due to heat exposure, it may indicate that the wrong type of tile or adhesive was used. In this case, remove the affected tiles and replace them with proper heat-resistant materials, ensuring you use thinset mortar rather than mastic adhesive.
Our Conclusion
Tiling a hearth is a rewarding DIY project that can dramatically enhance your fireplace’s appearance. Patience, attention to detail, and safety are keys to a successful tiling project. Take your time with each step, from preparation to grouting, and don’t hesitate to get help from a pro if you encounter challenges beyond your skill level.