We may be compensated if you purchase through links on our website. Our team is committed to delivering honest, objective, and independent reviews on home products and services.
Project details
Skill
Cost
Estimated Time
Hanging drywall may seem simple enough to DIY pros, but marking electrical boxes can be deceivingly tricky. One wrong measurement and your cut is ruined. Fortunately, there are a few easy methods for marking electrical boxes, and if you follow the steps correctly, you won’t even need a ruler. In this guide, we’ll teach you everything you need to know to mark electrical boxes like a pro.
In the video above, This Old House general contractor Tom Silva shows two simple ways to mark where electrical boxes are on drywall sheets.
*Unless otherwise noted, costs in this article reflect an average of prices that our team found from hardware stores like Lowes and Home Depot, and on Amazon.com.
Are Accurate Marks Important?
If you don’t mark electrical boxes properly on your drywall, your work could look sloppy and unfinished. Even worse, it could be unsafe. Here are a few reasons why you should take your time and get your markings right:
- Safety: Accurate cuts ensure that electrical components are properly enclosed and protected, reducing the risk of electrical fires or shocks.
- Aesthetics: Precise openings result in a cleaner, more professional appearance, contributing to the overall visual appeal of the space.
- Code compliance: If you don’t cut your electrical box holes correctly, you may not meet code requirements, which could cause you to fail inspection.
If you take the time to mark your electrical boxes correctly, you’ll avoid common mistakes and spare yourself a lot of headaches in the long run.
Method 1: Using a Level for Precise Marking
A method shown by Silva in the video above uses a level to transfer the electrical box location to the drywall sheet without taking any measurements.
- Stand level on the floor and hold it perfectly plumb against the side of the electrical box.
- Use a pencil to mark the top and bottom of the electrical box on the level.
- Next, draw a line along the side of the level and onto the floor.
- Hold the level plumb against the opposite side of the electrical box, and draw a second line onto the floor.
- Set the drywall sheet in place against the wall. Stand the level on one of the pencil lines on the floor. Plumb up the level and draw a vertical line onto the drywall sheet. This line represents one side of the electrical box.
- Transfer the two pencil marks on the level onto the drywall, representing the top and bottom of the electrical box.
- Now stand the level on the second pencil mark on the floor. Plumb up the level and draw a vertical line onto the drywall sheet. This represents the remaining side of the electrical box.
- Connect the two horizontal lines on the drywall with the two vertical lines to complete the outline of the electrical box.
- Cut along the lines with a jab saw to complete the electrical box cutout.
This method is very useful when working alone since you don’t need to hold the drywall sheet in place while marking.
Method 2: Using Marking Transfer Sheets
While you could use a pencil to draw lines, you can use marking transfer sheets for an even easier, quicker method—as shown in the video above. You don’t need a tape measure for either this method or Method 1, but if you’re new to DIY projects and are worried about making a mistake, it doesn’t hurt to keep one close by.
To accurately mark electrical boxes, try using marking transfer sheets:
- Take a mark-and-cut transfer sheet and peel off the protective backing to expose the sticky adhesive surface.
- Press the transfer sheet onto the electrical box.
- Stand the drywall sheet in position against the wall.
- Use a rubber mallet to tap on the drywall directly over the electrical box. The outline of the box will be transferred to the rear of the drywall sheet.
- Turn around the drywall sheet and cut along the red transfer lines.
If you’re dealing with multiple electrical boxes or working in tight spaces, this method can be a huge time saver.
Troubleshooting Common Issues
Even with careful marking and cutting, you may run into some challenges. Here are solutions to common problems:
- Oversized openings: If the cutout is too large, use drywall patches or joint compound to fill small gaps around the electrical box. Then, you can sand the drywall down for a smooth finish.
- Undersized openings: To fix openings that are too small, carefully widen the opening using a drywall rasp or utility knife. Take small amounts off at a time to avoid overcutting.
- Misaligned openings: If your markings look misaligned, double-check your marks and measurements before cutting. If necessary, use a larger cover plate to conceal minor misalignments.
While you can correct small mistakes, it’s always best to get it right the first time around. If your measurements are far off from where they should be, erase your pencil lines and try again.
Safety Considerations When Marking Electrical Boxes
When working with electrical boxes and drywall, keep these safety tips in mind:
- Always turn off power to the circuit you’re working on at the main electrical panel. Safety should be your top priority.
- Wear safety glasses and a mask to protect your eyes and lungs from drywall dust.
- Cut holes for electrical boxes in the drywall before you install them on the wall to avoid damaging electrical wires behind the drywall.
Be careful when cutting or sanding drywall, as inhaling drywall dust and respirable silica can be harmful. According to the Centers for Disease Control and Prevention, workers who breathe in drywall dust are more at risk for silicosis and lung cancer. Drywall dust can also cause irritation, coughing, and trouble breathing.
Even though cutting holes in drywall for electrical boxes is a small DIY project, you should still use proper safety precautions. Finishing the job is important, but not as important as your health.
Tools and Materials Needed To Mark Electrical Boxes
Before you begin marking for electrical boxes, gather the following tools and materials:
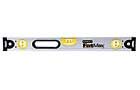
 Level
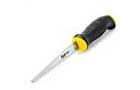
Level- Drywall saw
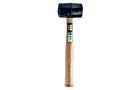
- Rubber mallet