Project details
Skill
Cost
Estimated Time
*Cost information in this article sourced from Angi.
With proper planning and execution, you can create a safe and enjoyable backyard ice rink that will last throughout the winter. This Old House experts Jenn Nawada and Nathan Gilbert guide Cece, a homeowner, through the process of constructing a backyard ice rink, demonstrating key techniques and considerations along the way.
Choosing the Right Location
You’ll want to start by picking out a good location for your rink. Here are key factors to consider:
- Adequate space: Pick a spot large enough to accommodate your desired rink size while allowing for safe skating.
- Level ground: Choose an area that is as level as possible to ensure even ice thickness and prevent water from pooling on one side.
- Sun exposure: Opt for a shaded area to help maintain ice quality and reduce melting.
In the video, Nawada and Gilbert assess Cece’s yard to determine the best location for the rink, emphasizing the importance of a level surface and proper sun exposure.
Backyard Ice Rink Materials and Tools Needed
Before beginning construction, gather these materials and tools:
- 2×10 or 2×12 lumber for framing
- Concrete form stakes
- Galvanized brackets and screws
- Garden hose
- Hammer
- Impact driver or screw gun
- Shovel
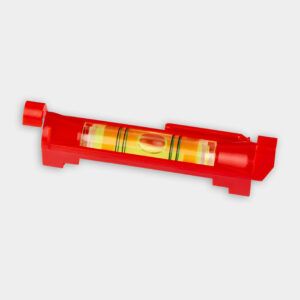
- String line level
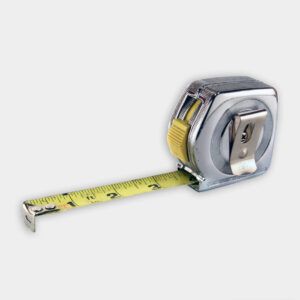
- Tape measure
- White polyethylene sheeting (7mm thickness)
Choosing Quality Materials
Selecting select durable materials that can withstand the winter elements is key. For instance, using lumber that resists warping under wet conditions and picking screws galvanized to resist rust will increase the rink’s longevity. The use of a thick polyethylene liner will reduce the chance of potential leaks.
Building the Rink Frame
Next, you’ll build a sturdy frame to contain the water and support the ice. Here’s how to get started:
- Measure and mark the desired rink size using stakes and string.
- Level the string using a line level to determine the frame’s height.
- Assemble the frame using 2×10 or 2×12 lumber, connecting the boards with galvanized brackets and screws.
- Square the frame and secure it to the ground using concrete form stakes.
- Level the frame and fill any gaps underneath with scrap lumber to ensure stability.
Gilbert demonstrates how to use galvanized brackets and screws to create strong corner joints. These joints create a durable frame that’s easy to disassemble at the end of the season.
Installing the Ice Rink Liner
The ice rink liner holds water and creates a smooth ice surface. Here’s how to install it properly:
- Lay out the white polyethylene sheeting inside the frame, allowing for at least 1 foot of overhang on all sides.
- Smooth out any wrinkles or folds in the liner to ensure an even surface.
- Secure the liner to the outside of the frame using staples, being careful not to puncture the portion that will hold water.
Nawada explains that white plastic helps reflect sunlight, maintaining ice quality by reducing melting.
Adding Functional and Visual Elements to the Rink
Before filling the rink with water, you can add various elements to make it feel more like a real hockey arena. Here are just a few features you can incorporate into your design:
- Centerline, zones, and goal lines: Create the center and goal lines with red-painted PVC boards and mark the end zones with blue-painted PVC boards.
- Face-off circles: Use blue and red PEX tubing to fashion the face-off circles.
- Goal creases: Add other markings using PEX, PVC, or other waterproof materials.
Once the ice is in place, you can also build DIY goalposts using PVC pipes, install a netting system around the perimeter to keep pucks in play and protect the surrounding area, and add outside seating.
Filling and Freezing the Rink
The final step is to fill the rink.
Use a garden hose to fill the rink slowly with water. According to Gilbert, filling the rink can take at least eight hours, so expect to exercise some patience. During this time, periodically check the water level for even distribution and adjust if necessary.
Once you’ve filled the rink, give the water at least two days to freeze solid before skating on it. The freezing time may take longer, depending on the temperature.
Maintaining Your Ice Rink
To keep your rink in top condition throughout the winter, follow these maintenance tips:
- Monitor ice thickness: Add water as needed to maintain solid ice that’s at least 3 inches thick.
- Patch cracks and holes: Fill in and level any imperfections that develop in the ice to ensure a smooth skating experience.
- Resurface the ice: Periodically add a thin layer of water to create a fresh, smooth surface.
- Snow and debris: Remove fresh snowfall regularly to prevent puddles and ice mounds from forming. Also, clear debris such as mud and leaves, which can create skating hazards.
Regular maintenance keeps the rink safe and enjoyable throughout the season. Investing in a good snow blower or a large plastic snow shovel can make snow removal more manageable. Additionally, after heavy use, consider using a DIY ice resurfacer, which can be made from a PVC pipe, to apply a thin layer of water evenly.
Backyard Ice Rick Safety Considerations
Safety should be a top priority when building and using your backyard ice rink. Consider the following safety factors:
- Clear perimeter: Keep the area surrounding the rink free of obstacles, trip hazards, and glass.
- First aid supplies: Have basic supplies on hand in case of accidents.
- Ice depth: Ensure the ice is at least 3 inches thick before allowing skating.
- Lighting: Install lights if you intend to use the rink after dark.
- Supervision: Always supervise any skating children.
Incorporate safety protocols, like testing the ice thickness regularly and encouraging skaters to wear helmets, especially young children and beginners.
Dismantling and Storage
When the winter season ends, dismantle and store your rink components. First, allow the ice to melt completely. Once the ice has melted off, remove the liner and hang it out to dry thoroughly before folding and storing it to prevent mold growth. Next, disassemble the frame and organize the hardware. Store the frame lumber and hardware in a dry location until next season.
Environmental Considerations for a Backyard Ice Rink
Building a backyard ice rink can have some environmental impacts. Consider these factors:
- Chemical use: Avoid using harmful chemicals to maintain the ice, as they can seep into the ground.
- Grass health: Install the rink after the grass becomes dormant and remove it before spring to minimize lawn damage.
- Water usage: Be mindful of water consumption when filling and maintaining your rink.
If you notice any issues with grass health after disassembling your rink, consider aerating the lawn and lightly reseeding any damaged areas.
For an eco-friendlier approach, explore options like using collected rainwater to fill the rink or considering synthetic ice that doesn’t require water or freezing temperatures.
Tips for a Smoother Ice Skating Experience
Enhancing your ice rink can involve minor adjustments and regular upkeep. Here are some additional tips:
- Edges and corners: Regularly check and maintain the rink’s edges and corners to prevent cracking and ensure smooth transitions.
- Temperature monitoring: Keep an eye on the weather forecasts. After a warm day, resurface the ice at night when temperatures drop to prevent rough patches.
- Gear storage: Create a small storage area near the rink for first aid supplies, skates, helmets, and maintenance tools to keep everything you need within easy reach.
Our Conclusion
With careful planning, proper construction, and diligent maintenance, you can create a safe and fun skating experience in your yard. Remember to prioritize safety and keep an eye on the condition of the rink so you can enjoy the unique opportunity to skate under the open sky. Invite friends and family, and make the most of the winter season right at home.
Shopping List
- Concrete form stakes
- Construction lumber
- Galvanized brackets
- Galvanized lag screws
- Galvanized screws
- Landscaping string
- Plastic sheeting