Wood rot is a common problem that affects even the best-maintained homes. It happens when wood is exposed to moisture and warmth, creating an ideal environment for fungi to thrive. Fortunately, repairing rot damage doesn’t always require replacing entire sections of wood.
The Dutchman repair technique is great for addressing localized rot, especially in exterior trim. It involves cutting out the damaged area and replacing it with a custom-fitted piece of wood. In this guide, we’ll explore how to identify rot, prepare for a Dutchman repair, and execute this restoration technique step by step.
Identifying Rot Damage
Early detection is key for preventing the rot from spreading or becoming more severe. Pay special attention to areas where wood meets concrete, masonry, or soil, as these junctions are particularly vulnerable to moisture accumulation. When inspecting for rot, look for these signs:
- Discolored or darker wood
- Cracked, peeling, or blistering paint
- Soft or spongy wood texture
- Visible fungal growth or a musty odor
While visual inspection is helpful, using these tools can provide a more accurate assessment:
- Screwdriver or awl: Probe suspect areas gently. If the tool easily penetrates the wood, rot is likely present.
- Moisture meter: This device can detect excess moisture in wood, indicating potential rot conditions.
- Infrared camera: For more advanced detection, this tool can reveal hidden moisture pockets within walls or ceilings.
Preparing for a Dutchman Repair
Before beginning the repair process, gather the below tools and materials.
- Utility knife
- Japanese handsaw
- Chisel set
- Sandpaper (100- and 150-grit)
- Polyurethane glue
- Stainless steel trim screws
- Replacement wood (preferably rot-resistant, like cedar)
- Oil-based primer and paint
- Drill with bits
- Safety glasses and dust mask
When working with wood and tools, take the appropriate safety precautions.
- Handle sharp tools with care and keep them out of reach of children.
- Wear safety glasses to protect your eyes from wood chips and dust.
- Use a dust mask to avoid inhaling wood particles.
- Work in a well-ventilated area, especially when using primers and paints.
Step-by-Step Guide to Dutchman Repair
Follow these steps to complete a successful Dutchman repair.
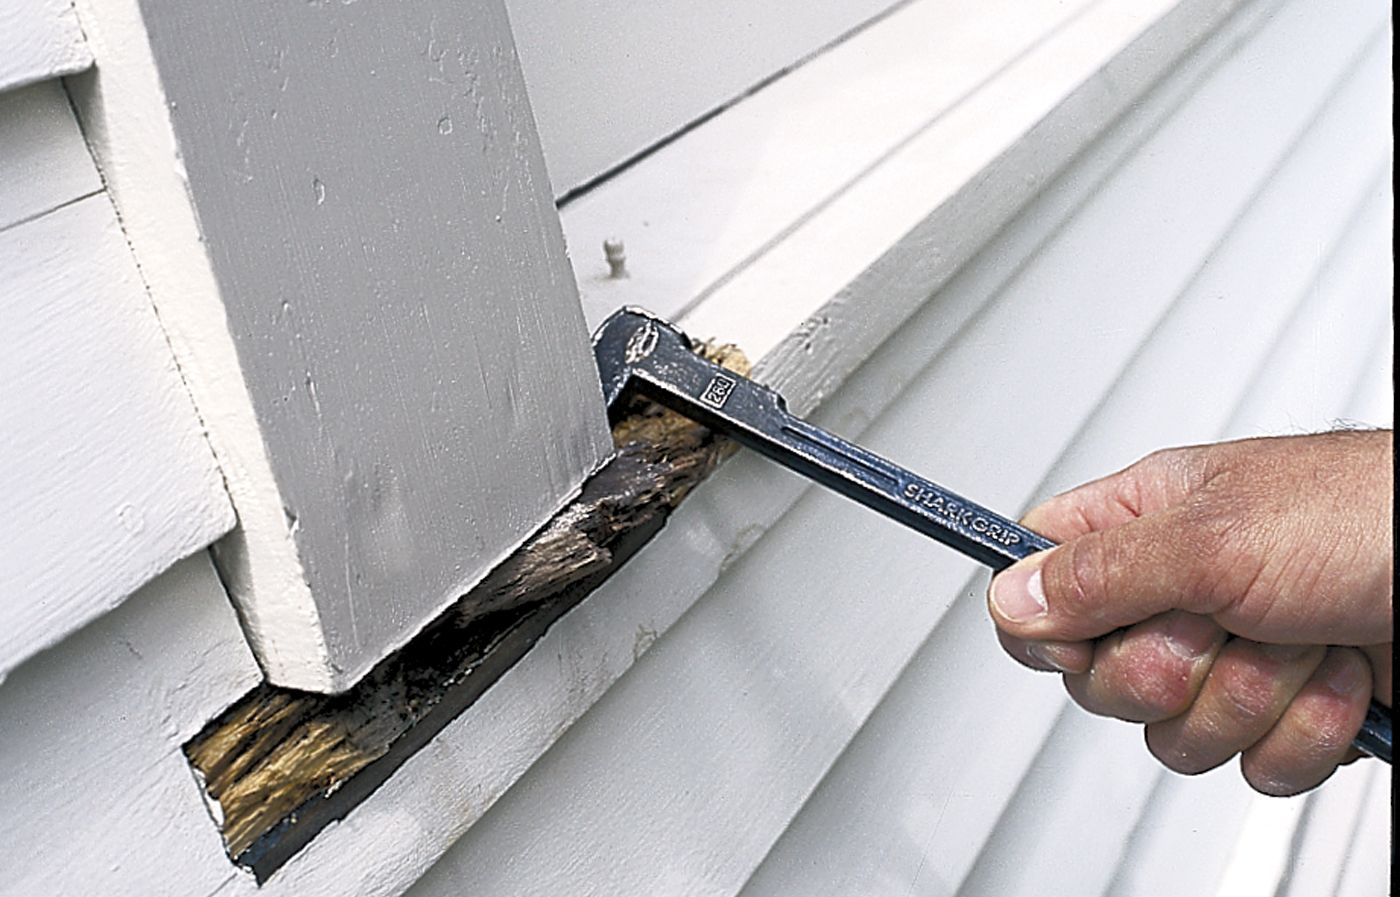
Removing Damaged Wood
Use a utility knife to score around the damaged area, creating a clean line for cutting. With a Japanese handsaw, make precise cuts to remove the rotted section. Ensure your cuts are straight and smooth for a tight fit later. Use a chisel to clean out any remaining rot, creating a clean, solid surface for the new piece.
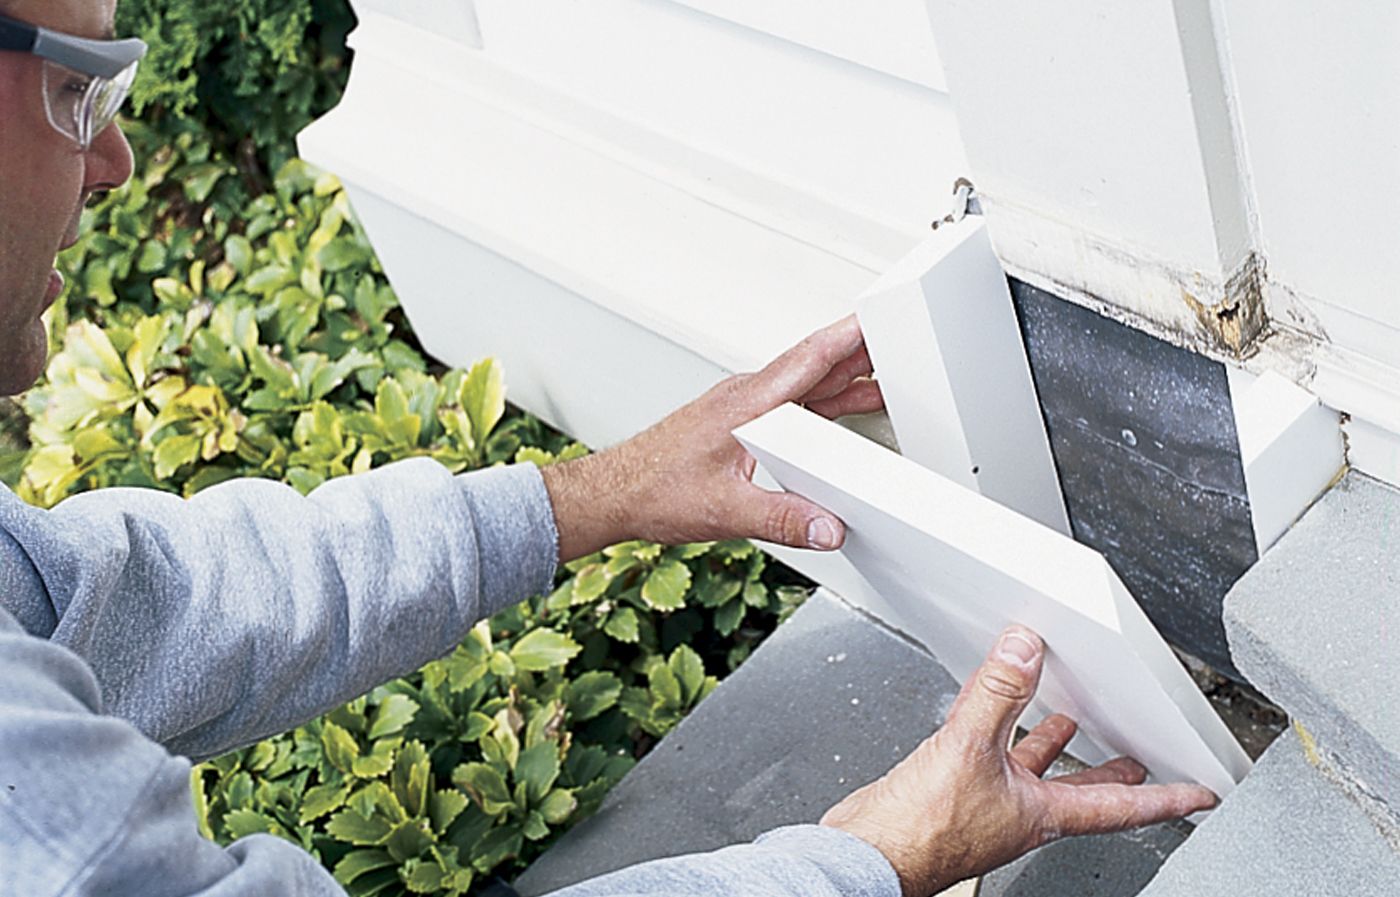
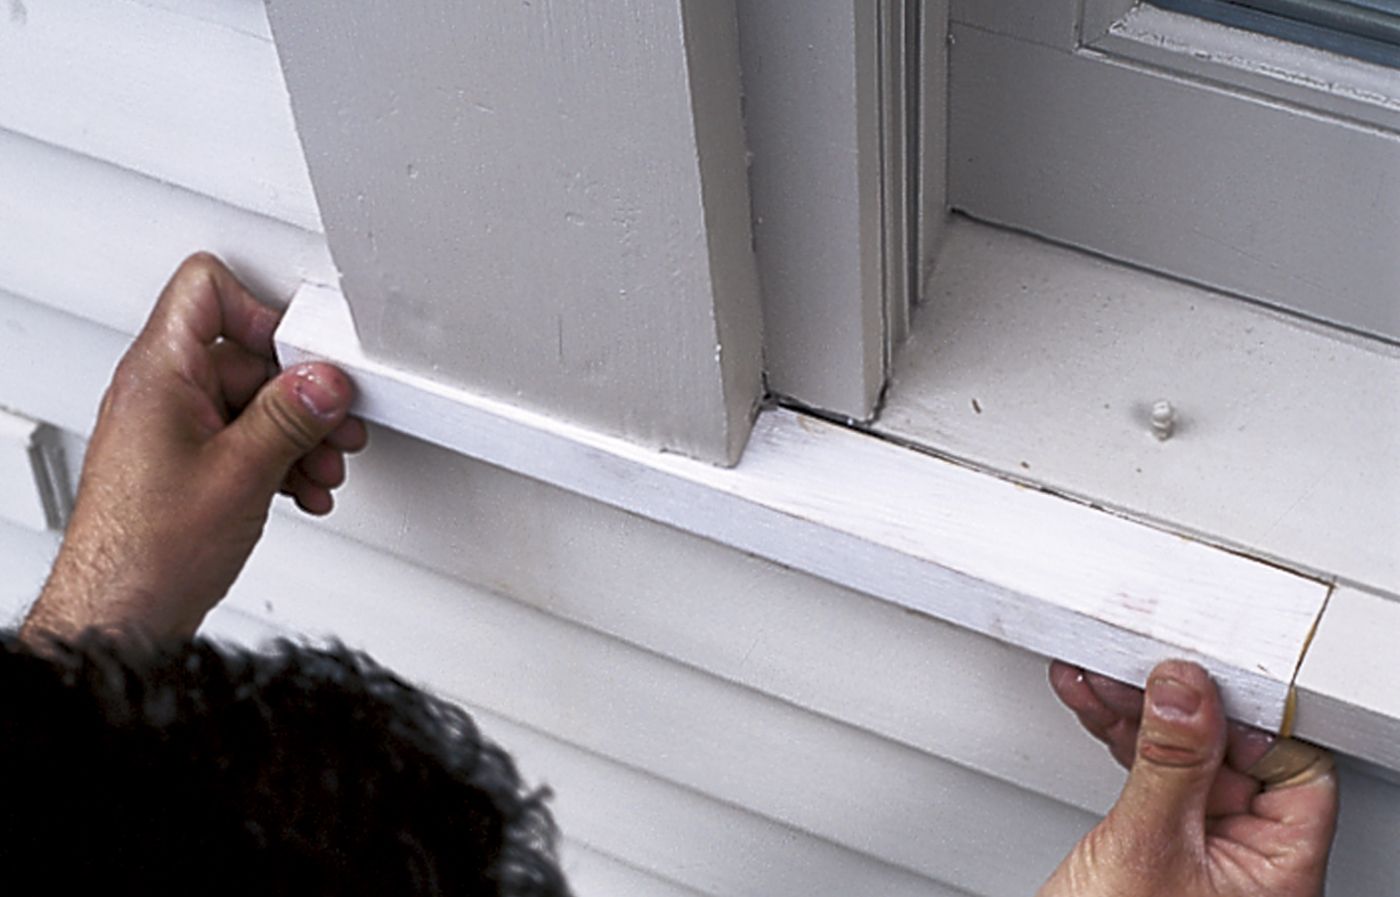
Cutting and Shaping the Dutchman Patch
Sand the edges of both the patch and the existing wood to create smooth, even surfaces for bonding. Measure the area where you removed the rot and cut a piece of replacement wood slightly larger than needed. Carefully trim and shape the new piece to fit snugly into the cutout area. Test-fit multiple times to ensure a perfect match.
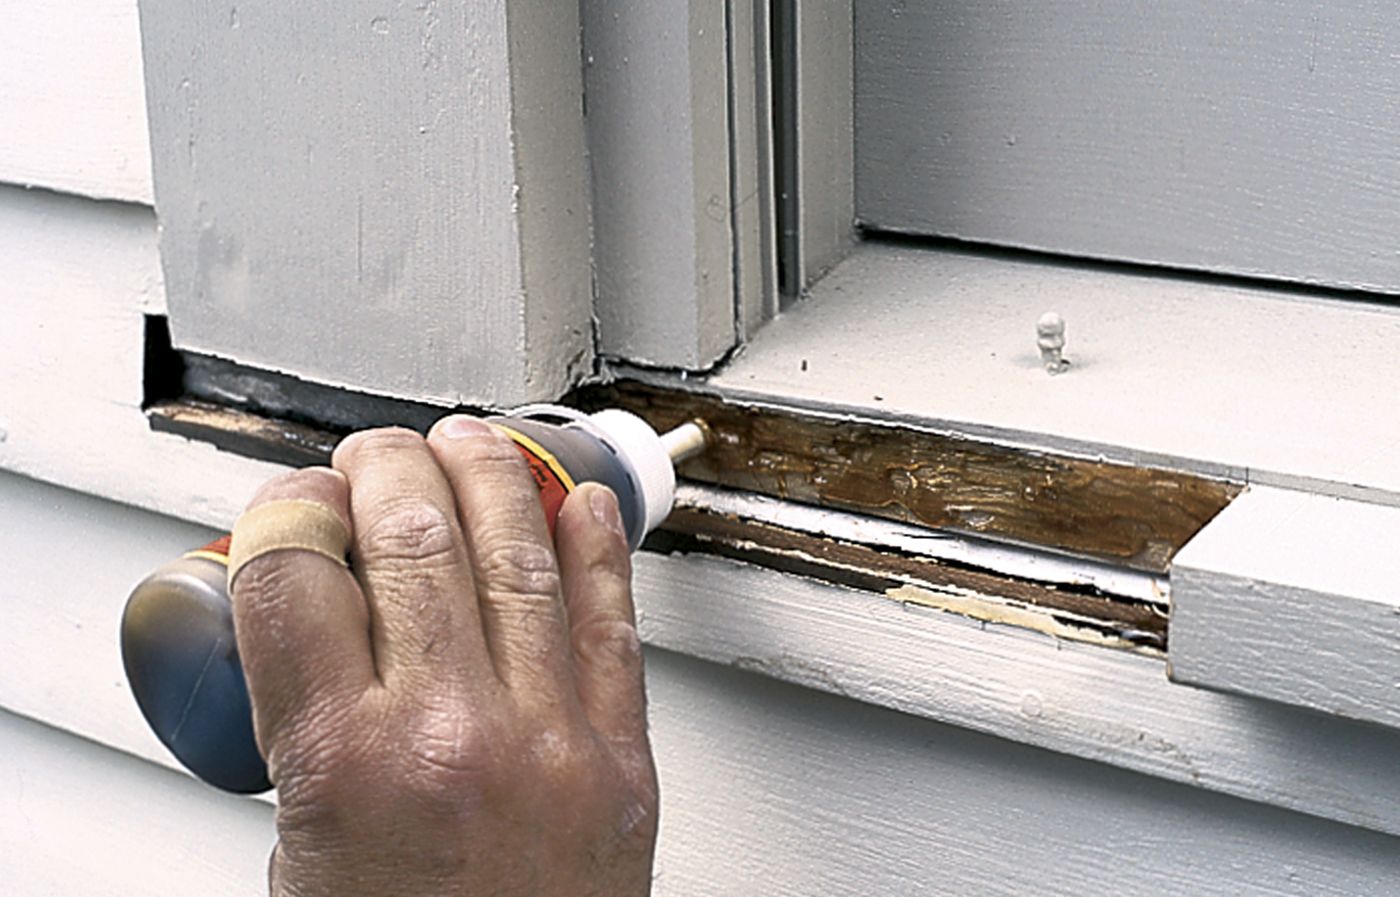
Fitting and Securing the Patch
Apply a thin layer of polyurethane glue to both the patch and the existing wood. Dampen the surfaces slightly to activate the glue. Press the patch firmly into place, ensuring it sits flush with the surrounding wood. Drill pilot holes and secure the patch with stainless steel trim screws, countersinking them slightly below the surface. Allow the glue to cure completely according to the manufacturer’s instructions.
Advanced Techniques for Repairing Rot Damage
For a more professional-looking finish, try these techniques to blend your Dutchman patch with the surrounding wood.
Matching Wood Grain and Color
Select replacement wood that closely matches the grain pattern and color of the existing wood. Orient the grain of the patch to align with the surrounding wood grain for a more natural appearance. If necessary, use wood stains or dyes to adjust the color of the patch to match the existing wood.
Blending the Repair With Surrounding Wood
Once the glue has cured, use a sharp chisel or block plane to level any slight differences in height between the patch and surrounding wood. Sand the entire area with progressively finer grits of sandpaper. Start with 100-grit and finish with 150-grit to create a smooth, uniform surface. Apply wood filler to any small gaps or screw holes, then sand again when dry.
Preventing Future Rot Damage
After completing your Dutchman repair, apply a coat of oil-based primer to the repaired area and surrounding wood. Once the primer is dry, apply two coats of high-quality exterior paint, allowing proper drying time between coats. Pay special attention to end grain and joints, ensuring they’re well-sealed against moisture intrusion.
Regular Maintenance Tips
- Inspect exterior wood surfaces annually for signs of paint failure or water damage.
- Clean gutters and downspouts regularly to prevent water from backing up onto wood surfaces.
- Trim back vegetation to allow air circulation around wooden structures.
- Address any water leaks or drainage issues promptly to prevent moisture accumulation.
Other Tips for Repairing Rotted Wood
While the Dutchman technique is effective for many rot repairs, other methods may work better in certain situations.
Epoxy Fillers
Epoxy fillers can repair smaller areas of rot damage. These two-part compounds can be molded and shaped to fill voids left by rot, and they bond strongly to the surrounding wood.
Wood Consolidants
Wood consolidants are another type of epoxy that can fix wood rot. They penetrate and harden soft, rotted wood, and are particularly useful for stabilizing areas where some rot remains after cleaning, providing a solid base for epoxy fillers or paint.
Dutchman Repair in Outdoor Furniture
Outdoor furniture is particularly susceptible to wood rot due to constant exposure to the elements. The Dutchman technique can extend the life of your favorite pieces without compromising their appearance.
Preventing Wood Rot
Now that you’ve fixed your rotted trim, you want to make sure it stays fresh and solid for many years. Incorporating routine maintenance into your home care schedule can prevent rot damage before it starts. Regularly apply sealant to exposed wood and ensure proper drainage around wood structures.
Common Areas Prone To Rot
Certain areas of your home are more susceptible to rot due to their exposure to moisture. The following areas often have horizontal surfaces or end grain exposed, making them more likely to trap water and develop rot over time. Keep an eye on these spots and take extra precautions if needed:
- Windowsills and frames
- Door frames and thresholds
- Exterior trim and siding
- Deck boards and railings
- Roof eaves and fascia boards
Rot-Resistant Wood Types
Using rot-resistant wood for repairs and construction projects around your home can help combat potential rot issues. Cedar, redwood, and pressure-treated wood are all excellent options that naturally resist fungi and moisture.