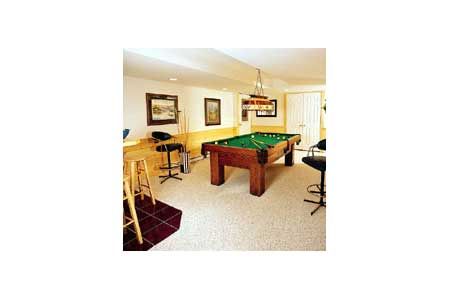
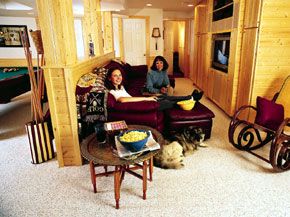
Most basements are little more than a place to cultivate cobwebs and store cans of paint. But fixing up a full-height basement can dramatically increase the usable living space in your house at a far lower cost than adding on.
Changing a concrete dungeon into an inviting living area is a challenge, and not every basement is a good candidate for finishing. Key considerations for conversion include controlling moisture, adding ventilation and light, and finding a way around hanging drain lines, ductwork and wiring. Although you can do some of the work yourself, most of it is best left to an experienced pro.
In this guide, we’ll walk you through how to determine whether your unfinished basement is suited for a remodel, and then how to turn it into a cost-effective addition to your home.
Assessing Your Basement’s Suitability for Expansion
Before you begin any basement renovation project, you must assess your basement. In addition to checking with local building regulations, there are basement-specific concerns to keep in mind.
Structural Considerations
Assess your home’s structural integrity before embarking on a basement expansion project. This includes evaluating the foundation, load-bearing walls, and overall stability of your house. A professional structural engineer can help determine if your home can support the proposed changes and identify any necessary reinforcements.
Moisture and Waterproofing
“If your house has a history of basement flooding, you’re crazy to consider a basement renovation until you solve that problem,” says remodeling contractor Paul Eldrenkamp, of Newton, Massachusetts. Most water problems, he says, are caused by inadequate control of roof runoff.
You can repair cracks in the foundation, clear your gutters of clogs, and slope the ground away to solve flooding problems. But if water still seeps in, installing or repairing foundation drains might be necessary.
Radon
Radon is a naturally occurring radioactive gas common in some parts of the country. A simple test will measure the level of radon in your basement and indicate whether mitigation is a good idea. If so, radon can be collected by buried drain lines and vented to the outside, much like excess water.
Local Building Codes and Regulations
Building codes vary, but generally, the finished ceiling height in a basement must be at least 7 feet. Codes permit some lower obstructions, and building inspectors are often willing to compromise when contractors encounter minor height problems. Your best bet is to contact your local inspector while you’re still in the planning stage. The inspector is likely to be more sympathetic when he gets consulted early in the process.
Once height requirements are met, there is still the question of doors and windows for emergency escape or egress. Building codes typically require one emergency window (or door) in a basement that contains habitable space, though each bedroom needs its own. If you turn a basement into a family room or a home theater, you probably won’t need the same number of emergency exits that would be required for bedrooms. Adding a code-compliant emergency exit can be expensive in a below-grade basement.
Stairways also can be a problem. Older stairways may not meet code requirements and might have to be replaced, adding to the project’s cost. Some contractors recommend new staircases anyway to make a remodeled basement more inviting.
Utilities and Mechanicals
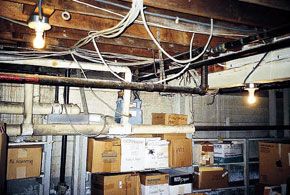
“Typically, people do not plumb houses with an eye to renovating their basements,” Eldrenkamp says. Water lines, air ducts, bathroom and kitchen drains, and supply and return lines for a hot-water heating system all could be located below ceiling joists, where they are smack in the way of a renovation.
Wiring and plumbing can often be relocated. However, the process is expensive, and it is sometimes next to impossible to move bulky utilities like drain lines and heating ducts. As a result, builders may hide plumbing, heating, and wiring runs in a ceiling, wall, or closet.

Sometimes offending pipes are simply left exposed and painted. One thing to remember: When tucking water and drain lines out of sight, don’t block access to water shutoffs and drain clean-outs.
Because plumbing and wiring can be hard to disguise, many builders turn to drop ceilings. Common to commercial buildings as well as to residential construction, these ceilings consist of a metal framework suspended several inches below ceiling joists that support drop-in panels available in a variety of textures and colors. Acoustic panels that deaden sound are widely used, especially if the basement is used as a home theater or a getaway for teenagers.
Tips for Your Basement Expansion
As you develop your plan for basement remodeling, keep in mind some of these basement-specific renovation tips from professionals.
Finished Walls
Because concrete in contact with the ground is generally cool, it can become a condensing surface for water vapor in the warm air escaping from a finished basement. The result? Damp building materials, mildew and, eventually, rot. Air will be musty and finished surfaces ruined unless you make the necessary adjustments. As Massachusetts builder Fred Unger puts it, “If you get a hack to do the work, it’s going to smell like gym socks.”

Unger isolates damp concrete walls from the rest of the space with 1 inch of extruded polystyrene insulation, followed by a layer of 6-milimeter polyethylene. Foam insulation can be sprayed on rough walls. Impermeable layers of foam and polyethylene separate wall framing from damp concrete or block while giving water vapor no cool surface on which to condense.
Joe Stanton, a Rhode Island builder, says it’s safer to give walls a way of drying out should any water or condensation collect inside. Fears of trapped moisture also prompt some remodelers to use light-gauge steel framing on outside basement walls. Although builders might differ on these details, they would agree that obvious water problems – such as leaking foundation walls – must be solved first.
Flooring
When it comes to flooring, just about any material will work — tile, carpet, vinyl or laminate. Fewer contractors, however, choose conventional hardwood flooring because moisture in the slab could cause the wood to swell and buckle.
Lighting
Clear away shrubbery from existing window wells to make the most of what natural light is available. If the basement has a steel bulkhead, a door with glass lights can be installed at the bottom of the steps, and the bulkhead doors can be left open in good weather. Similarly, replacing solid doors in the basement stairwell with glass doors may help to increase the amount of natural light.
Remodelers usually add several basement lighting circuits for additional light. Track lighting can be attractive in basements with plenty of headroom, even if it is used only as accent lighting.
Ventilation
Musty, damp air may be tolerated in a basement you visit only occasionally. But once the basement becomes a true living space, some ventilation is crucial in controlling air quality.
Eldrenkamp likes to use a reversing fan. In the winter, it draws in fresh, dry air from outdoors (the volume of air is low enough so the basement doesn’t feel like an unheated shed). In summer, moist air can be pumped out of the house.
Carl Hyman, owner of Alure Home Improvements, often uses a wall-mounted air exchanger, which vents cooler, damp air to the outside. If the house already has a forced-air heating system that includes air conditioning, the basement can be added as another zone. Air conditioning naturally lowers moisture levels in the air.
Another option is to add dehumidifiers, but these have several drawbacks. They are more expensive to run than a ventilation fan, and unless a dehumidifier is plumbed directly to a drain line it will have to be emptied periodically. And, as Heim points out, dehumidifiers tend to be noisy.
Our Conclusion
Turning your basement into a usable living space can make your home more valuable and comfortable. While it can be challenging to deal with moisture, ventilation, and utilities, these issues are easier to solve with good planning and some professional help.
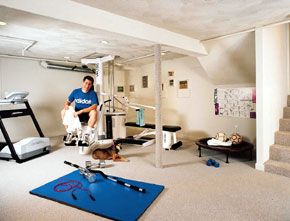
Start by checking if your basement is a good candidate for renovation and follow local building codes. Whether you want a family room, home theater, or exercise space, the work you put into remodeling your basement will create a bonus area for activities in your home.