We may be compensated if you purchase through links on our website. Our team is committed to delivering honest, objective, and independent reviews on home products and services.
Project details
Skill
Cost
Estimated Time
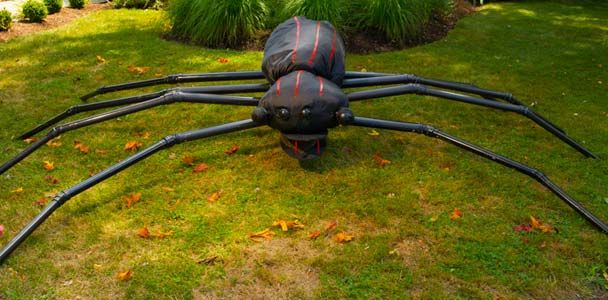
Halloween is the perfect time to unleash your creativity and transform your home into a spooky spectacle. One of the most effective ways to create a spine-chilling atmosphere is by constructing a giant Halloween spider. In this guide, we’ll walk you through the process of building a massive spider using affordable materials like PVC pipes, making it an ideal DIY project for Halloween enthusiasts.
*Unless otherwise noted, costs in this article reflect an average of prices that our team found from hardware stores like Lowes and Home Depot, and on Amazon.com.
Step-By-Step Instructions to Build a Giant Halloween Spider
This oversized arachnid is sure to startle trick-or-treaters and impress adults.
Make the Spider Base
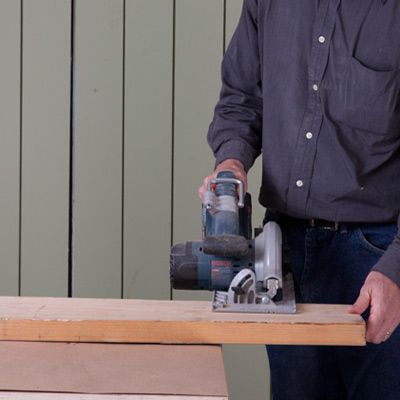
The first step in creating your giant Halloween spider is to construct a sturdy base that will be the foundation for the entire structure. This base will support the spider’s body and legs, ensuring stability and longevity. A strong foundation is essential to withstand the outdoor elements and support the spider’s weight effectively.
- To begin, you’ll need a 2×10 piece of wood cut to 36 inches in length. Using a circular saw, carefully measure and cut the wood to the specified dimensions.
- Once cut, thoroughly sand the edges to prevent splinters and create a smooth surface.
- After preparing the wood, it’s time to paint it black. Choose a high-quality exterior paint that can withstand outdoor conditions. Apply multiple thin coats for better coverage and durability. Allow each coat to dry completely before applying the next one.
Make the Spider’s Mouth
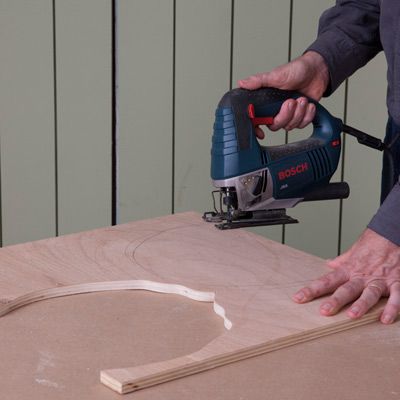
Creating a menacing mouth for your giant spider will add to its frightening appearance.
- Begin by sketching the outline of the mouth on a piece of plywood. Make sure to draw both the top and bottom sections separately. Use a pencil for easy modifications if needed.
- Once you’re satisfied with the design, it’s time to cut out the shapes.
- Carefully cut along the pencil lines using a jigsaw.
- After cutting, sand the edges to remove any roughness.
- Finally, paint both pieces black to match the base.
Make the Spider’s Fangs
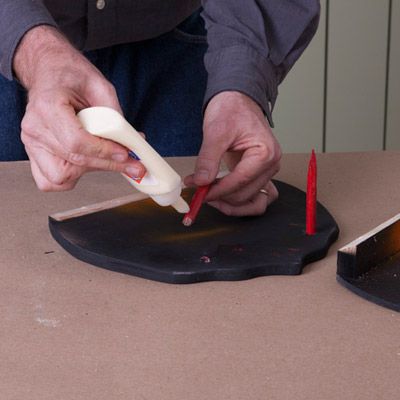
No spider is complete without its fearsome fangs. Properly crafted fangs can make your spider look even more intimidating as it looms in your yard.
- Start by cutting a 45-degree angle out of the long edge of a 1×2 piece of wood using a jigsaw.
- Attach the top and bottom of the mouth to this 1×2 using #8 1 1/4-inch wood screws. Ensure the top of the mouth sits securely on the angled edge to maintain stability.
- For the fangs themselves, use a handsaw to cut 3/8-inch dowels to the desired length.
- With a utility knife, carefully carve a point at the end of each dowel to create sharp-looking fangs.
- Drill 3/8-inch holes inside the top of the mouth to accommodate the fangs.
- Paint the fangs a vibrant red for a truly menacing look, then glue them securely into the pre-drilled holes.
Attach the Caps to the Frame
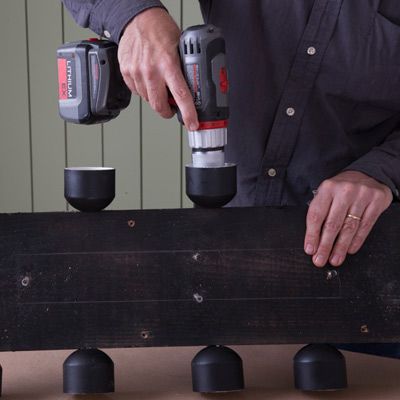
The caps will serve as connection points for the spider’s legs, so it’s important to attach them securely to the frame.
- Begin by painting eight PVC caps black to match the rest of the spider’s body.
- Once the paint is dry, carefully drill pilot holes for the fasteners in each end cap. These pilot holes will prevent the wood from splitting when you attach the caps.
- Next, position the caps on the frame where you want the legs to be attached. Using appropriate screws, fasten the caps firmly to the frame.
- Double-check that each cap is securely attached and aligned correctly to ensure the legs are properly positioned.
Put the Mouth on the Spider
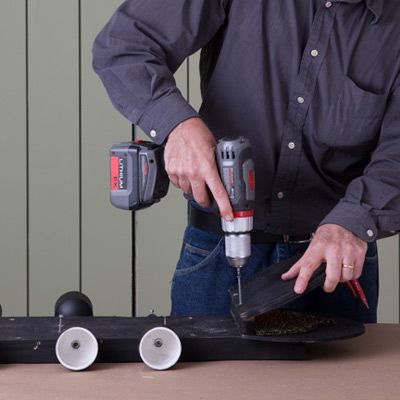
Attaching the mouth to the spider’s body will bring your creation to life.
- First, make two pilot holes in the assembled mouth, through the 1×2 support piece, using a 1/8-inch drill bit.
- Carefully position the mouth assembly on the base, ensuring it’s centered and aligned correctly.
- Once you’re satisfied with the placement, drive two 3-inch wood screws through the pilot holes in the mouth and into the base. Make sure the screws are tight, but be careful not to over-tighten and strip the wood.
Cut Pipe for Spider’s Legs
The legs are what make your spider truly giant and imposing.
- Using a circular saw, cut the PVC pipes to the desired lengths for the legs. While you have flexibility in determining the overall length, it’s important to keep the three joints of each leg the same length for symmetry. In our example, each leg section is 2 feet long, but you can adjust this based on how large you want your spider to be.
- After cutting, sand the cut edges of the pipes to remove any burrs or sharp edges.
- Then, paint all the leg pieces and PVC connectors black to match the rest of the spider. Apply multiple thin coats for better coverage and allow each coat to dry completely before handling.
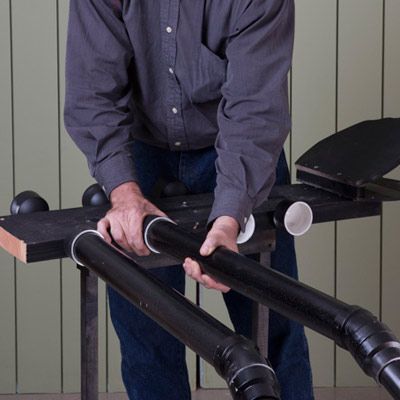
Assemble the Legs

This step requires attention to detail to ensure all legs are uniform and sturdy, which is key for both aesthetics and stability.
- Begin by laying out all your cut and painted PVC pipes and connectors. You’ll notice that the joints have reducer couplings, allowing you to connect wider pipes to smaller ones. This creates a tapered effect, mimicking the look of real spider legs, enhancing the realistic impression your spider gives.
- Before joining them, apply PVC cement to the inside of each connector and the outside of each pipe end. Work quickly, as PVC cement sets quickly.
- Ensure each joint is fully seated and aligned correctly.
- Allow the cement to cure completely per the manufacturer’s instructions before moving or handling the assembled legs.
Attach the Spider Legs
With the legs assembled, it’s time to bring your spider to life by attaching them to the body.
- Carefully plug each leg assembly into the corresponding cap on the body frame. Ensure that each leg is fully seated in its cap and oriented correctly. The legs should be angled outward slightly to give the spider a more natural, stable stance.
- Once all legs are in place, gently lift the entire spider to test the stability. If any legs feel loose, you may need to secure them further with a small amount of adhesive or a mechanical fastener, depending on your specific design.
Make the Spider Body
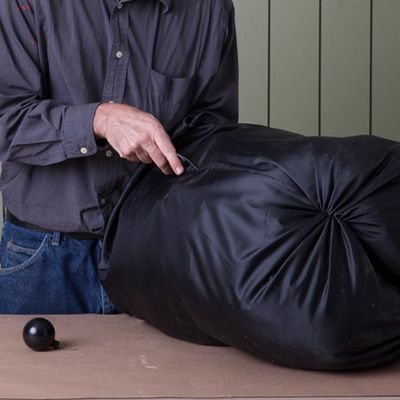
Creating the body of your giant spider adds volume and realism to your creation.
- Start with two black 2-by-3-foot nylon bags—one for the head and one for the body.
- Fill these bags with your chosen stuffing material. Use less filler for the head bag to make it slightly smaller than the body, mimicking the proportions of a real spider.
- For added detail, carefully open the bottom seam of the head bag in four places using a utility knife or seam ripper. These openings will accommodate the eyeballs. Make the slits slightly smaller than the diameter of the balls you’re using for eyes.
- Secure the eyeballs in place using black plastic zip ties for a secure hold. In this design, eyes stand out as realistic features.
- Finally, close each bag using its drawstring, ensuring the stuffing is evenly distributed and the shape is satisfactory.
Paint Stripes on the Body
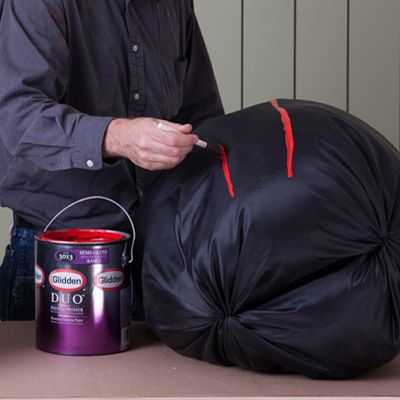
Adding stripes to your spider’s body is the final touch that will bring your creation to life and make it truly terrifying. Stripes add detail and a contrasting element, highlighting your spider’s bold, imposing presence.
- Begin by attaching Velcro tape to the bottom of the stuffed body bag. This will allow you to securely fasten the body to the wooden frame while still being able to remove it for storage or adjustments.
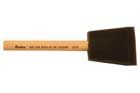
- Once the body is in place, use a foam brush to paint red stripes onto the spider’s body. The stripes can be arranged in various patterns—look at real spiders for inspiration.
- Allow the paint to dry completely before handling or displaying your spider.
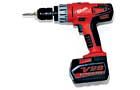
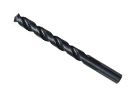
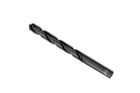
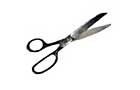
Necessary Tools to Build a Giant Spider
 Circular saw
- Jigsaw
- Drill/driver
- 3/8-inch drill bit
- 1/8-inch drill bit
- Utility knife
- Scissors
- Foam paint brush