Project details
Skill
Cost
Estimated Time
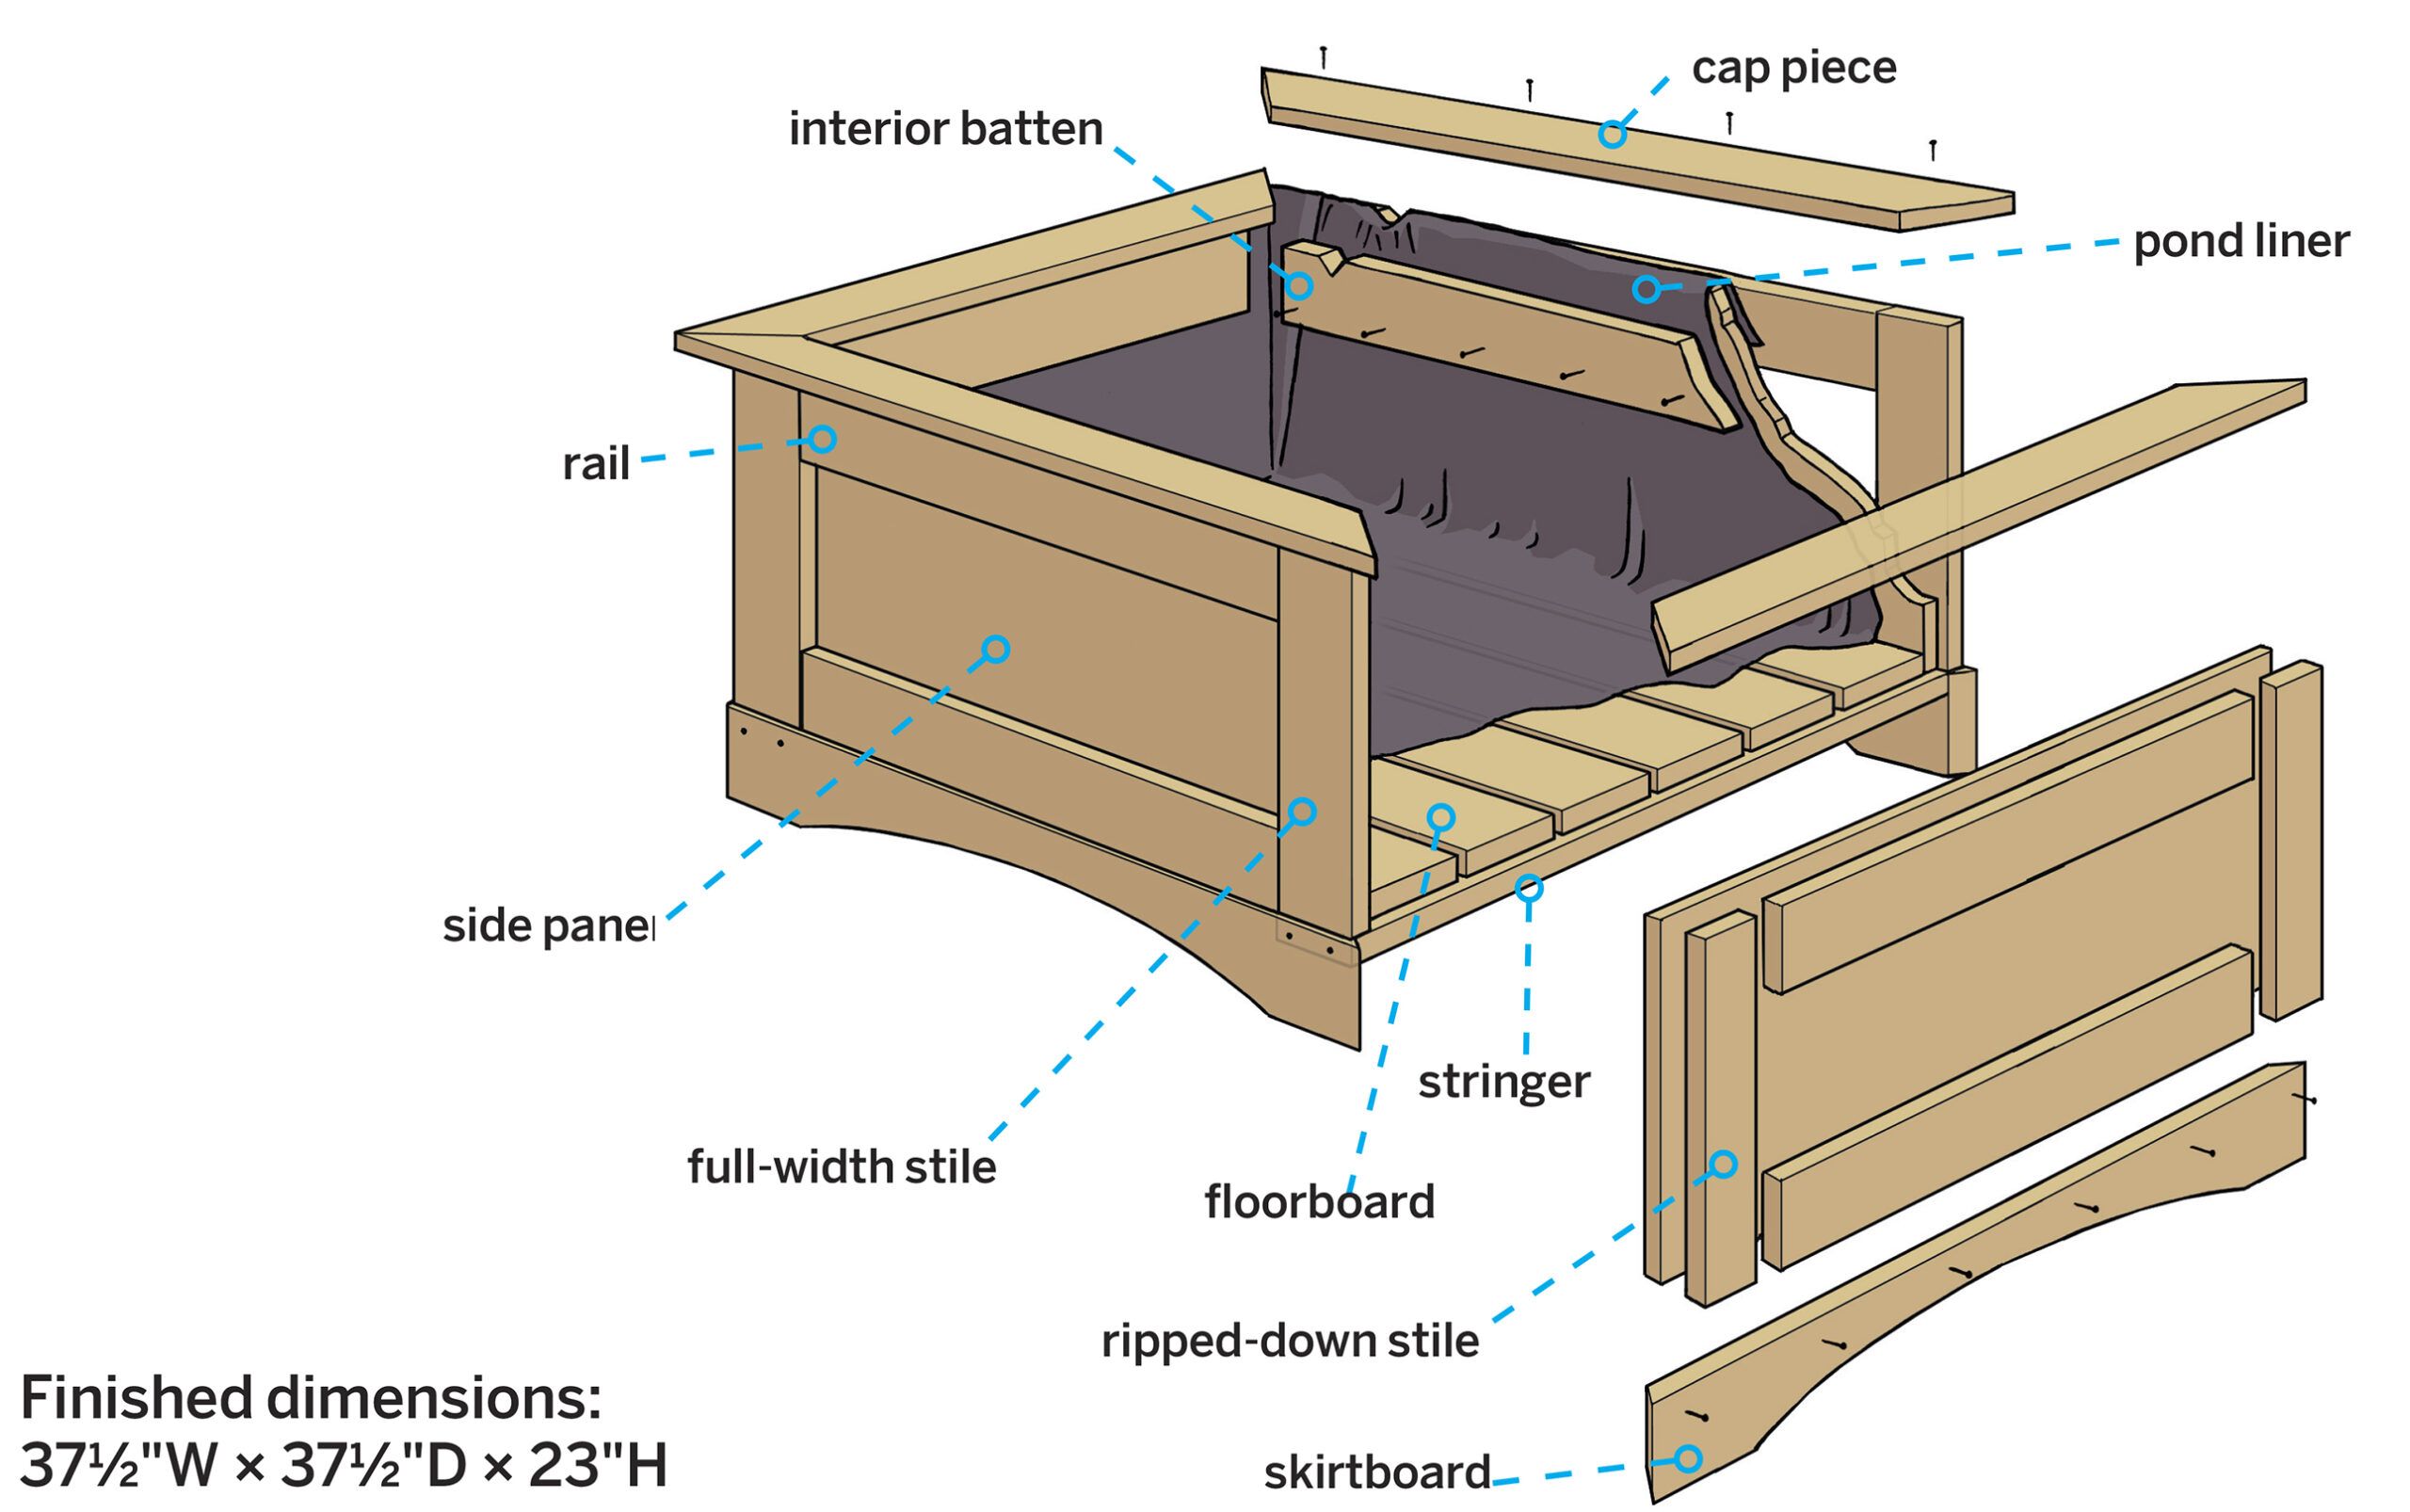
If you want to add a touch of Zen to your patio or garden, a small lily pond is a great choice that’s compact and easy to care for. The simple box construction is sturdy, while a thick pond liner contains the water and a plug-in aerator provides the circulation and oxygen that plants and fish need to thrive in a small space.
Follow along as This Old House contributor Christopher Beidel, also the owner of Pernt, a handmade furniture store in Brooklyn, New York, walks you through the step-by-step for this aqua-gardener’s starter project.
Prepping the Pond Project
This lily pond project can be completed in two days. The first day is dedicated to assembling the box, and the second day is for installing the liner and adding the lilies. Following these steps will create a serene aquatic environment that will bloom with colorful water lilies from June through August.
Tools You’ll Need
 Miter saw
- Bar clamps
- Drill/driver
- Hammer
- Straight edge
- Combination square
- Countersink drill bit
- Jigsaw
- Circular saw
- Caulk gun
- Staple gun
- Handsaw
- Utility knife


Other supplies used in this project include a water bubbler and water lily plants. Before starting this project, you can download and print the lily pond cut list.
Step 1: Cut the Parts to Make the Lily Pond Base
Begin by cutting all the necessary parts for your lily pond base. Use a miter saw to cut all the pieces:
- 2×6 floorboards and stringers
- 1×4 panel frames and interior battens
- Plywood side panels
Cut each piece according to the cut list.

Step 2: Attach the Floorboards to the Stringers
Lay the two stringers on your work surface and place the six floorboards across them. Use ⅛-inch spacers to maintain even spacing between the floorboards.
Clamp the assembly together and adjust it to achieve a ½-inch reveal on the stringers. Secure the floorboards to the stringers using a drill/driver and 1½-inch deck screws. Make sure the floorboards are aligned correctly before tightening the screws.

Step 3: Bevel the Pieces to Make the Lily Pond Skirt
Using a miter saw, cut opposing 45-degree bevels into the ends of each of the four skirtboards.

Step 4: Mark the Decorative Arches for the Lily Pond
To add a decorative touch to your lily pond, you’ll create arches on the skirtboards.
- Clamp a skirtboard to your work surface and mark the center point for the top of the arch, 2 inches from the bottom edge.
- Make additional marks 3 inches in from each end along the bottom edge. Drive finishing nails at these marks.
- Use a flexible straightedge to trace an arch between the nails and the center point.
- Cut out the arch with a jigsaw and use this piece as a template for the remaining skirtboards.

Step 5: Attach the Pond Skirtboards
Flip the base assembly upside down on your work surface. Then:
- Use ½-inch spacers at the corners to align the top edge of the skirtboards with the stringers.
- Arrange the skirtboards upside down around the base and drill pilot holes using a combination countersink bit.
- Secure the skirtboards to the stringers with 2-inch deck screws. For the skirtboards parallel to the stringers, drive screws every 6 inches into the stringers’ edges.
Check that the skirtboards are flush for a neat finish.
Step 6: Cut the Frames to Make the Sides of the Pond
To create a seamless look for your lily pond, you’ll need to adjust the width of some frame stiles.
Rip four stiles down from 3½ inches to 2¾ inches using a circular saw and a straightedge as a guide. This adjustment ensures that all stiles will appear to be 3½ inches wide when the structure is assembled.

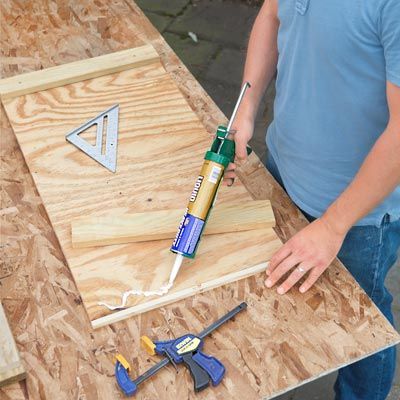
Step 7: Apply the Frames
Begin assembling the side panels by aligning a ½-inch spacer along the short edge of a side panel to set the overhang for the plywood of the abutting panel. Here’s how:
- Apply construction adhesive to the plywood, then press one of the ripped-down stiles in place. Secure the stile with three evenly spaced 1¼-inch deck screws.
- Repeat this process for another panel.
- For the two panels that will sandwich the first two, use a ¾-inch spacer to set the stiles’ overhang.
- Glue and screw the rails between the stiles to complete the frame assembly.
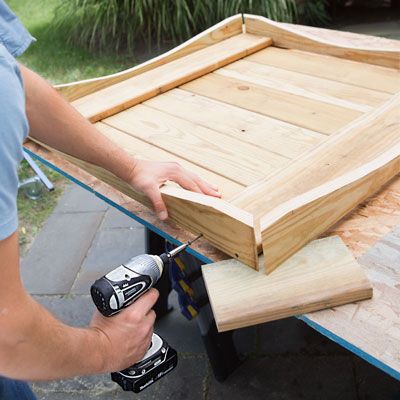
Step 8: Attach the Panels to Assemble the Lily Pond Box
Now it’s time to bring all the components together to form the box structure of your lily pond.
- Fit a panel with full-width stiles onto the notch at the base, parallel with the floorboards. Secure it by driving 1½-inch deck screws through the panel and into the edge of the floorboard.
- Install the opposite panel, then install the panels with the ripped-down stiles between the first two.
- At the corners, countersink pilot holes and drive three evenly spaced 1½-inch deck screws through the faces of the full-width stiles into the edges of the ripped-down stiles.

Step 9: Reinforce the Pond Corners
To ensure the structural integrity of your lily pond, reinforce each corner with two 3-inch stainless-steel or galvanized corner brackets.
Use the screws provided with the brackets for installation. This step is crucial for maintaining the stability of your pond, especially when it’s filled with water. Secure brackets carefully to avoid any gaps that might compromise the structure.

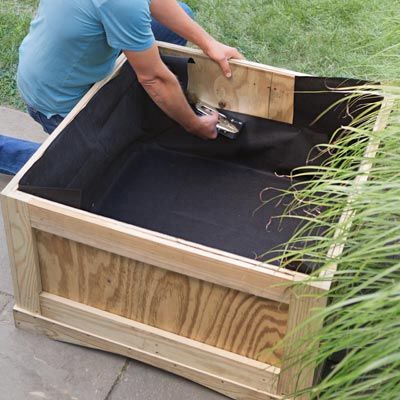
Step 10: Protect the Lily Pond Liner
Before installing the pond liner, it’s essential to protect it from direct contact with the wood. We recommend using landscape fabric.
Use a staple gun to secure a layer of landscape fabric inside the box. This fabric acts as a buffer between the liner and the wood structure.
Use a handsaw to create a V-shaped notch, approximately 1 inch deep, in the top edge of one of the panels. This notch will allow you to route the pump’s cord under the cap later in the construction process.
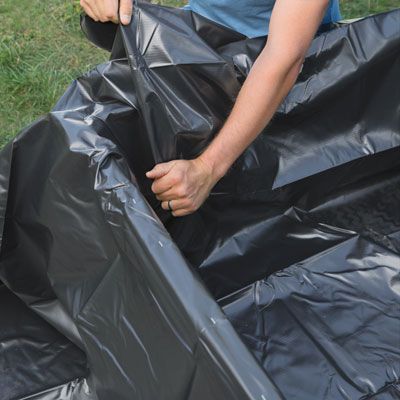
Step 11: Lay Out the Pond Liner
Carefully unfold the pond liner and gently place it over the box structure. Work the liner into the bottom and corners, ensuring a snug fit.
Create neat pleats at each corner to avoid bunching of the material. Smooth out any wrinkles to maintain a clean and professional appearance.
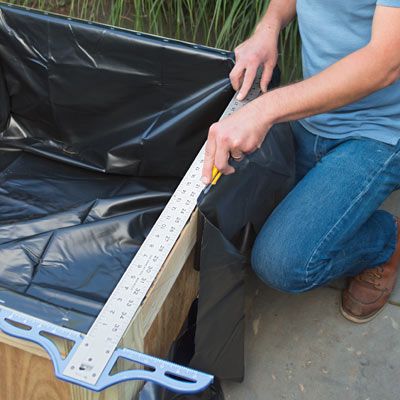
Step 12: Cut Liner to Fit the Lily Pond
Once the liner is in place, use a staple gun to tack it along the top edges of the panel frames at 6-inch intervals. This secures the liner temporarily while you trim the excess.
Using a straightedge and a utility knife, carefully cut the excess liner at the outside.
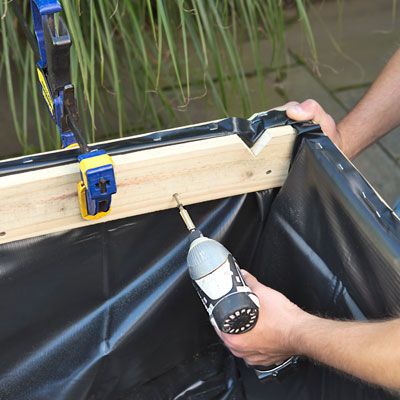
Step 13: Install the Interior Battens to Secure the Pond Liner
Use a handsaw to create a V-shaped notch in one interior batten, matching the notch you made in the side panel for the pump cord. Clamp the batten in place and secure it with 1½-inch deck screws. Repeat this process for the remaining battens, ensuring they’re firmly attached to create a watertight seal.
Tip: For tight joints, miter one end, line up the miter’s short point with the corner, and mark the short point at the other corner. Cut the line.
Step 14: Cut the Lily Pond Caps
Using your miter saw, cut the first cap piece to size. Before installing all the caps, place the aerator in the center of the box and carefully route its power cord through the notch you created earlier.

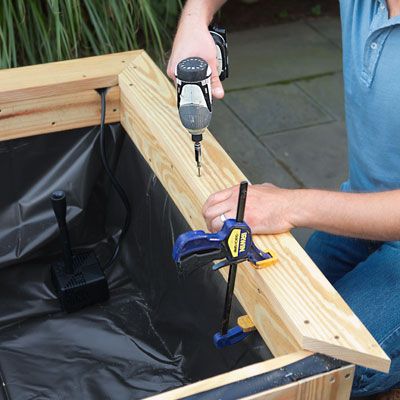
Step 15: Attach the Cap Pieces to the Pond
Attach the cap pieces by clamping a mitered cap piece in place on top of a side panel. Countersink pilot holes and secure it to the panel’s top rail and interior batten with 1½-inch deck screws every 12 inches.
Continue mitering and installing the remaining cap pieces, working around the box until all sides are covered.
Step 16: Stain the Pond
With the construction of your lily pond complete, it’s time to protect and beautify the wood.
Apply a high-quality exterior-grade stain to all exposed surfaces. This enhances the appearance of your pond and protects the wood from moisture and UV damage, extending the life of your new water feature. Select a stain color that complements your garden’s aesthetic to blend seamlessly.

Step 17: Plant the Waterlilies
Now for the exciting part – adding life to your lily pond.
- Line a 12-inch plastic or terra-cotta pot with landscape fabric to prevent soil from escaping.
- Place a lily rhizome in the pot and fill it with wet topsoil. Cover the soil with a layer of gravel to keep it in place. Avoid using potting soil as it tends to float.
- Position three or four pots at the bottom of the pond, then fill it with 16 inches of water.
- Finally, turn on the pump and enjoy your new aquatic garden.

Maintaining Your Lily Pond
To keep your lily pond thriving, regular maintenance is essential. Here are some tips to ensure your water feature remains healthy and beautiful:
- Monitor water levels regularly, especially during hot weather, and top up as needed.
- Remove dead leaves or debris from the water surface to prevent decomposition and maintain water quality.
- Prune yellowing or dying lily pads to encourage new growth and maintain the plants’ appearance.
- Check the pump and filtration system periodically to ensure they’re functioning correctly.
Remember to maintain your pond regularly and consider adding complementary elements to enhance its appeal and functionality.