Project details
Skill
Cost
Estimated Time
*Costs in this article sourced from Angi.
 Tape measure
- Pencil
- Circular saw
- flexible wood strip
- Jigsaw
- Clamps
- Drill/driver
- router
- Rabbeting router bit – 1/2-inch
- Staple gun


An outdoor privacy screen can transform your backyard, patio, or deck into a secluded oasis. A DIY privacy screen is an excellent solution if you’re looking to block an unsightly view, create a cozy nook, or simply add a decorative element to your outdoor space.
In this guide, we’ll walk you through the process of building your own outdoor privacy screen, from selecting materials to final installation. With some basic woodworking skills and the right tools, you can create a custom screen that enhances your outdoor living area and provides the privacy you desire.
Materials and Tools Needed for Your Privacy Screen
Before building your outdoor privacy screen, you’ll need to gather all the necessary materials and tools. Here’s an overview of what you’ll need.
Essential Materials
- Eyebolts, washers, and connector nuts
- Exterior wood finish or paint
- Exterior wood screws
- Lattice panels
- Rot-resistant wood (such as cedar, redwood, or pressure-treated lumber)
- Wood glue
Required Tools
- Circular saw
- Clamps
- Drill/driver
- Jigsaw
- Pencil
- Router with a 1/2-inch rabbeting bit
- Safety glasses and work gloves
- Staple gun
- Tape measure
Designing Your Outdoor Privacy Screen
When designing your outdoor privacy screen, consider the specific needs of your space and the overall aesthetic you want to achieve. A well-designed screen should complement your existing outdoor decor while providing the desired level of privacy.
Choosing the Right Wood
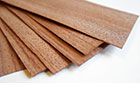
Selecting the appropriate wood for your privacy screen is essential for its longevity and appearance. Rot-resistant wood and rustproof fasteners are must-have materials. Cedar, redwood, and pressure-treated lumber are excellent choices for outdoor projects due to their natural resistance to decay and insects. Each type of wood has its own unique characteristics, so consider factors such as color, grain pattern, and cost when making your selection.
Determining Screen Dimensions
The size of your privacy screen will depend on the area you want to conceal and the available space in your yard. Measure the intended location carefully, taking into account any obstacles or existing structures. Most privacy screens come in three- or four-panel configurations, allowing for flexibility in placement and storage. Consider the height needed to effectively block unwanted views and the width required to cover the desired area. Remember to factor in the screen’s stability, especially if you live in a windy area.
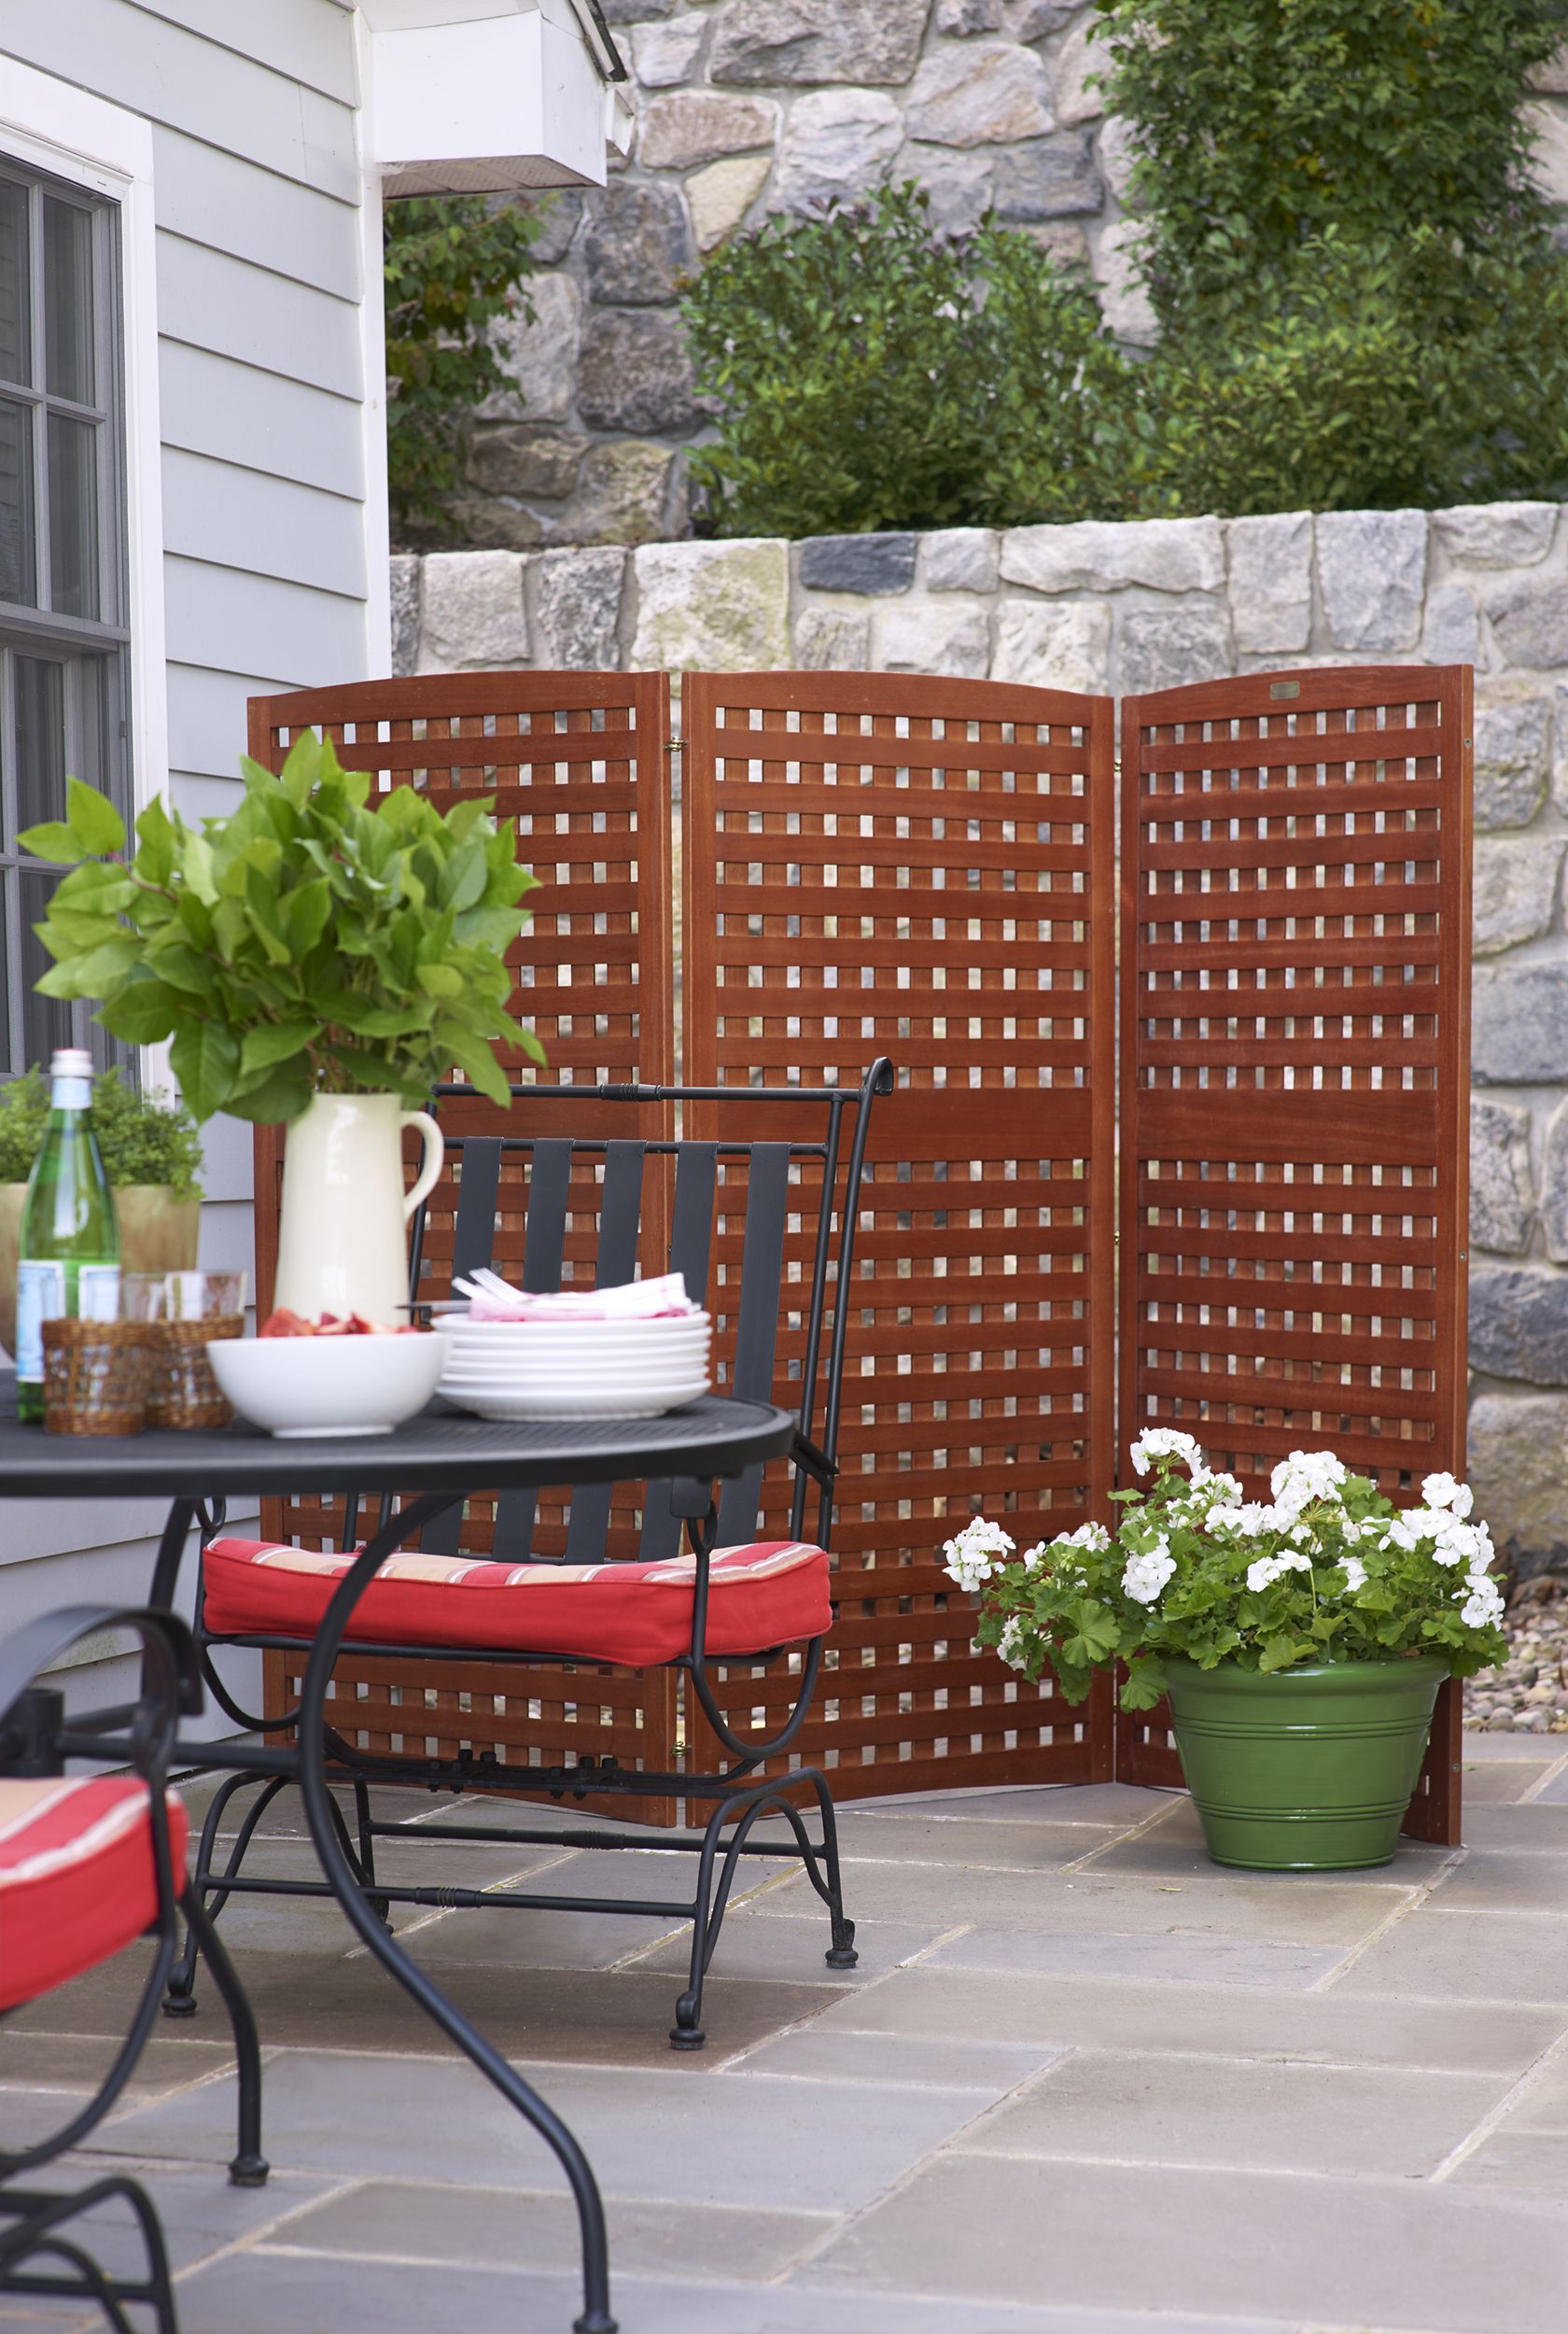
Shown: A folding lattice screen made of eucalyptus softens the rough stone wall looming over this patio.
Step 1: Privacy Screen Overview
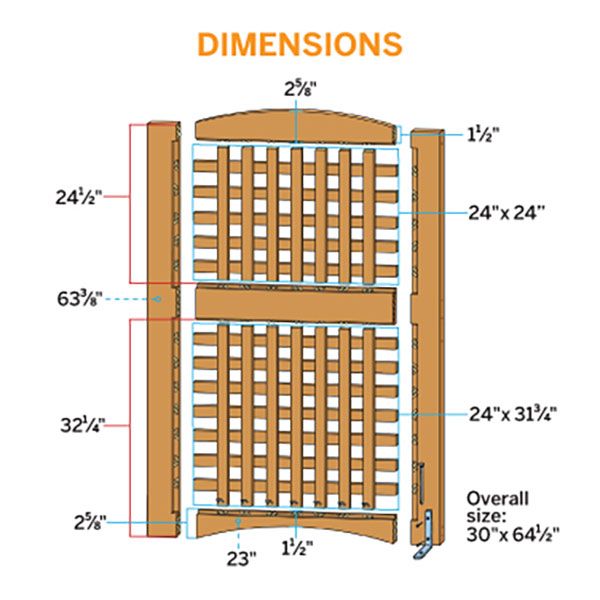
Use factory-made lattice panels to simplify construction.
Step 2: Assemble the Frames

Cut the ½-inch-thick rails and stiles to length for the frames according to the cut list. The curved top and bottom rails are made from one ½x6 piece, using a flexible wood strip to mark the curve and a jigsaw to make the cut. Dry-fit the parts on a flat surface, with the best-looking side of the board facedown, then fasten the parts using glue and clamps and structural screws driven through the stiles and into the ends of the rails.
Step 3: Rout the Frame
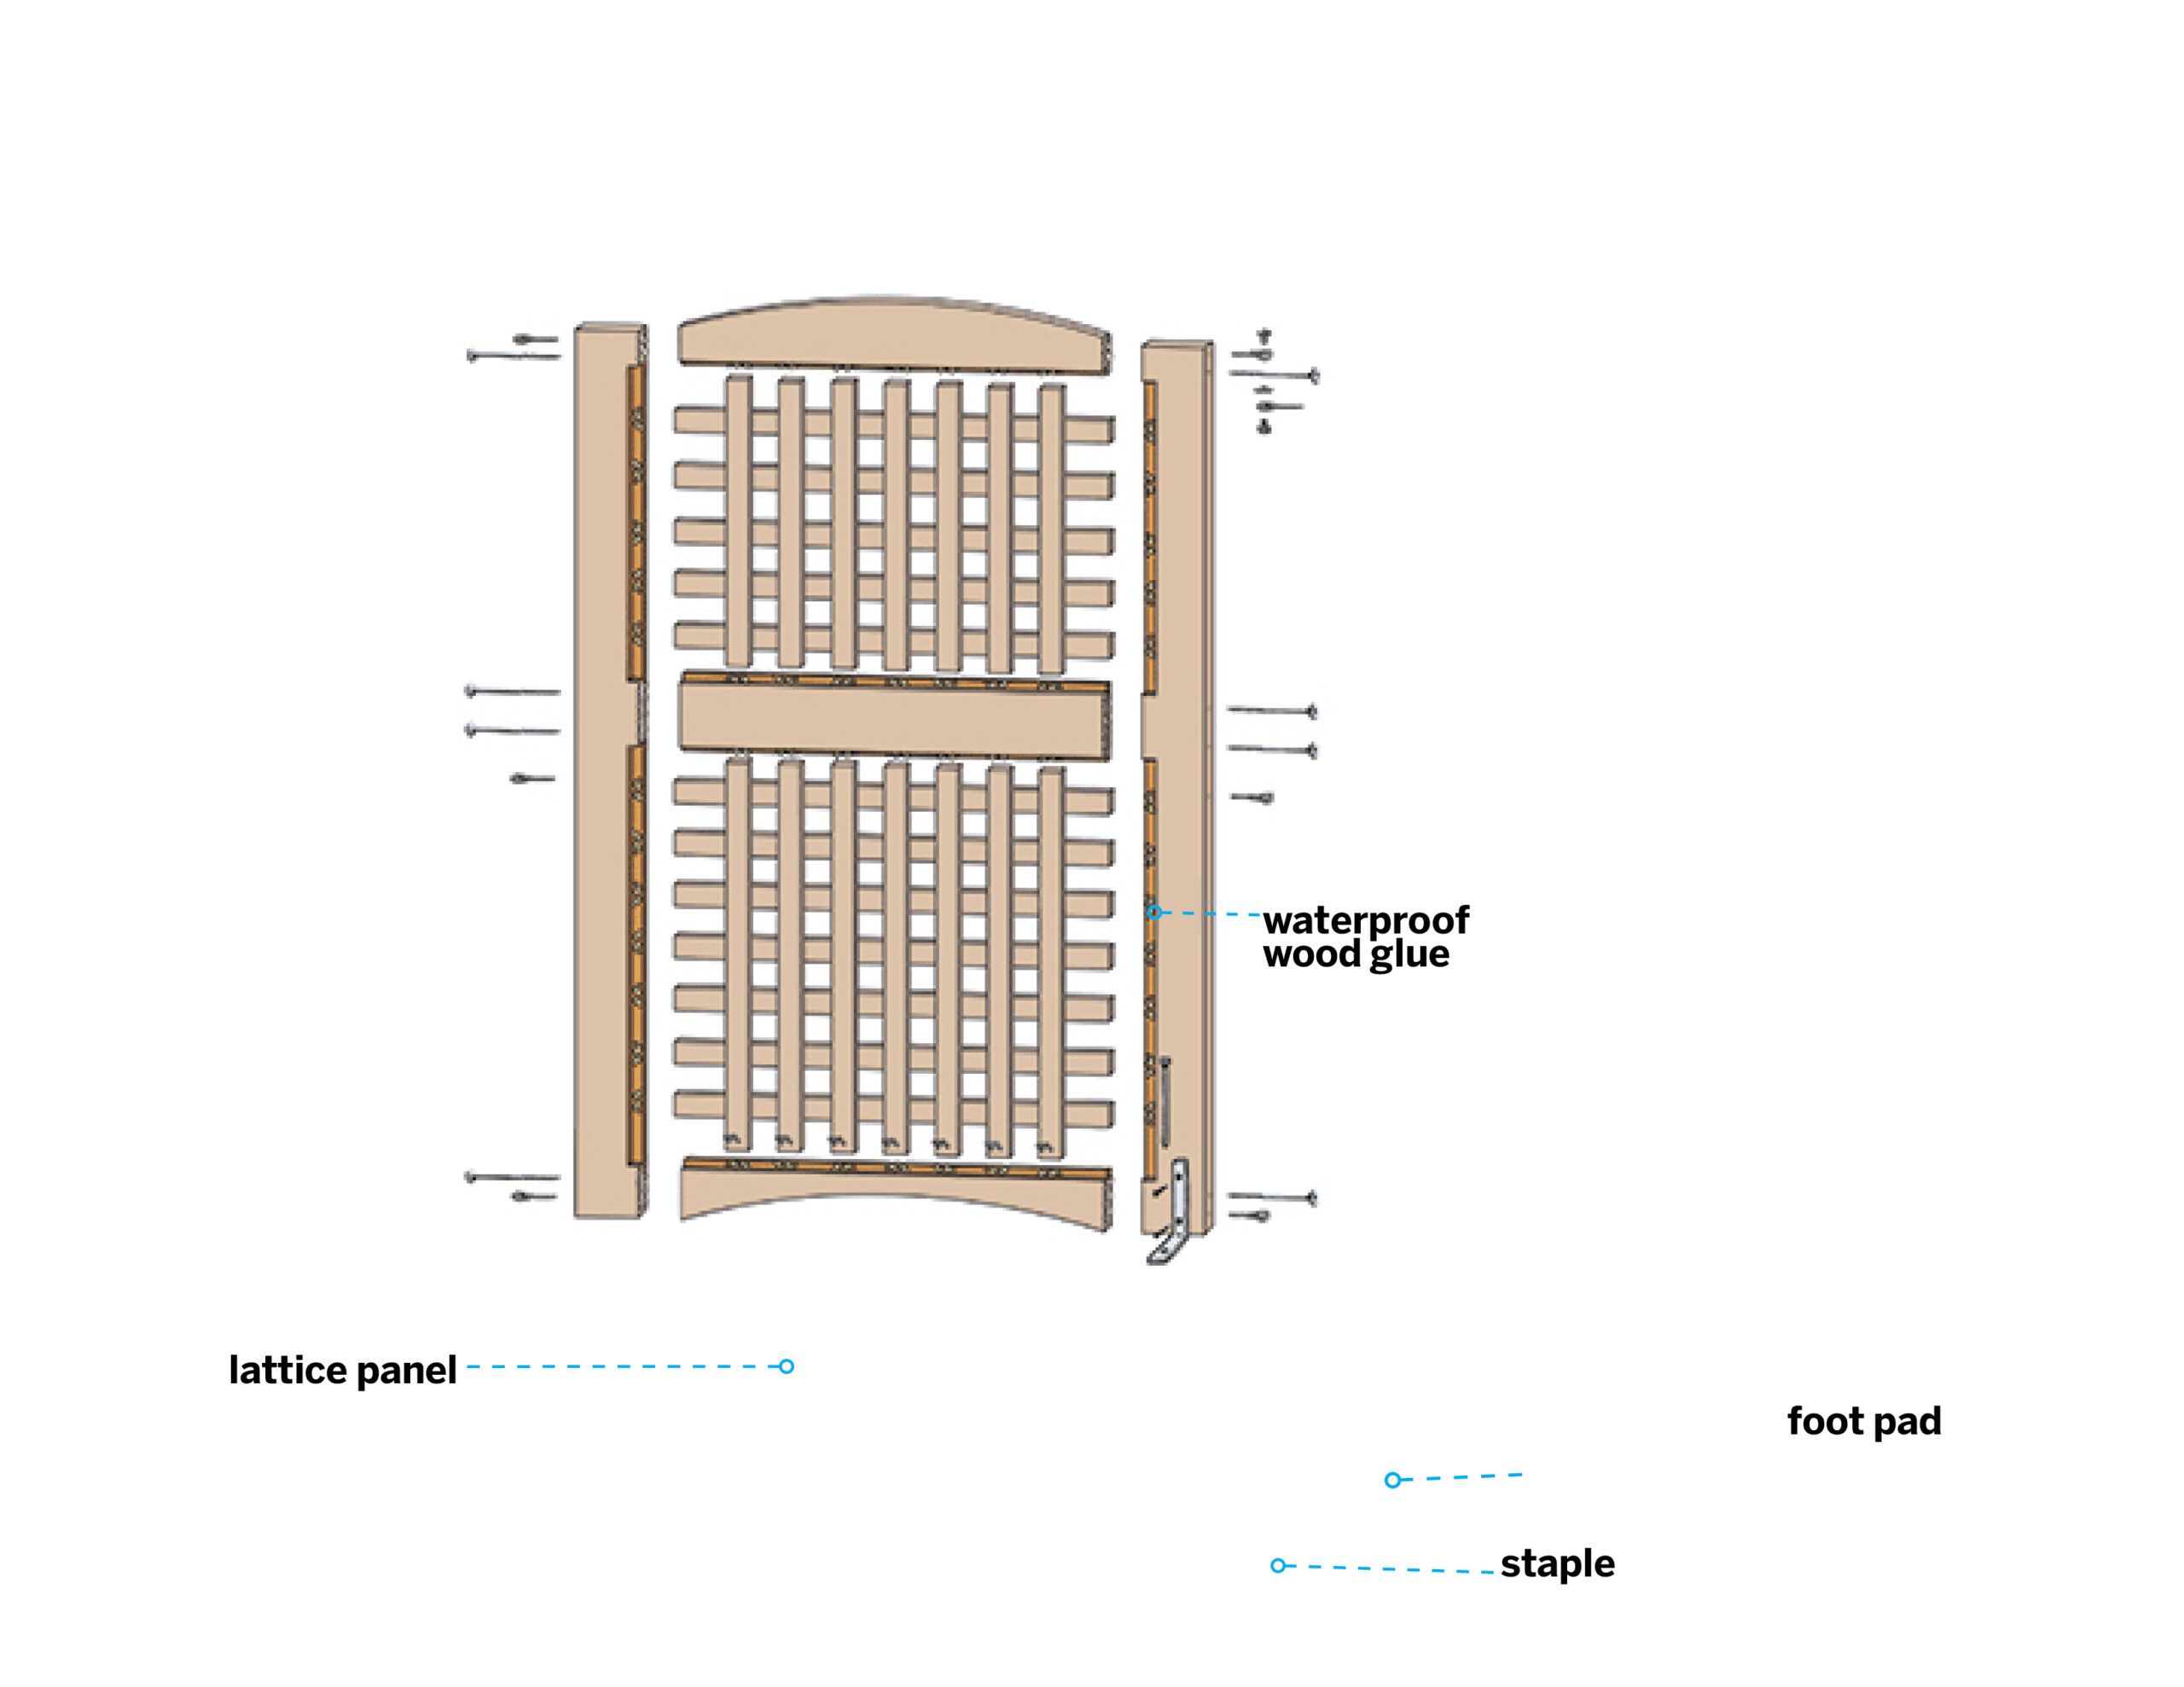
Chuck a ½-inch rabbeting bit with a ball-bearing guide into a router and set the bit depth to the thickness of two lattice strips combined. Rabbet the inside edges of the frame’s stiles only. Next, reset the bit to the depth of one strip and route the inside edges of the three rails.
Step 4: Attach the Lattice
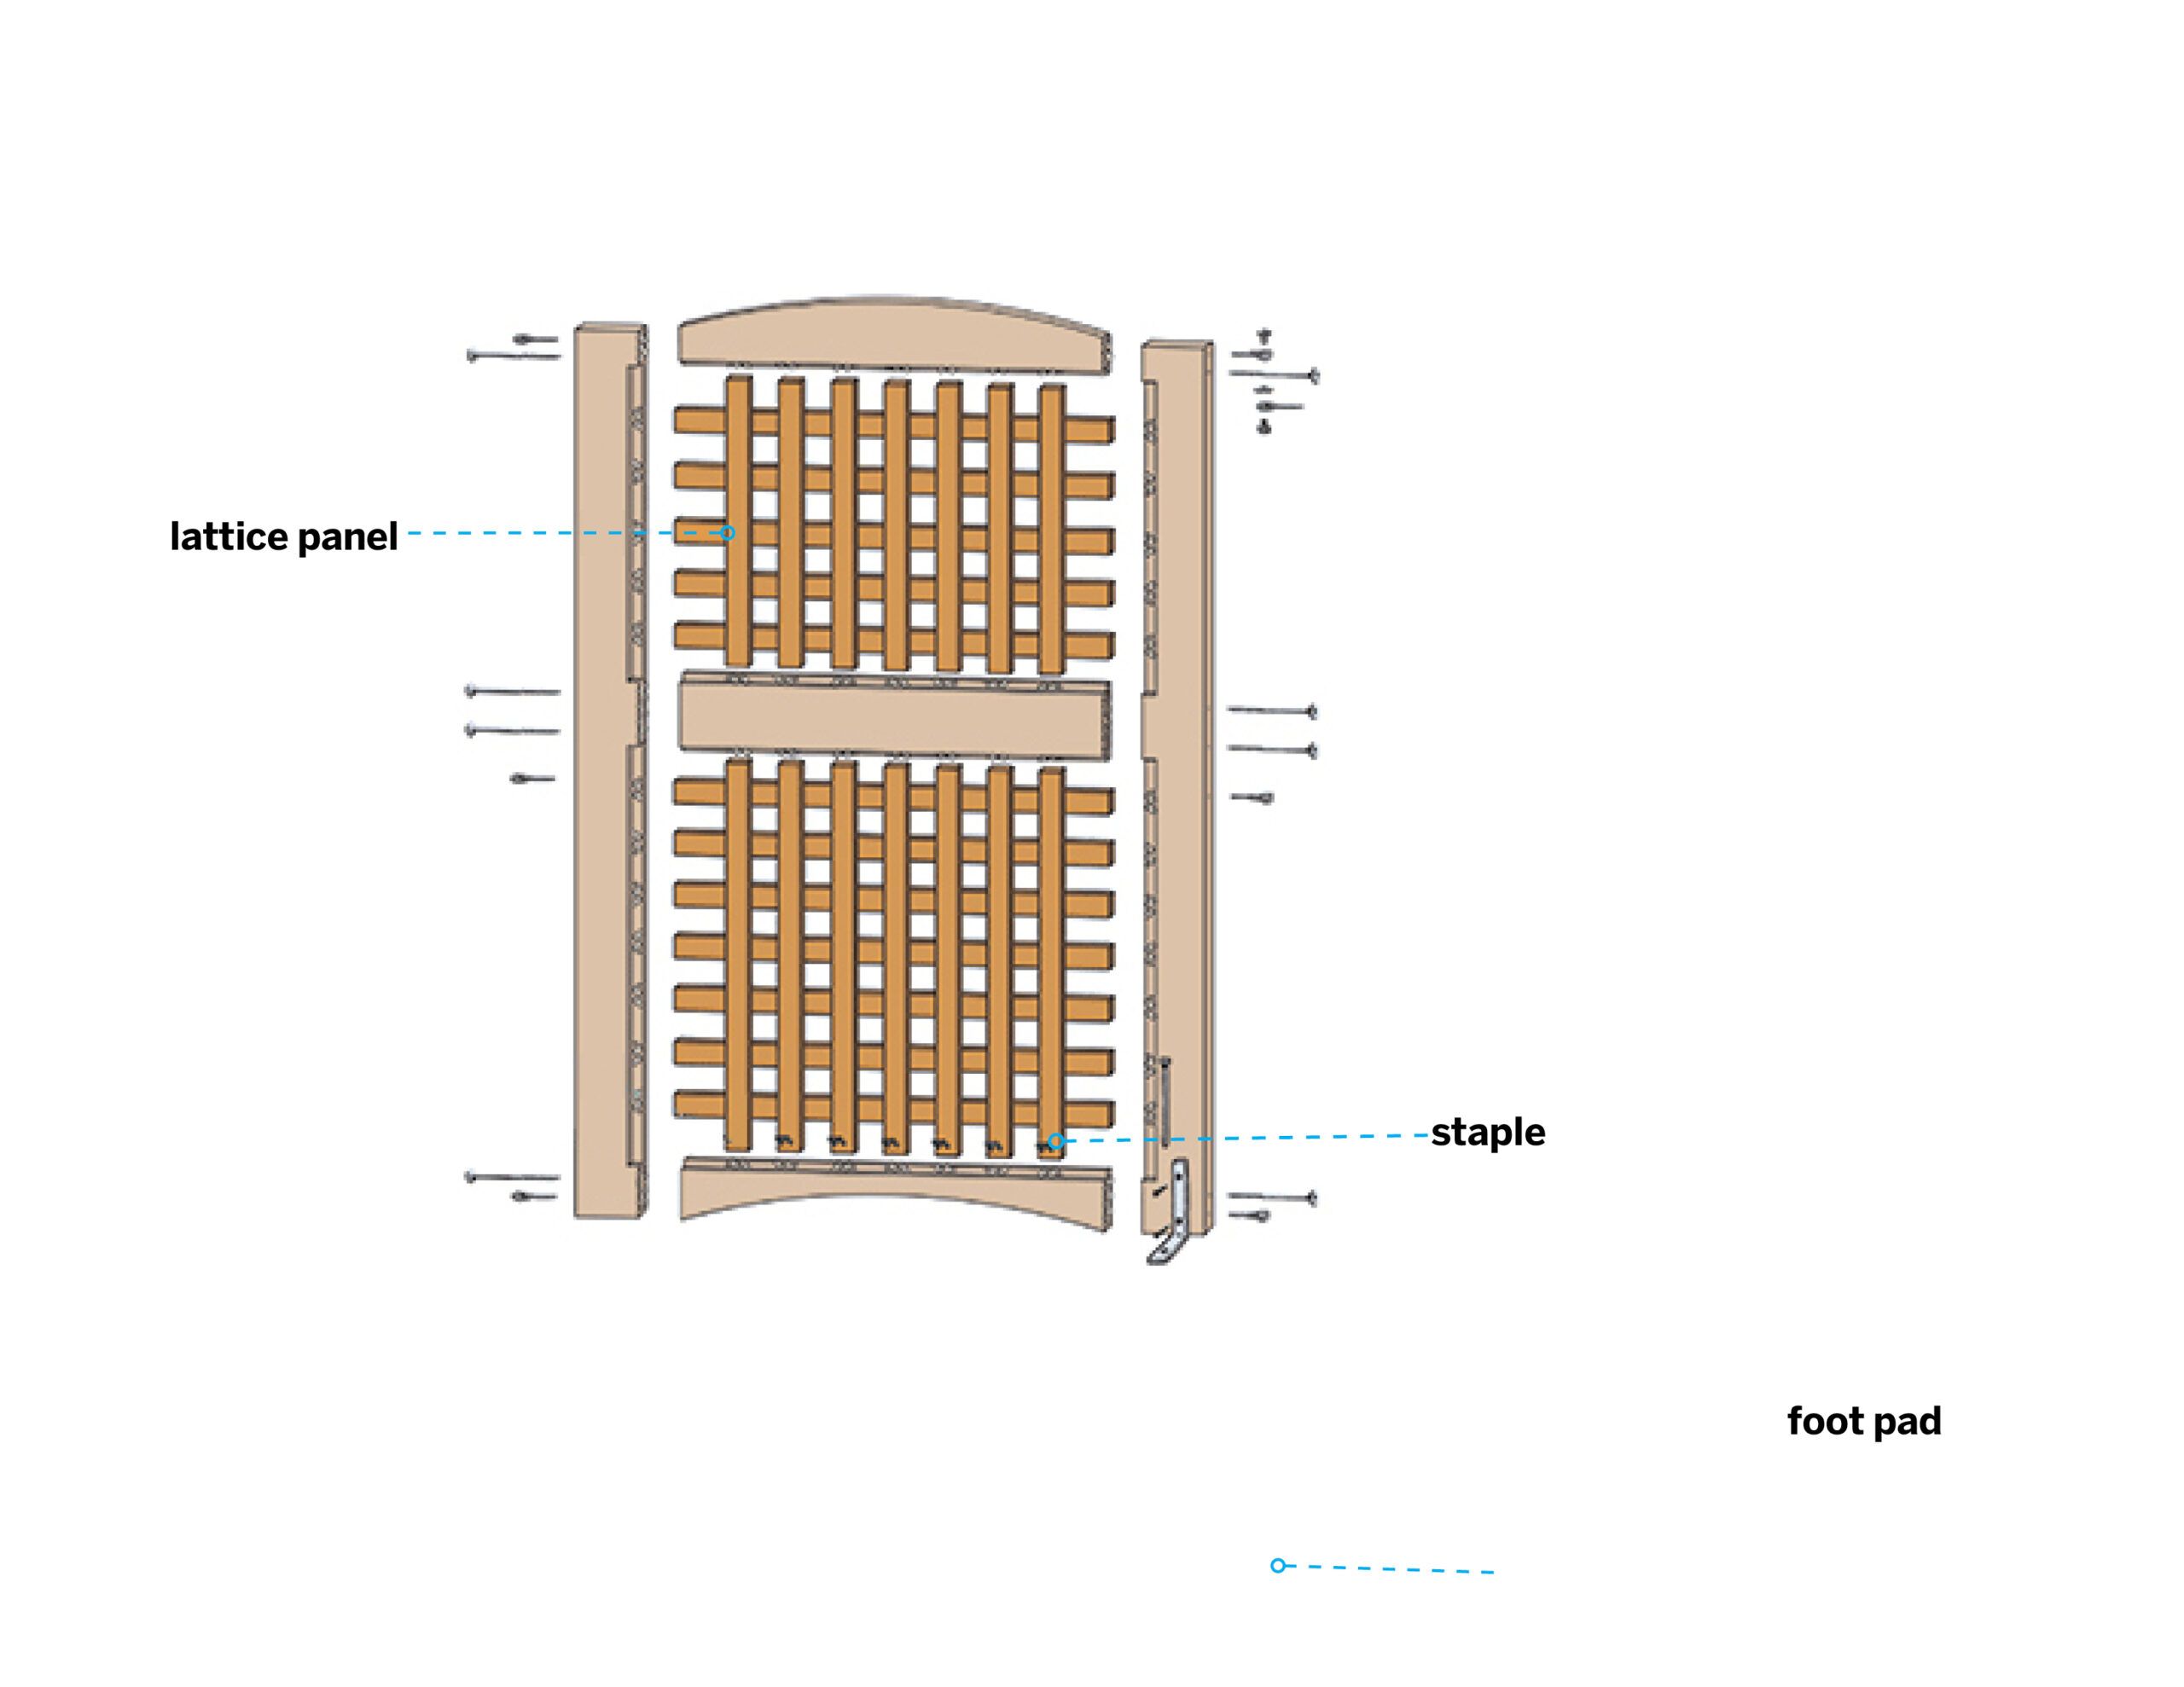
Cut the lattice panel in half lengthwise and cut off sections to fit the rabbeted openings. Drop one large and one small panel into the rabbets of the appropriate frame openings, with the strips that run parallel to the rails facing down. Glue and staple the lattice strips to the rabbets. Repeat Steps 2 through 4 to make the two remaining panels.
Step 5: Connect the Panels
Using a 3⁄16-inch bit, drill three 1½-inch-deep holes evenly spaced along the outside edge of one panel’s stile. Screw an eyebolt into each hole. Do the same with the stile of the adjoining panel, but locate the holes ¼ inch lower than those in the first stile, to overlap the bolts. Repeat for the adjoining stiles. Place a plastic washer between each pair of overlapping eyebolts and join them with connector nuts and bolts.
Finishing and Maintaining Your Outdoor Privacy Screen
Proper finishing and maintenance are crucial for protecting your privacy screen from the elements and ensuring its long-term durability.
Applying Protective Finishes
Once your screen is assembled and installed, apply a high-quality exterior wood finish to protect it from moisture, UV rays, and general wear and tear. Choose a finish that enhances the wood’s natural beauty while providing adequate protection.
Regular Maintenance Tips
Perform regular maintenance to keep your privacy screen looking its best. Apply a penetrating oil-based deck or fence finish regularly to keep it looking its best. Additionally, inspect your screen periodically for loose hardware, signs of rot, or damage from weather or pests. Address any issues promptly to prevent further deterioration.
Alternative Privacy Screen Options
While building a custom privacy screen can be a rewarding project, alternatives are available for those who prefer a quicker solution or lack the necessary tools and skills.
Ready-Made Screens
Many home improvement stores and online retailers offer pre-made privacy screens in various styles and materials. These can be an excellent option if you’re short on time or prefer a more straightforward installation process.