We may be compensated if you purchase through links on our website. Our team is committed to delivering honest, objective, and independent reviews on home products and services.
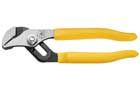
 Tongue and groove pliers
- Wrench
- Flathead screwdriver
- Valve reseating tool


A leaky outdoor faucet can waste water and increase utility bills. Fortunately, repairing a hose spigot is often a straightforward DIY project that can save you money and extend the life of your outdoor plumbing. In this article, we’ll walk you through the process of rebuilding a hose spigot, from diagnosing the problem to completing the repair. In the video above, Ask This Old House plumbing and heating expert Richard Trethewey demonstrates the steps to fix a leaky outdoor faucet.
Understanding Hose Spigots
Hose spigots, also known as outdoor faucets or hose bibs, are essential fixtures for any home with a yard or garden. They provide easy access to water for various outdoor tasks, from watering plants to washing cars. However, like any plumbing component, hose spigots can develop issues over time.
Common Hose Spigot Problems
Several issues can affect the performance of your hose spigot:
- Leaks around the handle or stem
- Dripping from the spout when closed
- Difficulty turning the handle
- Low water pressure
Most of these problems stem from worn-out components within the spigot, such as washers, packing, or valve seats. Fortunately, many of these issues can be addressed without replacing the entire fixture.
Types of Hose Spigots
Before attempting a repair, you’ll first need to know what type of spigot you’re dealing with. The most common types include:
- Gate valves: These are some of the oldest types of plumbing fixtures, and they were frequently used for water mains. They are not as commonly used anymore as the stem is prone to breaking over time.
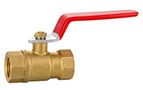
- Ball valves: This type of valve replaced many gate valves. As the name suggests, these have a ball inside that controls the flow of water without the need for a washer. However, they are expensive and not very common.
- Compression valves: This is the most common type of valve located outside of homes today. A washer presses against the seat, shutting off the water. If a faucet is leaking, it’s possible that the washer or the seat is in need of repair.
- Frost-free spigots: Designed with a long stem, they prevent water from freezing by keeping the shut-off valve inside the house, ensuring year-round functionality in colder climates.
The repair process may vary slightly depending on the type of spigot you have. In this article, we’ll focus on repairing a standard compression faucet.
Preparing for the Repair of a Hose Spigot
Before you begin the repair process, gather the necessary tools and materials and take proper safety precautions.
Tools and Materials Needed
To rebuild a hose spigot, you’ll need the following:
- Flathead screwdriver
- Monel screws
- Replacement washers
- Teflon packing
- Tongue and groove pliers
- Valve reseating tool
- Wrench
Safety Precautions
Before starting any plumbing repair, take the following safety measures:
- Locate and shut off the water supply to the spigot.
- Relieve pressure by opening the faucet.
- Protect your eyes with safety glasses.
- Use gloves to prevent cuts and scrapes.
Step-by-Step Hose Spigot Repair Process
Now that you’re fully prepared, let’s walk through the process of rebuilding your hose spigot, from removing the vale to reassembling the spigot.
Removing the Valve
- Shut off the water supply to the spigot.
- Use tongue and groove pliers to loosen the bonnet nut.
- Unscrew the valve stem from the spigot body.
Replacing the Washer
- Remove the screw holding the old washer in place using a flathead screwdriver.
- Take out the old washer and replace it with a new one of the same size. Make sure the smooth side of the washer is facedown.
- Secure the new washer with the screw, ensuring it’s tight but not over-tightened.
Repacking the Stem
- Loosen the packing nut on the bonnet to expose more of the stem thread.
- Wrap Teflon packing around the stem thread about 1 ¼ times.
- Hand-tighten the packing nut over the new Teflon packing. Finish tightening with the pliers and wrench.
Reseating the Valve
- Insert the valve reseating tool into the spigot body.
- Turn the tool clockwise to smooth and clean the valve seat.
- Remove any debris from the spigot body.
Reassembling the Spigot
- Reinsert the valve stem into the spigot body.
- Tighten the bonnet nut securely using pliers.
- Turn the water supply back on and test the spigot for leaks.
Troubleshooting Common Issues With Hose Spigots
Even after a repair, you might encounter some issues with your spigot. Here are some common problems and their solutions:
Persistent Leaks
If the spigot continues to leak after replacing the washer, the valve seat may be damaged beyond what the reseating tool can fix. In this case, you may need to replace the entire spigot.
Difficulty Turning the Handle
If the handle is still difficult to turn after repacking the stem, there may be mineral buildup inside the valve. Try soaking the valve in vinegar to dissolve the deposits.
Low Water Pressure
Low pressure after repair could indicate a clogged aerator or debris in the water line. Remove and clean the aerator, and flush the line to improve flow.
When to Call a Professional Plumber for a Hose Spigot Repair
While many hose spigot repairs can be DIY projects, there are situations where it’s best to call a professional plumber, such as:
- If you’re unable to locate or access the shut-off valve
- When dealing with galvanized pipes that may be corroded
- If the spigot is connected to your home’s main water line
- When you encounter any unexpected complications during the repair process
Maintaining Your Hose Spigot
Regular maintenance can prevent many common spigot issues and extend the life of your outdoor faucet. Here are some tips to keep in mind when working with a spigot:
Inspect your spigot for leaks regularly
- Avoid overtightening the handle when closing the valve
- Clean the spigot and surrounding area to prevent debris buildup
- Drain and cover the spigot before winter to prevent freezing