We may be compensated if you purchase through links on our website. Our team is committed to delivering honest, objective, and independent reviews on home products and services.
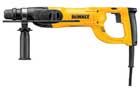
 Hammer drill
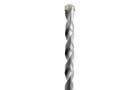
- masonry bit – 5/32-inch
- Masonry bit – 1 1/4-inch
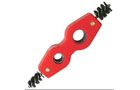
- Pipe brush
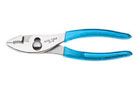
- Pliers
- Screwdriver
- Cordless drill/driver
- Tubing cutter
- Propane torch
- Adjustable wrench
Installing a frost-proof hose spigot is a smart upgrade for any home that experiences cold winters, providing convenient outdoor water access while protecting against freezing damage. Unlike traditional outdoor faucets, these spigots have a long stem that extends through the wall, placing the shut-off valve inside the heated space of your home. This project requires moderate plumbing skills and some basic DIY skills since you’ll be cutting into the side of the house. In the above video, Ask This Old House plumbing and heating expert Richard Trethewey demonstrates how to install a frost-proof sill cock for a homeowner struggling with an inconveniently placed and leaky outdoor faucet.
Benefits of Frost-Proof Spigots
Frost-proof spigots offer several advantages over traditional outdoor faucets:
- Freeze protection: The valve mechanism is located inside the warm house, preventing freezing.
- Year-round use: No need to shut off and drain the spigot during the winter.
- Leak prevention: Reduces the risk of water damage from frozen and burst pipes.
How Frost-Proof Spigots Work
A frost-proof spigot is longer than a traditional outdoor spigot, with the O-ring near the back, inside the house. When you turn off the faucet, water drains from the long stem, leaving no water to freeze near the outdoor opening. This simple yet effective mechanism ensures that your outdoor water source remains operational year-round.
Choosing the Right Frost-Proof Spigot
Selecting the appropriate frost-proof spigot for your needs involves considering several factors. Pay attention to the specific requirements of your home and the climate you reside in.
Sillcock vs. House Hydrant
You have two main options for outdoor spigots that won’t freeze:
- Frost-proof sillcock: A frost-proof sillcock is an outdoor faucet with a long stem that extends inside the house to prevent freezing. The valve that controls water flow is located deeper inside the wall, keeping it away from freezing temperatures. This is what Trethewey installs in the video.
- House hydrant: A house hydrant is an outdoor faucet that is also attached directly to the house but offers enhanced durability and features, like a flush-mount design and debris cover. While they offer improved freeze protection, they are also more expensive.
Length
The length of the frost-proof spigot’s stem is important for proper installation. Ensure you select a spigot with a stem length that is slightly longer than the thickness of your exterior wall. Measure the wall thickness accurately to determine the correct length.
Additional Features
Look for spigots with extra features, such as a built-in vacuum breaker to prevent backflow contamination or a quarter-turn handle for easy operation. These features can make your spigot easier to use.
Preparing for a Frost-Proof Hose Spigot Installation
Before beginning the installation process, you’ll first want to gather the necessary tools and materials and take proper safety precautions.
Tools and Materials Needed
To install a frost-proof spigot, you’ll need the following:
- Hammer drill with 1¼-inch masonry bit (this can be rented)
- Tubing cutter
- Propane torch
- Adjustable wrench
- Pliers
- Screwdriver
- Pipe brush
- Teflon tape
- Frost-proof sillcock
- Copper fittings and pipe
- Ball valve
- Masonry screws
- Expanding foam insulation
Safety Precautions
When working with plumbing and power tools, safety should always be your top priority. Here are some things you can do to help keep yourself protected.
- Wear safety glasses and ear protection when drilling.
- Turn off the main water supply before cutting into existing pipes.
- Use caution when working with a propane torch and ensure proper ventilation when soldering.
Installation Process of a Frost-Proof Hose Spigot
Installing a frost-proof spigot involves several steps, from creating the opening in your foundation to connecting the new fixture to your existing plumbing.
Creating the Opening
In the video, Trethewey uses a hammer drill to drill a hole in the concrete wall of the home’s foundation. However, if your outdoor spigot is already in an accessible location and you are only going into the siding of your home, you can use an oscillating saw instead.
- Choose a location for your new spigot that’s easily accessible and close to an existing water line.
- Use a hammer drill with a 1¼-inch masonry bit to bore a hole through the foundation wall.
- Ensure the hole is slightly angled downward to the outside to allow for proper drainage.
Preparing the Spigot
- Wrap Teflon tape around the threaded end of the sillcock.
- Thread a copper adapter onto the end of the sill cock and tighten with pliers and a wrench.
- Remove the handle and stem unit from the sillcock to protect it during installation.
Mounting the Spigot
- Feed the sillcock through the hole in the foundation wall from the outside.
- Use a level to ensure the spigot is straight, then mark and drill pilot holes for mounting screws.
- Secure the spigot to the foundation wall using masonry screws.
Connecting to Existing Plumbing
- Use a strip of emery cloth to clean a short section of the existing cold-water pipe.
- Cut out a portion of the pipe with a tubing cutter.
- Clean the inside of a copper T-fitting with a pipe brush.
- Brush flux around the outside of the just-cut tubing, and to the inside of the T-fitting.
- Use a propane torch and lead-free solder to solder the T-fitting to the cold-water pipe.
- Apply flux to the inside of the copper adapter threaded onto the end of the sill cock.
- Insert a copper street elbow into the adapter.
- Cut copper pipe to length and attach copper fittings to extend from the street elbow at the sill cock to the T-fitting on the cold-water pipe. Also, install a ball valve to the pipe assembly.
- Solder together all the pipes, fittings, and valve.
Finishing Touches
- Reinsert the stem unit and handle into the sill cock.
- Seal the hole in the foundation wall with expanding foam insulation to prevent drafts and pests.
- Open the ball valve and test the new spigot for proper function and leaks.
Maintenance and Care of Your Hose Spigot
Perform regular inspections and periodically check the spigot for signs of leaks or drips and proper drainage. Check that the mounting is secure to the foundation, and take note of any damage to the handle or stem.
Winterizing
While frost-proof spigots are designed to withstand freezing temperatures, it’s still a good idea to take some precautions, such as:
- Remove and store any attached hoses before winter.
- Consider using an insulated cover for extra protection in extreme cold.
- If you’ll be away for an extended period, shut off the interior valve and drain the spigot.
Troubleshooting Common Issues With Frost-Proof Hose Spigots
Even with proper installation and maintenance, you may encounter some issues with your frost-proof spigot, including:
Leaking Spigot
If your spigot is leaking, it could be due to:
- Worn washers or O-rings
- Loose packing nut
- Damaged valve seat
To address these issues, you may need to disassemble the spigot and replace the faulty components.
Frozen Spigot
While rare, a frost-proof spigot can freeze if:
- The pitch of the spigot is incorrect, preventing proper drainage.
- A hose is left attached during freezing weather.
- The interior of the home is too cold.
If your spigot freezes, carefully thaw it using gentle heat, such as a hairdryer, and address the underlying cause to prevent future occurrences.